
The more I looked at this tank, I kept thinking that it looked like something else, but out of place. Then it hit me........It looks like a DUCK DECOY!
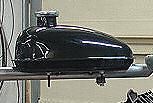
The first thing I did was to lower the fill neck about 1/2", just to get rid of the duck's head. The next thing was to come up with a "bottom so to speak, to fill it out. I tried one idea that I didn't quite like because it was too thick.
I then commenced to plan"B". I started with a wood buck and covered it with fiberglass resin and cloth and started shaping from there.

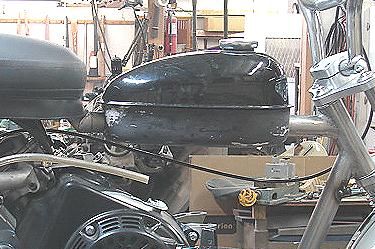
With the addition of the "perch belly", it will look more like a sportster tank.
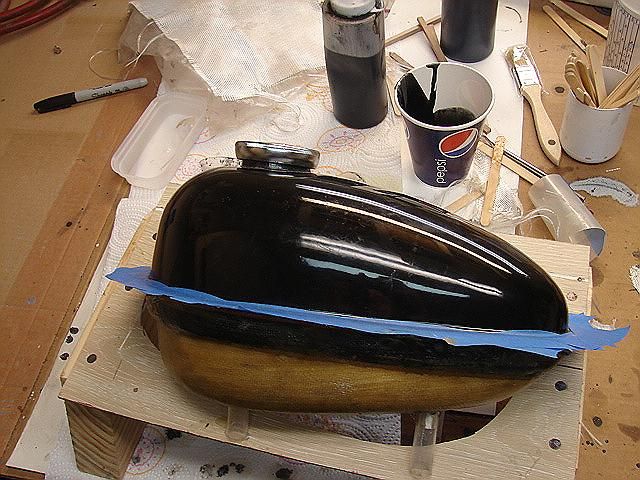
Right now it's on it's final coat of filler, and I should have it ready by this week. Still waiting on some components for the T/C cover.......wait till you see that!

The first thing I did was to lower the fill neck about 1/2", just to get rid of the duck's head. The next thing was to come up with a "bottom so to speak, to fill it out. I tried one idea that I didn't quite like because it was too thick.

I then commenced to plan"B". I started with a wood buck and covered it with fiberglass resin and cloth and started shaping from there.

With the addition of the "perch belly", it will look more like a sportster tank.

Right now it's on it's final coat of filler, and I should have it ready by this week. Still waiting on some components for the T/C cover.......wait till you see that!


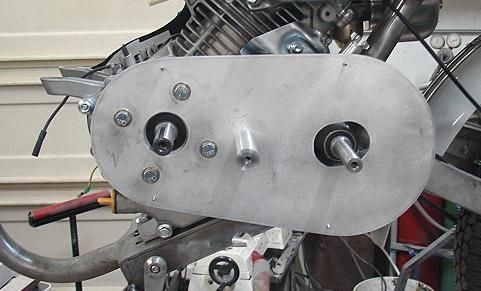
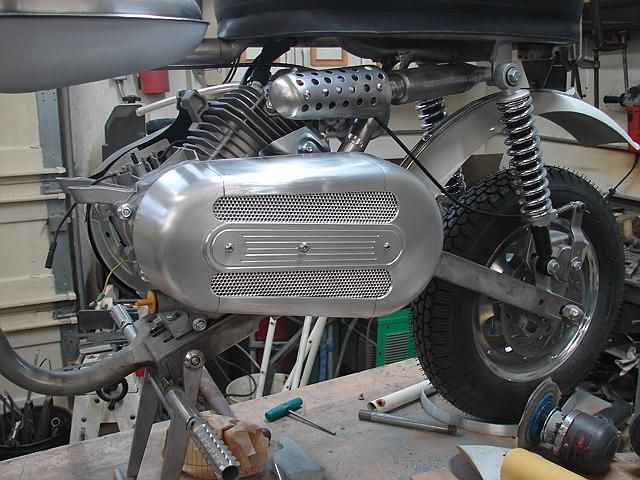
I gotta good start on the T/C cover, after I had to mod my extended oil tube to clear the back of the cover.
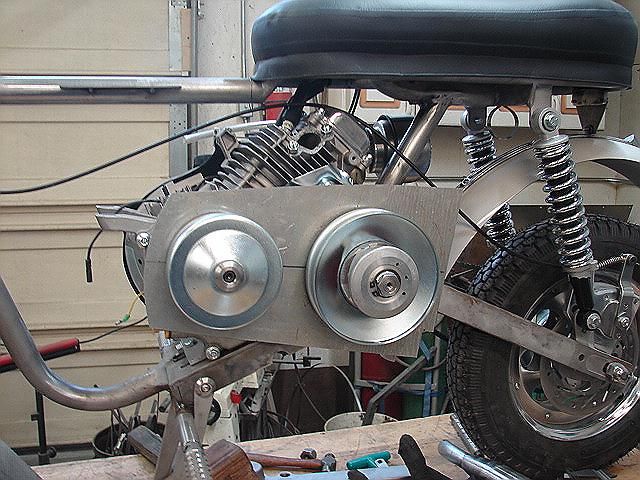
Once I got that out of the way, it was time to construct the cover itself. I wanted something that didn't look too primitive, but yet not real complicated. I had this idea that's be burning a hole in my sleep patterns for the last 4 months. It was just a matter of execution, and finding the right "material". I looked all around locally, solicited family and friends with not much luck, so I decided to look online and found exactly what I needed, at a pretty reasonable cost.
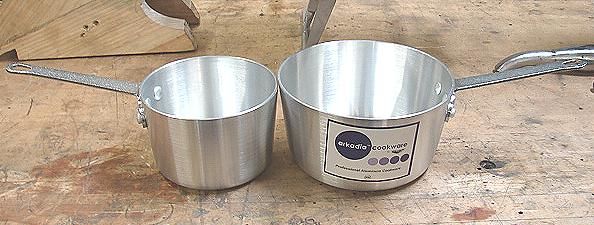
Yes......aluminum pots.
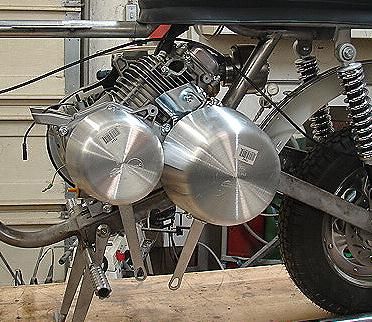
It's just a matter of where to cut and tie them together. Just "connect the pots" so to speak.
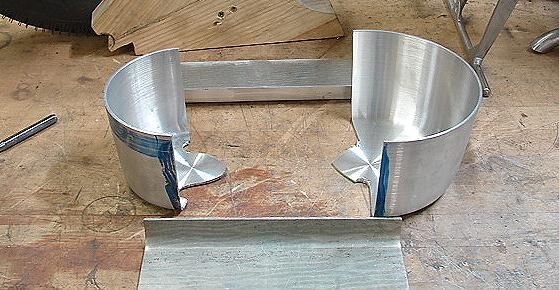

I basically used aircraft rivets on the joints.
I'm still working on the screen and the cover bar. I have about 3 options I'm looking at for the design of the center bar, hope to have done this weekend.

Once I got that out of the way, it was time to construct the cover itself. I wanted something that didn't look too primitive, but yet not real complicated. I had this idea that's be burning a hole in my sleep patterns for the last 4 months. It was just a matter of execution, and finding the right "material". I looked all around locally, solicited family and friends with not much luck, so I decided to look online and found exactly what I needed, at a pretty reasonable cost.

Yes......aluminum pots.

It's just a matter of where to cut and tie them together. Just "connect the pots" so to speak.


I basically used aircraft rivets on the joints.

I'm still working on the screen and the cover bar. I have about 3 options I'm looking at for the design of the center bar, hope to have done this weekend.
^^^which is a lost art, too^^^ Very cool solution!:thumbsup:
Airframes guys would love us to write up "working rivets."
My experience didn't quite come from the aviation industry....it came long ago when I worked in a body shop. I had the pleasure of rebuilding a few panels on an Airstream trailer.(wingless aircraft) My boss didn't want anything to do with the job if he couldn't do it with pop rivets, but I assured him that if a person has 2 hands, and the right knows what the left is doing, it ain't that hard.
My experience didn't quite come from the aviation industry....it came long ago when I worked in a body shop. I had the pleasure of rebuilding a few panels on an Airstream trailer.(wingless aircraft) My boss didn't want anything to do with the job if he couldn't do it with pop rivets, but I assured him that if a person has 2 hands, and the right knows what the left is doing, it ain't that hard.
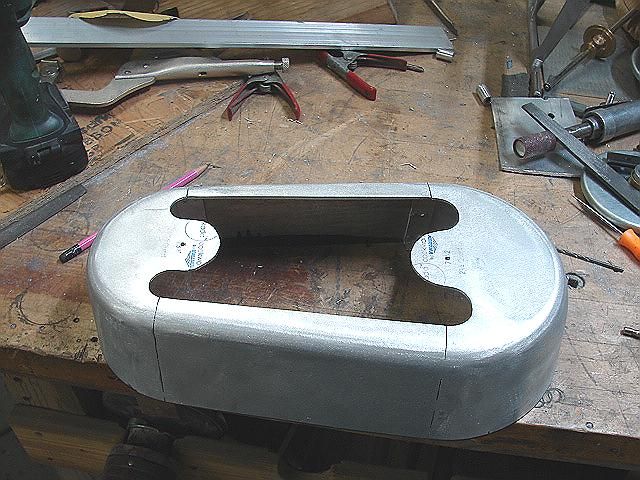
Well, I got er finished up today. I had to get the length right for the stand off.
I cut the center bar yesterday, and finished countersinking the holes in the drain panel. I now looks more like a mesh than a flat piece with holes in it. I believe I will skip the hand polishing process, and powder coat this in the super chrome.
Most of the hard stuff is now done, just a few more details and it will be ready for paint.

I cut the center bar yesterday, and finished countersinking the holes in the drain panel. I now looks more like a mesh than a flat piece with holes in it. I believe I will skip the hand polishing process, and powder coat this in the super chrome.

Most of the hard stuff is now done, just a few more details and it will be ready for paint.
Not so sure you want to go with super chrome p/c, unless you've had good luck previously. My coater will not do parts in super chrome because it does not adhere as well and doesn't yield as good a finish. I can only share what I was told...and for the quality of work I generally get, I trust his opinion. That cover would look great polished, but certainly understand the time it'll take.