I'm not sure what section was best for this. The engine section is nothing but, trouble shooting this one seems to have the most build logs.
This project originally started in 2011 here, Faster | Scooter Doc Forum
I'm going to try and repost here too.
Here's my first post from 2011 and where it started. Ported the intake and de burred the header flange and double shimmed the valves, it made a notable difference!
So i finally did it. all those upgrades they advertise suck and rob power. The bigger carb is kind of pointless and as far as the CDI we couldn't give it a fair chance as supposedly they only work if your scooter is top notch, witch it wasn't running the hotter cam. The cheap Chinese quality control doesn't ensure the gear is pressed on right. Thats right the timing on these cams is probably wrong i lost power a really noticeable amount till i put the stock cam back in. (a whole 10 mph slower)
So here is what went down, raised the the intake roof and deleted the valve guide then put 2 extra valve spring shims in and set the valve lash to 1 1/2 and 2 1/2 thousands.
(pics to big, click for image, or copy and paste the URL)
On a GOOD down hill i can hit 50 mph and you can feel and hear the engine picking up RPMs, up to 9k after the CVT maxes out. Next up a 60cc jug and some other mods. may even delete all the vacuum BS on the carb and get a nice little 20 some mm carb that doesn't run a slide and is just the butter fly. For the cam a friend thinks he can set the cam timing correctly after he finds the lobe center and then we will give it another try. any one know of any good cams before we try to fix the cheap after market one? remember this is a 50cc and i'm not going for a drop in 125 or 150 or anything.
EDIT: How do these work and where does it tap in to?
Oops, there was an error! | Scooter Doc Forum
...and then a few months later...
Well i've been busy and not busy and it's been a while. I'm fairly sure i'm going to buy a 44mm 60cc jug and piston kit it's about 50 usd.
So far whats been done is are
ported intake
ported exhaust flange
exhaust header was wrapped with asbestos cloth or some other old school cloth knowing my dad
clipped the slider spring on the carb
adjusted the carb.
deleted the vacuum system accept for the petcock. as far as i can remember at least.
clipped and modified the spark plug
opened up the CVT cover
replaced drive belt
finally got a horn
xenon bulb
new throttle cable
new valve stem on rear tire
replaced locks, ignition, and keys
fixed trunk latch
Some just boring every day use others economical power adders or reliability/efficiency in the case of the spark plug mod.
I also may have found a 60cc dome top piston that may fit, i may have to buy just to see but, some collaboration with some scooters gurus may also give me an idea if it will even fit
404 Not Found
I got to thinking about all the GY6s and how they used to be honda design, very similar to the honda mini trail and how the same can be said with the whole monkey bike scene and i thought, "wait a minute" and sure enough both Honda and Chinese engines tend to run 13mm wrist pins.
I used to have an s65 engine witch i sold. Now all i have left are the rings to it and some odds and ends but, no piston.
The Honda Sport 65 was a 44mm bore with a 13mm wrist pin and 41.4mm stroke. Sound familiar?
So maybe if the deck height and ring height and dome height are alright then it's possible it may fit then you would have to deal with the valve relief but, since i know some people that may not be a big deal.
I also tried the scrappy dogs sport A9 cams it's either poor product or i got defective item, the amount of hours installing and removing it on several occasions and double checking for installation error with very skilled mechanics, it's definitely the cam. one of the skill mechanics said the cam gear has to be off the way it runs, witch it runs like the timing chain is off a tooth or so but that's not the case.
He says based on the stock cams gear he can repress the A9s gear, i tried emailing scrappy dog, they said i was stuck with it because it's been so long since ordered it, and to make the best of it. The mechanic said that sport bike cams (he works on a lot of sport bikes) don't even come with a cam gear to prevent this problem. so we may repress the cam gear if and when there may not be any room for any more lift if i use a dome top piston if it even fits.
most likely what i see happening is a decked head, and the A9 cam with repressed gear and maybe a partial port of the exhaust side of the head.
and fast forward to present after 5+ YEARS!!!
i'm including the imgur link to the photos for full resolution as some of the detail gets lost on some photos when they shrink down.
[video=youtube;XPjWzNvN5qU]https://www.youtube.com/watch?v=XPjWzNvN5qU[/video]
These particular chassis use 10 in rims, similar design to some of the 150cc scooters but, a little smaller. should handle well considering my Honda z50 with 8 rims does 75mph on the straight away just fine.
I was able to source a 44mm jug kit and a 44mm stroker crank which puts that total CC count to about 66.7 ccs, a few more than the 63 ccs i was aiming for and quite a bit more than 100+ mph 50cc class from the isle man in the 60s. Though i'm about 17 gears and 2 cylinders short
https://i.imgur.com/IP2Ek2j.jpg
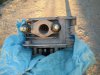
Mmmm, 139qmb gy6 small block performance goodness!
https://i.imgur.com/o55XviS.jpg
https://i.imgur.com/jXLPfiR.jpg
https://i.imgur.com/COCPrHA.jpg
https://i.imgur.com/zOMX0nQ.jpg
https://i.imgur.com/cdAyUim.jpg
BTW, spend the money and flywheel removal tool you will save some time!
https://i.imgur.com/3Rk9YHJ.jpg
One reason this whole thing could blow up is that oddly i didn't need a can of computer duster to make the crank super cold nor did i have to heat up the cases to remove or install the new crank. I have seen some YT videos where that needs done as in some GY6's, as the O.D. crank's ball bearing is an interference fit or close to. The fact i didn't have to do that for either crank makes me think ney, so i'm not too worry but, something I did note about this particular 139qmb among some other things.
i'm missing some photos here but, i took the pump apart and bought took apart a 150c GY6, they are different that's all i can remember. i think there is a brass plug in one of the case halves, that may contain the check ball and spring that controls the pressure output. The old timers say that's how most of 'em work. You can play with for high or lower pressure. Generally you want a stiffer spring so it has to pump up more pressure before the check ball moves and opens up the passageway thusly causing an output of pressure, especially if you want to install jets to mist part of the cylinder or crank case or install oil coolers. I didn't learn about that till after i buttoned up the bottom end, plus i found some bad arse synthetic oil.
After Test fitting the jug kit, i had about 38 thousands cut off the top of the jug and modified the stock head gasket for re-use. This brought up a few issues that need rectified.
The stock gasket needs it's rubber coating fully removed, i'll be using "chicano chrome" as the old timers call it, for the new sealant it is apparently a race proven method. I also had to hand hand file and sand the I.D. after using air tools to remove the bulk of the meat now that i'm 5 mms over sized. part of the bead is still there so i may have to remove more material form the I.D. because the space from the bead has to go somewhere when flatted. By doing this i loose several thousands off of the total deck height with gasket install, thusly increasing static compression! I'm thinking i'm saving at least 5 thou + 38 thou cut from the jug. The base gasket thickness and being paper type gasket, it's compression installed will play in to that too. Then finally the cam timing will be changed and will need corrected back to factory spec due to one sided tensioner rocking the gear to side over the other.
https://i.imgur.com/Knm1XoO.jpg
i spy a few burrs.
https://i.imgur.com/hcPszDD.jpg
I used window dap putty to measure valve to piston which ended up being around 112+ thou! suffice to say the new deck height is no skin of the valve to piston clearance, even if the valves float.
https://i.imgur.com/LiXKMKC.jpg
https://i.imgur.com/kEO8MbU.jpg
https://i.imgur.com/LiXKMKC.jpg
https://i.imgur.com/YvQF97E.jpg
^ Before decking 38 thou ^
https://i.imgur.com/00rMGVn.jpg
^ After decking 38 thou ^
https://i.imgur.com/qtUDZlL.jpg
Another after decking shot. the gasket is clean and de-rubbered, other than crap in the camera lense.
https://i.imgur.com/ql7vFX6.jpg
After, without the head gasket.
https://i.imgur.com/w2h6drp.jpg
That's quite the change! 1 mm off the deck height and 5mm more bore and 2.6mm more stroke!!! That's 66.7cc!!! I'm gonna have to break this thing in with 114 octane from the airport. lol
https://i.imgur.com/qkuDITr.jpg
This whole project started because of little 50cc Jonway that used to whoop up on all the other 50cc scooters. That little jonway was actually 60cc sold as a 50cc! If 10 extra ccs with no port work, no extra compression or stroke, no bigger valve no NOTHING was so notable faster than 50cc what is this gonna do ...aside from blow up that is.
https://i.imgur.com/S2Yl3Ql.jpg
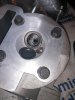
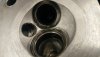
Initial test fit revealed some interference, so another thing that needed rectified was the 39mm combustion chamber needing chamfered/machined to fit the new 44mm piston at the new deck height.
https://i.imgur.com/OGUFqeS.jpg
We needed a way to mount the head to the lathe. i did not want to buy a 60cc head as I had the intake ported and i bet the factory scoops that puppy put for plenty of clearance and i want as little clearance as possible for more static compression! This could also be pointless for a number of reasons. it could also adversely affect initial flame travel while the piston is still at TDC since the edge of the head and the piston are closer together could also help by causing a little wedge action. That's probably neither here nor there since there are probably diminishing marginal returns with static compression. We have porting, camshafts and valve timing for dynamic compression.
https://i.imgur.com/LbVkwnX.jpg
Since the stud holes are center to the head, we had this laser cut so we can chuck it on the lathe.
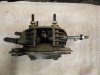

In theory should also come in with the Honda mini trail stuff and the chinese pit bike/clones too.
https://i.imgur.com/acvABIp.jpg
https://i.imgur.com/owUBf8K.jpg
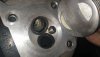
My friend even used the die grinder to treat the surface of the combustion chamber. In theory it's supposed to help with combustion / burn / flame travel.
https://i.imgur.com/jpYqTl3.jpg
With compression comes heat and with heat comes heatsinks! Wait, what? Does that even make sense? Well the heat tends to collect in the sharpest edges, that whys radiators an heatsinks are nothing but, fins and edges. That there is the start of pingin and pre destination.
https://i.imgur.com/DDb9icE.jpg
So I need to make like Nascar and start smoothing over the edges but, without hurting valve seats. It's shame I don't know anyone with the super small valve grinders or else i'd get a 3 angle valve job too.
I also looked at putting in larger valves but, then the piston would need fly cut, i use an intake valve to increase the exhaust valve size but, then i never found anything to increase the intake side and even the heat would kill an intake valve assuming it's heat treated differently. That's neither here nor there, porting will have to suffice.
https://i.imgur.com/mufq6i3.jpg
https://i.imgur.com/frCJCUN.jpg
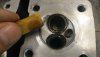
I used 220 grit and ATF and wet sanded using a circular motion. WAX ON, WAX OFF, daniel son!
https://i.imgur.com/m5R8DmZ.jpg
I attempted to photograph how smoothed over the edge around the valves, spark plug hole and threads the best I could. I def feels smoother.
https://i.imgur.com/5OSD0JC.jpg
https://i.imgur.com/OGUFqeS.jpg
I'm thinking it's all looking softer than this

https://i.imgur.com/3yCyjhL.jpg
The cheaply machined chinese parts are just that, cheaply machined!
https://i.imgur.com/QDkAKTU.jpg
Same for the skirt area.
https://i.imgur.com/JRIzwjW.jpg
https://i.imgur.com/ioFJzuU.jpg
I softened up some of the edges in the outside wrist pin area too. As long as the machine surface areas are untouched it will be fine. We're not touching the ring lands or top piston edge. The valve reliefs were touch up some. One old timer though knocking down the cast finish might have (at the time) fixed the initial piston to head interference and help with flame travel/combustion but, that was only a few thou it also made the valve relief edges a little less soft/smooth. I may take a dremel and smooth valve relief edges even more. I'd also assume the let the piston top carbon up that'll add a few though to the top of the piston and help insulate against edges.
https://i.imgur.com/J4fI6RB.jpg
Here's another old school trick, double shim the valves for that tiny extra bit of spring pressure. I haven't ever read about anyone having backfiring during deceleration or having valve float. That may be because of the CVT. The GY6 150 sprins are little bigger but, i hear talk they should work on am 139qmb 50cc.
http://49ccscoot.proboards.com/thread/415/1100-1284-150cc-valve-springs
Still doesn't really scratch the surface those pressure is but, one variable. you have the metal type, spring shape, frequency, springiness etc etc. i remember reading on a spring MFG's website talking about vibrations and frequencies etc etc. I bet if someone had some high speed footage of valve springs under load you'd seem them doing some pretty interesting dances as they shake all about and do the hokey pokey and 8,000 rpm.
Either way i have some different cams to play with and Ramp angles can put a spring under more load so i probably ought to look into the ramp angles of the new cams hopefully it isn't too much more aggressive because springs will be another can of worms if you want them RIGHT and not just some random springs with the word PERFORMANCE slapped on the package.
https://i.imgur.com/72vuq1m.jpg
That puts me back towards finally testing and fitting.
https://i.imgur.com/cI4PCgc.jpg
Which is gonna be a pain the arse. The cam gears will need repressed ...or modified in to adjustable cams. When that extra 1mm of slack on EACH SIDE of the chain is taken up on ONE SINGLE SIDE, you lose about 1.5mm or so (i'm guesstimating here) of chain distance on that side pulling the cam gear to one side thusly off of TDC. Look at the photo even at an angle the holes would still be fairly more even than this. You could also the clamp the head on without the jug and play the chain and you would see the cam move. I mention that as someone argued me on that. I kept an open mind as there are chain guides but, they aren't tensioning guides!
I will also have the base gasket at the jug to deal with and compression of the top end once it's torqued down, shouldn't be any interference as when we tested fitted the head after matching with used no base gasket or heavily reused gasket, i'm not even sure we used a head gasket. Ideally I want to be as close to "zero deck" when the piston just about touches or touches, i'm gonna say the prior because the wrist pin, rod and crank bears all have play, especially when worn. some engines run combustion chambers smaller than the piston with a FLAT relief cut into the head so that outer flat area of the piston "claps" with the head with almost no space in between what so ever forcing all the air fuel mixture into the smaller combustion chamber. My piston has crown but, kind of similar to what i'm trying to achieve. The valve timing and ramp angles will affect the dynamic compression. meaning the more air i can flow in, means more air i can compress.
https://i.imgur.com/IReZZSG.jpg
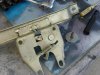
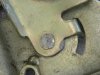
Another thing i've noticed is the weight of the exhaust likes to crack the outer engine case behind the flywheel. I'll have to try and drill and TIG weld this or have a friend give it a shot.
https://i.imgur.com/R3aUJqE.jpg
Though the i think the crack in UNDER the bolt that holds the exhaust. Maybe this one just cracked. Still it would be wise to keep a mind out for what might have cause that. Maybe something needs a secondary bracket fabbed up to take weight off of something, maybe not.
I'll be using the stock exhaust, airbox and carb and will try some various jets, i either ordered some jets or a jet kit. I'll be relying on sole timer experience for the jetting. If all else fails I think we have special drill bit set which wouldn't hurt, i got this scoot because it was wrecked and sat for a few years. the idle jet was clogged solid and while the wire brush bristled got it clear, it was some time before it idled better, i bet there might be an extra thou or so at least, of varnish that needs drilled out of the idle jet, if not more to feed those extra CCs and stroke. I haven't got that far yet, 1 step at a time.
Oh yeah, i think ...my memory is hazy, this 139qmb might have an extra mm of width on the oil pump gear, i don't have any other 139qmbs to compare with.
EDIT: this probably needs proof read a few more times as i am better at spoken english more so than typened english.
This project originally started in 2011 here, Faster | Scooter Doc Forum
I'm going to try and repost here too.
Here's my first post from 2011 and where it started. Ported the intake and de burred the header flange and double shimmed the valves, it made a notable difference!
So i finally did it. all those upgrades they advertise suck and rob power. The bigger carb is kind of pointless and as far as the CDI we couldn't give it a fair chance as supposedly they only work if your scooter is top notch, witch it wasn't running the hotter cam. The cheap Chinese quality control doesn't ensure the gear is pressed on right. Thats right the timing on these cams is probably wrong i lost power a really noticeable amount till i put the stock cam back in. (a whole 10 mph slower)
So here is what went down, raised the the intake roof and deleted the valve guide then put 2 extra valve spring shims in and set the valve lash to 1 1/2 and 2 1/2 thousands.
(pics to big, click for image, or copy and paste the URL)
On a GOOD down hill i can hit 50 mph and you can feel and hear the engine picking up RPMs, up to 9k after the CVT maxes out. Next up a 60cc jug and some other mods. may even delete all the vacuum BS on the carb and get a nice little 20 some mm carb that doesn't run a slide and is just the butter fly. For the cam a friend thinks he can set the cam timing correctly after he finds the lobe center and then we will give it another try. any one know of any good cams before we try to fix the cheap after market one? remember this is a 50cc and i'm not going for a drop in 125 or 150 or anything.
EDIT: How do these work and where does it tap in to?
Oops, there was an error! | Scooter Doc Forum
...and then a few months later...
Well i've been busy and not busy and it's been a while. I'm fairly sure i'm going to buy a 44mm 60cc jug and piston kit it's about 50 usd.
So far whats been done is are
ported intake
ported exhaust flange
exhaust header was wrapped with asbestos cloth or some other old school cloth knowing my dad
clipped the slider spring on the carb
adjusted the carb.
deleted the vacuum system accept for the petcock. as far as i can remember at least.
clipped and modified the spark plug
opened up the CVT cover
replaced drive belt
finally got a horn
xenon bulb
new throttle cable
new valve stem on rear tire
replaced locks, ignition, and keys
fixed trunk latch
Some just boring every day use others economical power adders or reliability/efficiency in the case of the spark plug mod.
I also may have found a 60cc dome top piston that may fit, i may have to buy just to see but, some collaboration with some scooters gurus may also give me an idea if it will even fit
404 Not Found
I got to thinking about all the GY6s and how they used to be honda design, very similar to the honda mini trail and how the same can be said with the whole monkey bike scene and i thought, "wait a minute" and sure enough both Honda and Chinese engines tend to run 13mm wrist pins.
I used to have an s65 engine witch i sold. Now all i have left are the rings to it and some odds and ends but, no piston.
The Honda Sport 65 was a 44mm bore with a 13mm wrist pin and 41.4mm stroke. Sound familiar?
So maybe if the deck height and ring height and dome height are alright then it's possible it may fit then you would have to deal with the valve relief but, since i know some people that may not be a big deal.
I also tried the scrappy dogs sport A9 cams it's either poor product or i got defective item, the amount of hours installing and removing it on several occasions and double checking for installation error with very skilled mechanics, it's definitely the cam. one of the skill mechanics said the cam gear has to be off the way it runs, witch it runs like the timing chain is off a tooth or so but that's not the case.
He says based on the stock cams gear he can repress the A9s gear, i tried emailing scrappy dog, they said i was stuck with it because it's been so long since ordered it, and to make the best of it. The mechanic said that sport bike cams (he works on a lot of sport bikes) don't even come with a cam gear to prevent this problem. so we may repress the cam gear if and when there may not be any room for any more lift if i use a dome top piston if it even fits.
most likely what i see happening is a decked head, and the A9 cam with repressed gear and maybe a partial port of the exhaust side of the head.
and fast forward to present after 5+ YEARS!!!
i'm including the imgur link to the photos for full resolution as some of the detail gets lost on some photos when they shrink down.
[video=youtube;XPjWzNvN5qU]https://www.youtube.com/watch?v=XPjWzNvN5qU[/video]
These particular chassis use 10 in rims, similar design to some of the 150cc scooters but, a little smaller. should handle well considering my Honda z50 with 8 rims does 75mph on the straight away just fine.
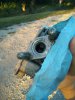
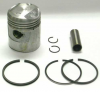
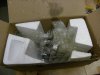
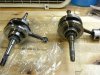
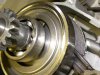
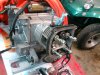
I was able to source a 44mm jug kit and a 44mm stroker crank which puts that total CC count to about 66.7 ccs, a few more than the 63 ccs i was aiming for and quite a bit more than 100+ mph 50cc class from the isle man in the 60s. Though i'm about 17 gears and 2 cylinders short
https://i.imgur.com/IP2Ek2j.jpg
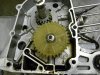
Mmmm, 139qmb gy6 small block performance goodness!
https://i.imgur.com/o55XviS.jpg
https://i.imgur.com/jXLPfiR.jpg
https://i.imgur.com/COCPrHA.jpg
https://i.imgur.com/zOMX0nQ.jpg
https://i.imgur.com/cdAyUim.jpg
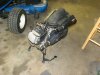
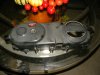
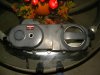
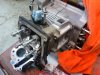
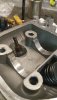
BTW, spend the money and flywheel removal tool you will save some time!
https://i.imgur.com/3Rk9YHJ.jpg
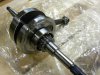
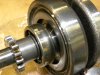
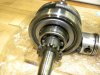
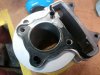
One reason this whole thing could blow up is that oddly i didn't need a can of computer duster to make the crank super cold nor did i have to heat up the cases to remove or install the new crank. I have seen some YT videos where that needs done as in some GY6's, as the O.D. crank's ball bearing is an interference fit or close to. The fact i didn't have to do that for either crank makes me think ney, so i'm not too worry but, something I did note about this particular 139qmb among some other things.
i'm missing some photos here but, i took the pump apart and bought took apart a 150c GY6, they are different that's all i can remember. i think there is a brass plug in one of the case halves, that may contain the check ball and spring that controls the pressure output. The old timers say that's how most of 'em work. You can play with for high or lower pressure. Generally you want a stiffer spring so it has to pump up more pressure before the check ball moves and opens up the passageway thusly causing an output of pressure, especially if you want to install jets to mist part of the cylinder or crank case or install oil coolers. I didn't learn about that till after i buttoned up the bottom end, plus i found some bad arse synthetic oil.
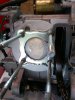
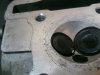
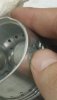
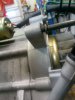
After Test fitting the jug kit, i had about 38 thousands cut off the top of the jug and modified the stock head gasket for re-use. This brought up a few issues that need rectified.
The stock gasket needs it's rubber coating fully removed, i'll be using "chicano chrome" as the old timers call it, for the new sealant it is apparently a race proven method. I also had to hand hand file and sand the I.D. after using air tools to remove the bulk of the meat now that i'm 5 mms over sized. part of the bead is still there so i may have to remove more material form the I.D. because the space from the bead has to go somewhere when flatted. By doing this i loose several thousands off of the total deck height with gasket install, thusly increasing static compression! I'm thinking i'm saving at least 5 thou + 38 thou cut from the jug. The base gasket thickness and being paper type gasket, it's compression installed will play in to that too. Then finally the cam timing will be changed and will need corrected back to factory spec due to one sided tensioner rocking the gear to side over the other.
https://i.imgur.com/Knm1XoO.jpg
i spy a few burrs.
https://i.imgur.com/hcPszDD.jpg
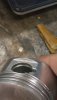
I used window dap putty to measure valve to piston which ended up being around 112+ thou! suffice to say the new deck height is no skin of the valve to piston clearance, even if the valves float.
https://i.imgur.com/LiXKMKC.jpg
https://i.imgur.com/kEO8MbU.jpg
https://i.imgur.com/LiXKMKC.jpg
https://i.imgur.com/YvQF97E.jpg
^ Before decking 38 thou ^
https://i.imgur.com/00rMGVn.jpg
^ After decking 38 thou ^
https://i.imgur.com/qtUDZlL.jpg
Another after decking shot. the gasket is clean and de-rubbered, other than crap in the camera lense.
https://i.imgur.com/ql7vFX6.jpg
After, without the head gasket.
https://i.imgur.com/w2h6drp.jpg
That's quite the change! 1 mm off the deck height and 5mm more bore and 2.6mm more stroke!!! That's 66.7cc!!! I'm gonna have to break this thing in with 114 octane from the airport. lol
https://i.imgur.com/qkuDITr.jpg
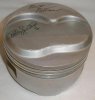
This whole project started because of little 50cc Jonway that used to whoop up on all the other 50cc scooters. That little jonway was actually 60cc sold as a 50cc! If 10 extra ccs with no port work, no extra compression or stroke, no bigger valve no NOTHING was so notable faster than 50cc what is this gonna do ...aside from blow up that is.
https://i.imgur.com/S2Yl3Ql.jpg
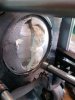
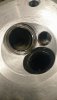
Initial test fit revealed some interference, so another thing that needed rectified was the 39mm combustion chamber needing chamfered/machined to fit the new 44mm piston at the new deck height.
https://i.imgur.com/OGUFqeS.jpg
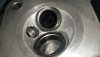
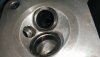
We needed a way to mount the head to the lathe. i did not want to buy a 60cc head as I had the intake ported and i bet the factory scoops that puppy put for plenty of clearance and i want as little clearance as possible for more static compression! This could also be pointless for a number of reasons. it could also adversely affect initial flame travel while the piston is still at TDC since the edge of the head and the piston are closer together could also help by causing a little wedge action. That's probably neither here nor there since there are probably diminishing marginal returns with static compression. We have porting, camshafts and valve timing for dynamic compression.
https://i.imgur.com/LbVkwnX.jpg
Since the stud holes are center to the head, we had this laser cut so we can chuck it on the lathe.
In theory should also come in with the Honda mini trail stuff and the chinese pit bike/clones too.
https://i.imgur.com/acvABIp.jpg
https://i.imgur.com/owUBf8K.jpg
My friend even used the die grinder to treat the surface of the combustion chamber. In theory it's supposed to help with combustion / burn / flame travel.
https://i.imgur.com/jpYqTl3.jpg
With compression comes heat and with heat comes heatsinks! Wait, what? Does that even make sense? Well the heat tends to collect in the sharpest edges, that whys radiators an heatsinks are nothing but, fins and edges. That there is the start of pingin and pre destination.
https://i.imgur.com/DDb9icE.jpg
So I need to make like Nascar and start smoothing over the edges but, without hurting valve seats. It's shame I don't know anyone with the super small valve grinders or else i'd get a 3 angle valve job too.
I also looked at putting in larger valves but, then the piston would need fly cut, i use an intake valve to increase the exhaust valve size but, then i never found anything to increase the intake side and even the heat would kill an intake valve assuming it's heat treated differently. That's neither here nor there, porting will have to suffice.
https://i.imgur.com/mufq6i3.jpg
https://i.imgur.com/frCJCUN.jpg
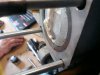
I used 220 grit and ATF and wet sanded using a circular motion. WAX ON, WAX OFF, daniel son!
https://i.imgur.com/m5R8DmZ.jpg
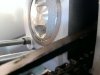
I attempted to photograph how smoothed over the edge around the valves, spark plug hole and threads the best I could. I def feels smoother.
https://i.imgur.com/5OSD0JC.jpg
https://i.imgur.com/OGUFqeS.jpg
I'm thinking it's all looking softer than this
https://i.imgur.com/3yCyjhL.jpg
The cheaply machined chinese parts are just that, cheaply machined!
https://i.imgur.com/QDkAKTU.jpg
Same for the skirt area.
https://i.imgur.com/JRIzwjW.jpg
https://i.imgur.com/ioFJzuU.jpg
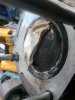
I softened up some of the edges in the outside wrist pin area too. As long as the machine surface areas are untouched it will be fine. We're not touching the ring lands or top piston edge. The valve reliefs were touch up some. One old timer though knocking down the cast finish might have (at the time) fixed the initial piston to head interference and help with flame travel/combustion but, that was only a few thou it also made the valve relief edges a little less soft/smooth. I may take a dremel and smooth valve relief edges even more. I'd also assume the let the piston top carbon up that'll add a few though to the top of the piston and help insulate against edges.
https://i.imgur.com/J4fI6RB.jpg
Here's another old school trick, double shim the valves for that tiny extra bit of spring pressure. I haven't ever read about anyone having backfiring during deceleration or having valve float. That may be because of the CVT. The GY6 150 sprins are little bigger but, i hear talk they should work on am 139qmb 50cc.
http://49ccscoot.proboards.com/thread/415/1100-1284-150cc-valve-springs
Still doesn't really scratch the surface those pressure is but, one variable. you have the metal type, spring shape, frequency, springiness etc etc. i remember reading on a spring MFG's website talking about vibrations and frequencies etc etc. I bet if someone had some high speed footage of valve springs under load you'd seem them doing some pretty interesting dances as they shake all about and do the hokey pokey and 8,000 rpm.
Either way i have some different cams to play with and Ramp angles can put a spring under more load so i probably ought to look into the ramp angles of the new cams hopefully it isn't too much more aggressive because springs will be another can of worms if you want them RIGHT and not just some random springs with the word PERFORMANCE slapped on the package.
https://i.imgur.com/72vuq1m.jpg
That puts me back towards finally testing and fitting.
https://i.imgur.com/cI4PCgc.jpg
Which is gonna be a pain the arse. The cam gears will need repressed ...or modified in to adjustable cams. When that extra 1mm of slack on EACH SIDE of the chain is taken up on ONE SINGLE SIDE, you lose about 1.5mm or so (i'm guesstimating here) of chain distance on that side pulling the cam gear to one side thusly off of TDC. Look at the photo even at an angle the holes would still be fairly more even than this. You could also the clamp the head on without the jug and play the chain and you would see the cam move. I mention that as someone argued me on that. I kept an open mind as there are chain guides but, they aren't tensioning guides!
I will also have the base gasket at the jug to deal with and compression of the top end once it's torqued down, shouldn't be any interference as when we tested fitted the head after matching with used no base gasket or heavily reused gasket, i'm not even sure we used a head gasket. Ideally I want to be as close to "zero deck" when the piston just about touches or touches, i'm gonna say the prior because the wrist pin, rod and crank bears all have play, especially when worn. some engines run combustion chambers smaller than the piston with a FLAT relief cut into the head so that outer flat area of the piston "claps" with the head with almost no space in between what so ever forcing all the air fuel mixture into the smaller combustion chamber. My piston has crown but, kind of similar to what i'm trying to achieve. The valve timing and ramp angles will affect the dynamic compression. meaning the more air i can flow in, means more air i can compress.
https://i.imgur.com/IReZZSG.jpg
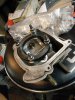
Another thing i've noticed is the weight of the exhaust likes to crack the outer engine case behind the flywheel. I'll have to try and drill and TIG weld this or have a friend give it a shot.
https://i.imgur.com/R3aUJqE.jpg
Though the i think the crack in UNDER the bolt that holds the exhaust. Maybe this one just cracked. Still it would be wise to keep a mind out for what might have cause that. Maybe something needs a secondary bracket fabbed up to take weight off of something, maybe not.
I'll be using the stock exhaust, airbox and carb and will try some various jets, i either ordered some jets or a jet kit. I'll be relying on sole timer experience for the jetting. If all else fails I think we have special drill bit set which wouldn't hurt, i got this scoot because it was wrecked and sat for a few years. the idle jet was clogged solid and while the wire brush bristled got it clear, it was some time before it idled better, i bet there might be an extra thou or so at least, of varnish that needs drilled out of the idle jet, if not more to feed those extra CCs and stroke. I haven't got that far yet, 1 step at a time.
Oh yeah, i think ...my memory is hazy, this 139qmb might have an extra mm of width on the oil pump gear, i don't have any other 139qmbs to compare with.
EDIT: this probably needs proof read a few more times as i am better at spoken english more so than typened english.