Vintage 1970 Broncco tx2/tx1

1970 Broncco TX2/TX1

  • yes

    Votes: 2 28.6%
  • No

    Votes: 5 71.4%

  • Total voters
    7
  • Poll closed .

cfh

Well-Known Member
#1
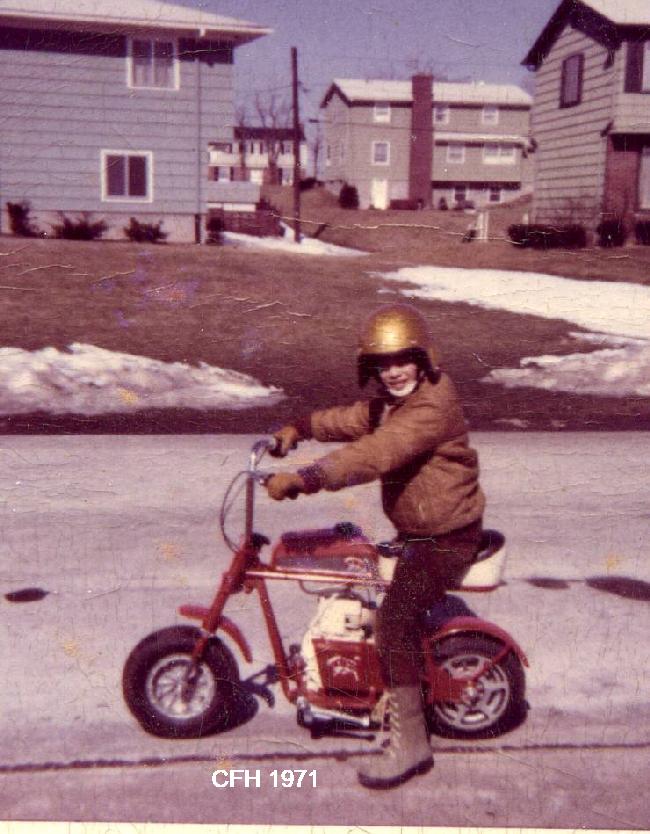
So when in 1971, i saved up snow shoveling and lawn money to buy my first mini bike. went to Kelly's mini bike shop in Rochester NY, and for some odd reason, ended up buying a Broncco TX2 (orange.) Here's a picture of me and my new bike:


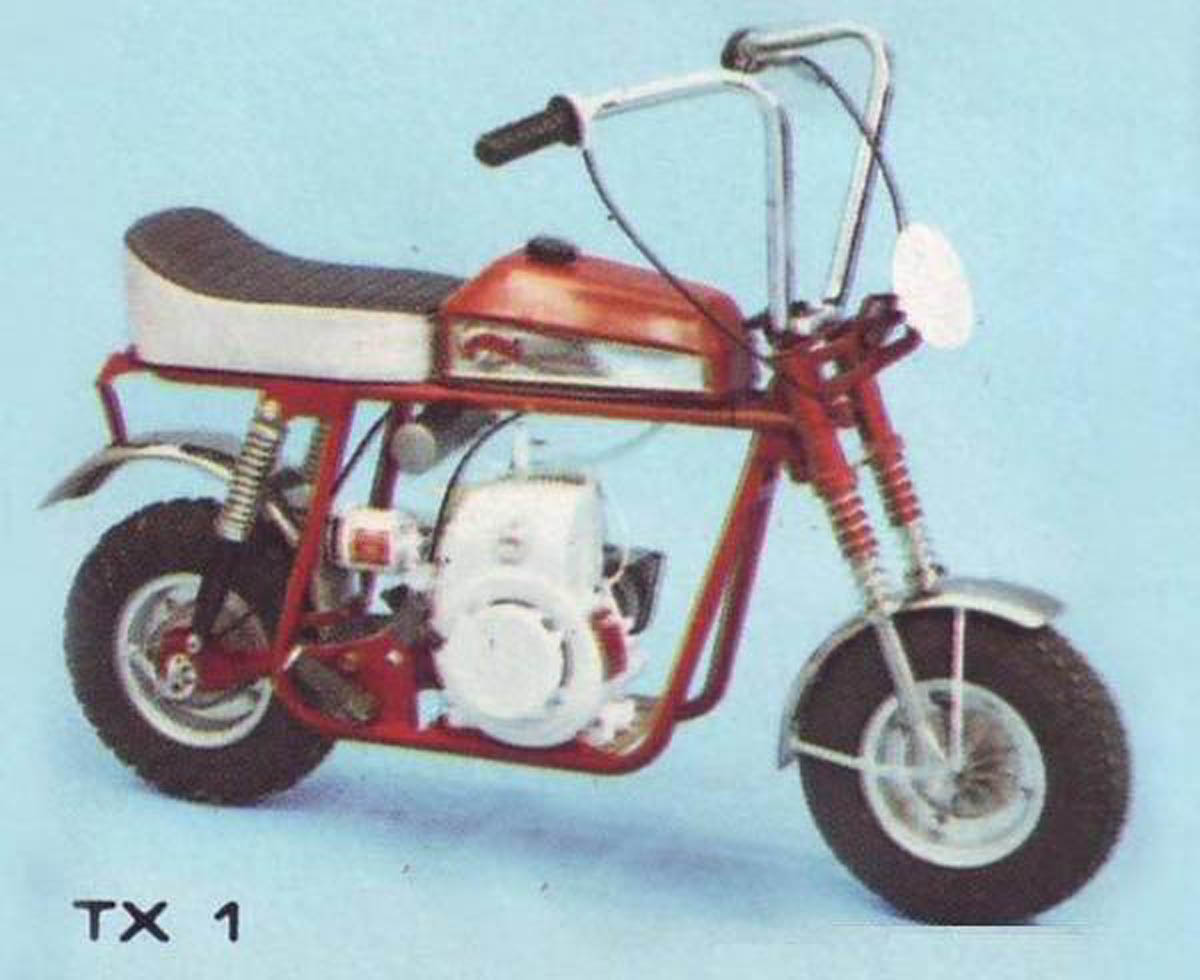
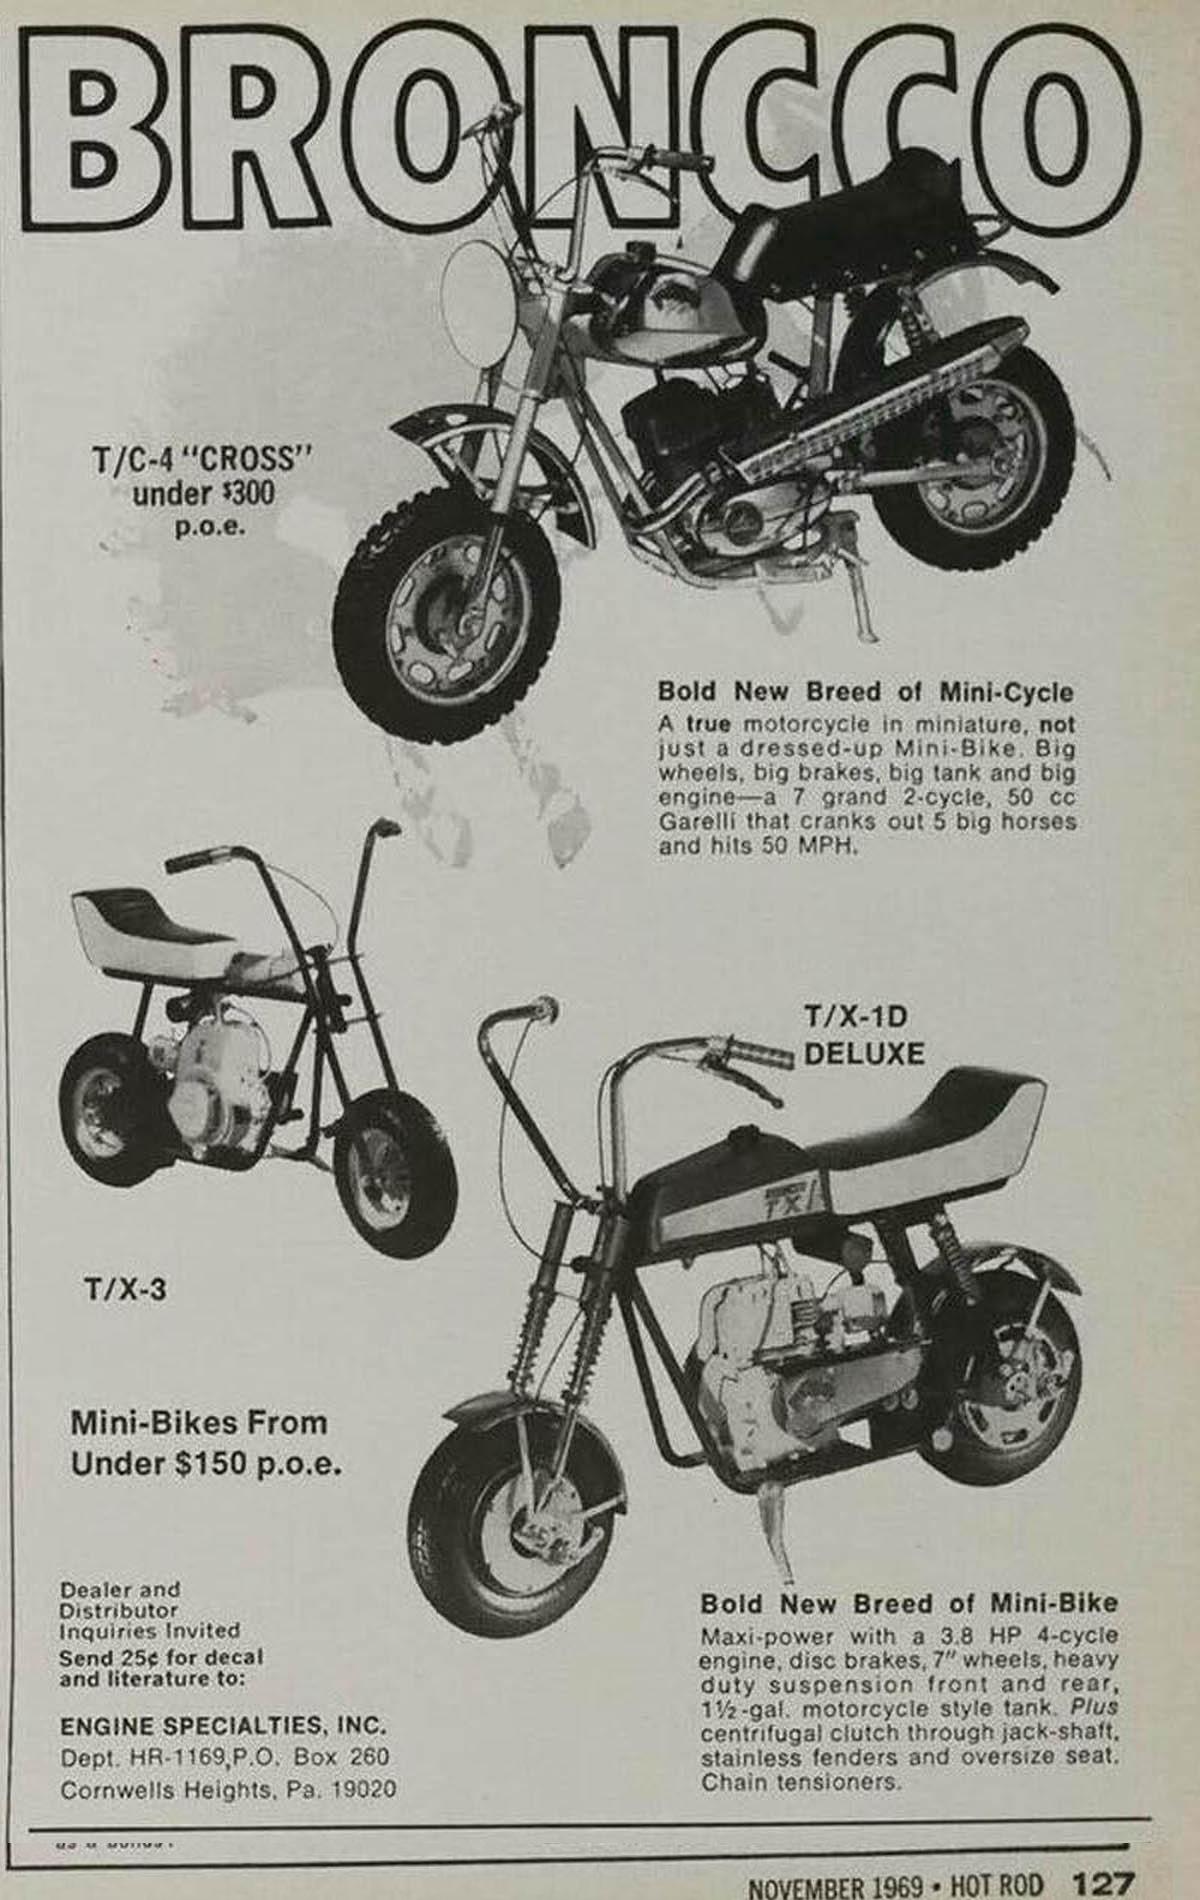
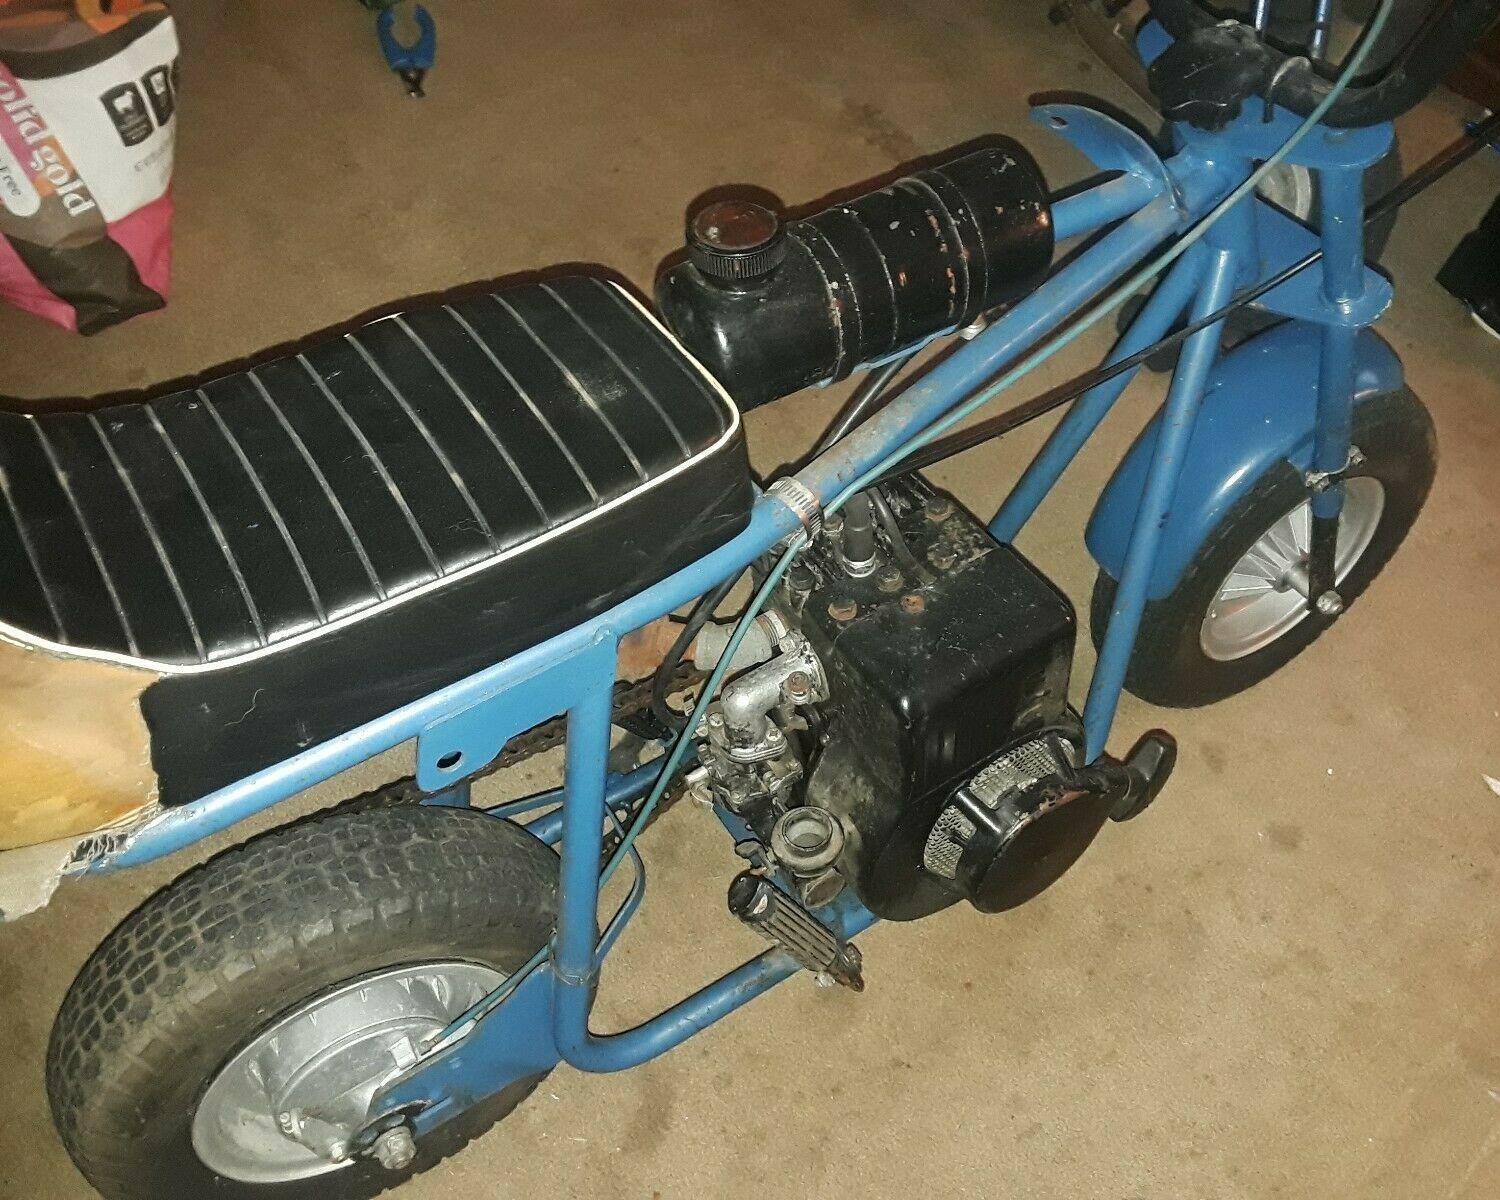
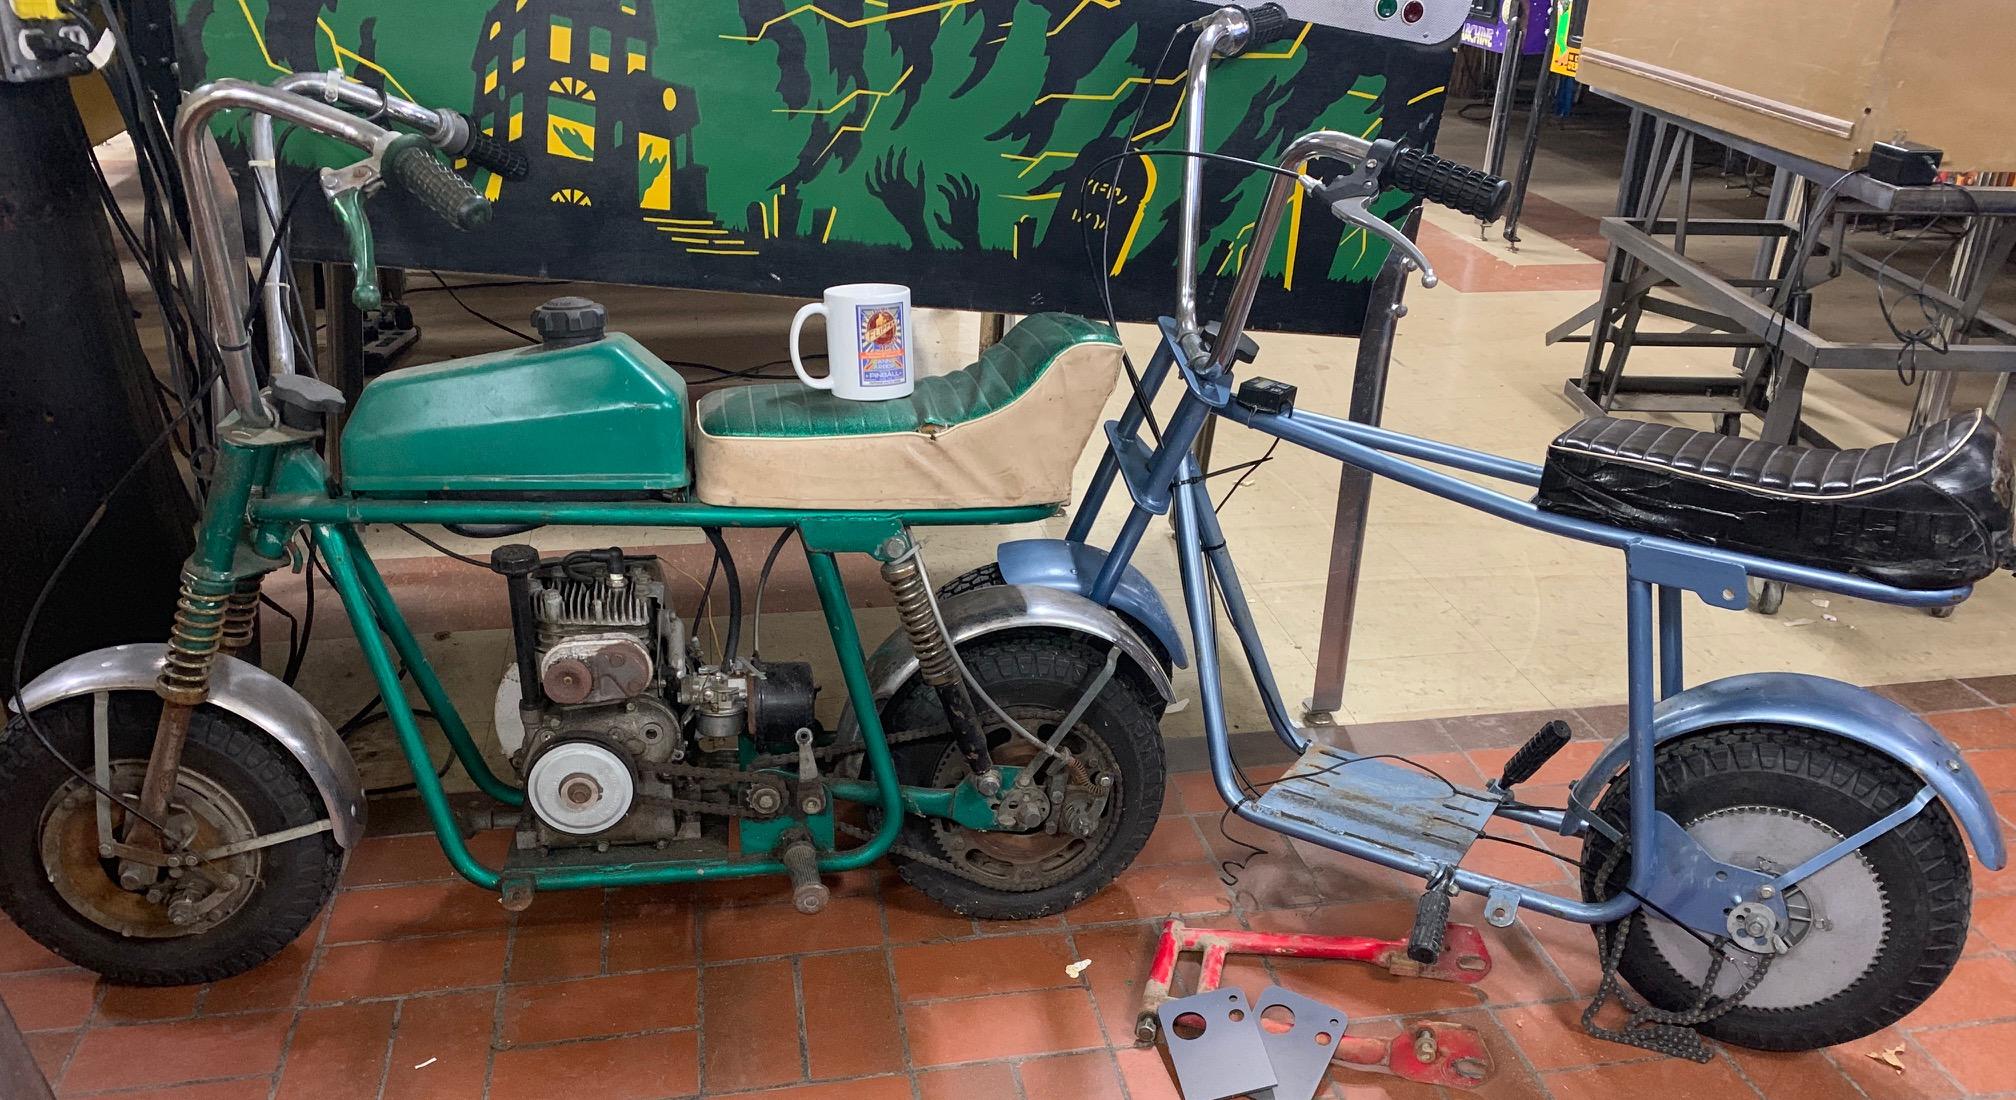
When I got back into mini bikes, i never thought i would come across any Broncco stuff. And frankly, I wasn't really jonesin' for a Broncco either. I always liked my neighbor's Rupp roadster and other neighbor's Honda ct70. They seemed way better (and in fact were.) I have since re-done a bunch of Rupps (you can't throw a rock without hitting one around here, they are everywhere.) But i ended up tripping across a couple Bronccos, and thought, what the heck, maybe i should re-do these. So i bought a Tx1 and a Tx2:


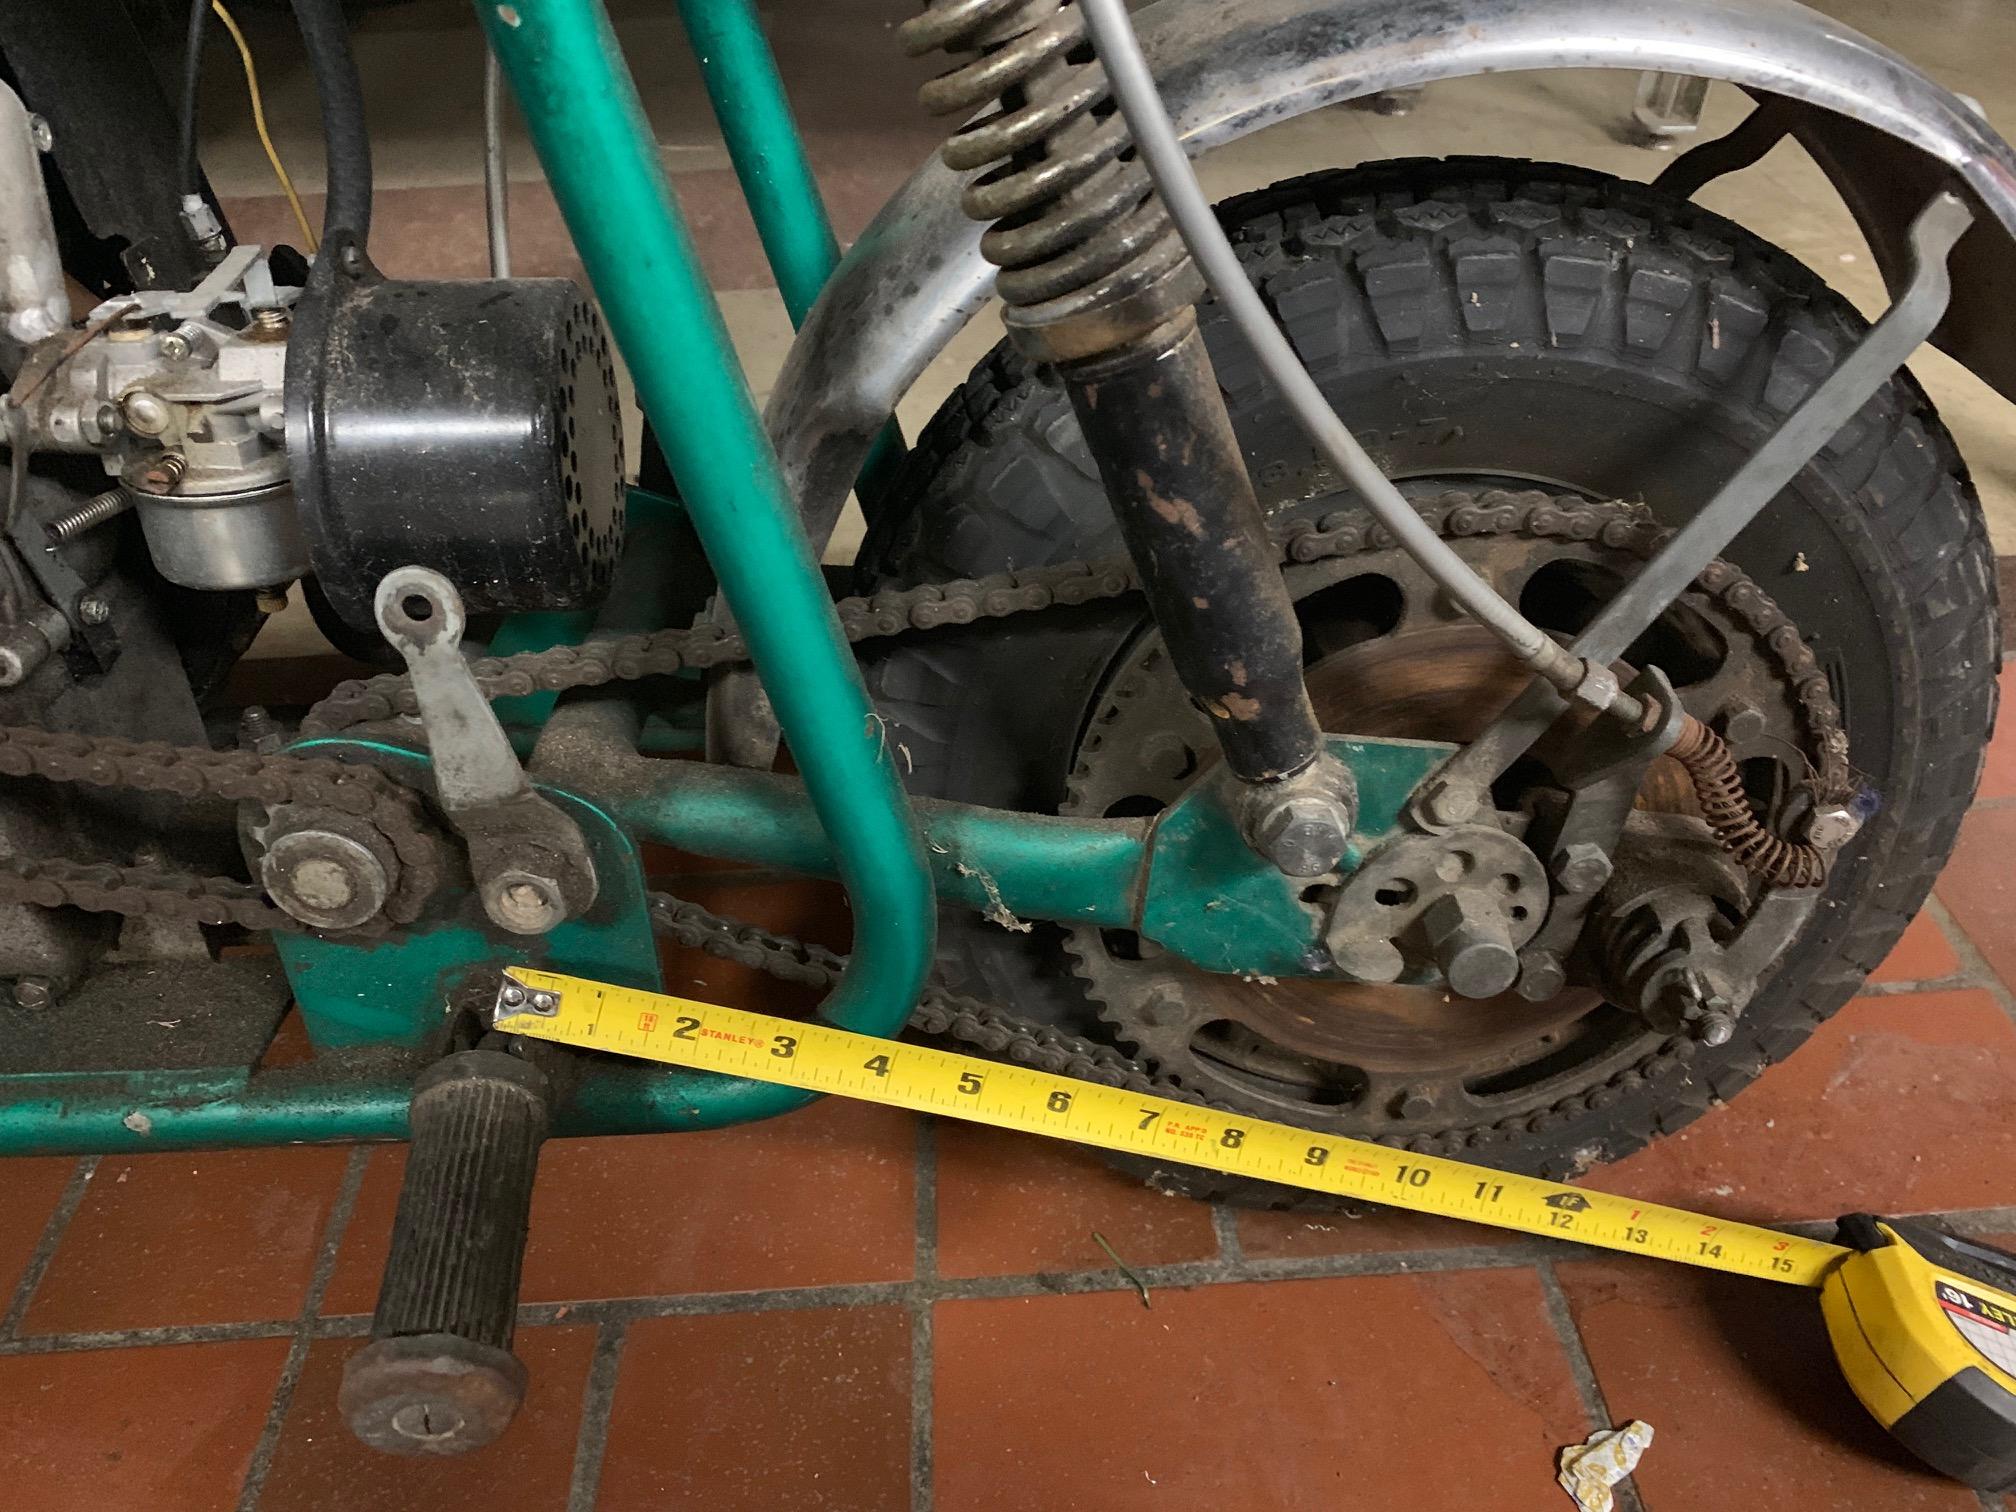
The one thing I always hated about my original Tx2 was the lack of rear suspension. So a couple years after I bought my first mini bike (probably 1973), I noticed my neighbor had a 'roller' (we didn't call them that) in his garage and it was a 1970 green broncco Tx2 (front and rear suspension). He sold it to me for $13, with no engine and a torn seat. I stripped all the good parts off my Tx1 and put them on the Tx2, and added a torque converter. It was a pretty awesome mini bike! I could finally almost keep up with the Rupp neighbor and his Roadster.

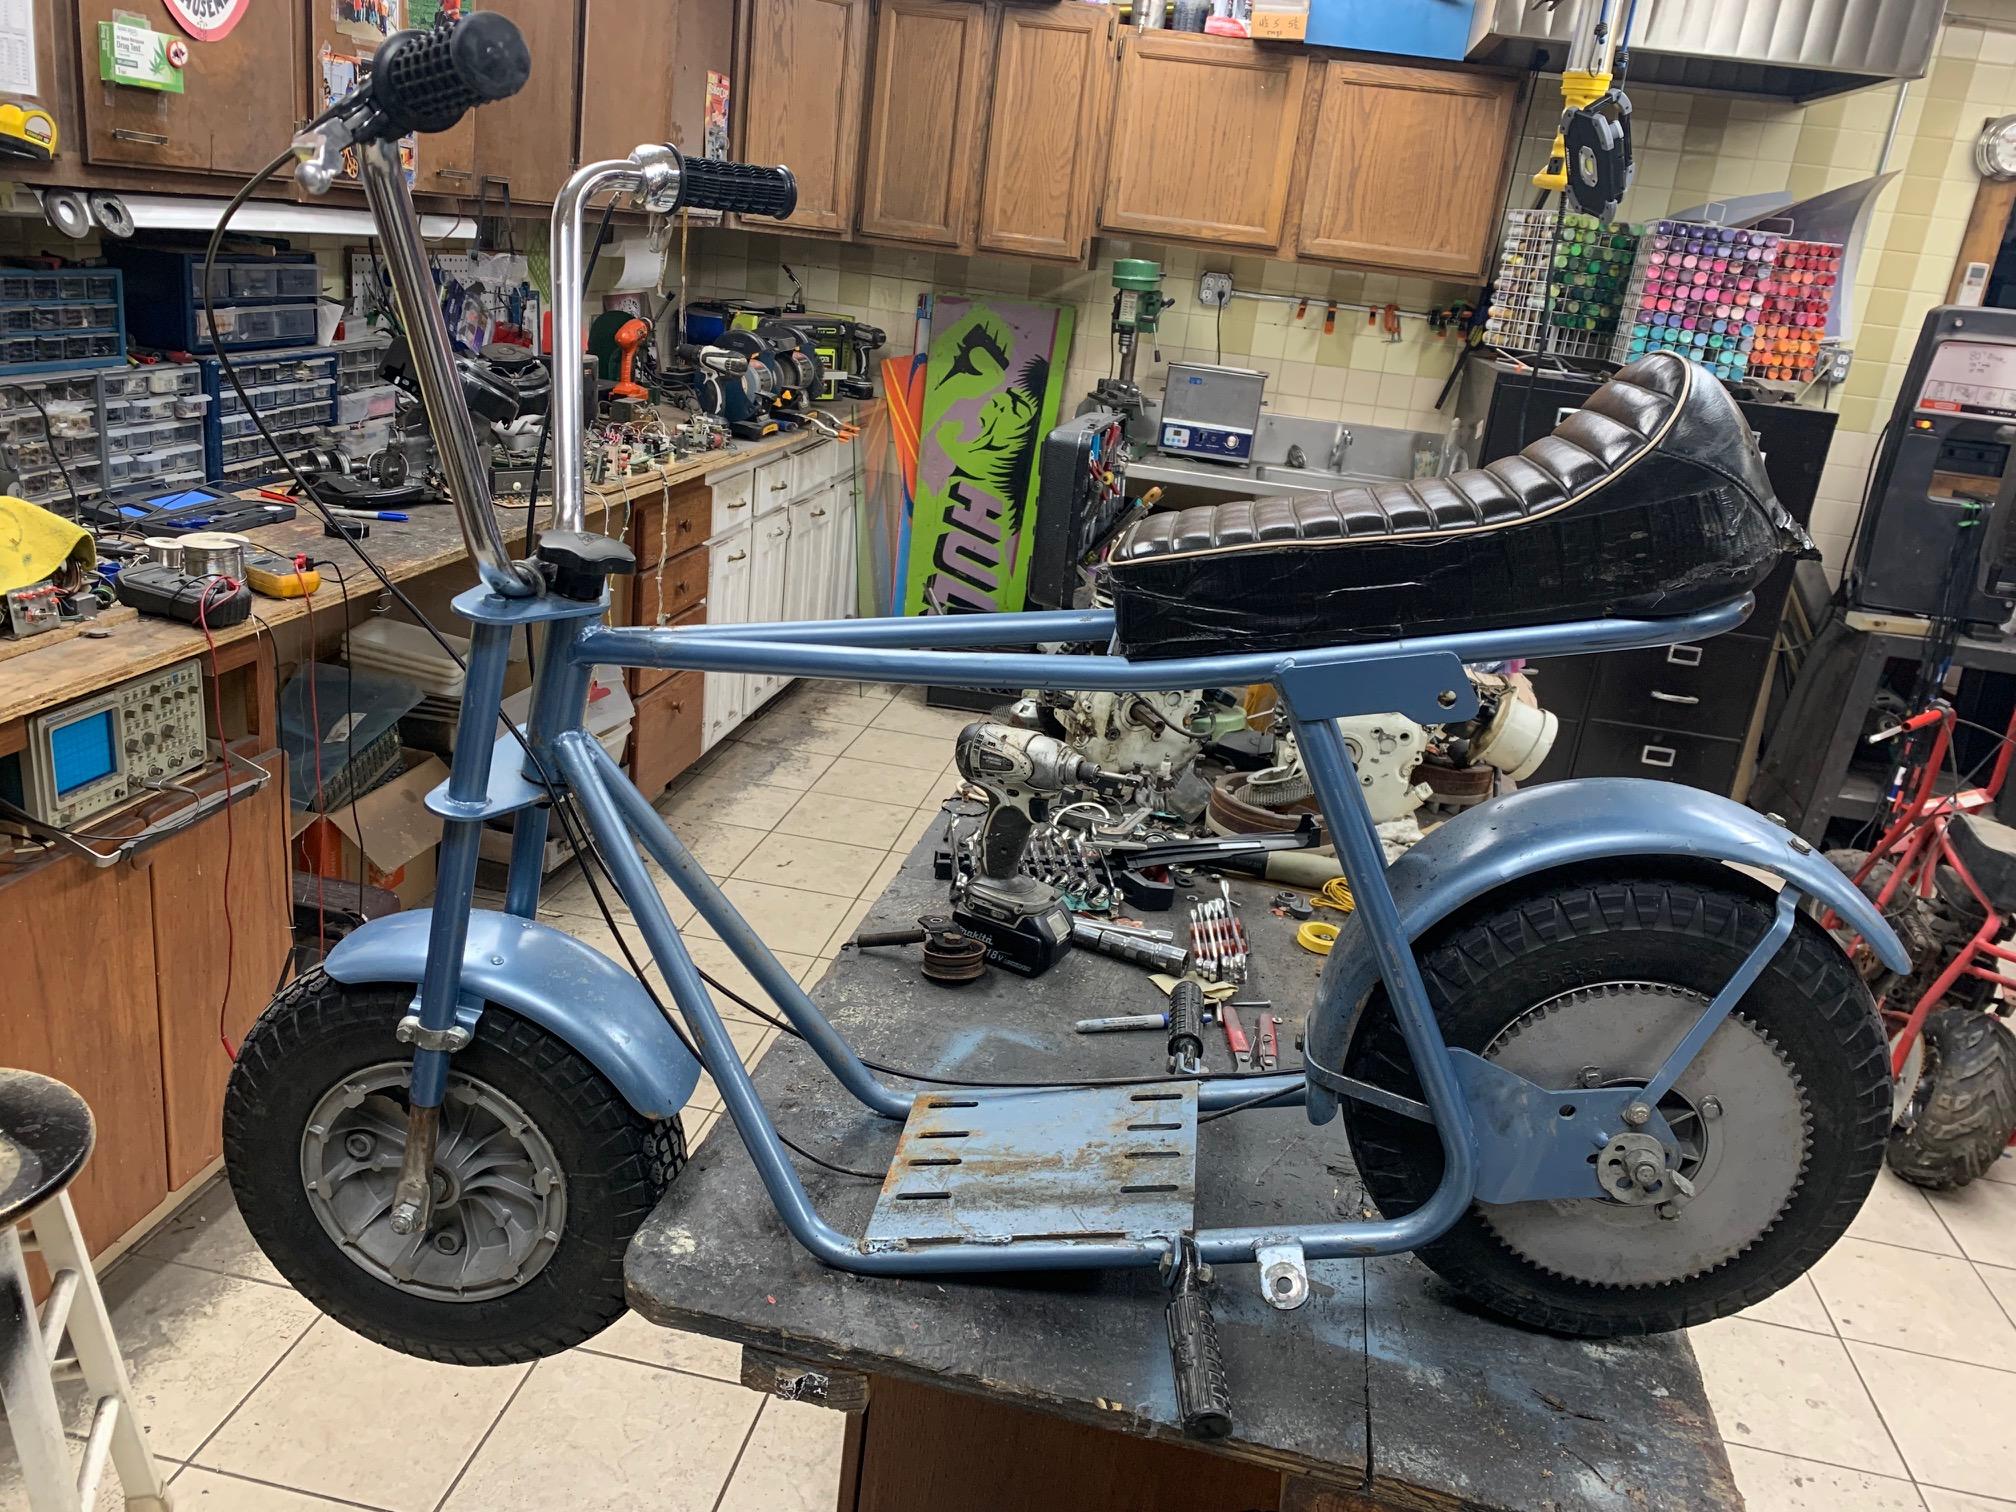
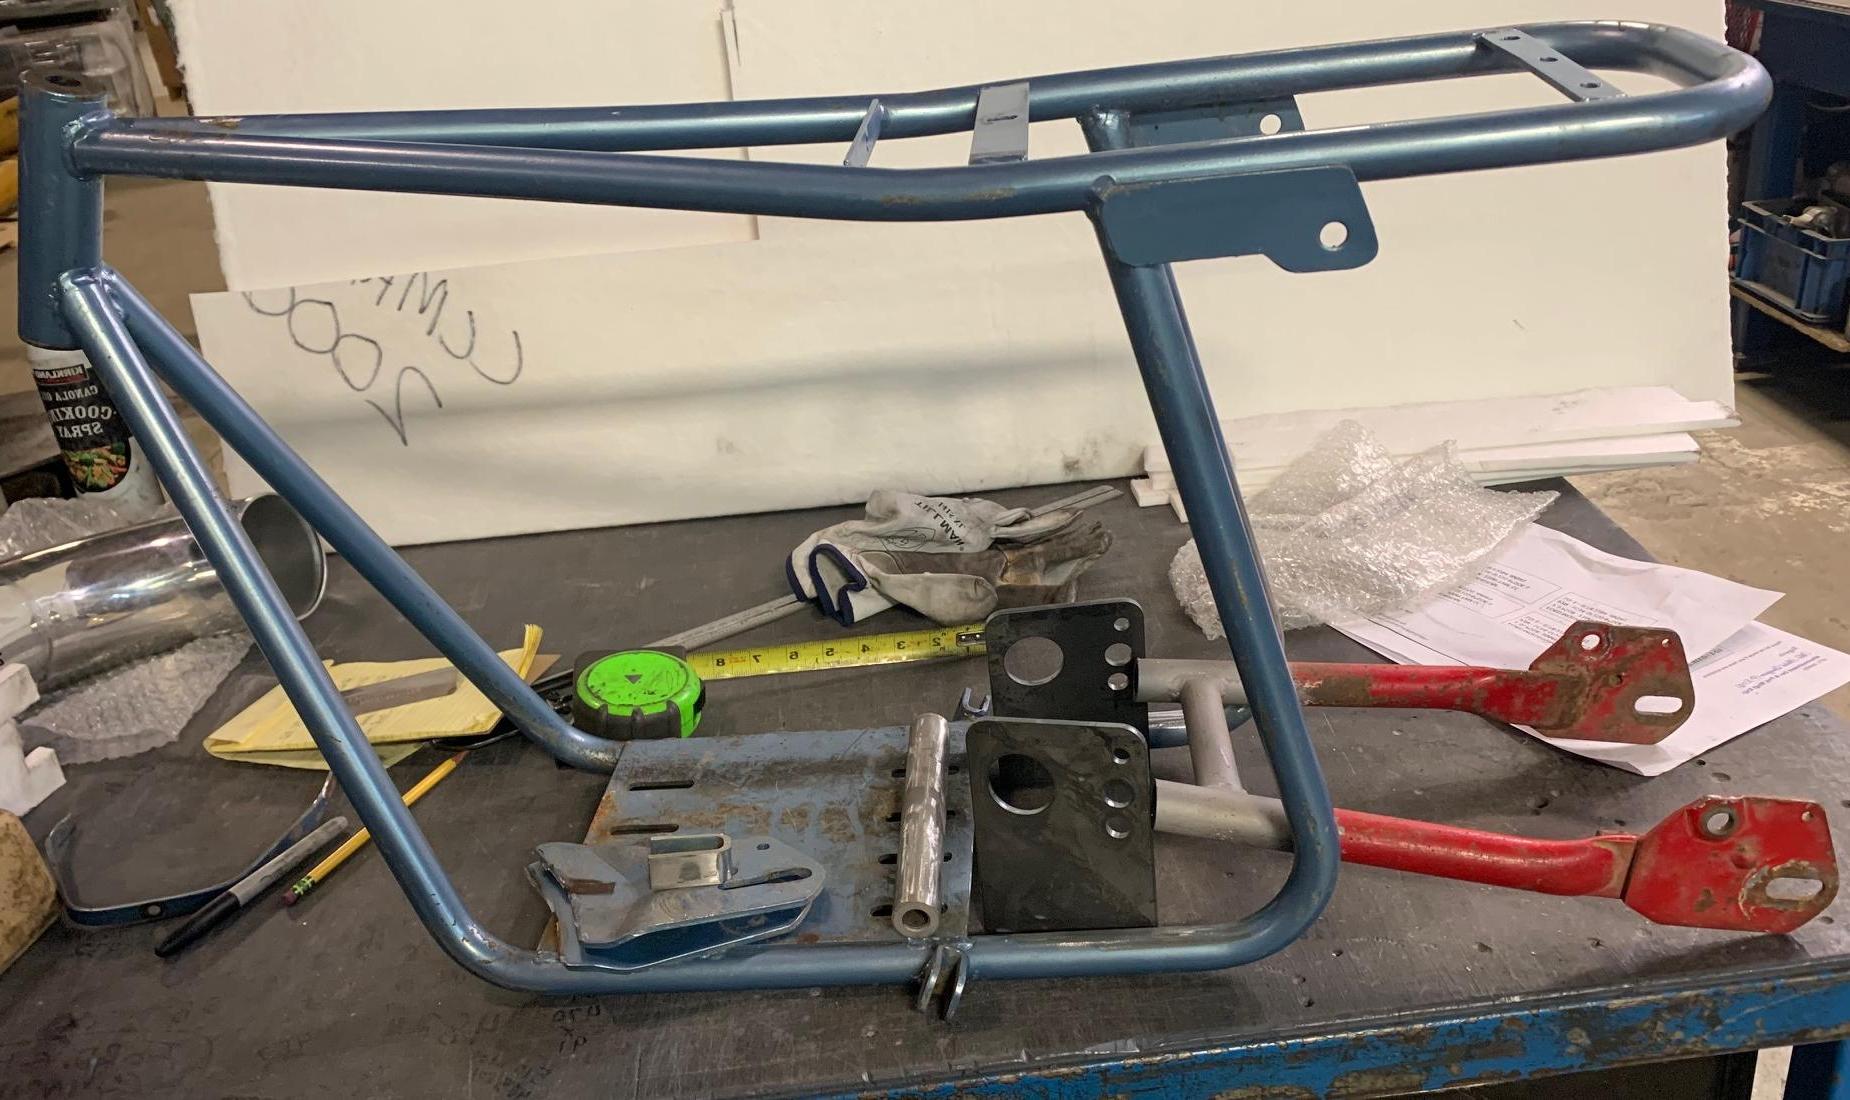
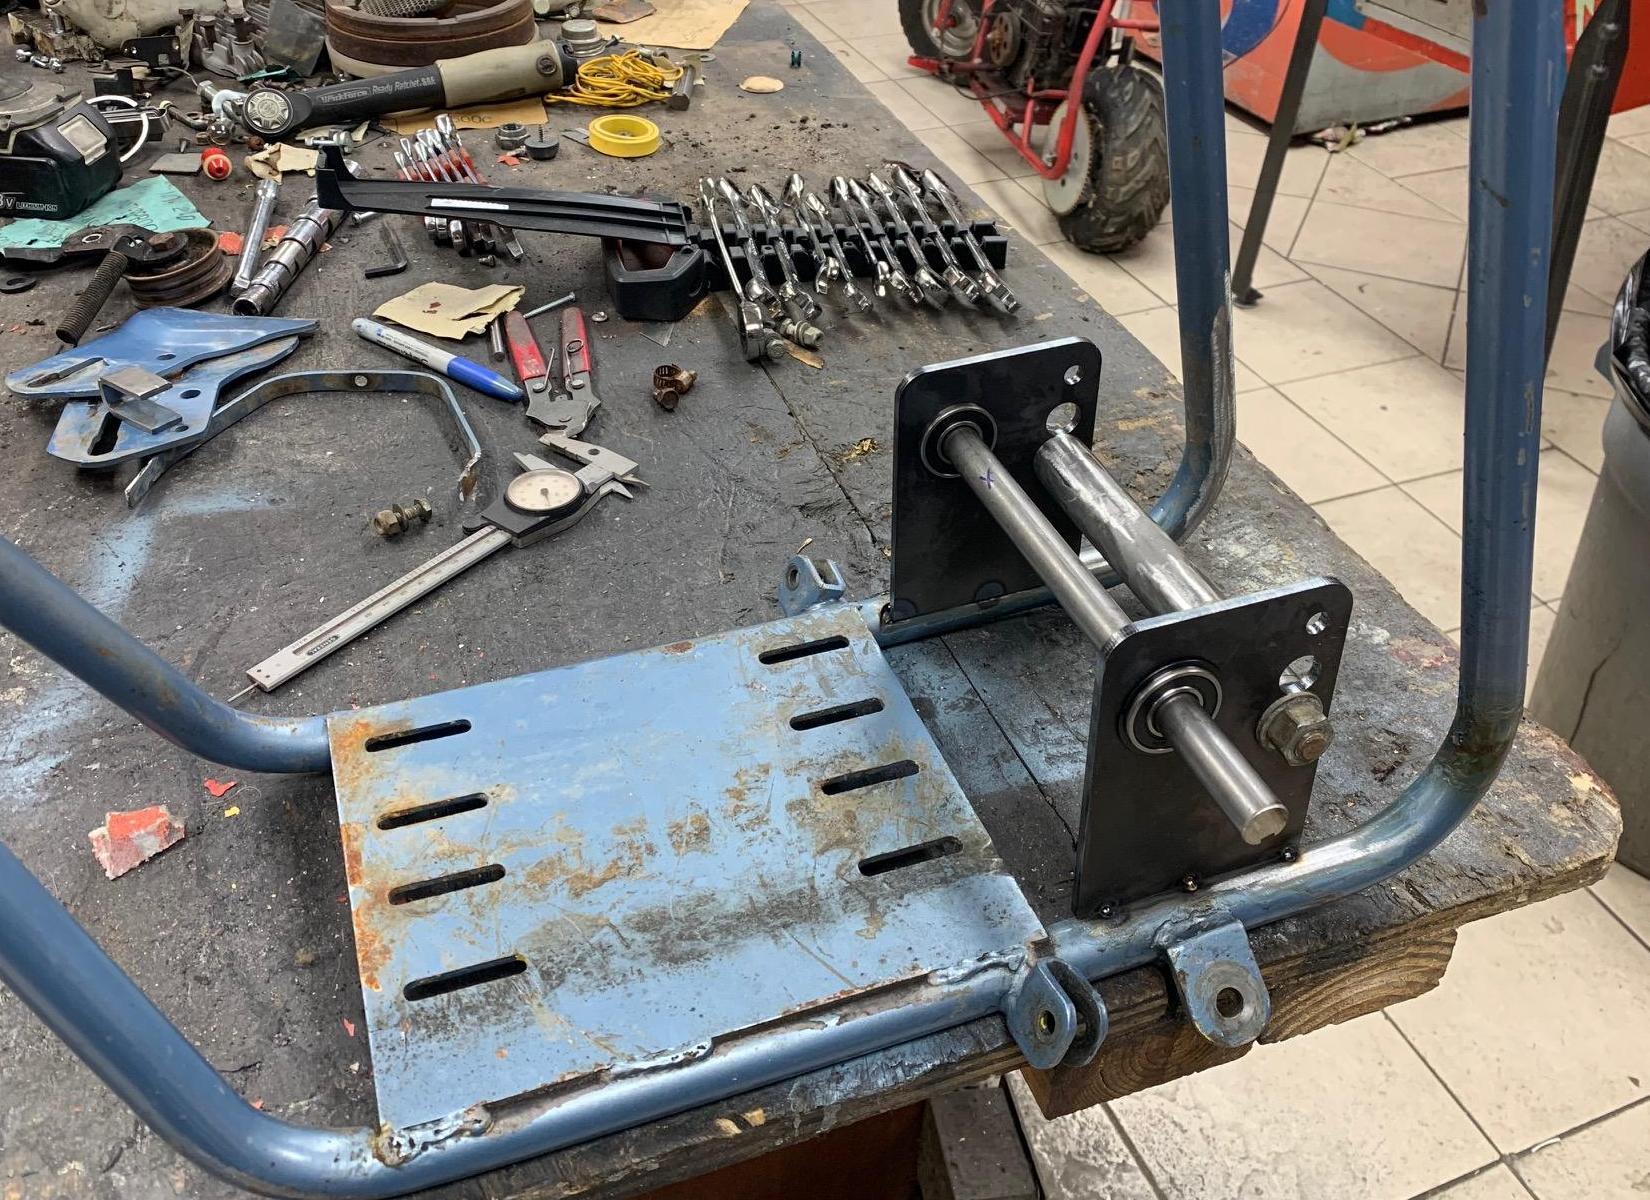
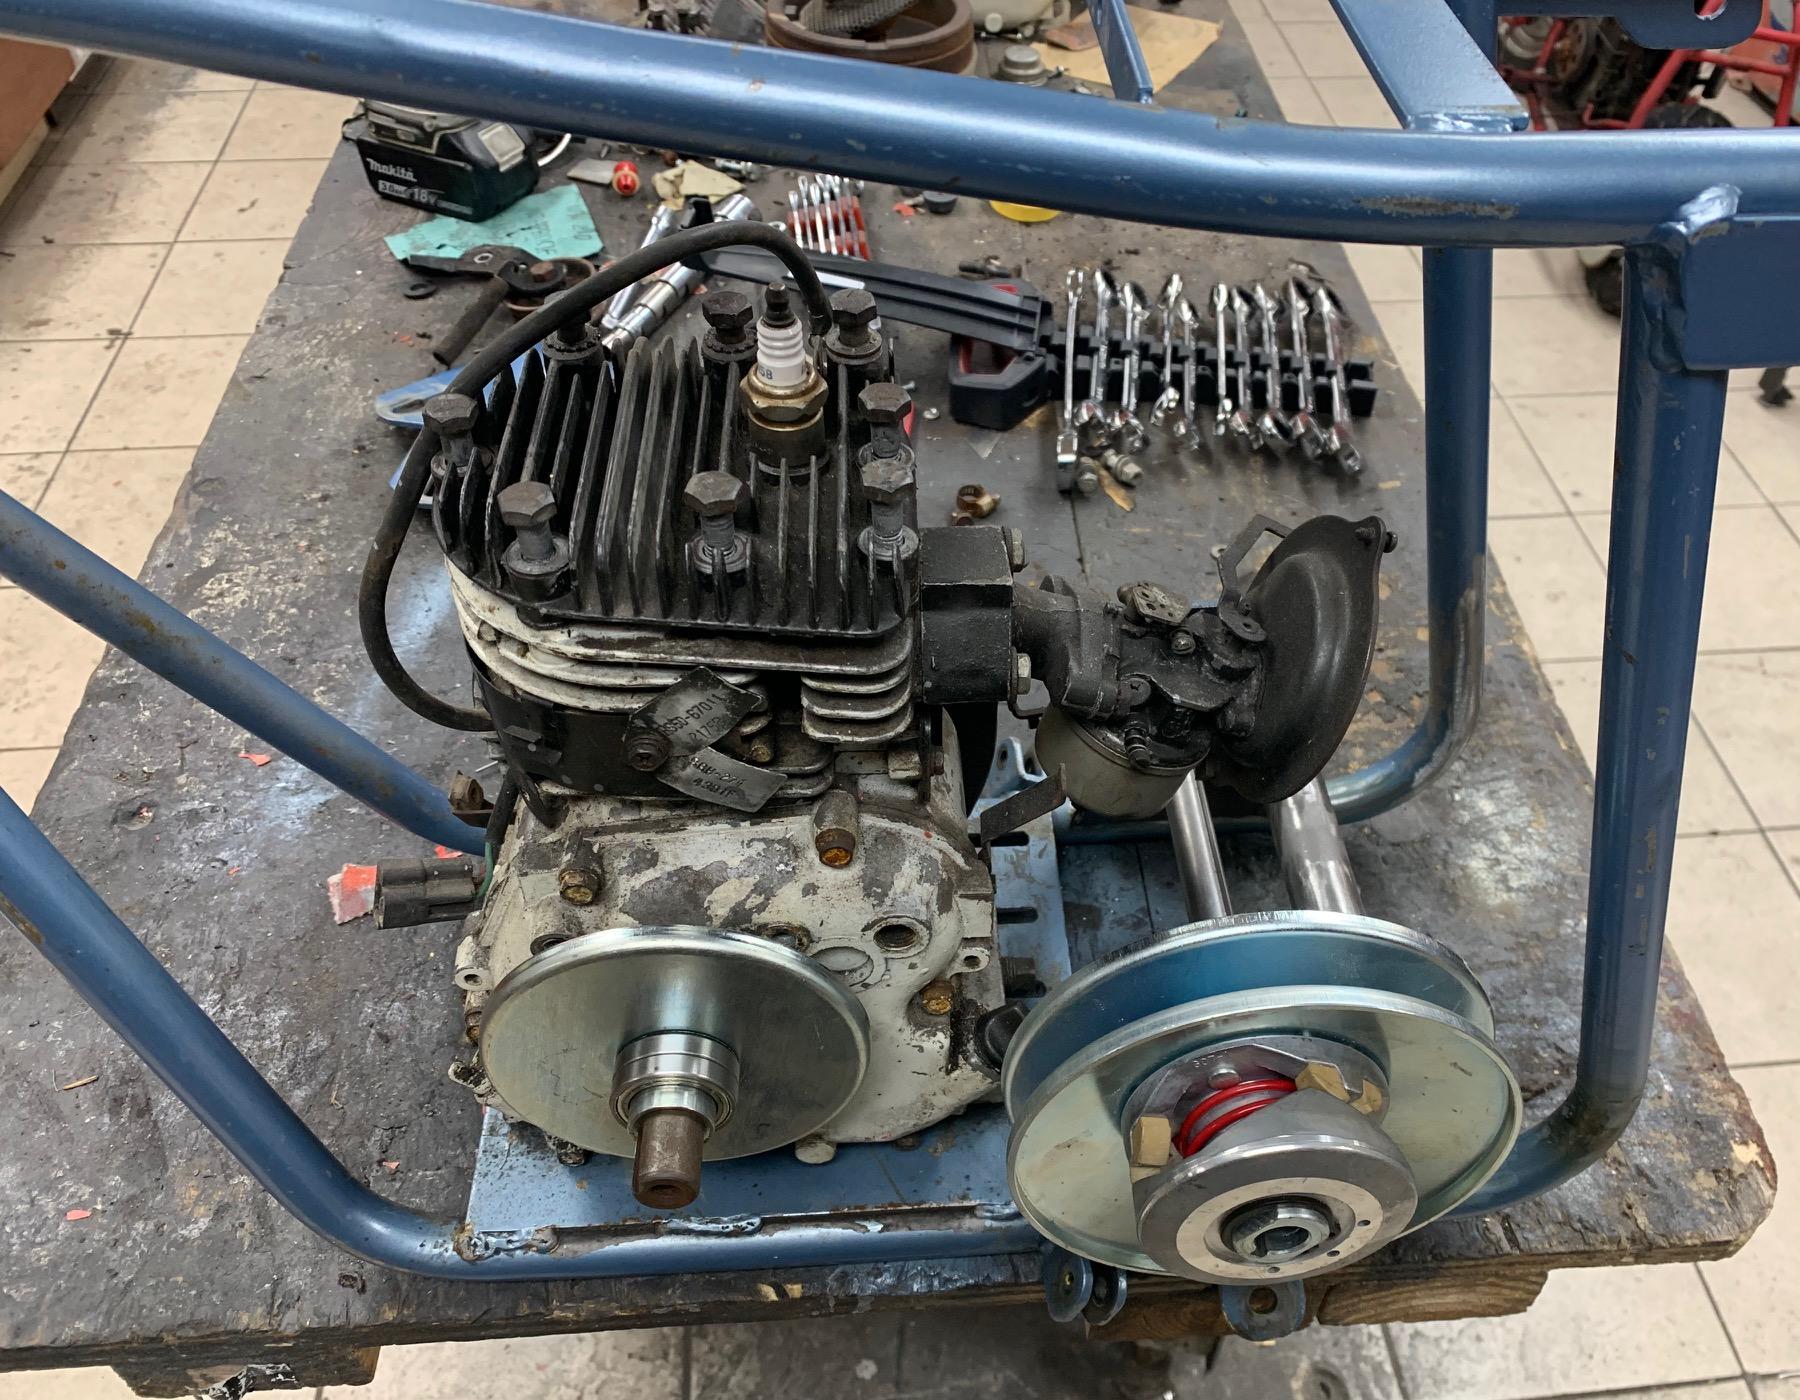
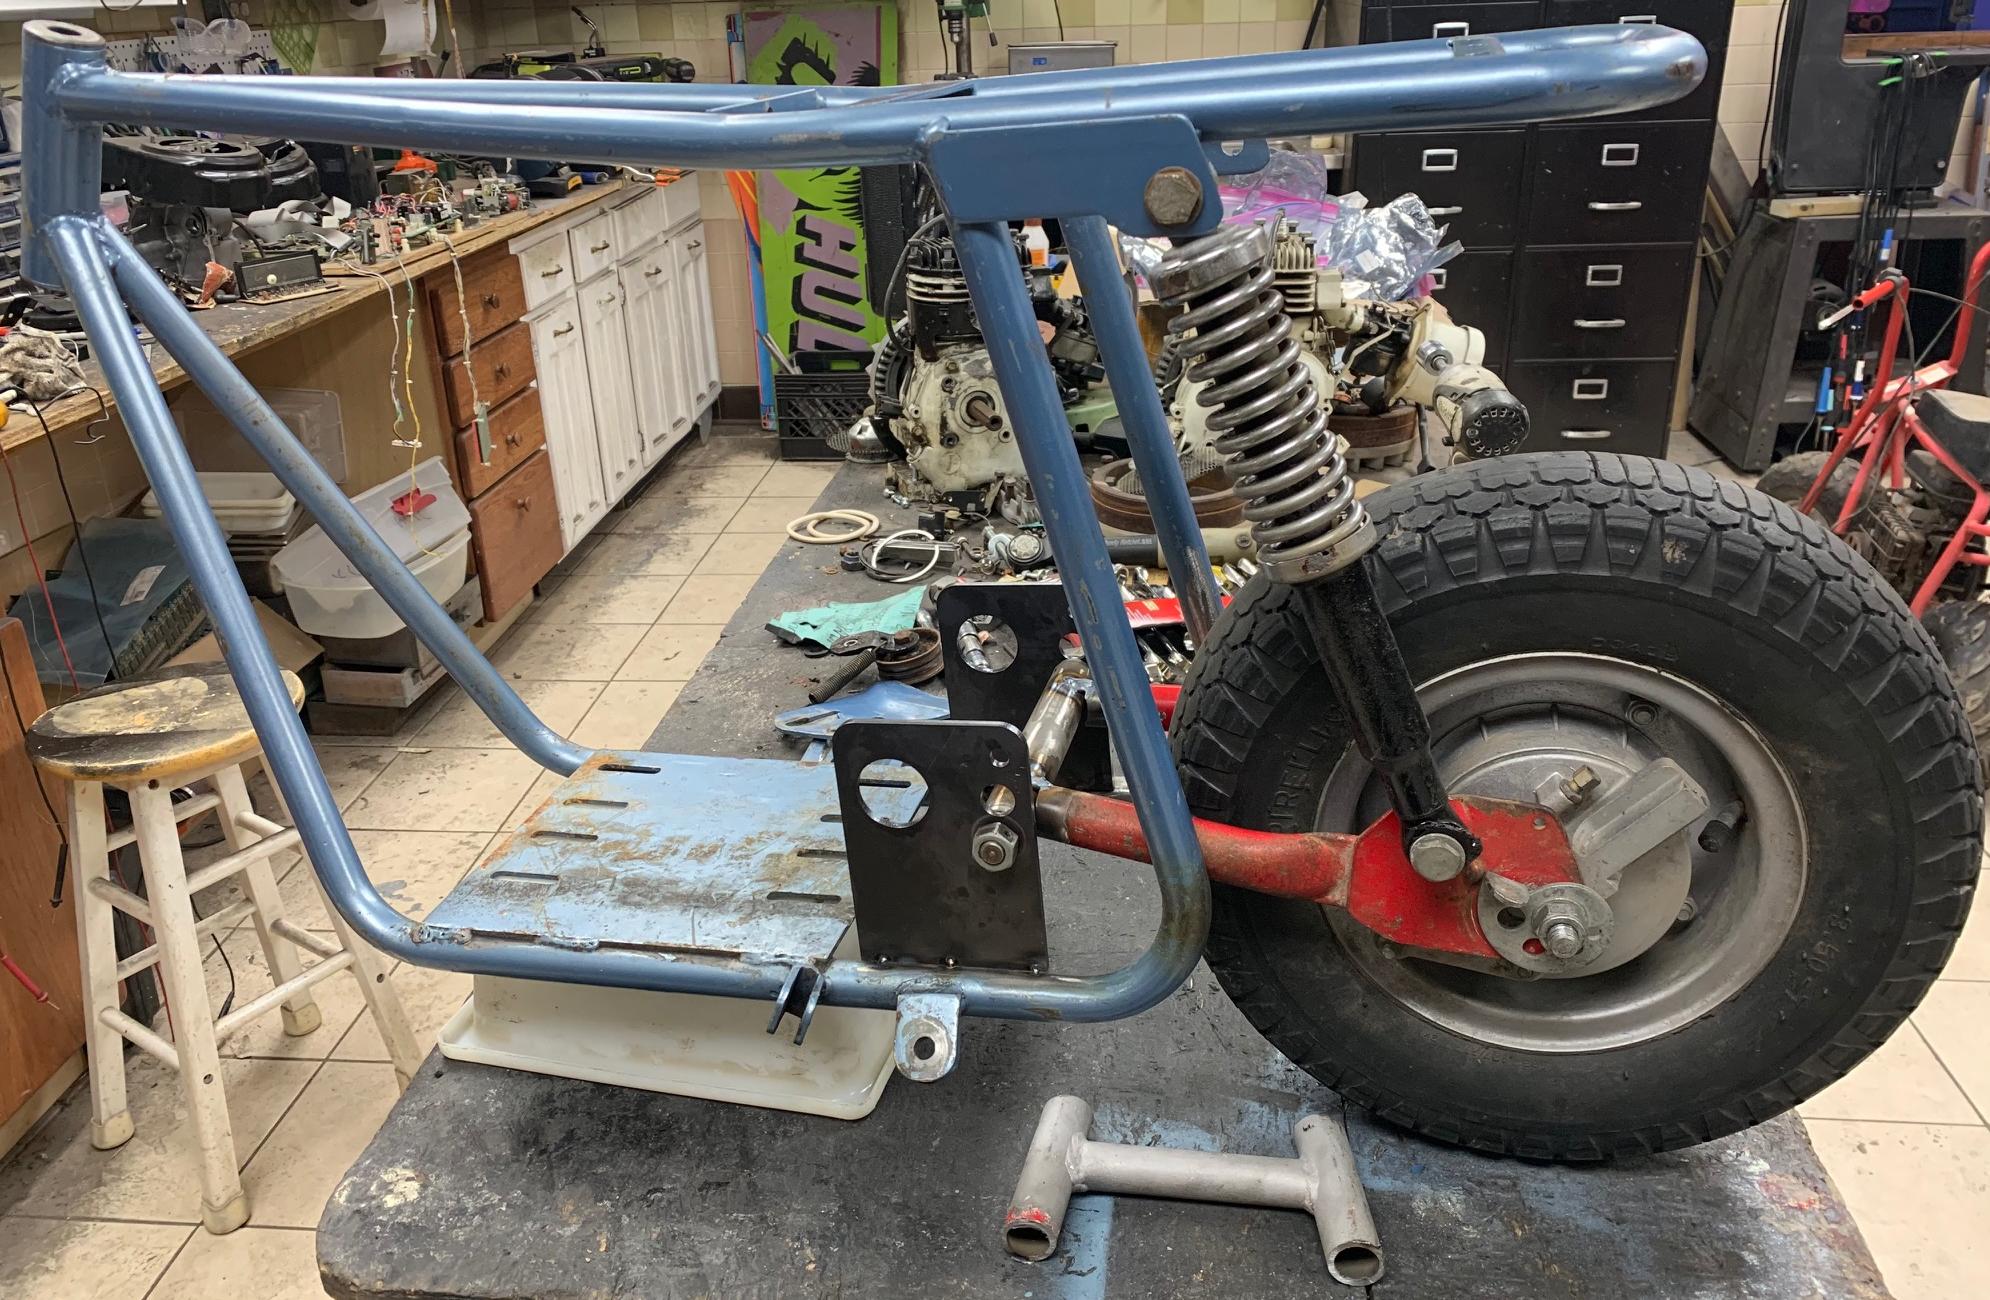
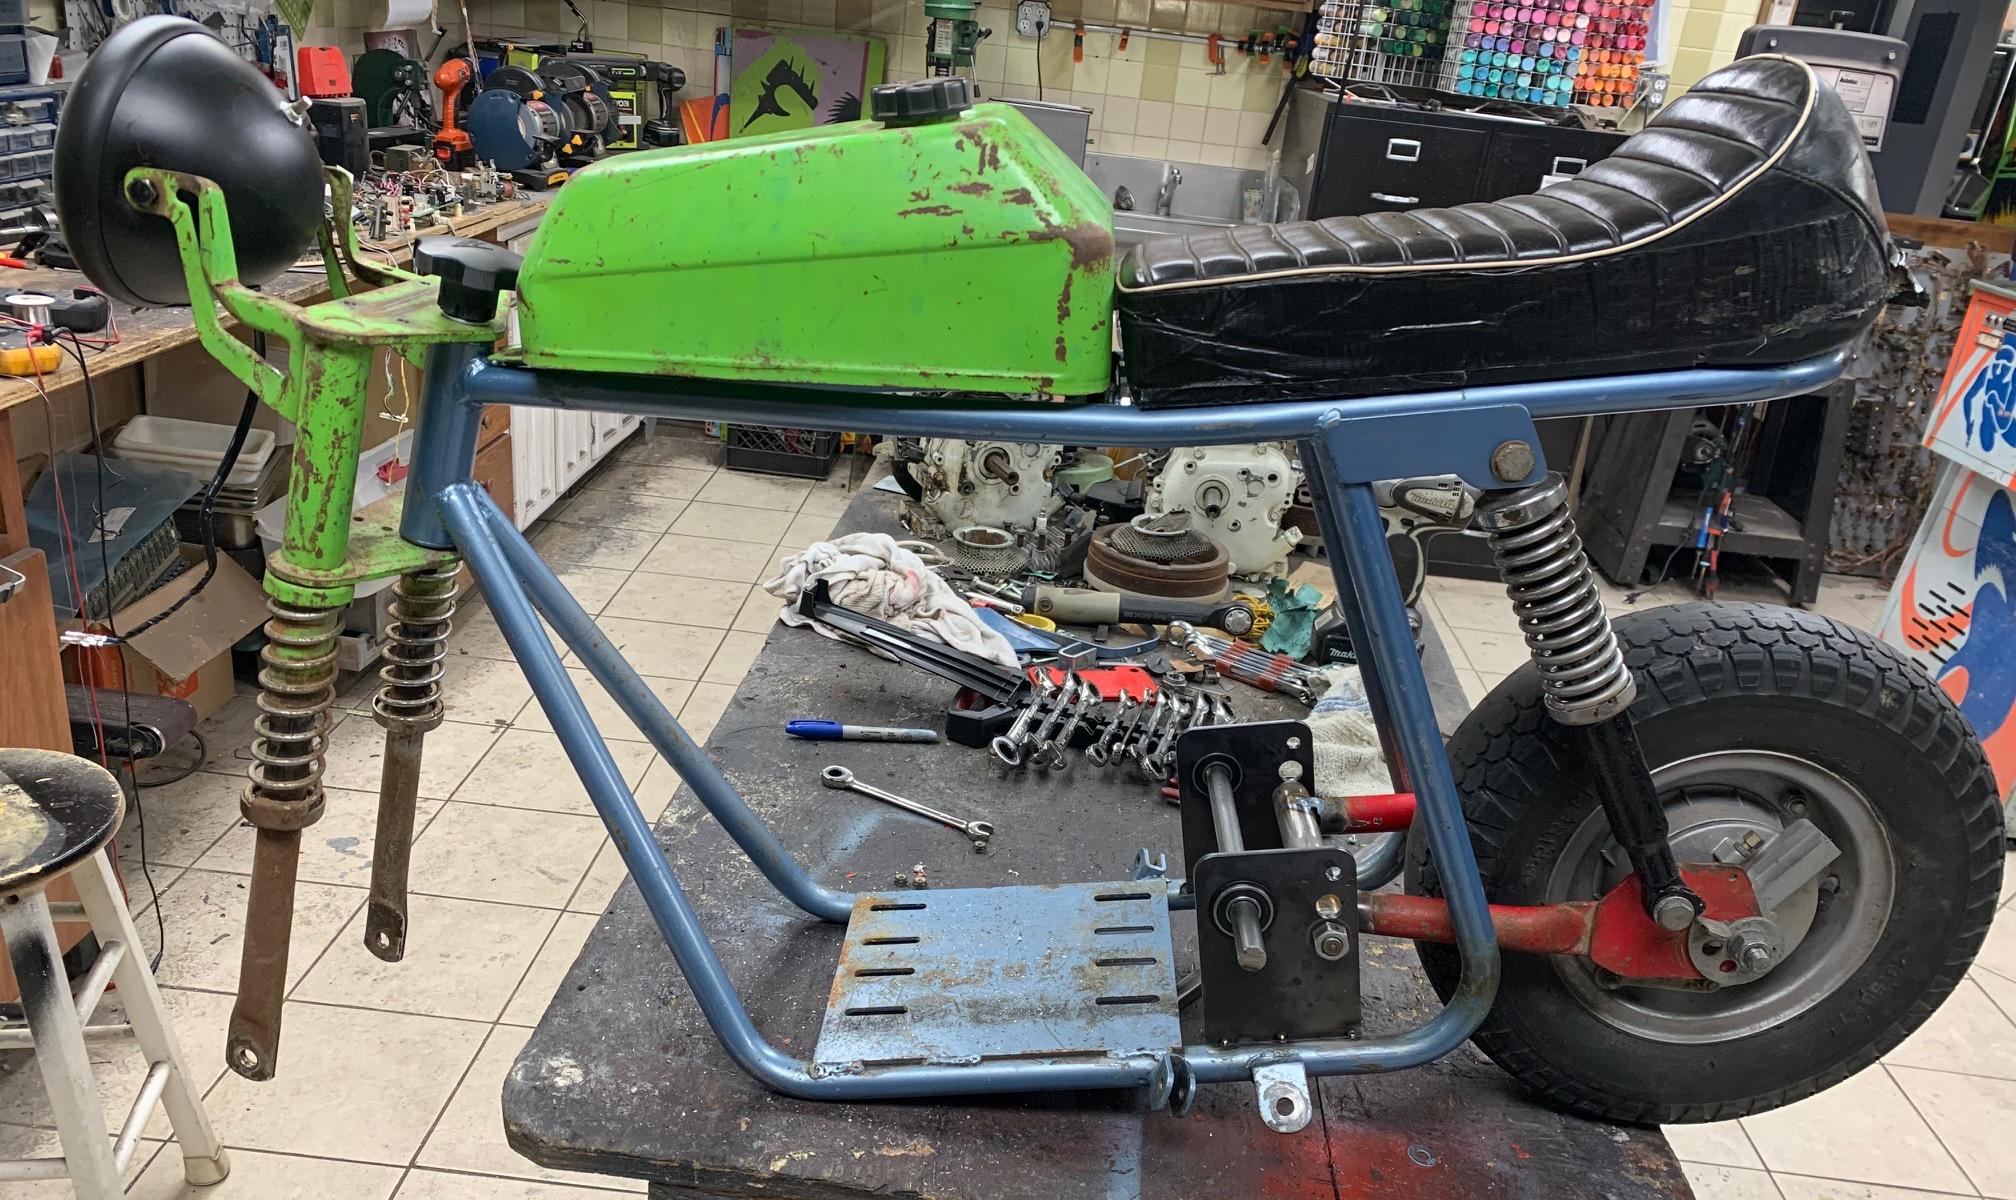
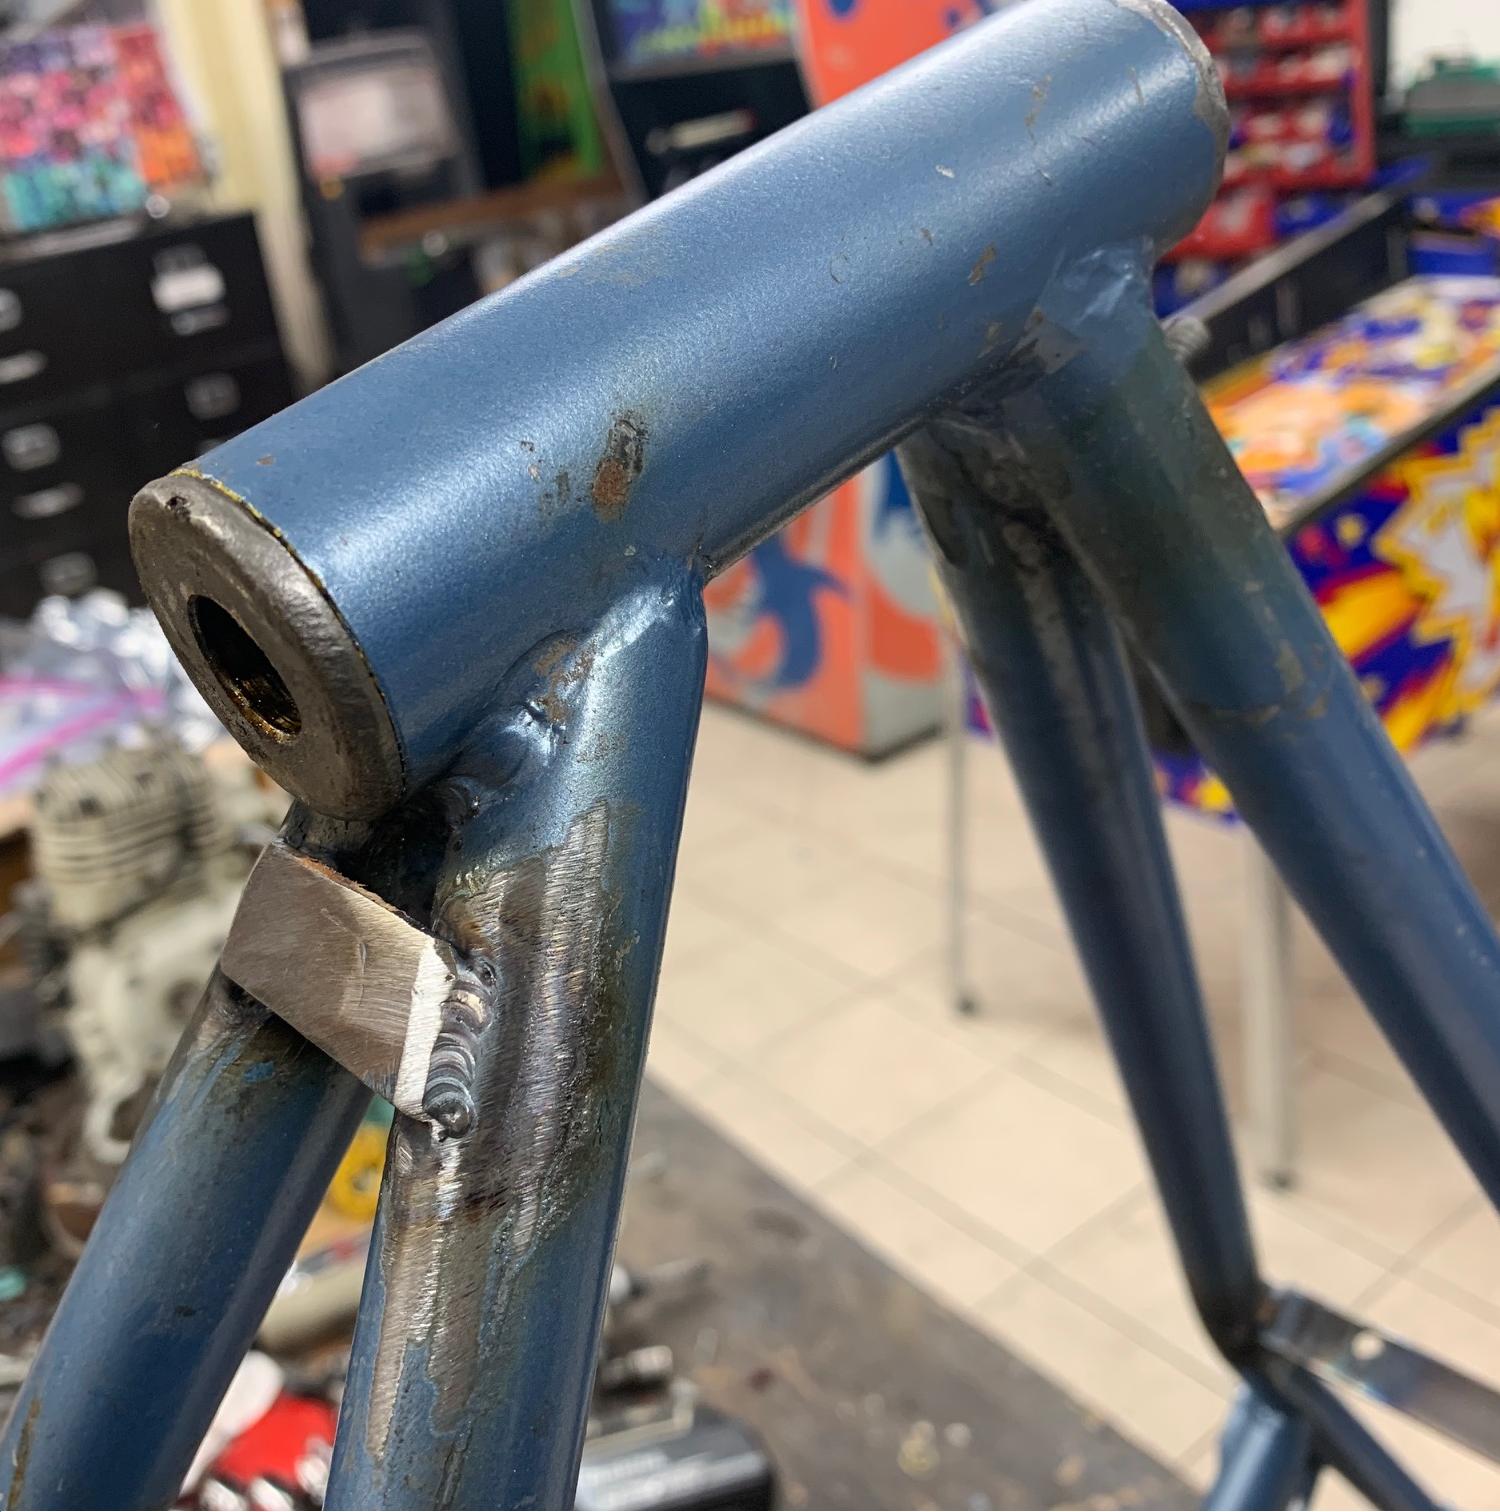
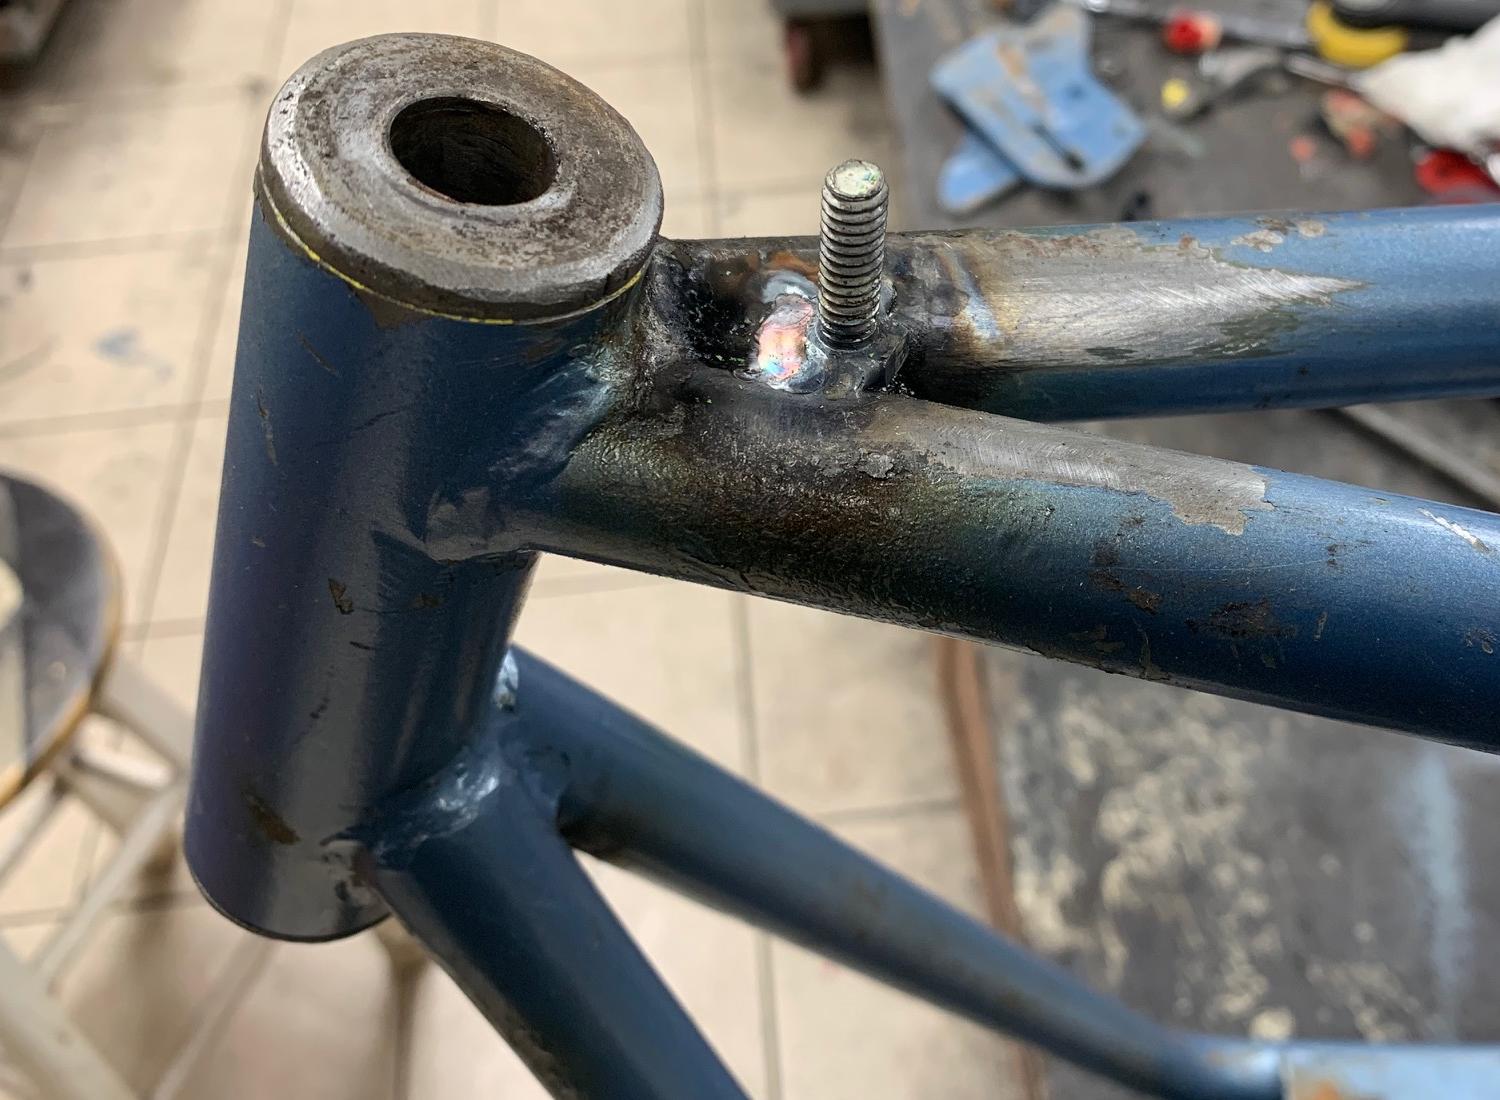
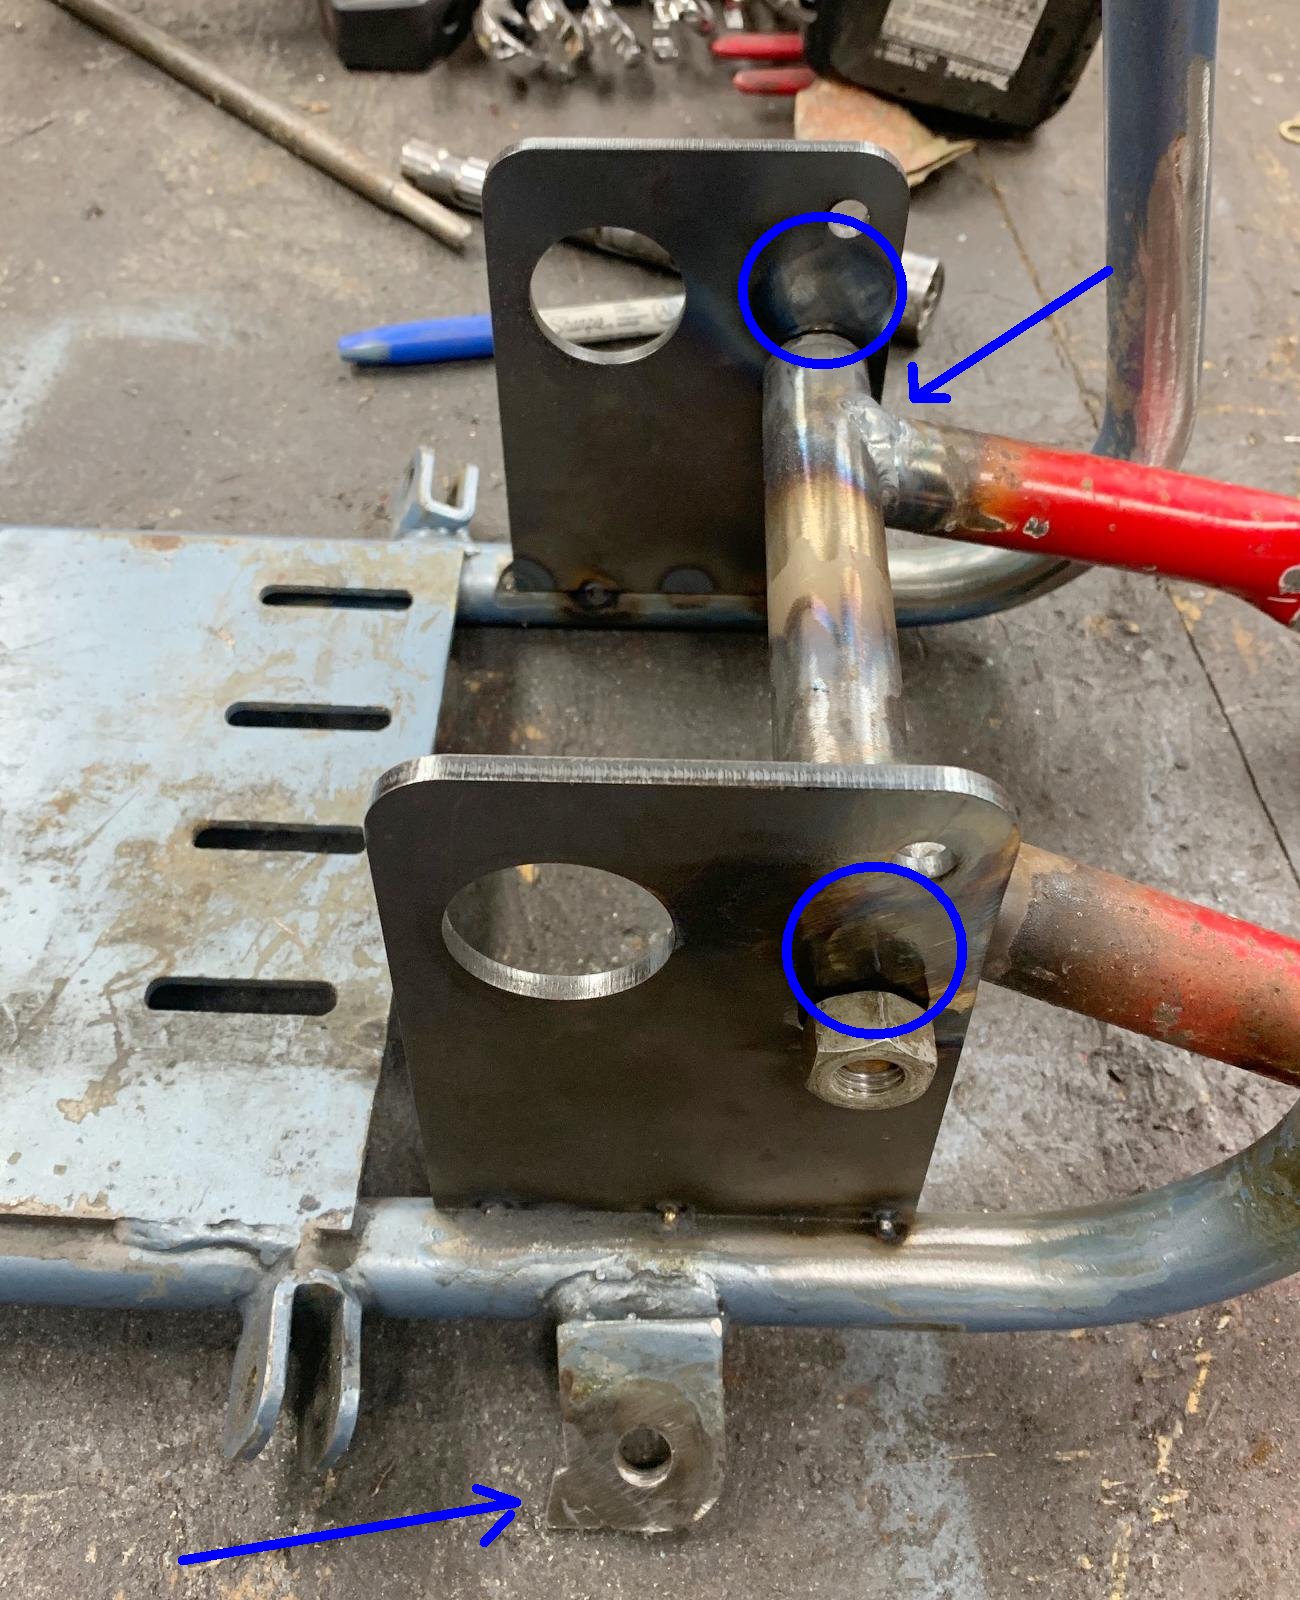
So what I'm going to do here is use the 1970 green Tx1 in the picture above as a guide (only), and turn the blue 1970 Tx2 into a Broncco Tx1. Will have to add a swingarm and a jackshaft. Probably some other stuff too. Will also install a torque converter. I've been buying Bronco parts as they come up on ebay, they are pretty hard to find.... I'll put a Tecumseh HS50 motor on the Broncco with a nice UAxx Dellorto carb (it's an Italian mini bike, must have a Dellorto.) I'm not sure how 'stock' it will all look, but i'm going to try and mimic the green Tx2.

Sorry about the lack of shoes. Instead I put my Vintage Flipper World coffee cup in the picture. i thought you could use any personal item. Maybe i'll go back to the shop and take another picture with a shoe...
 
#4
Sorry about the lack of shoes. Instead I put my Vintage Flipper World coffee cup in the picture. i thought you could use any personal item. Maybe i'll go back to the shop and take another picture with a shoe...
https://www.oldminibikes.com/forum/index.php?threads/OldMiniBikes-build-off-2020.168435/

"How to Enter/Rules:

To enter, take a photo of your project and the item (a pair of shoes) and post it under the appropriate thread under the 2020 Build Off section using the Thread Prefix for your build off selection.

Edit: The object that you will need to have prominently displayed in your entry post photo is a pair of shoes."
 
#5

cfh

Well-Known Member
#7
did some work today on the Tx2/Tx1 project. First stripped the Tx2 bike and did some crude measurements and "i hope this works here" type thinking/prototyping. But that hard tail has to come off the Tx2 frame first, before I can really get a good idea what I'm doing...


Then broke out the Metabo and cut off the Tx2's hard tail. I had bought some Bonanza jackshaft plates from OldMiniBikes warehouse, and I think they will work perfectly for the jackshaft and swingarm pivot point (which is what the original Tx1 did). The advantage to the Bonanza plate is the jackshaft bearing hole is cut high on the plate. This allows for a 6" torque converter driven unit to be positioned above the lower tube of the frame. Which is exactly what is needed here. The Bonanza plates are taller than the original Tx1 broncco jackshaft plates... But this is going to work out great. On the Tx1 it used a centrifugal clutch. So they didn't cut their jackshaft plate bearing holes thinking that some yahoo (me!) would be mounting a 6" driven unit on the end of the jackshaft. I also used the Mill and cuts new swing arm pivot point holes, 2.75" from the bottom of the jackshaft plate. That should put the swing arm in about the right position, when the plates are welded to the frame.

Note the swing arm I am using is from a Broncco, but not from a Tx1. Me thinks it's a Tx6 swing arm. Something I found on Ebay... But it's too long. It would be cool to have a longer swing arm, increasing the bike's length 4 inches or so, but that would involve changing the position of the lower shock mount. Not a terrible thing, but it would give it a "1973 suzuki rm" look with stand up shocks. That's not really what i'm going for here. It's not the worst idea, but i don't think that's how I want to roll. So i cut the pivot tube off the swing arm. I'll use that, mounted between the jackshaft plates, to get a good position to weld the jackshaft plates to the frame. I'll just TIG tack all this stuff up, and see how it looks/measures. Then once I have it where I want it, i'll lay down the TIG welds to make it all permanent.

Tx1 configuration:


How it should work on the Tx2 frame (before shortening the swing arm):
 

cfh

Well-Known Member
#8
Worked some more on the Tx2/Tx1 bike. Tack welded the jackshaft plates into the frame. I really wanted to see how the torque converter lined up with the motor. Turns out I can use a series30 asymmetric torque converter. A series20 just would not line up, but a series30 will align quite nicely.


Also started working on cutting the swing arm. After doing a lot of measuring and guessing, looks like just about 4" has to come off the swing arm length. So i cut the arms on the chop saw (now there's no cross member, so the arms are loose). Next had to worry about the width between the two (now loose) swing arms - they have to be just narrow enough to sneak past the frame/seat up stays, but not too close to mess with the wheel and sprocket. Then tack welded the swing arms to the pivot point tube (that I cut off the swing arm in the prior post.) Mounted a shock to the frame/swingarm and it lines up just right! I can probably finish weld all the parts now.

Still have to work on a rear fender mount point and a brake hub stop on the swing arm. But that's pretty easy, compared to getting the swing arm length and position correct.


cfh

Well-Known Member
#10
one consideration i can't get my head around... if you look the original green Tx1 (pic above), the chain is on the same side as the torque converter. Which i find a bit weird, but that's how it is. Looking at the original advertising for the Tx1, that's how it is. But that doesn't mean i need to keep it that way. Is there any advantage to keeping the rear sprocket on the same side as the clutch? it would be really easy to flip the wheel and run the chain on the other side (like nearly every other mini bike with a jackshaft)... probably have to make this decision soon, because have to weld in the brake hub stopper on the flywheel... ideas appreciated...
 
#11
Nice work so far. Those bonanza jackshaft plates are pretty close in design to the Broncco's and work out well. I think most bikes run the sprocket on the opposite side of the TC. @markus may be able to help you with that.
 

cfh

Well-Known Member
#12
Sorry in the above post for some reason I said flywheel when I meant swing arm....

Another thing to think about is the position of the kickstand. I actually do have a kickstand for this bike. It’s not exactly original but it looks fairly close to original. And it does utilize the stock existing kickstand mount. But the original TX1 has the kickstand forward of the engine. The TX2 has a kickstand behind the engine. I kind of like the idea of it being back, I think it’s easier to get to, especially when you have a torque converter cover in the way. But if I was going to move it, now would be the time.

I guess I have to determine how close I want this to be ‘original’. The position of the sprocket on the right or left side, and the position of the kickstand seem like small details, but do I want to stay with the original bronco design? Or make things just a little easier on myself and the overall maintenance and use of the bike.

For example on the sprocket... It’s just easier to maintain with the chain on the opposite side of the bike, compared to the clutch. It’s easier to maintain, easier to lube, it’s easier to remove/service. But I would think broncco had a reason for putting it on the same side as the clutch. It may have been just to minimize another chain guard. Because if you put the chain and sprocket on the other side, compared to the clutch, you probably need another chain guard. It could be that simple...
 
#13
Sorry in the above post for some reason I said flywheel when I meant swing arm....

Another thing to think about is the position of the kickstand. I actually do have a kickstand for this bike. It’s not exactly original but it looks fairly close to original. And it does utilize the stock existing kickstand mount. But the original TX1 has the kickstand forward of the engine. The TX2 has a kickstand behind the engine. I kind of like the idea of it being back, I think it’s easier to get to, especially when you have a torque converter cover in the way. But if I was going to move it, now would be the time.

I guess I have to determine how close I want this to be ‘original’. The position of the sprocket on the right or left side, and the position of the kickstand seem like small details, but do I want to stay with the original bronco design? Or make things just a little easier on myself and the overall maintenance and use of the bike.

For example on the sprocket... It’s just easier to maintain with the chain on the opposite side of the bike, compared to the clutch. It’s easier to maintain, easier to lube, it’s easier to remove/service. But I would think broncco had a reason for putting it on the same side as the clutch. It may have been just to minimize another chain guard. Because if you put the chain and sprocket on the other side, compared to the clutch, you probably need another chain guard. It could be that simple...
I would position the engine where the bike would balance best. Then walk around for a bit and scratch my head. It’s usually splitting the difference with the lighter weight TC sticking out. Usually i leave just enough room to allow the rider to easily locate the foot peg and rest fully on it. I have to deal with this, clowns with clown shoes.
The jackshaft arrangement should be evident then.
Just what I would do.
Nice project
 

cfh

Well-Known Member
#15
Did some more mock up today. I have a second set of forks. These are probably off a Tx6, but they fit nicely for this project. The Tx1 seemed to use external springer style forks, that's why I got these.

I haven't made up my mind as to whether i should put a lighting coil on the Hs50 engine, to support a headlight. Unfortunately i don't have the broncco tail light assembly. So perhaps i should cut off the headlight mounts. I bolted on some random headlight i had lying around as a mock up...


here's yet another version of this bike... there's a lot to think about here... Notice the different front fender mounts...


also notice the different styles of seats and brakes (disc/drum) used....


cfh

Well-Known Member
#17
i put a straight edge across the top tubes, you're right. looking at other bronccos their top tubes appear straight. but this light bend looks intentional. also i noticed at the head neck tube, the top tubes don't come around the sides and stick out the front of the neck tube (like every other broncco frame i've ever seen), with the plastic end caps. so now i'm wondering what exactly this frame is... any ideas?

another thing is the rear sprocket is 72 tooth. i was thinking of using a 15, 16 or 17 tooth jackshaft sprocket. this give a 4.2 (or 4.5 or 4.8) to 1 ratio (tires are 14.25" tall). At 3600 rpm that's about 32 to 35 mph. Seems Ok right?
 

cfh

Well-Known Member
#18
I've done a bit of research, and i can't come up with what the deal is with this blue frame. The head is definitely different than any other Broncco i've seen. But it is original, there's no doubt about that. The welds and bends are factory. The only thing I've come up with is Broncco made a design change. Their typical head/downtube/uptube junction was kind of a crappy design. I have another Broncco frame, where it failed exactly there (at the head.) Because the top tubes intersect the head, more or less, in the middle of the neck tube, it allows a bent fork to possibly break the head/top/bottom tube joint. That's exactly what happened on this other Broncco frame i have.

To change the design, they had to put that slight (5 degree?) bend in the top tubes, to bring them up, to intersect the head tube at the top. Now the bottom tubes are at the bottom of the head, and the top tubes are at the top of the head. This gives a much stronger head junction, less likely to break in a front end collision.

Anyway that's the best I have come up with. Though I can't find any pictures of another Broncco frame with this frame change.
 

cfh

Well-Known Member
#19
Think i solved the mystery...
on ebay there's a Broncco (they say tomahawk but looks like a Marauder) with the same head frame configuration as my blue frame. It does look like that was a design change. it has bent front forks too, but no apparent head/neck damage.


cfh

Well-Known Member
#20
Did some light work today. Frankly i'm waiting for a jackshaft part before i finish welding the jackshaft plates to the frame. Want to make sure it all lines up proper before welding it permanent.

First up today was to add a small plate to the front side of the two down tubes from the head/neck. why you ask? because there's no stopping the triple tree from hitting the down tubes. I don't like this as it can dent or mar the tubes (which significantly weaken them.) So this little plate takes the abuse when the handle bars are turned to the 'stops'.


Next was to weld a 1/4-20 bolt just behind the head/neck. This is the front mount for the gas tank. This frame never appeared to have a remote gas tank. So it needed something to hold the gas tank in place.


last up today was to fill weld the two unused (big) holes in the jackshaft plates. They were big and ugly, and i'm not going to use them. so it seemed like a good idea. Also welded the cut swing arms to the pivot tube. They were just tack welded before. And last added a little tab of metal to the kickstand mount. This is a "max point" for the new kickstand to not move beyond.

 
Top