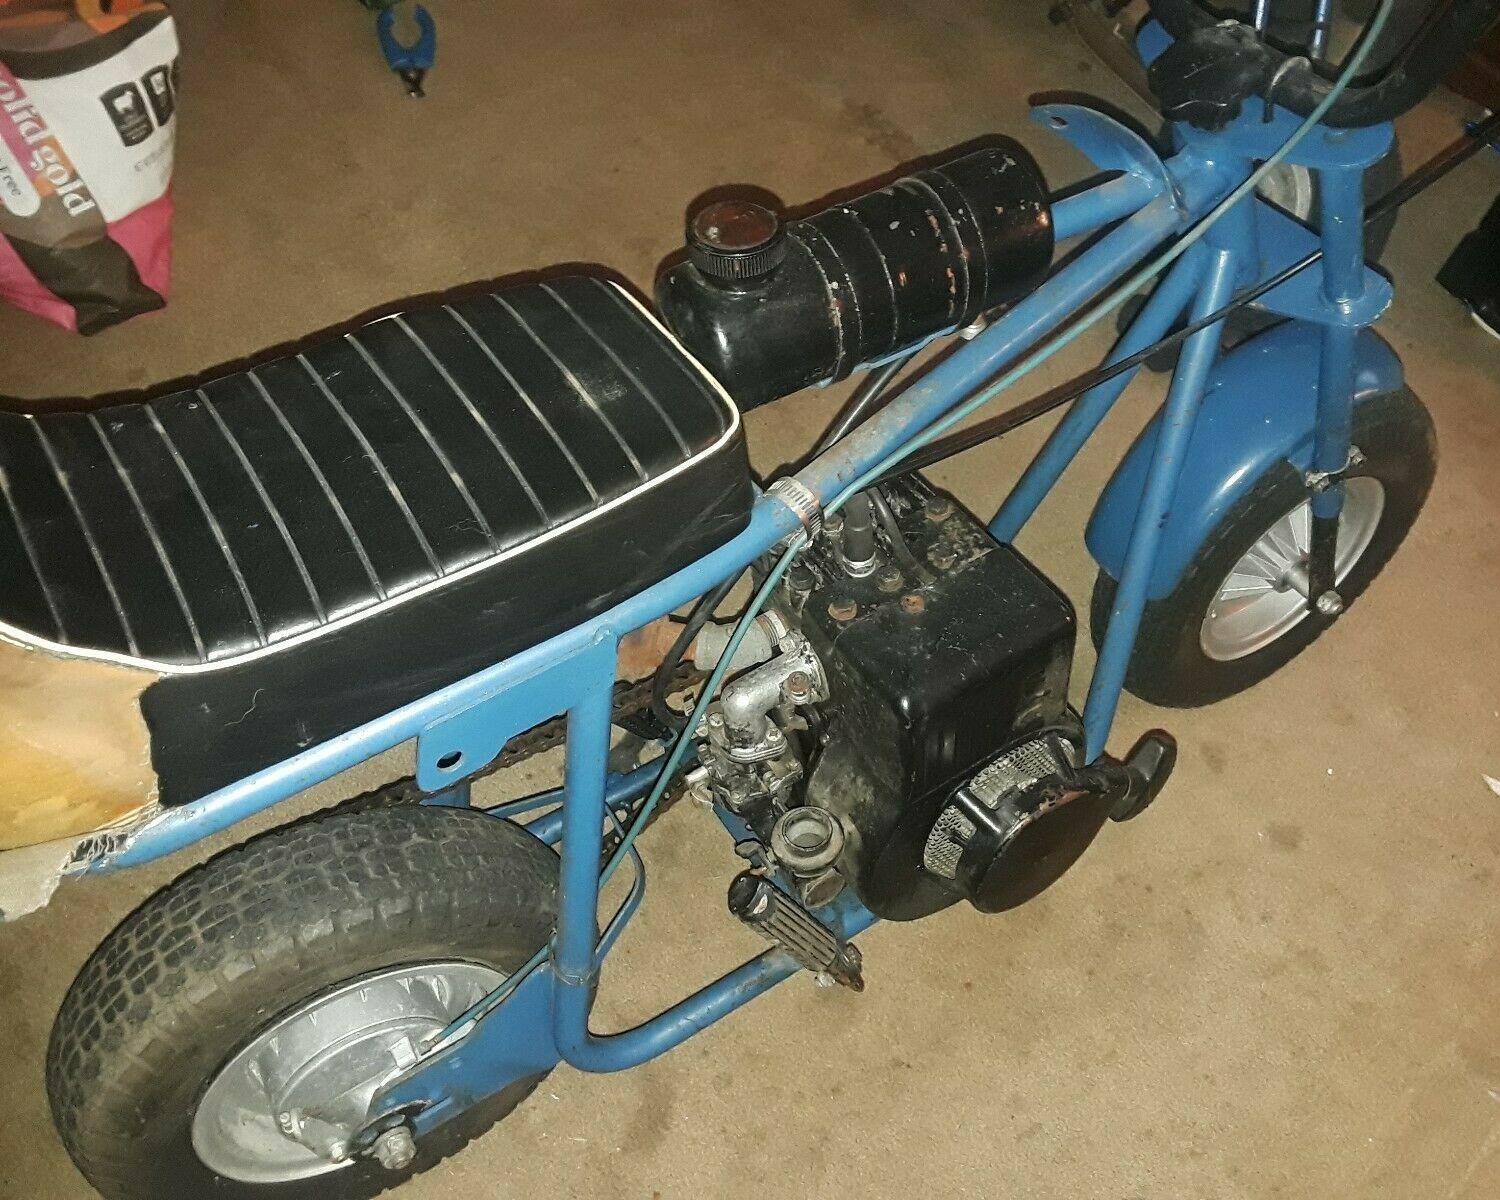
Vintage 1970 Broncco tx2/tx1
- Thread starter cfh
- Start date
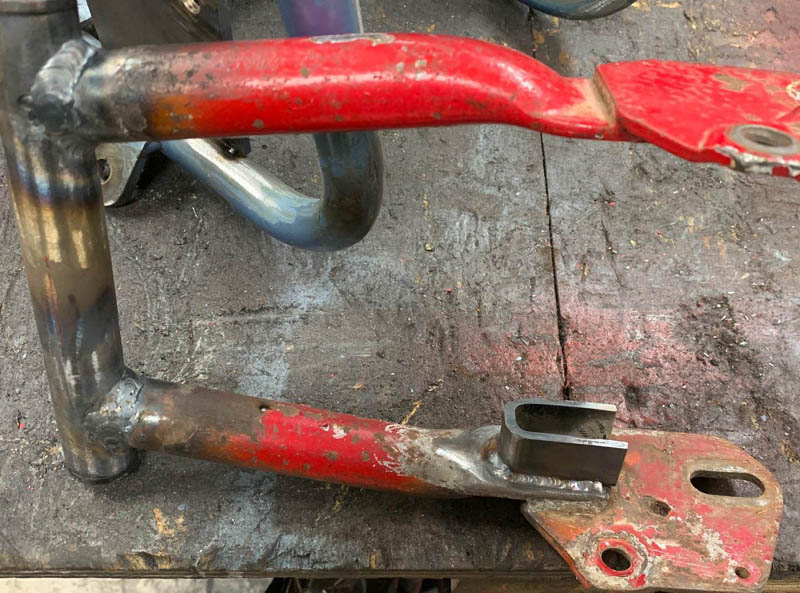

I've done a bit of research, and i can't come up with what the deal is with this blue frame. The head is definitely different than any other Broncco i've seen. But it is original, there's no doubt about that. The welds and bends are factory. The only thing I've come up with is Broncco made a design change. Their typical head/downtube/uptube junction was kind of a crappy design. I have another Broncco frame, where it failed exactly there (at the head.) Because the top tubes intersect the head, more or less, in the middle of the neck tube, it allows a bent fork to possibly break the head/top/bottom tube joint. That's exactly what happened on this other Broncco frame i have.
To change the design, they had to put that slight (5 degree?) bend in the top tubes, to bring them up, to intersect the head tube at the top. Now the bottom tubes are at the bottom of the head, and the top tubes are at the top of the head. This gives a much stronger head junction, less likely to break in a front end collision.
Anyway that's the best I have come up with. Though I can't find any pictures of another Broncco frame with this frame change.
Nice fab skills! I lived in Webster back in the mid-late 60"s. Visited Kelly's many times. He had a lot of bikes in that store. Spoke to his son's several years ago and bought what remained of the parts they saved. They told me when they closed Mr Kelly just tossed everything in a pile out back for the trash to pick up. OUCH.
Dr. Shop, the front end (neck/head tube area) is definitely original on my blue frame. It's all factory welds. also did you not see the picture i posted of the other bike (as found on ebay, picture repeated below)? it has the same front end. I suspect Broncco identified this weak point and made the change. it was a good idea!
Joe51, do you know when Kelly's Minibikes closed? i could never find any information out about the store. Can't find any old ads either. To be honest, i had no intention of buying a minibike from him! I had my heart set on a minibike that was at Namn Brothers (I can't find any of their catalogs online/ebay either, so i don't know what model i was looking at). It was my dad that thought buying a minibike at a catalog store was a bad idea, and he took me to Kelly's. I remember the rows and rows of minibikes there. Unfortunately i didn't know enough about them, i let Kelly steer me to the Broncco. I wish he had steered me to a Rupp.... ha! I wanted a bike (even back then) with front/rear suspension. My orange Tx2 lacked that (only front suspension), and i regretted not having rear suspension until i got that $13 roller Tx1 a couple years later...
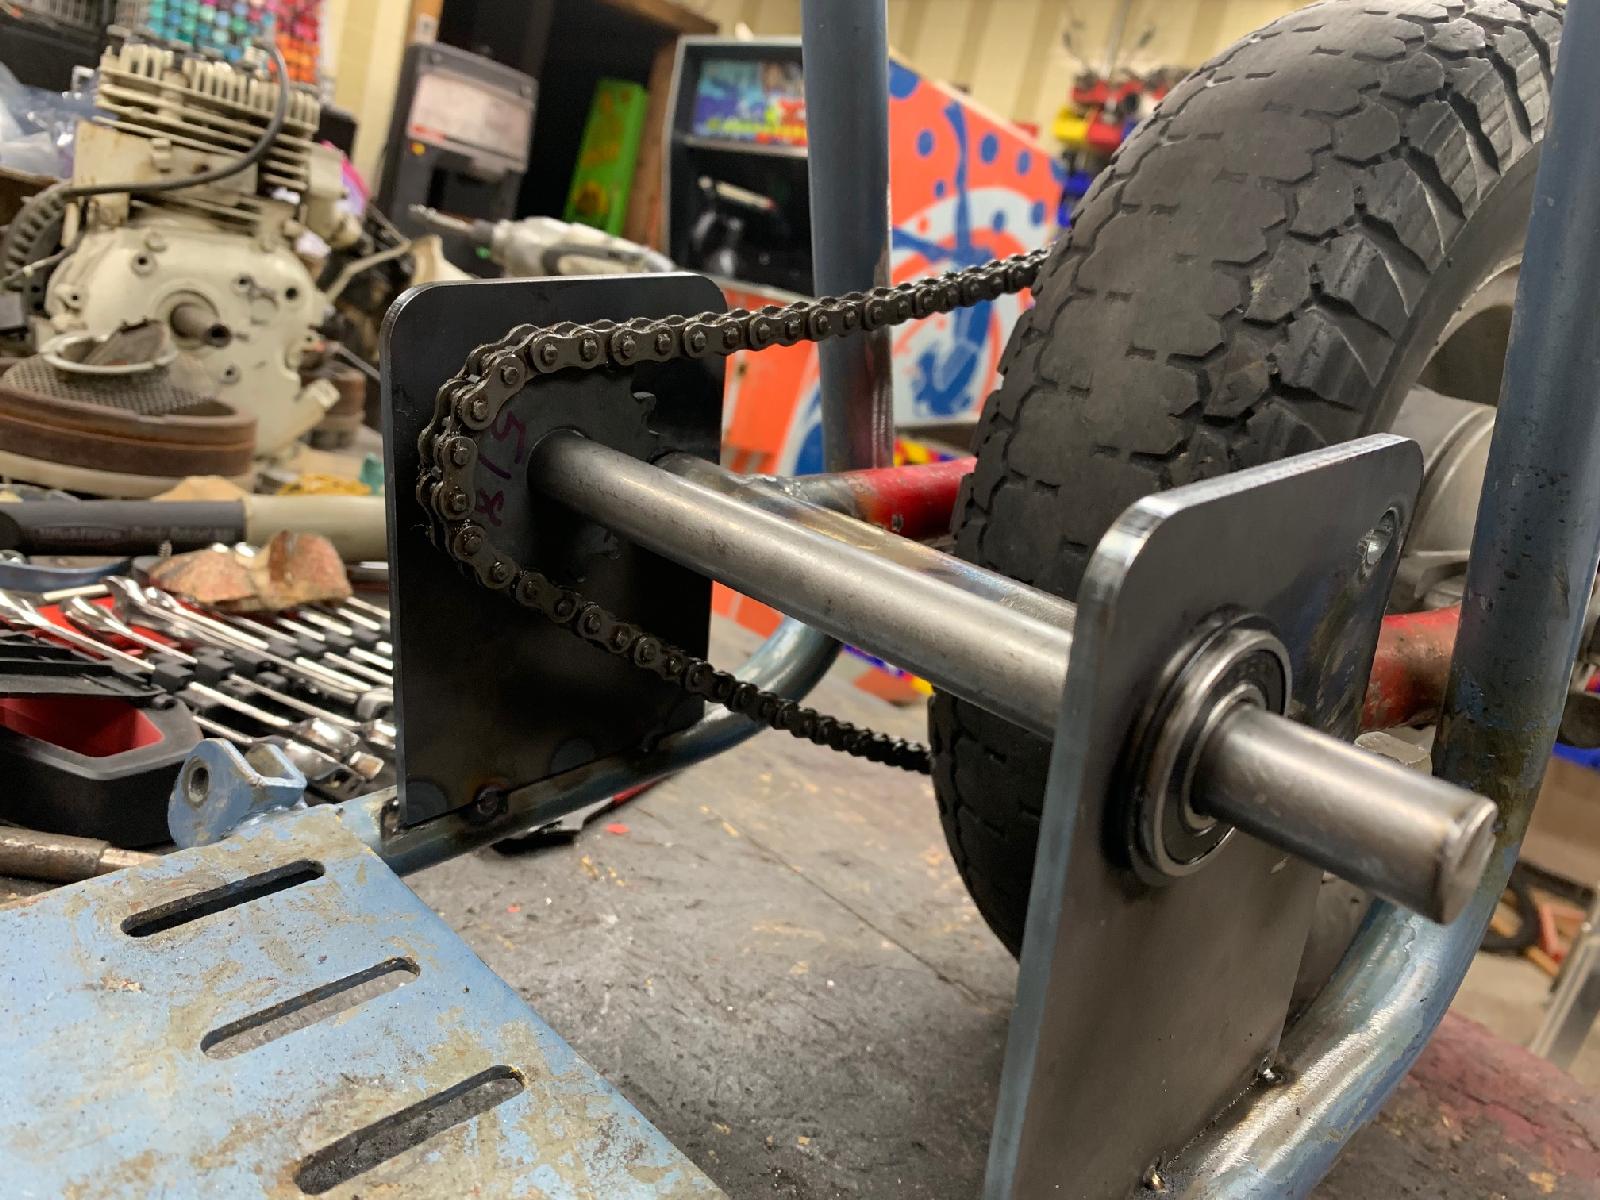
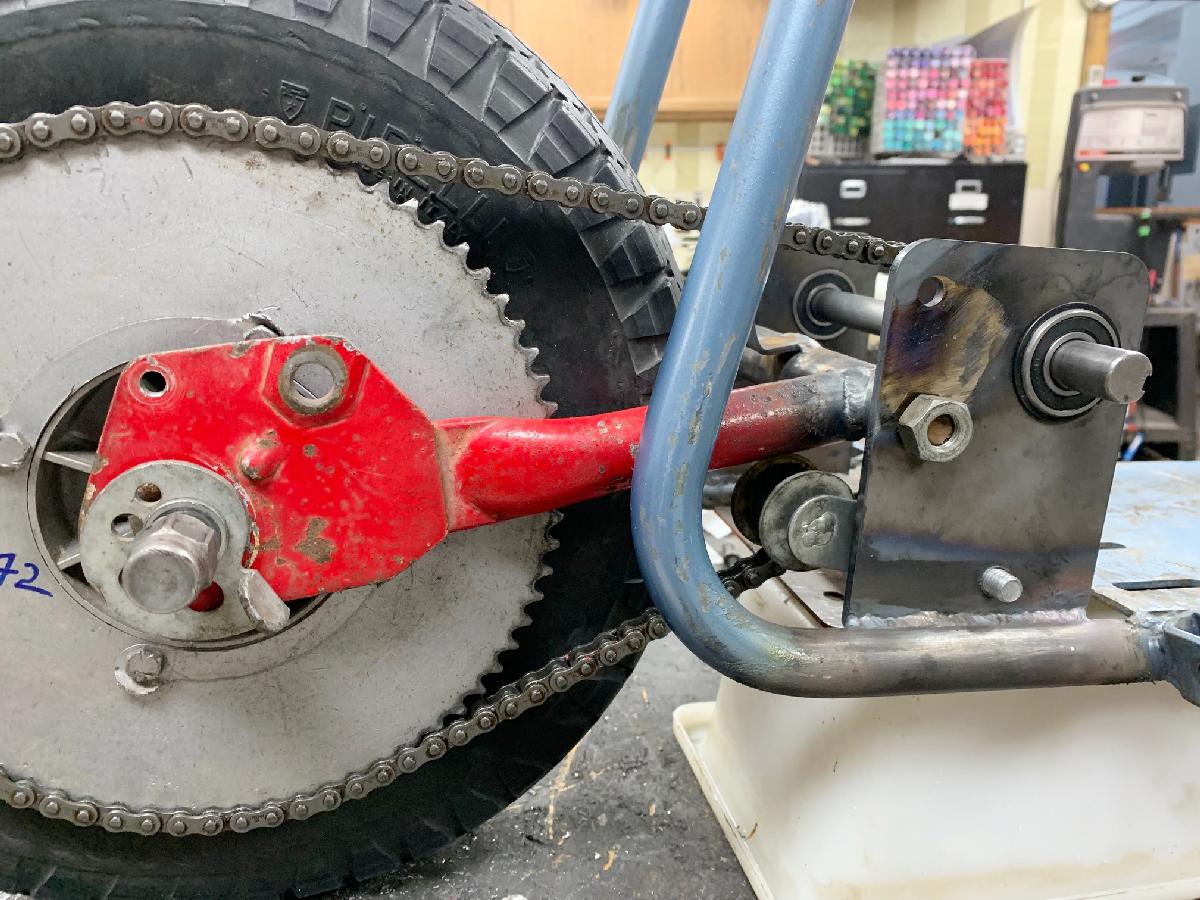
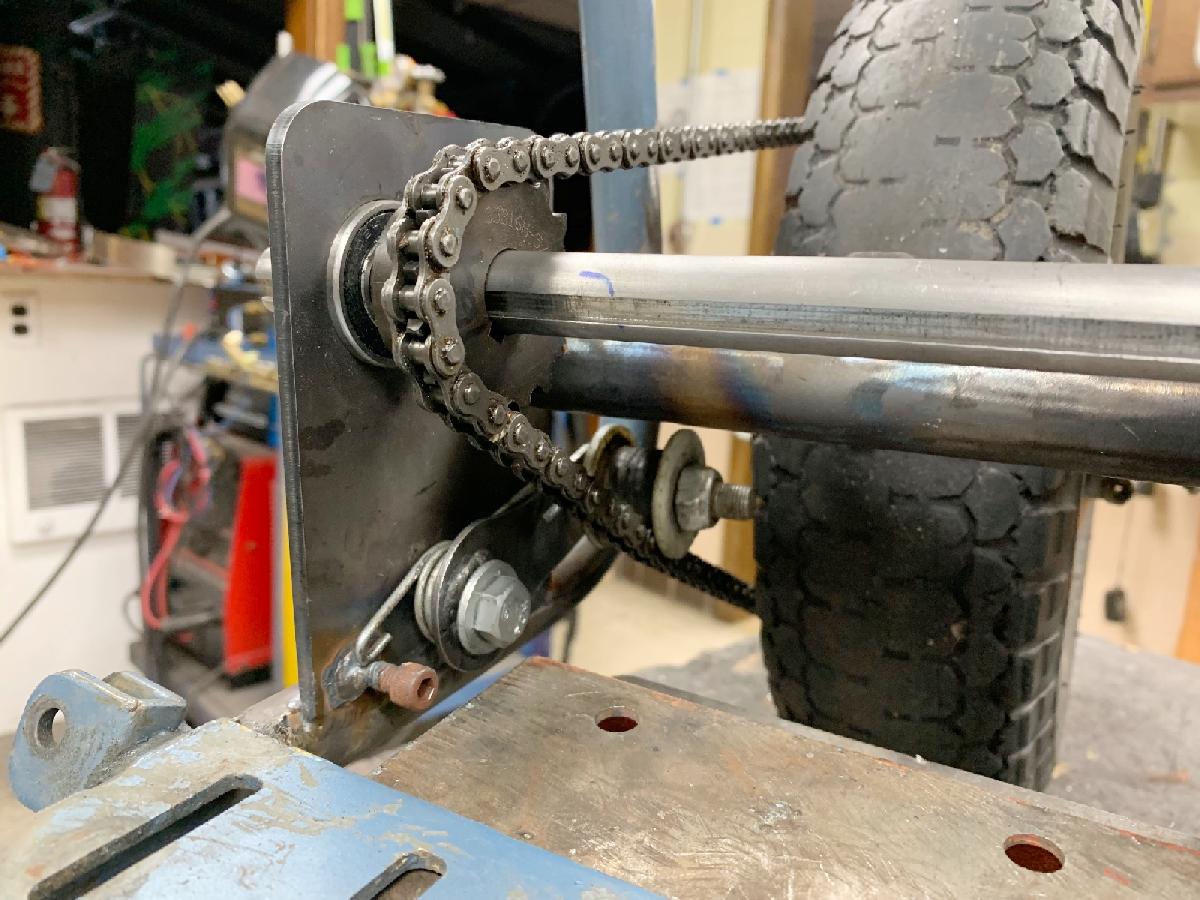
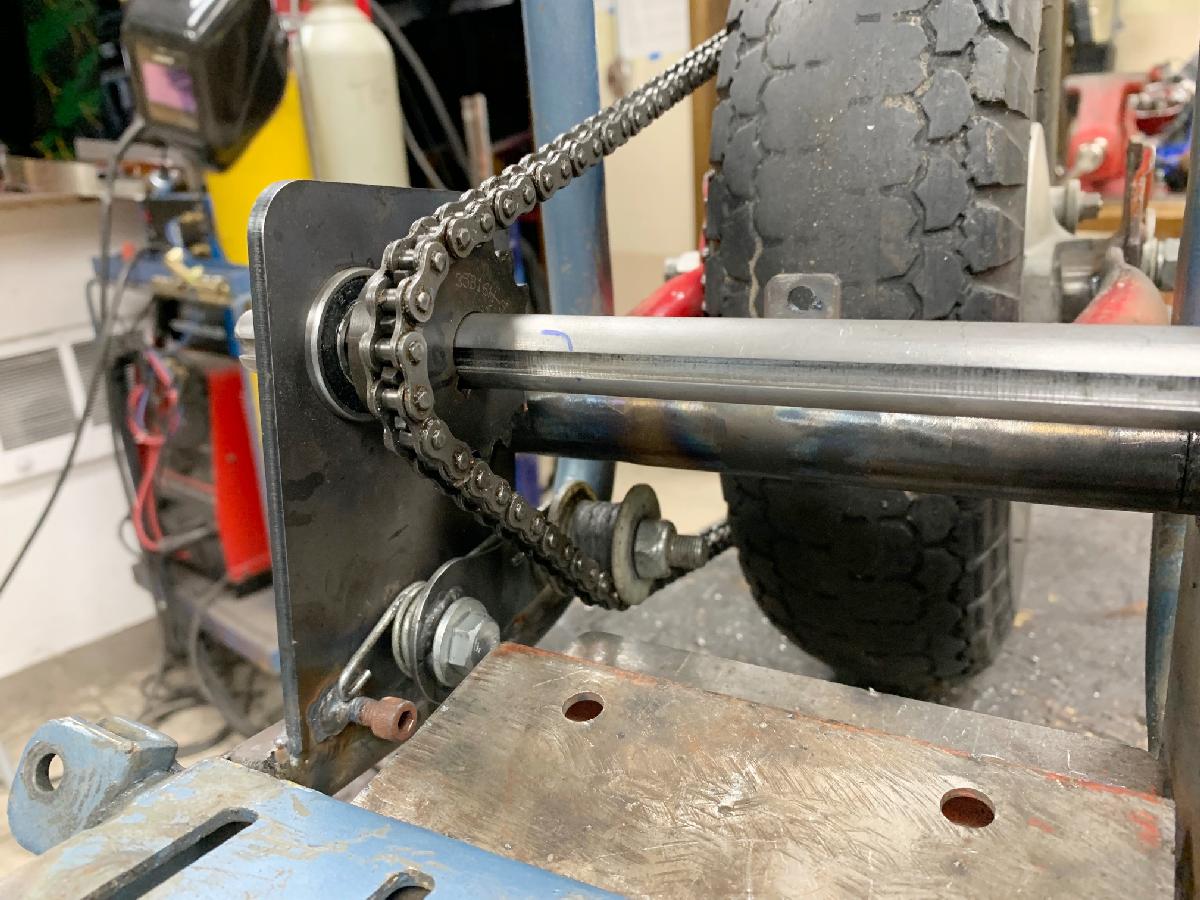
I'm going with a 16t or 17t jackshaft sprocket. At 16 tooth the ratio will be 4.5 to 1. at 17 tooth it goes to 4.23 to 1. I'm pretty sure staying at 4.5 to 1 is probably a better idea. But the thing I was most curious about was the chain position. Since i'm using new jackshaft mount plates (and hence swing arm position), I wanted to check the chain distance from all the pieces. Seems to work out fine. I was a bit worried the chain may hit the bottom of the swing arm.
The bigger problem is the chain tension. As the swing arm moves, the chain gets loose. I will have to figure out travel distance, and see how much it effects the chain. But I may need to construct a chain tensioner for this project. Not a big deal, but another thing to make/weld.
I also have to make the jackshaft. I buy 5/8" jackshaft material in 3 foot lengths, cut it to proper length, and then drill/tap usually one side. And the other side (torque converter side), i usually run a 5/8-18 die across so I can use a big nut.
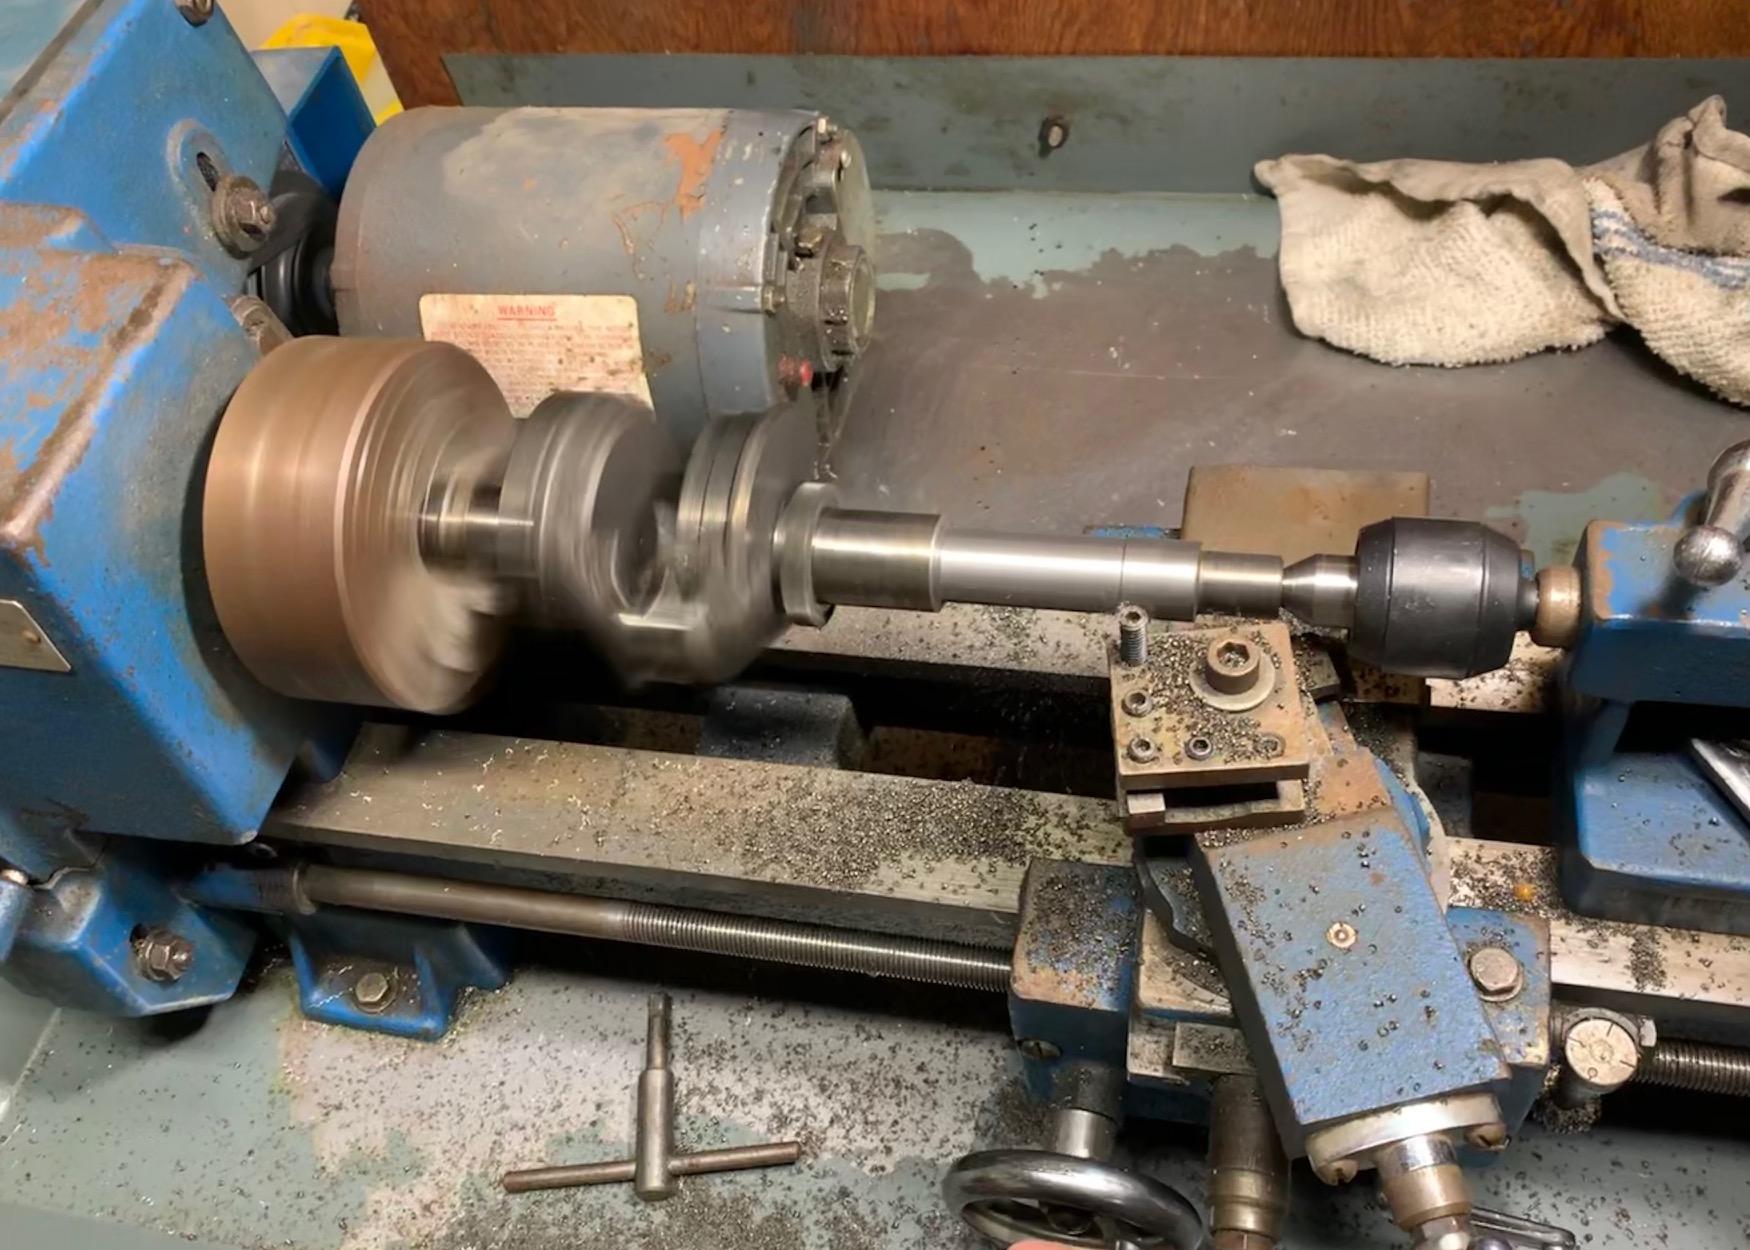
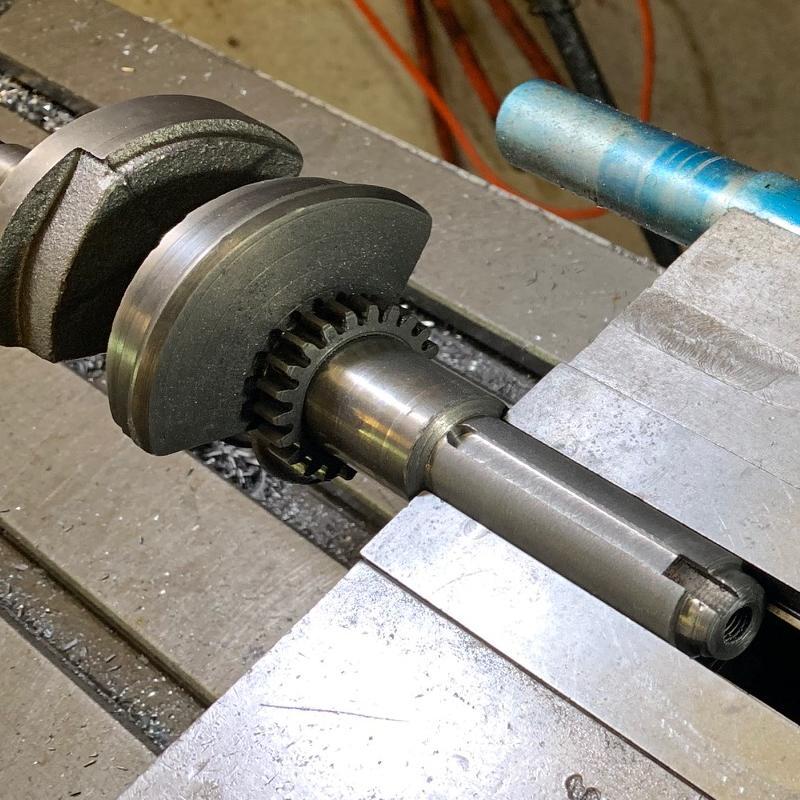
snow fell today, it was a snow day. got a little time in at my shop. i'm still thinking about stuff on the frame. so i shifted my energy to the motor. I'm using a Tecumseh HS50 off a snowblower. I had forgotten the harvested motor had an improper minibike PTO shaft. It was like .875" diameter with a weird tapered end. The end is no problem, can cut it off, and will end up with a full 2.75" PTO. But i have to turn it to .750" diameter and mill a keyway so i can put a clutch on the motor's PTO shaft. I just got a new small 6" lathe and was dying to do some real work with it. Cutting the crankshaft PTO down to .750" went pretty well. I still have to mill the keyway, probably will do that tomorrow at my buddy's shop.
After the crankshaft is done, i'll cut a new performance cam for the motor. i have a special gig constructed to do that. More on that later. Will also hone the cylinder and check the ring gaps. Lap the valves too. Use a billet connecting rod and delete the governor.
After the crankshaft is done, i'll cut a new performance cam for the motor. i have a special gig constructed to do that. More on that later. Will also hone the cylinder and check the ring gaps. Lap the valves too. Use a billet connecting rod and delete the governor.
Dr. Shop, the front end (neck/head tube area) is definitely original on my blue frame. It's all factory welds. also did you not see the picture i posted of the other bike (as found on ebay, picture repeated below)? it has the same front end. I suspect Broncco identified this weak point and made the change. it was a good idea!
") , this change may make it newer than 1970. Just curious and am enjoying following your project! Wish I had a full shop at home!
, this change may make it newer than 1970. Just curious and am enjoying following your project! Wish I had a full shop at home!best i can tell bronco did the change to the neck/head tube junction probably more mid-1970s. but it's hard to say for sure as all the bikes i've seen it on don't have original motors. i do have serial numbers though. but i don't know if there's a date baked into those numbers. i didn't take that into account when i did the '1970' post name...
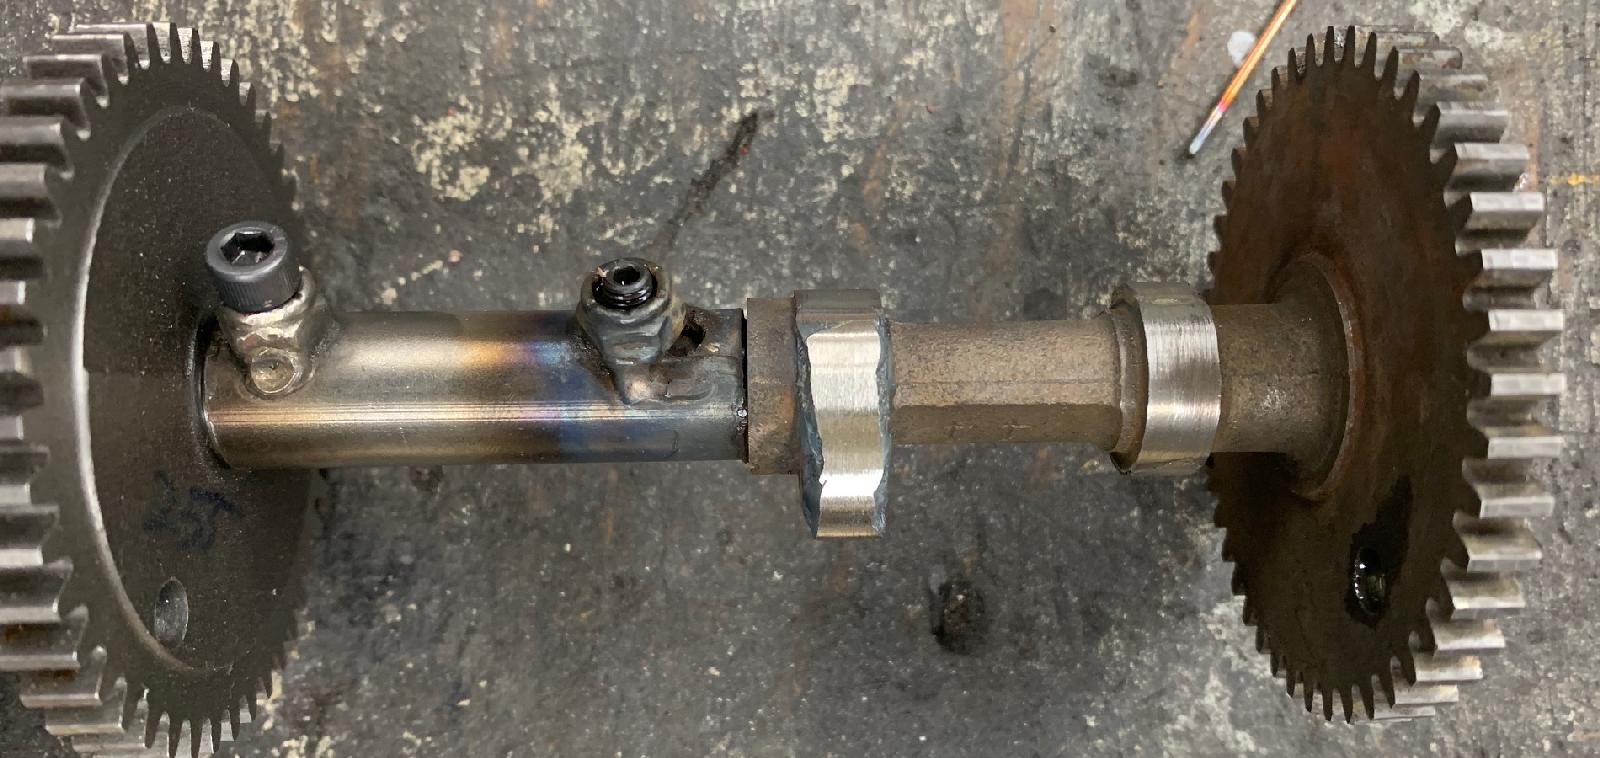
Since i finished up the crankshaft on the Tecumseh HS50 engine, I figured should also grind the cam. This is a bit of a process. First you have to weld the original cam. The lobes have to be taller than needed, and i build them up with the TIG welder. In the picture below you can see the contraption i made that holds the 'read' cam to the 'write' (welded) cam.
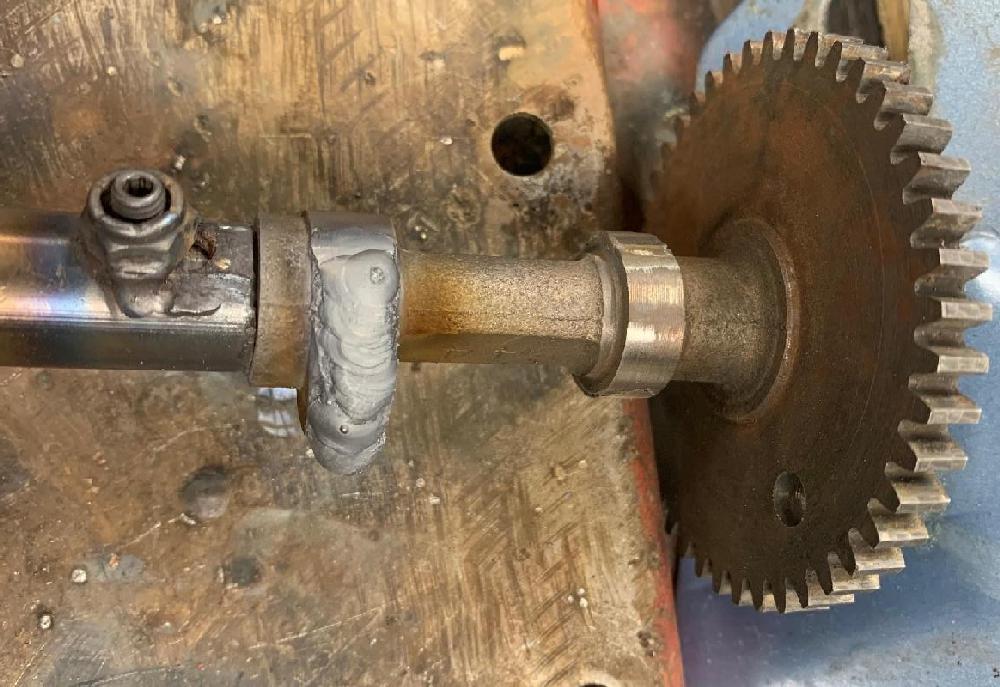
Then i have a contraption that holds an original Dynocam 255 next to the freshly welded stock cam. The two cams have to be perfectly aligned, which i have a special tool to do this (it's not elaborate, but it works.) I put the two linked cams into my cam grinder (don't laugh), and grind away. This fancy cam grinder reads the original Dynocam, and transfers the grind to the welded stock cam.
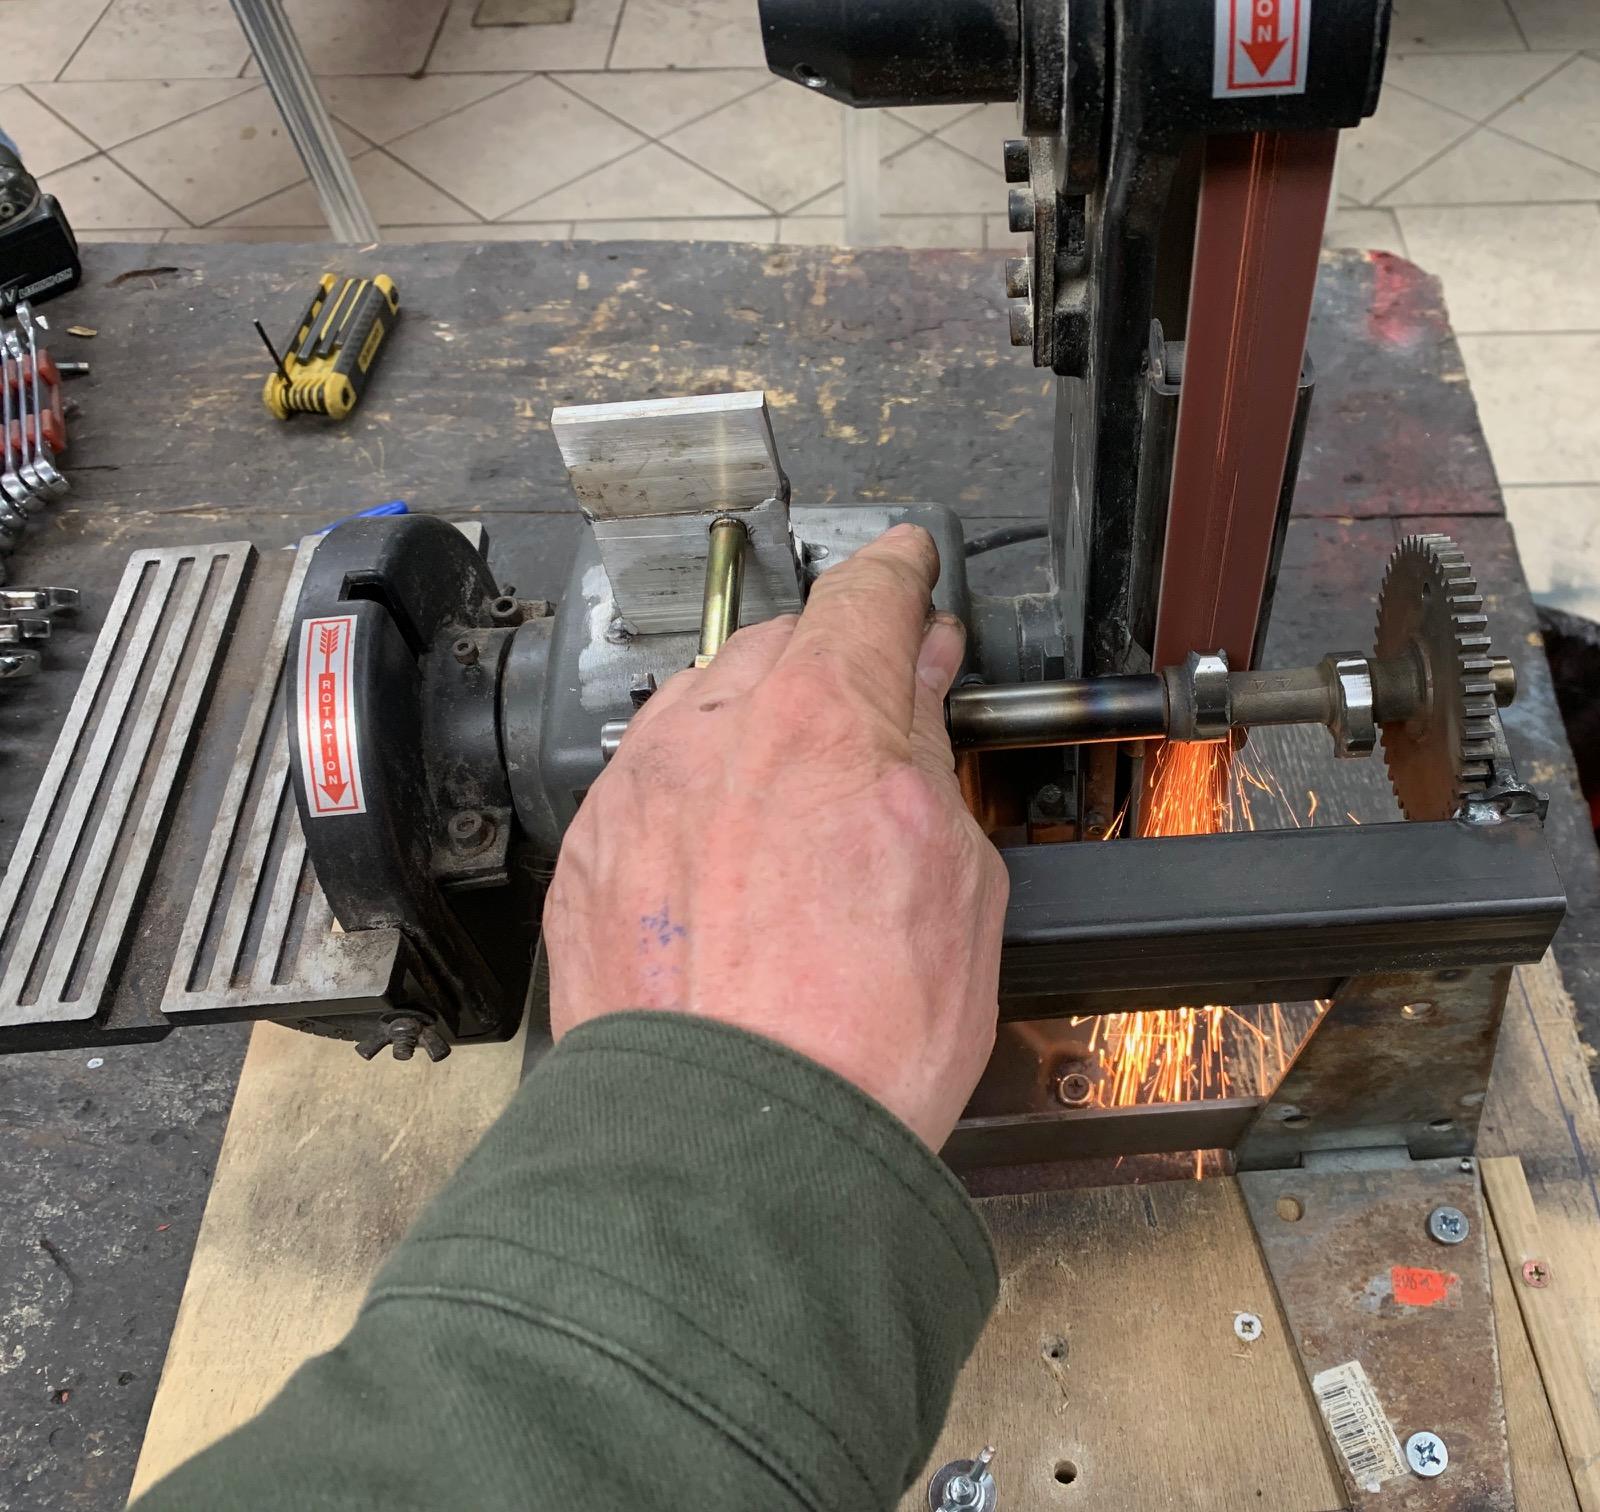
Below is a picture of how it looks when done. It's not nearly as clean as a Dynocam, but man it sure does work well. And it doesn't cost $100 and two to three weeks of time!
Then i have a contraption that holds an original Dynocam 255 next to the freshly welded stock cam. The two cams have to be perfectly aligned, which i have a special tool to do this (it's not elaborate, but it works.) I put the two linked cams into my cam grinder (don't laugh), and grind away. This fancy cam grinder reads the original Dynocam, and transfers the grind to the welded stock cam.
Below is a picture of how it looks when done. It's not nearly as clean as a Dynocam, but man it sure does work well. And it doesn't cost $100 and two to three weeks of time!
That I cannot measure precisely but I can tell you that they are getting taper. The whole point behind the taper is to make sure the tappets spin so they don’t get wear marks in them. And I guarantee you that is happening. My grinding tools are not precision. and trust me, there’s taper baked in there
Did some fender work today. The rear fender is OK, just needed a little stitch weld (small crack). But the front fender needed more work. It was the style that bolts to the side of the upper suspension tubes. I can't use that style, since i'm putting a springer style front end (from a Tx6 i believe) on this bike.
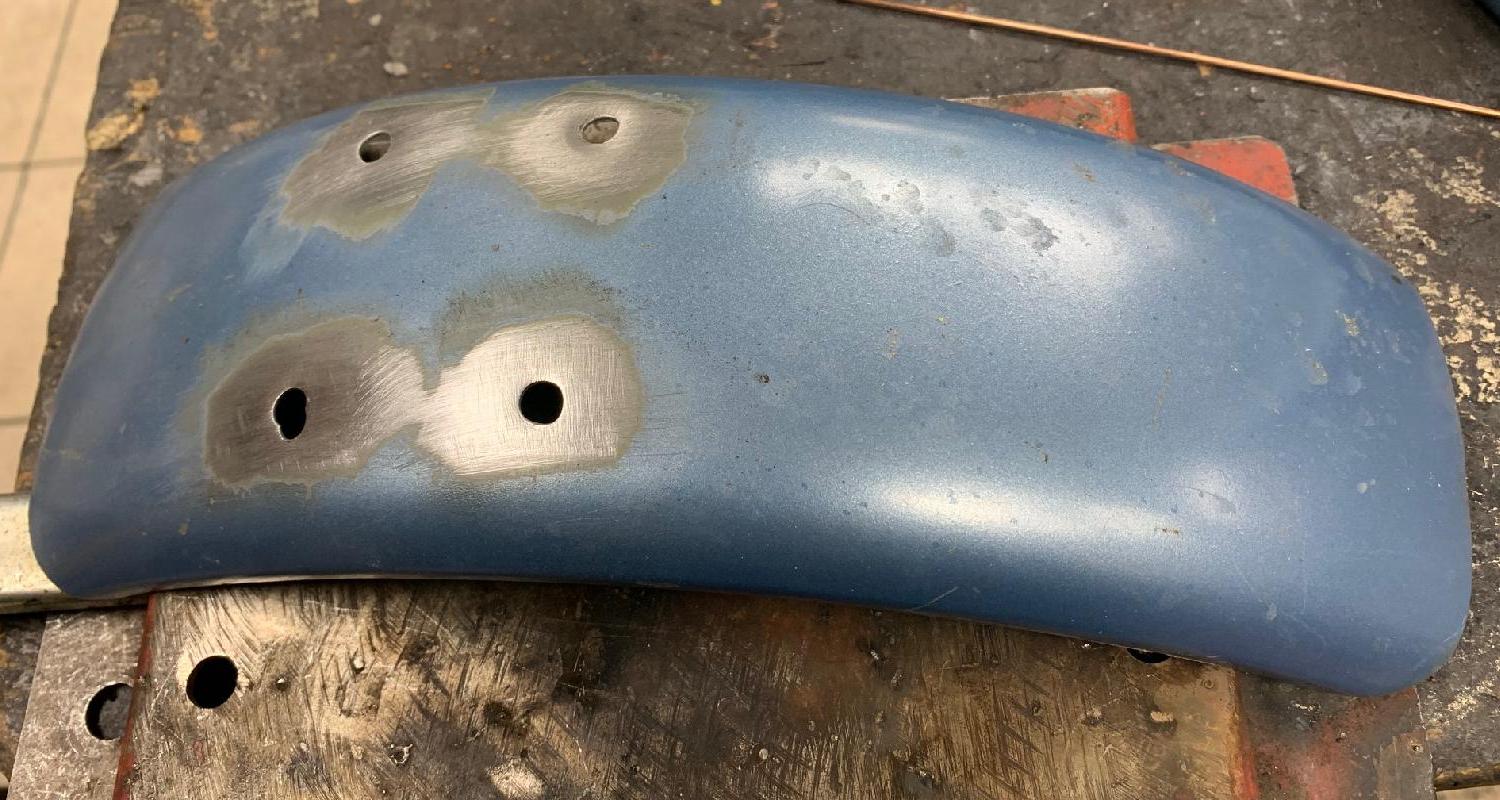
I drilled out the riveted fender mount bracket, to remove it. This left four holes in the fender. Fill welded those holes and ground them flush. Made a different style front fender bracket, as used on the later Tx1 models. This gives me a 'high' off road style fender, instead of a low 'street' style fender, which i like better.
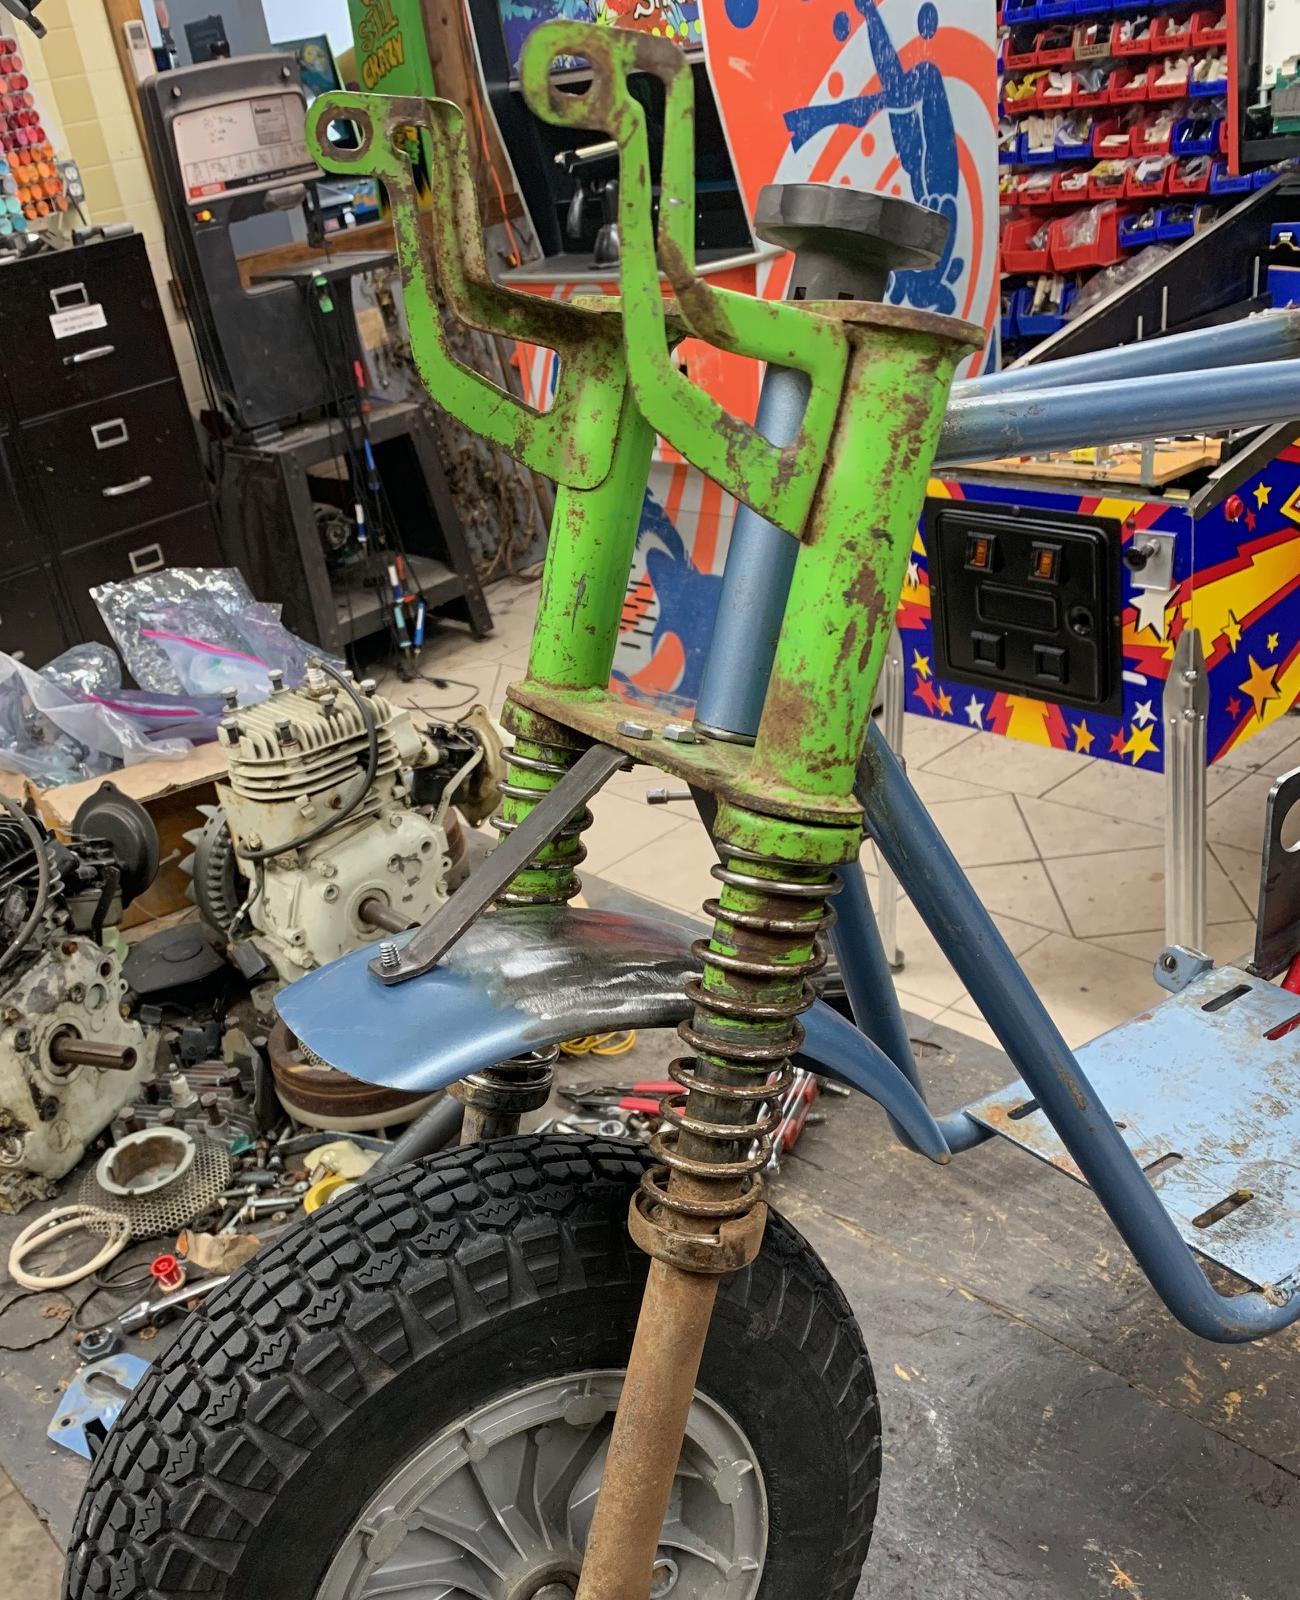
Just need to figure out if I can mount a front brake. The Tx1 should have a front brake. Initially the whole bike used disc brakes. but at some point in the 1970s they changed to a drum brake for the rear. But the disc stayed in the front. I don't have any of those parts. Might try and adapt a DB30 style disc front brake. But i'm not sure that will work (or look) right.
I drilled out the riveted fender mount bracket, to remove it. This left four holes in the fender. Fill welded those holes and ground them flush. Made a different style front fender bracket, as used on the later Tx1 models. This gives me a 'high' off road style fender, instead of a low 'street' style fender, which i like better.
Just need to figure out if I can mount a front brake. The Tx1 should have a front brake. Initially the whole bike used disc brakes. but at some point in the 1970s they changed to a drum brake for the rear. But the disc stayed in the front. I don't have any of those parts. Might try and adapt a DB30 style disc front brake. But i'm not sure that will work (or look) right.
Time to come up with some sort of chain tension concept. I looked around the shop and found a used chain tensioner. it was pretty generic, probably something off ebay for cheap. but i believe it would work Ok. so i did some mounting, and here's the outcome via pictures. i do believe it will work fine. and prevent the chain from coming off when the suspension is compressed.
By the way I am *not* going to install lights. was going to, but it just complicates things. i don't ride at night anyway, so it's pointless.
just need to figure out a front brake, and finish the motor, and all the hard work is done...
By the way I am *not* going to install lights. was going to, but it just complicates things. i don't ride at night anyway, so it's pointless.
just need to figure out a front brake, and finish the motor, and all the hard work is done...