Dr. Shop Teacher's JFF Gilson Knight Rider
- Thread starter Dr. Shop Teacher
- Start date

Looking good. Your buddies welding shop looks just like my welders shop. I was there today.:laugh:
Great stuff Pete , thanks for all the fine details !
Dang Pete ! :shrug: I Quit ! :laugh: You're making the rest of us look bad .
nice job on the metal finnishing
Grab Handle and Metal Straightening
When I had this on the Project forum, a member suggested recessing the grab handle tabs inside the frame. So I thought about it and added some weld in the tail so I could cut the existing welds. You can see one of the additional welds below, the others are above the notch in the tail. I notched the tail and used a grinding wheel to finish the recess.
Notch rough cut

I filled one of the original parcel rack holes and drilled a new one for the grab bar.

View from the top.

And, from the rear.

The swing arm had seen it's share of abuse, and like many, the tab for the brake cable had been hacked off. I heated it up and straightened it out and ground a simple curve.


When I had this on the Project forum, a member suggested recessing the grab handle tabs inside the frame. So I thought about it and added some weld in the tail so I could cut the existing welds. You can see one of the additional welds below, the others are above the notch in the tail. I notched the tail and used a grinding wheel to finish the recess.
Notch rough cut
I filled one of the original parcel rack holes and drilled a new one for the grab bar.
View from the top.
And, from the rear.
The swing arm had seen it's share of abuse, and like many, the tab for the brake cable had been hacked off. I heated it up and straightened it out and ground a simple curve.
Last edited:
TAV/Jackshaft Plate
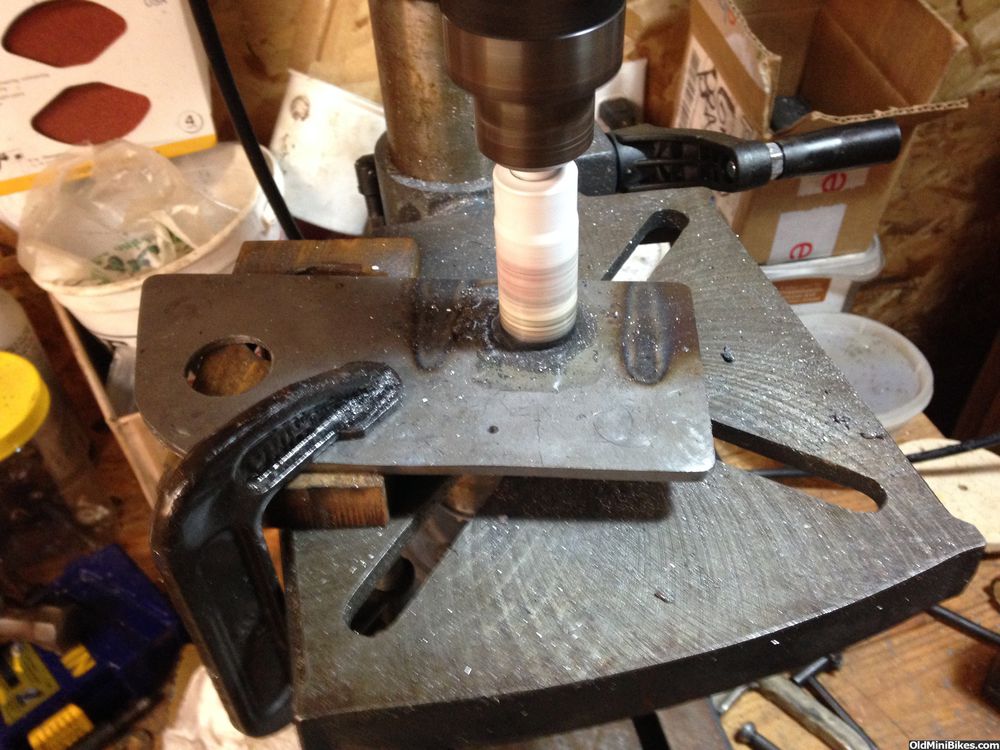
Finished up a pair of TAV/Jackshaft Plates (my last set) today. You can see how these are made here: https://www.oldminibikes.com/forum/...gilson-wards-tav-jackshaft-bracket-sorta.html
This bike is getting a TAV30 with an asymmetric driven (6" with a 5/8" bore). I ordered a bunch of different drive sprockets for the jackshaft (10, 11, 13, 14, 15t) to see what works best. I figured the TAV30 would be a better fit given the torque of the motor. I'm not going to mess with springs in the TAV unless I really have to.
I used a carbide tipped hole saw for the 1 3/8" bearing hole.

Bearing hole done (lots of cutting oil). All of these holes have to be very precise, or nothing will line up.

Normally, a matching 1 3/8" hole would be done on the outside. I drilled a 1" hole with a metal cutting hole saw. This will work fine for mounting the jackshaft.
3/8" holes for the mounts.
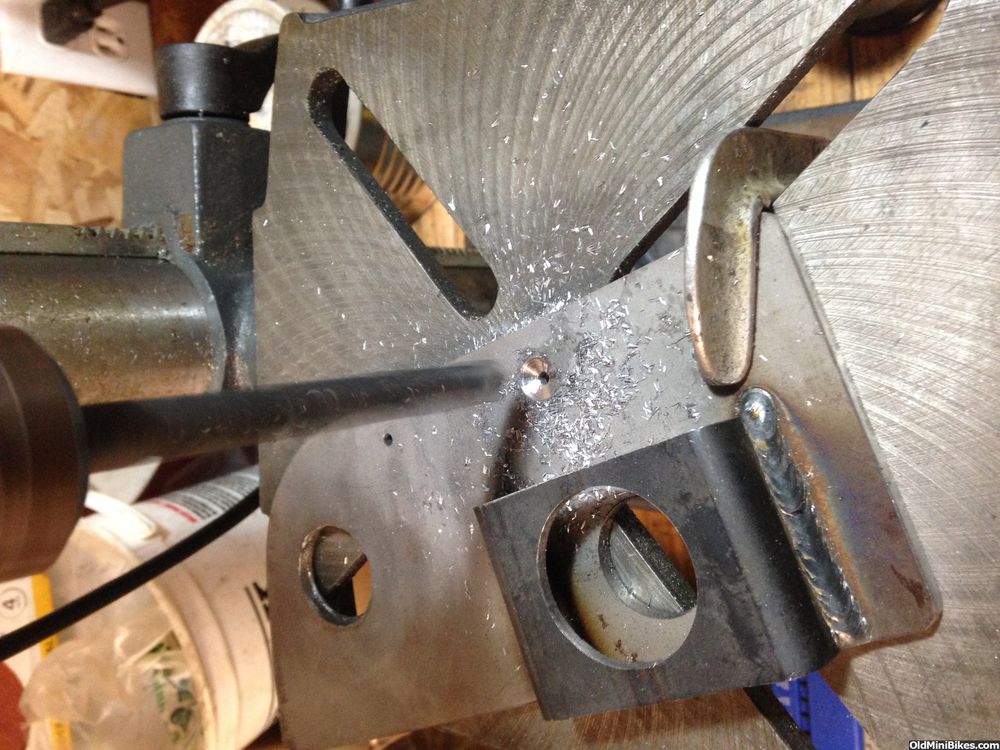
Here it is in place. Shocks arrive tomorrow and then I can start the final mock up for the disc brake hubs.

Finished up a pair of TAV/Jackshaft Plates (my last set) today. You can see how these are made here: https://www.oldminibikes.com/forum/...gilson-wards-tav-jackshaft-bracket-sorta.html
This bike is getting a TAV30 with an asymmetric driven (6" with a 5/8" bore). I ordered a bunch of different drive sprockets for the jackshaft (10, 11, 13, 14, 15t) to see what works best. I figured the TAV30 would be a better fit given the torque of the motor. I'm not going to mess with springs in the TAV unless I really have to.
I used a carbide tipped hole saw for the 1 3/8" bearing hole.
Bearing hole done (lots of cutting oil). All of these holes have to be very precise, or nothing will line up.
Normally, a matching 1 3/8" hole would be done on the outside. I drilled a 1" hole with a metal cutting hole saw. This will work fine for mounting the jackshaft.
3/8" holes for the mounts.
Here it is in place. Shocks arrive tomorrow and then I can start the final mock up for the disc brake hubs.
Pete with this amount of work have considered a longer swing arm and possibly address the fork rake ? Awesome stuff buddy !
Sent from my iPhone using Tapatalk
Angelo, the fork rake was fixed on this particular bike. They added what looks like 5 degrees as compared to my other 3 bikes. As to the swing arm, no, I hadn't considered it. Shock mounts would have to change (come forward), and as you know, the swing arm has a drop to the front. That would be some serious cutting and filling. Not sure I'd see much benefit at 35 mph or so.
Sent from my iPhone using Tapatalk
Sent from my iPhone using Tapatalk
I've been cutting 1/2 and 3/4 aluminum plate on a table saw for 40+ years using Johnsons paste wax for lube. Drilling holes too.And the band saw if there is no large stick of wax. On the Bridgeport I keep it under 700 rpm, the table saw you have no choice but a carbide blade and paste wax and it's like butter. Our band saws at work adjust so I try to get the close to 700 or under rpm.
Front Rotor Hub Mock-up
Had some time this morning before going to a meeting at the university this afternoon (and on the road tomorrow and Friday ferrying mom to the docs), so I made up the mock-up for the front hub. Pictures are all wacky, again.:angry:
First, I needed to find the center of the head:

Then I used this locate center the wheel between the fork lowers.
And, used a piece of scrap aluminum to fix the width between the forks.
Wheel centered with a temporary spacer on the right (left front sitting on the bike).

I centered the Motovox disc on a 2 1/2" round piece of 1/4" modeling plywood.

I made up several more 1/4" round pieces to build out the rotor from the wheel.

Then I built it out to the caliper. The total width to the caliper is 1 3/8." Then, two more 1 1/2" diameter 1/4" rounds plus a washer serve as a spacer to the fork. The washer is just slightly thinner than the plywood.
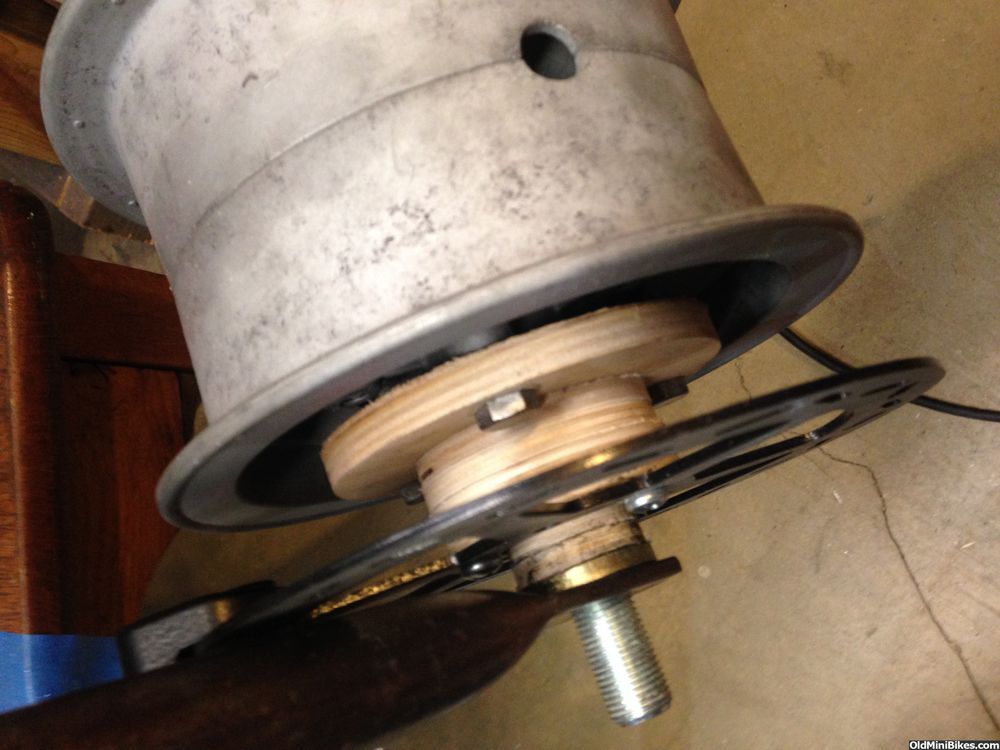
Here's what it looks like off the bike:

From this, I can take measurements and do a CAD drawing. Do note I was using standard hole saws for these pieces and the final piece will have a center hub/spacer that matches the ID of the Motovox disc.
Had some time this morning before going to a meeting at the university this afternoon (and on the road tomorrow and Friday ferrying mom to the docs), so I made up the mock-up for the front hub. Pictures are all wacky, again.:angry:
First, I needed to find the center of the head:
Then I used this locate center the wheel between the fork lowers.
And, used a piece of scrap aluminum to fix the width between the forks.
Wheel centered with a temporary spacer on the right (left front sitting on the bike).
I centered the Motovox disc on a 2 1/2" round piece of 1/4" modeling plywood.
I made up several more 1/4" round pieces to build out the rotor from the wheel.
Then I built it out to the caliper. The total width to the caliper is 1 3/8." Then, two more 1 1/2" diameter 1/4" rounds plus a washer serve as a spacer to the fork. The washer is just slightly thinner than the plywood.
Here's what it looks like off the bike:
From this, I can take measurements and do a CAD drawing. Do note I was using standard hole saws for these pieces and the final piece will have a center hub/spacer that matches the ID of the Motovox disc.
Really nice work on making your own parts Pete:thumbsup:
10-4 on both , that 5 degree will make a big difference :thumbsup:
I've been cutting 1/2 and 3/4 aluminum plate on a table saw for 40+ years using Johnsons paste wax for lube. Drilling holes too.And the band saw if there is no large stick of wax. On the Bridgeport I keep it under 700 rpm, the table saw you have no choice but a carbide blade and paste wax and it's like butter. Our band saws at work adjust so I try to get the close to 700 or under rpm.
Another easy way to find the correct spacers for the front wheel while retaining fork width, is to remove the springs and slide the lower tubes all the up. That retains the width and keeps things in line. Make your wheel spacers and check to see if the lower tubes slide easily in and out of the uppers with the wheel bolted in place.
Danford1
Danford1
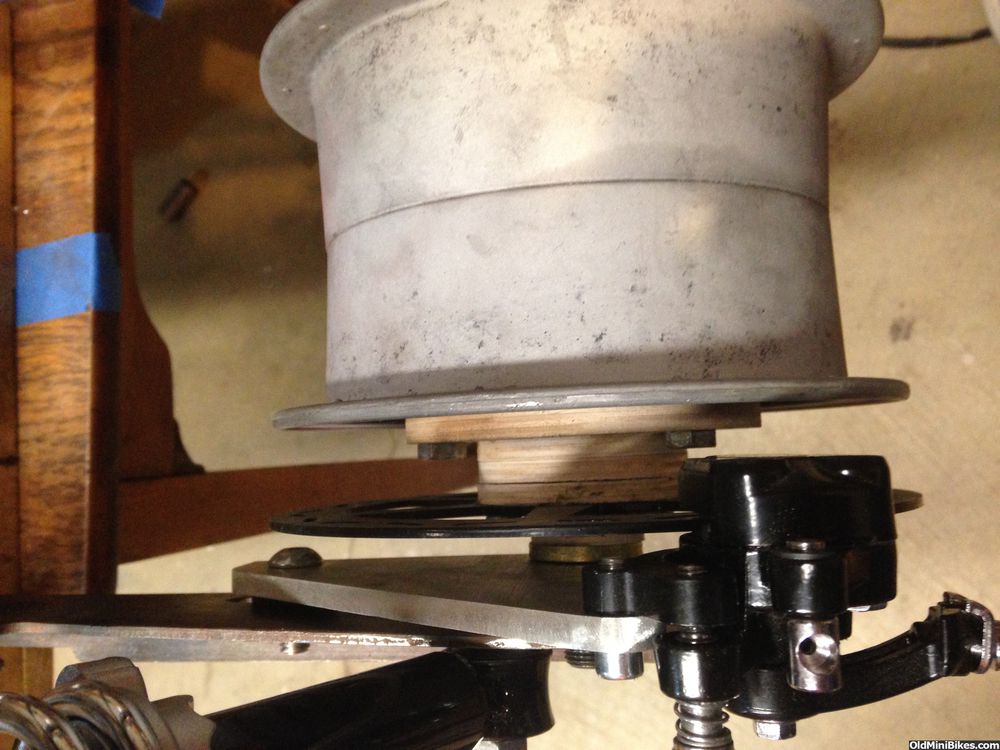
Rear Brake Hub--Final Dimensioning
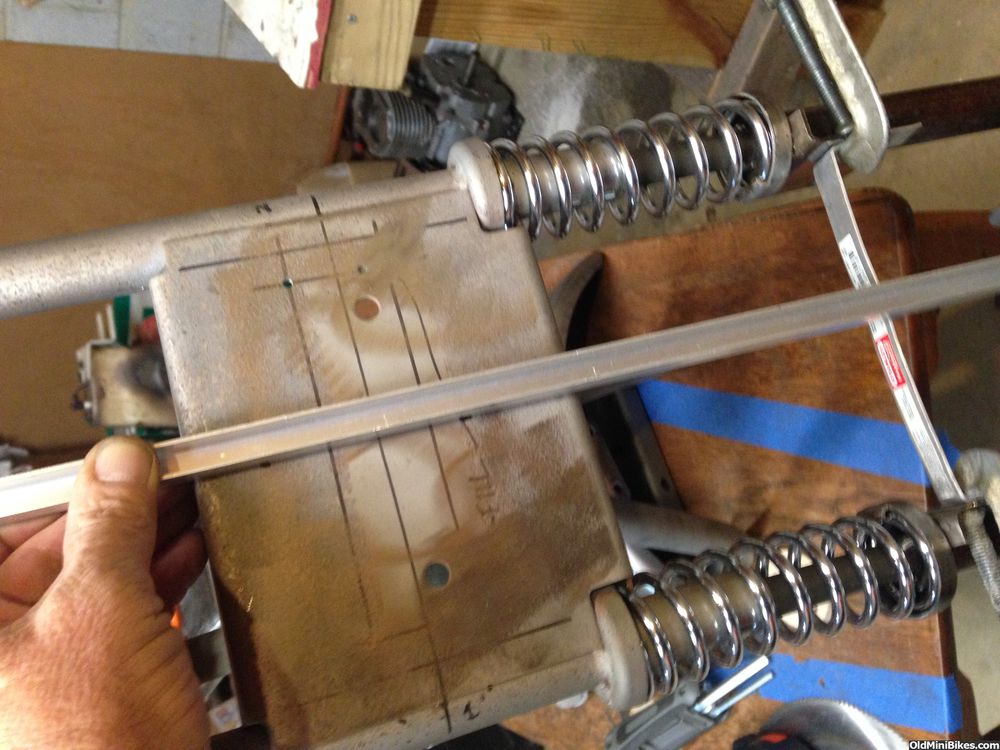
Had a few minutes before heading north again, so I checked the rear hub for proper dimensions. My eyeball said the front and rear would be the same, but "nope." The spacer to the disc on the rear is 1/4" narrower, so two different hubs will need to be machined.
I also wanted to see if I could flip the caliper forward of the shock, and that is also a "nope" without hacking the h-e-double toothpicks out of the swing arm. A note about the swing arm: It's an Allis swing arm, which I think is longer than the Wards swing arm. The shocks seem to be raked a bit more than on the Wards-derivative bikes. Pics are wacky again.
Shocks mounted (I'm using stainless for all hardware).
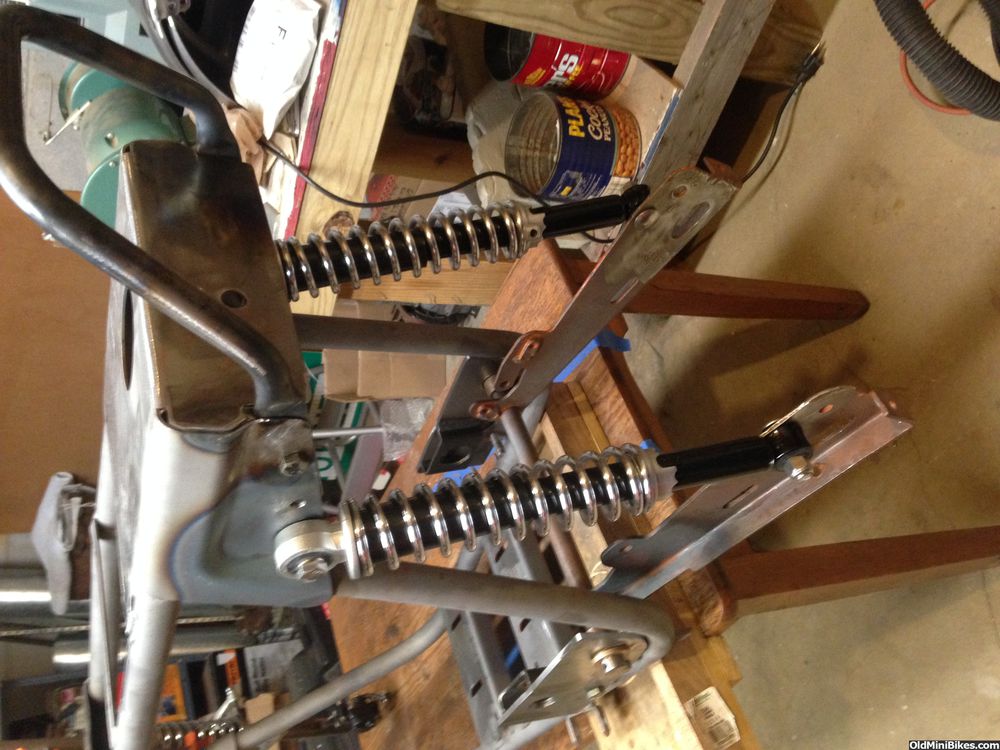
Side view:
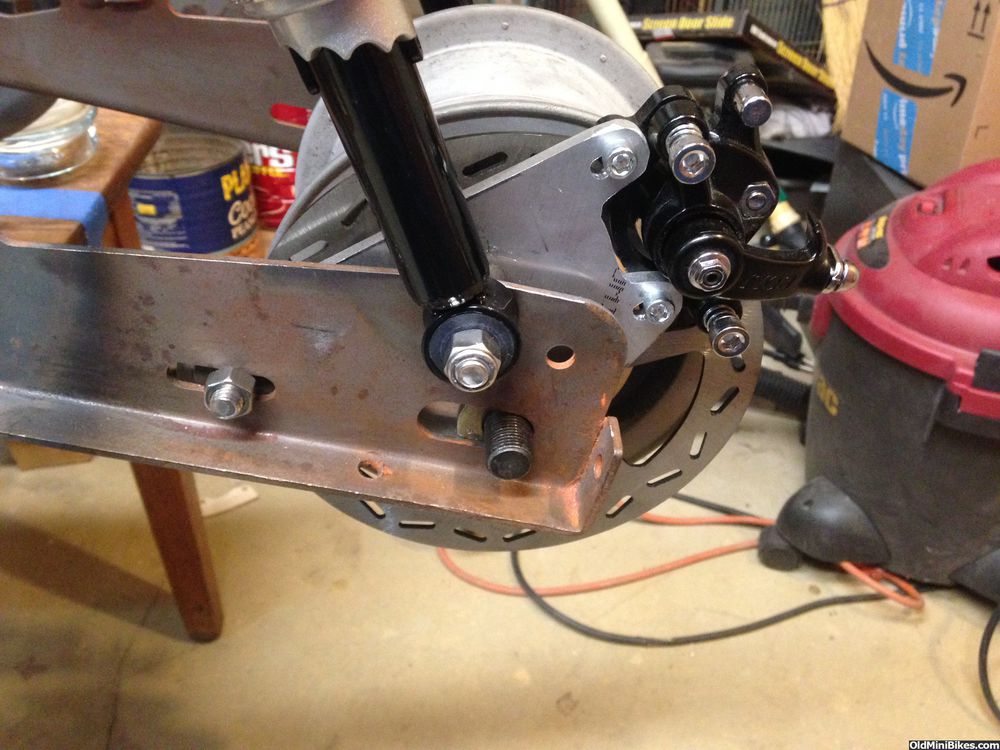
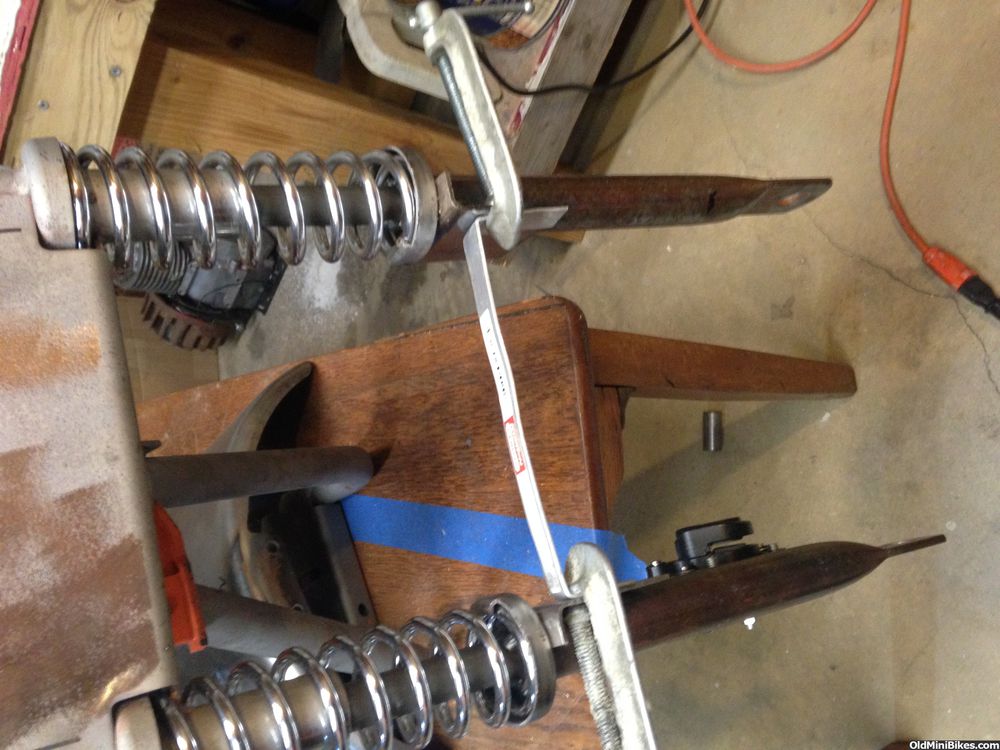
Another view:
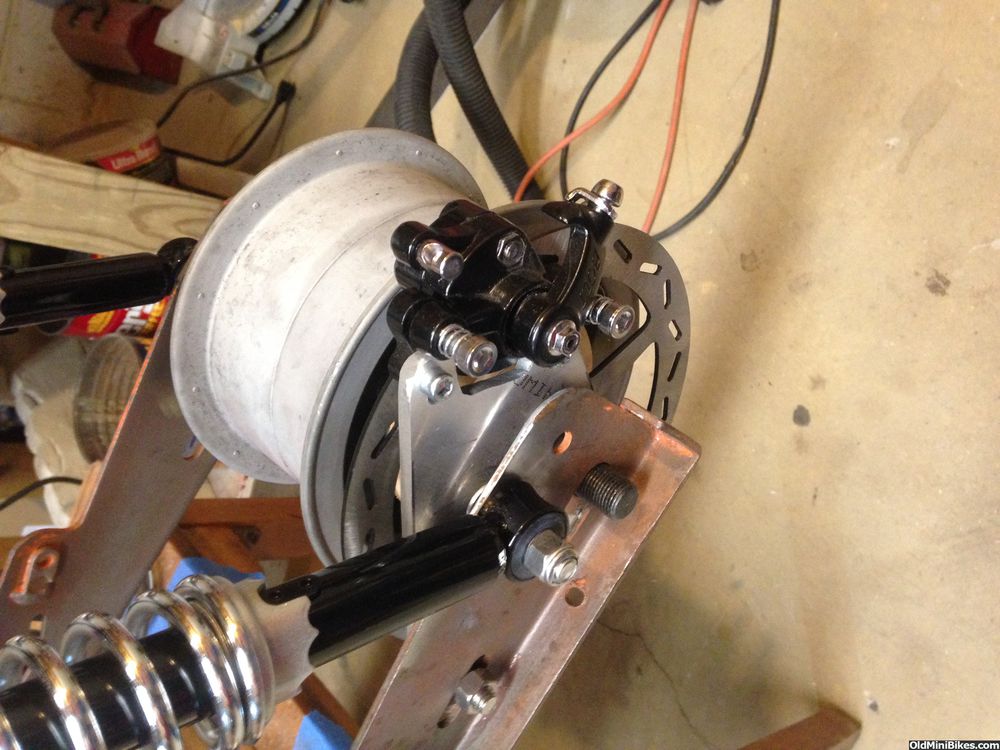
From the rear (note that I had to step off to clear the shock carriage bolt):
Had a few minutes before heading north again, so I checked the rear hub for proper dimensions. My eyeball said the front and rear would be the same, but "nope." The spacer to the disc on the rear is 1/4" narrower, so two different hubs will need to be machined.
I also wanted to see if I could flip the caliper forward of the shock, and that is also a "nope" without hacking the h-e-double toothpicks out of the swing arm. A note about the swing arm: It's an Allis swing arm, which I think is longer than the Wards swing arm. The shocks seem to be raked a bit more than on the Wards-derivative bikes. Pics are wacky again.
Shocks mounted (I'm using stainless for all hardware).
Side view:
Another view:
From the rear (note that I had to step off to clear the shock carriage bolt):