Dr. Shop Teacher's JFF Gilson Knight Rider
- Thread starter Dr. Shop Teacher
- Start date

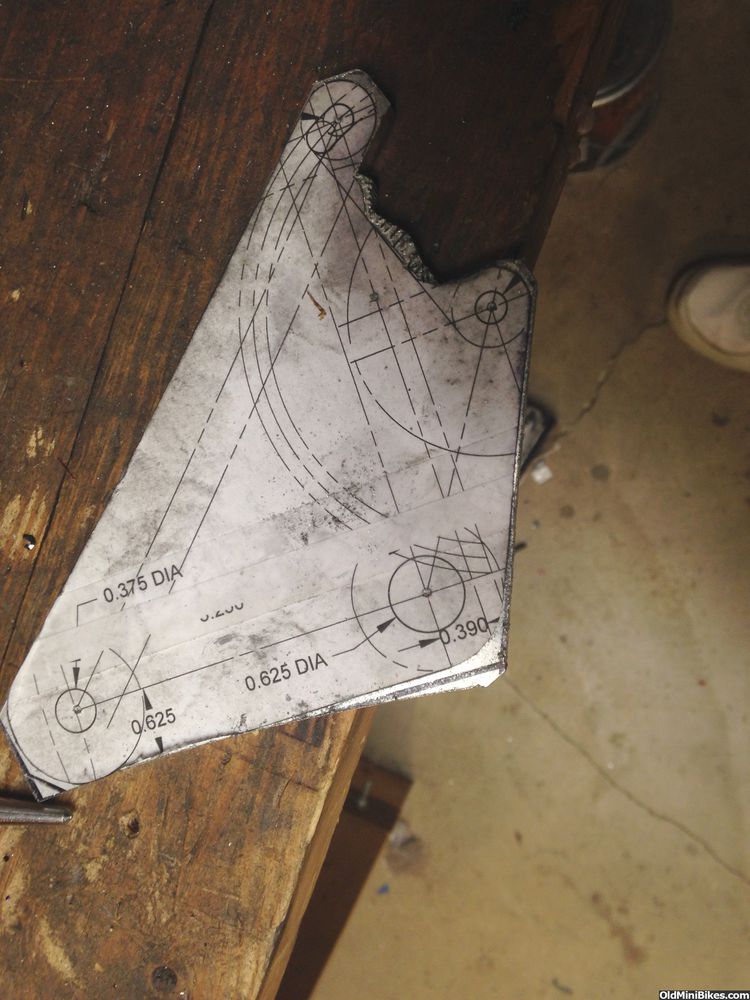
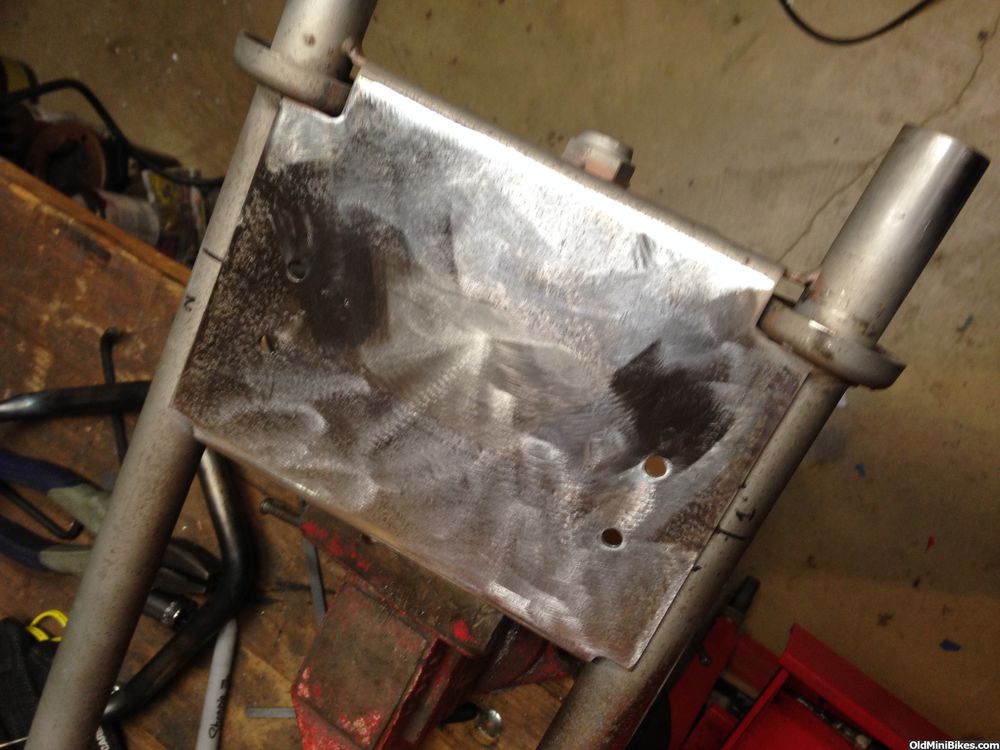
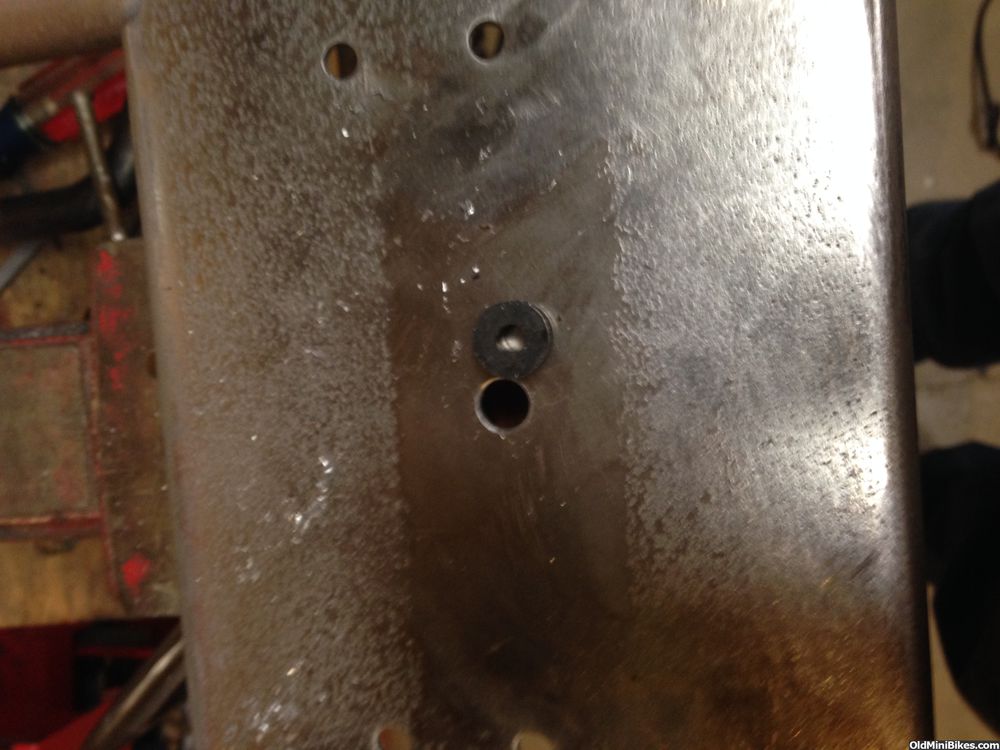
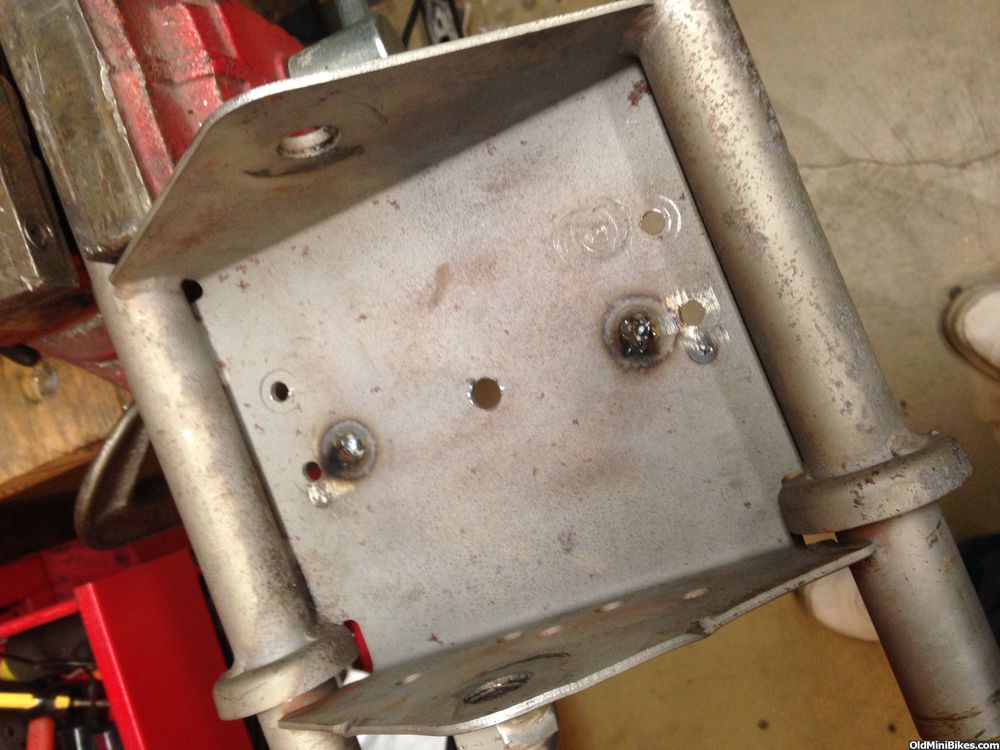
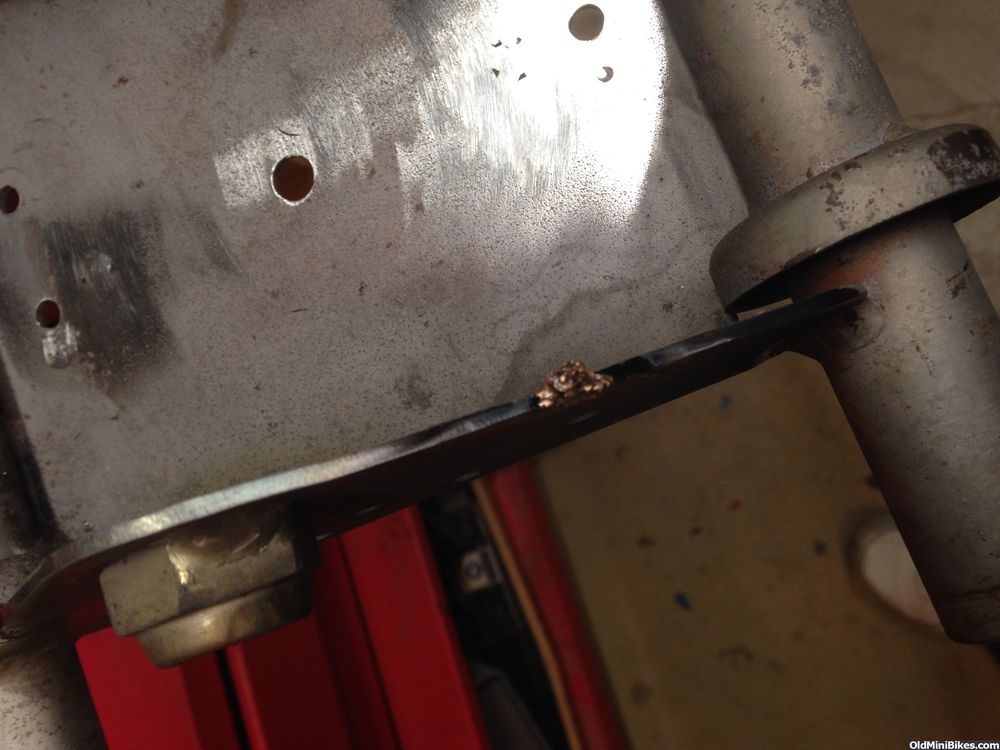
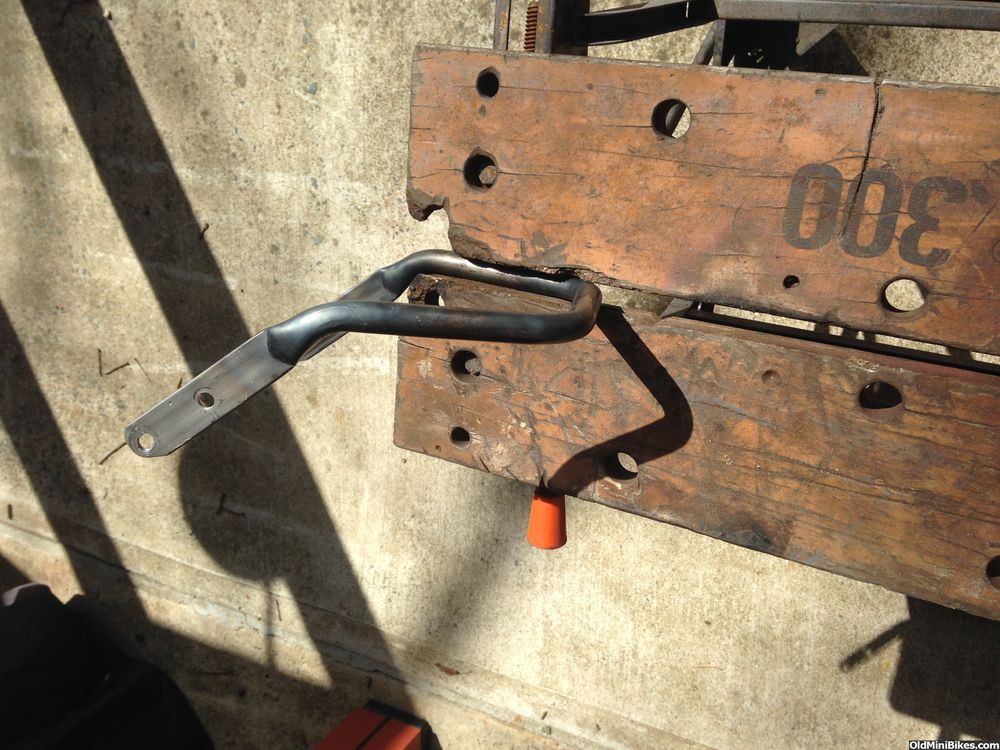
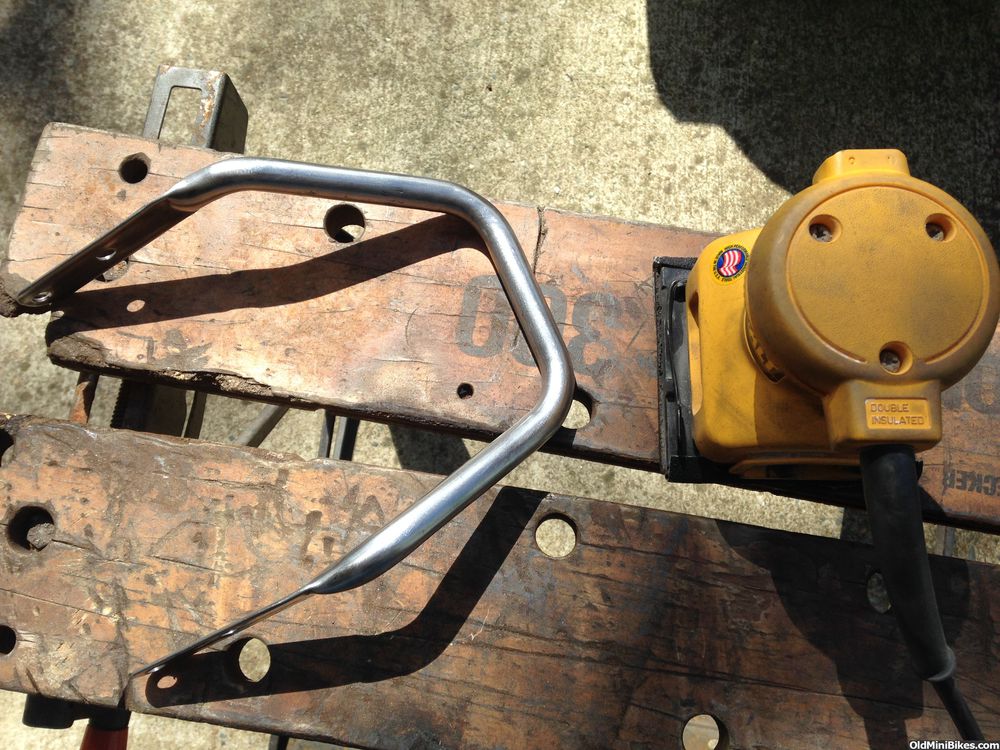
Rear Brake Bracket--Final Version
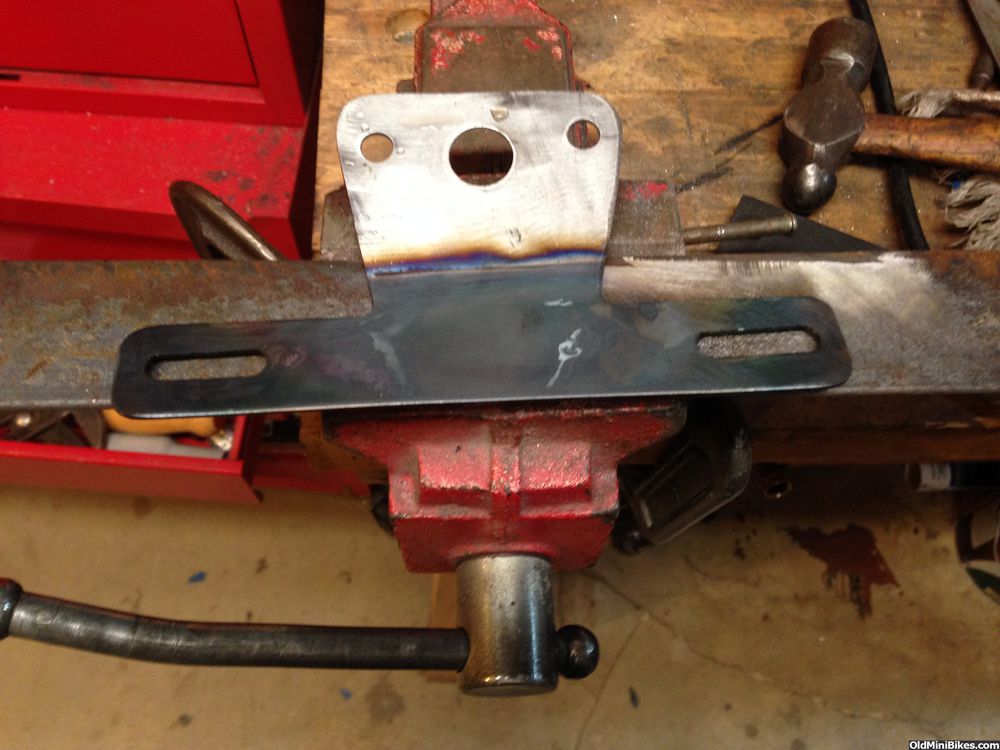
Finally got to making the rear brake bracket today. I used my CAD drawing as the pattern for this piece. The pattern was attached to the 6061 with spray adhesive. Again, I cut the rough shape with my band saw though this time I followed the advice of a couple of posters and waxed the blade before cutting which made a slight difference--the speed is still too fast.
Here's the piece cut rough. Notice I used relief cuts to make the final shaping a bit easier.
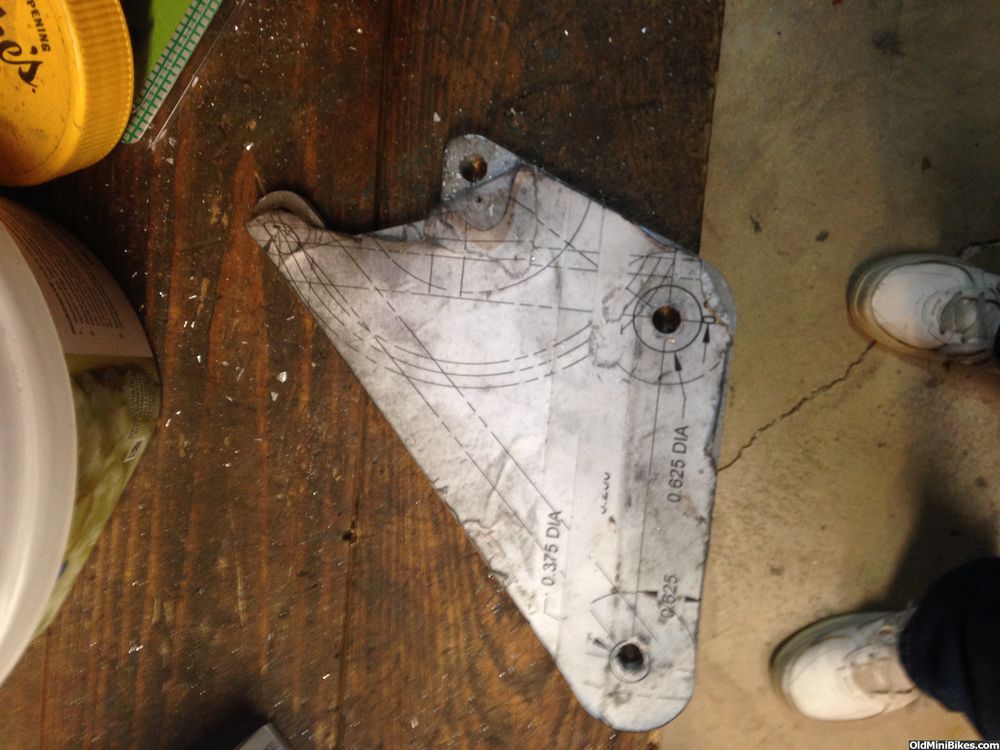
Here's the piece shaped. I used an angle grinder to bring piece close to size and filed to final size around the caliper mounts.
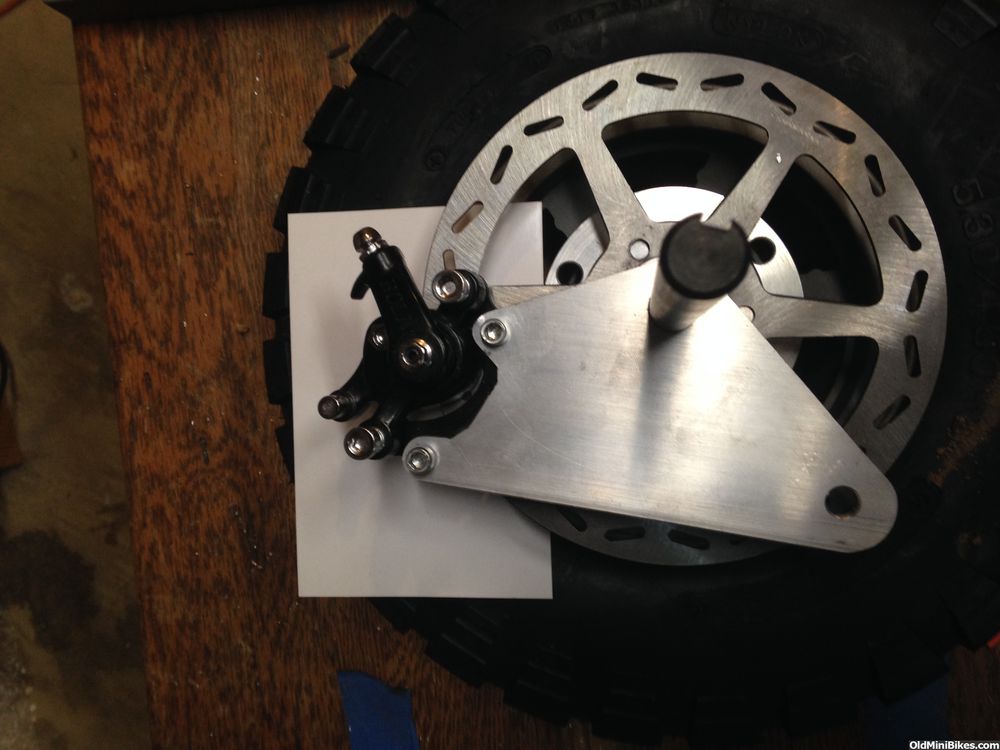
And mocked up with hub and disc. Perfect clearances. Turns out I didn't need the adjustment slot at the top mounting bolt.
Finally got to making the rear brake bracket today. I used my CAD drawing as the pattern for this piece. The pattern was attached to the 6061 with spray adhesive. Again, I cut the rough shape with my band saw though this time I followed the advice of a couple of posters and waxed the blade before cutting which made a slight difference--the speed is still too fast.
Here's the piece cut rough. Notice I used relief cuts to make the final shaping a bit easier.

Here's the piece shaped. I used an angle grinder to bring piece close to size and filed to final size around the caliper mounts.
And mocked up with hub and disc. Perfect clearances. Turns out I didn't need the adjustment slot at the top mounting bolt.
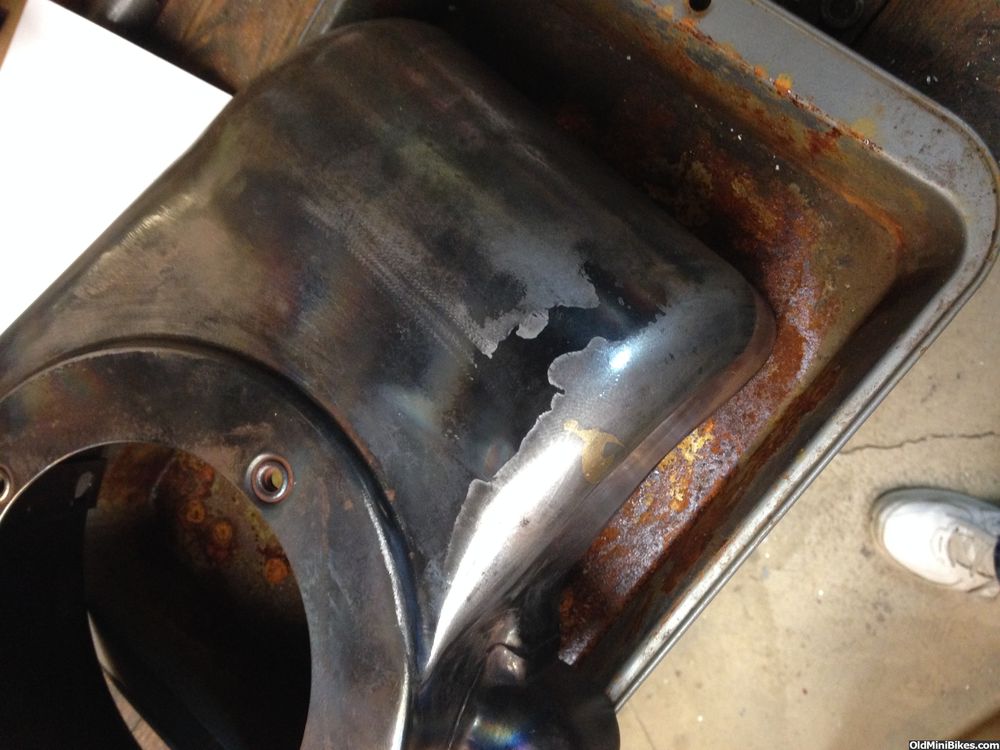
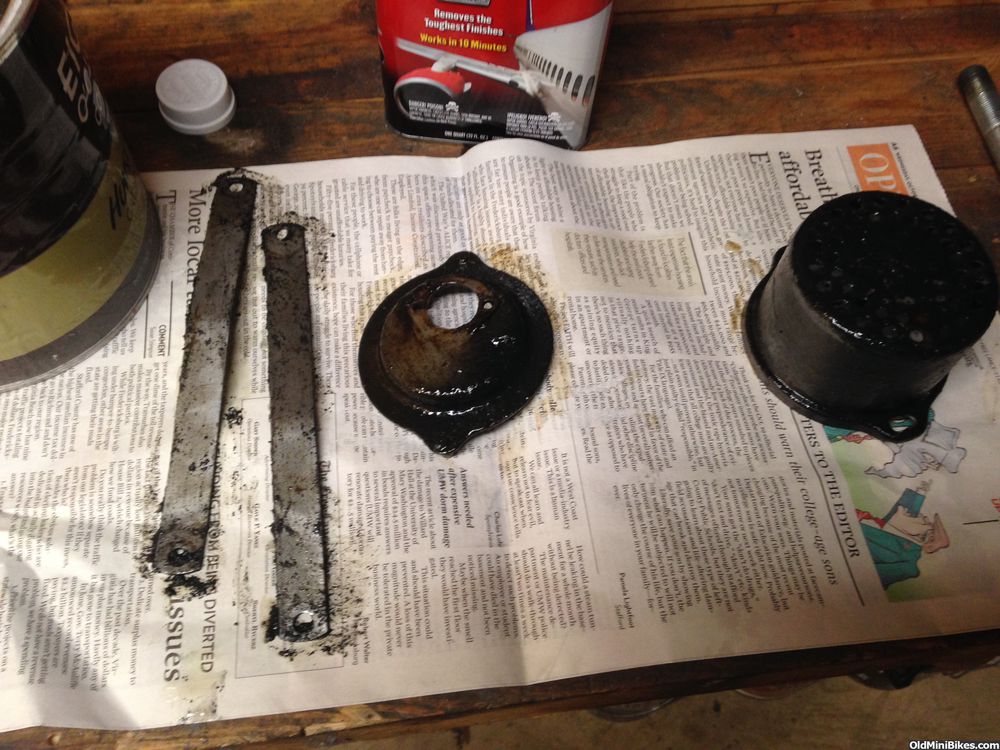
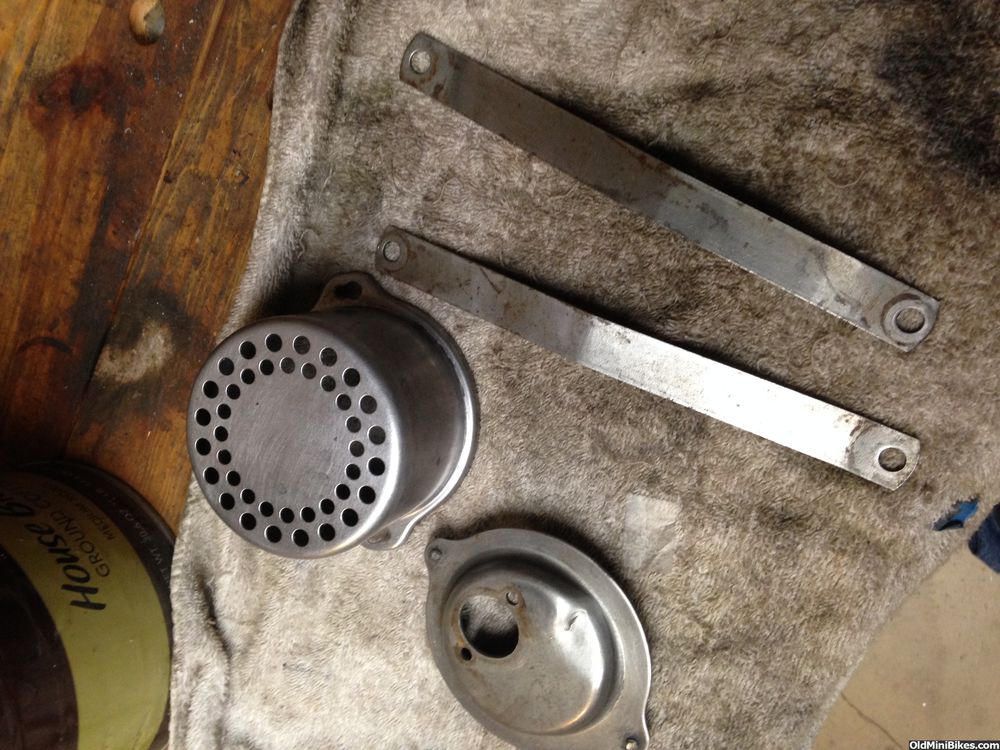
Tear down--Removing Brazing Flux Glaze from Shroud
So, breaking into brazing with a MAP torch has it's issues. One of which is you have to get a lot of heat to melt the brazing rod--the MAP torch tip I have is a wide one so I couldn't concentrate the heat as tightly as an oxy/acet torch would. This left me with a black glaze on the shroud. This stuff would not come off by sanding. What's worse is that it won't accept powder coating either. All caused by too much heat.
As I read about it, I could have easily removed it right after brazing by spritzing with very hot water and the flux would shatter like glass. The alternative is to use an acid to remove it. I used Rustoleum rust remover and a wire brush. I could have used muriatic acid had it been warm enough outside, so it took a while.
Here's what we started with (I had this all over the place):
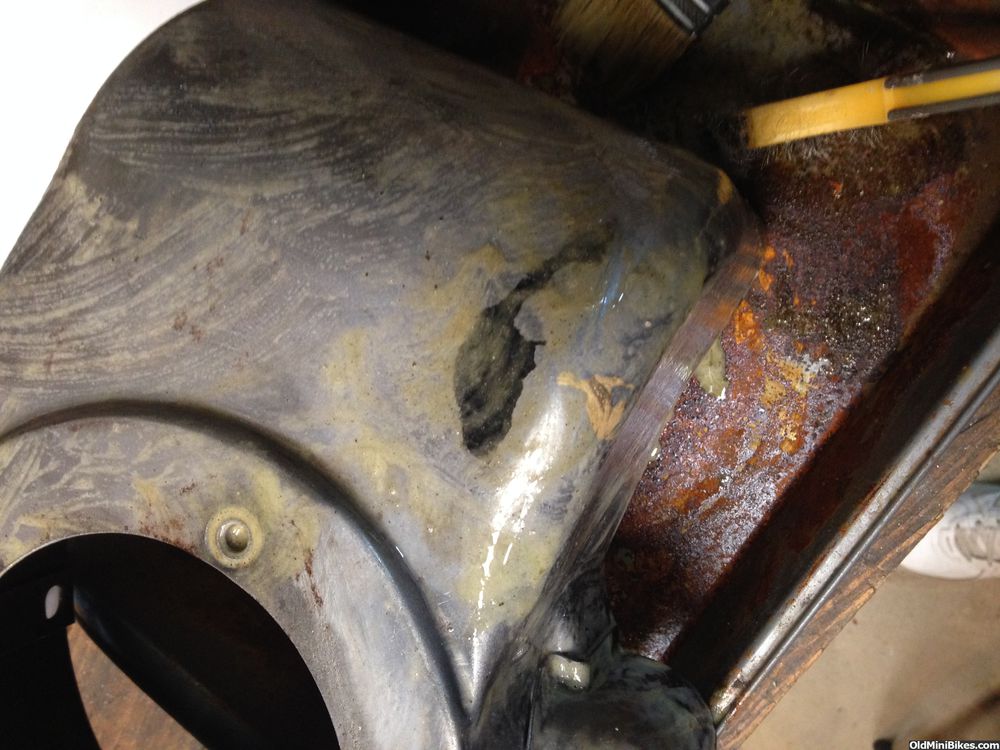
After about 20 minutes:
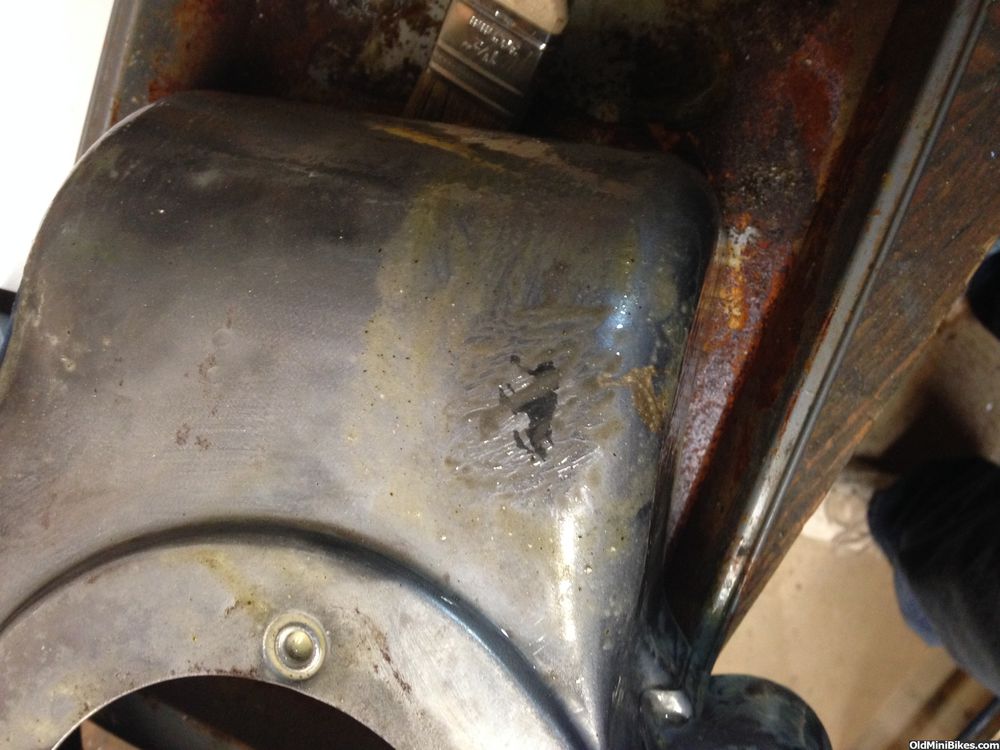
After 40 minutes:
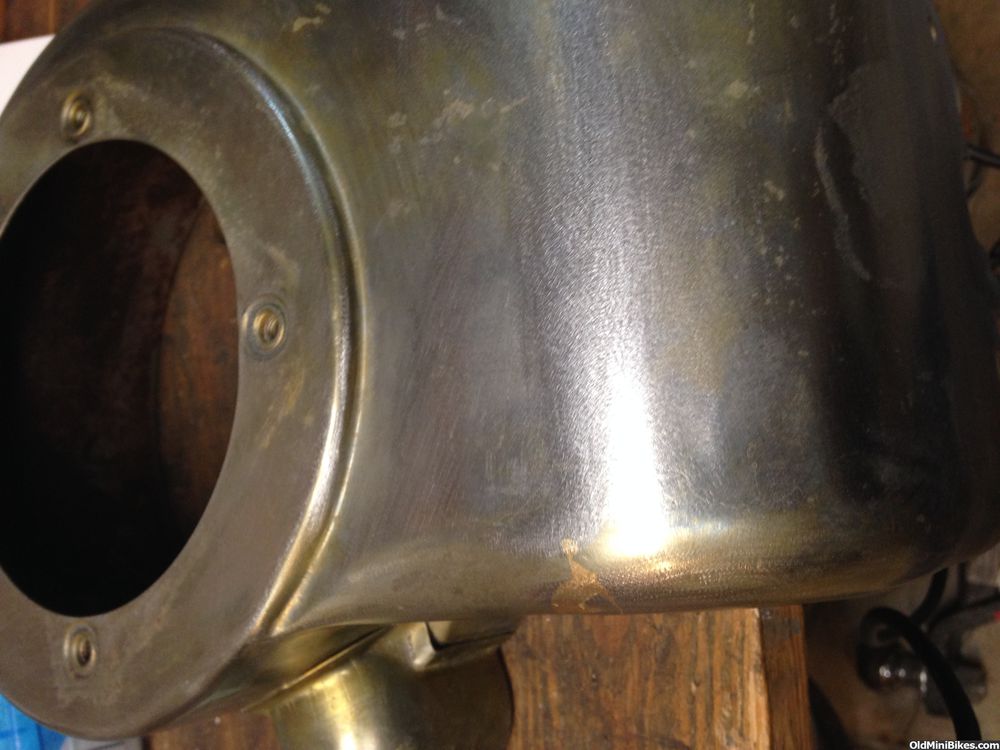
And then a thorough rinse and light sanding:
So, breaking into brazing with a MAP torch has it's issues. One of which is you have to get a lot of heat to melt the brazing rod--the MAP torch tip I have is a wide one so I couldn't concentrate the heat as tightly as an oxy/acet torch would. This left me with a black glaze on the shroud. This stuff would not come off by sanding. What's worse is that it won't accept powder coating either. All caused by too much heat.
As I read about it, I could have easily removed it right after brazing by spritzing with very hot water and the flux would shatter like glass. The alternative is to use an acid to remove it. I used Rustoleum rust remover and a wire brush. I could have used muriatic acid had it been warm enough outside, so it took a while.
Here's what we started with (I had this all over the place):
After about 20 minutes:
After 40 minutes:
And then a thorough rinse and light sanding:
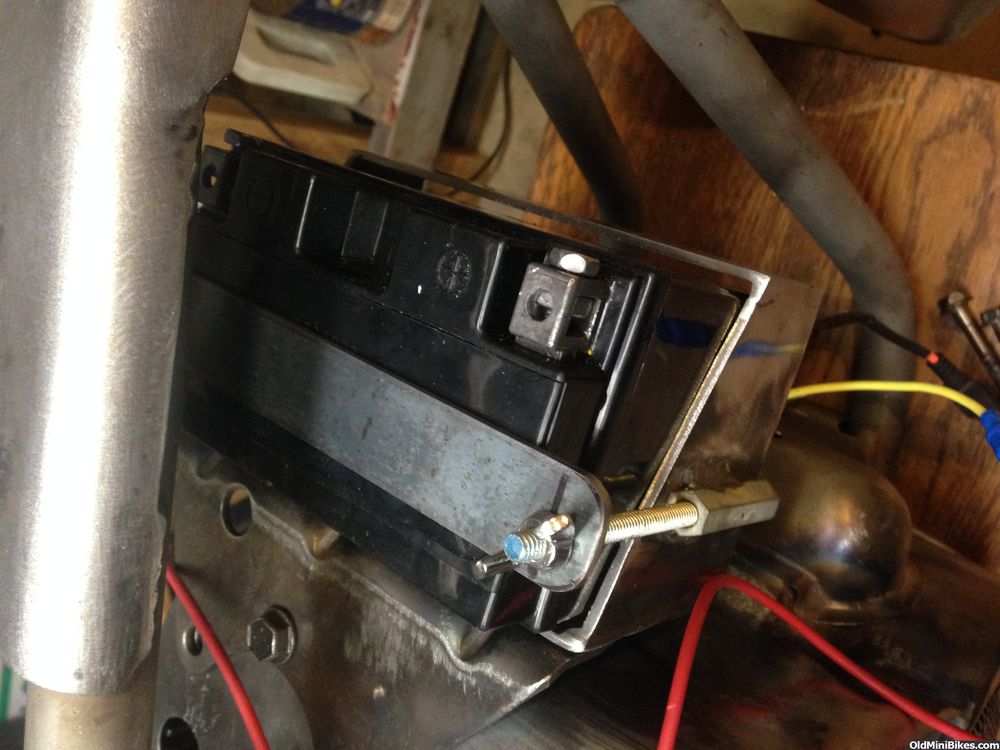
Got the bike somewhat assembled to test systems this morning before the rain, sleet and snow hit. One of things I needed to do was make sure the bike started--I knew I was going to have to replace the carb as the main jet is bottomed out and I knew it would not sustain full throttle without burping a lot. For this test, I left the existing China carb on.
To test the system, I started first with the diode. The manual says it should put out about 18-20 volts for it to test good. Once running, I used my multimeter and checked voltages at the blade fuse and, sure enough, got 19 volts at low idle. The next step was to check the voltage regulator. I first checked the voltage at the AC output from the stator and, at idle, I was getting about 8 volts at low idle and was right where it should be. I checked for output by wiring in a car lightbulb after the switch, and sure enough, it turned right on. The bulb does get brighter as I revved the engine up, but I think the regulator will cap the voltage as it is designed for a max 13.8v output.
I made up a simple hold-down for the battery. I'll do some more work to it.
Here's the light running directly off the stator.
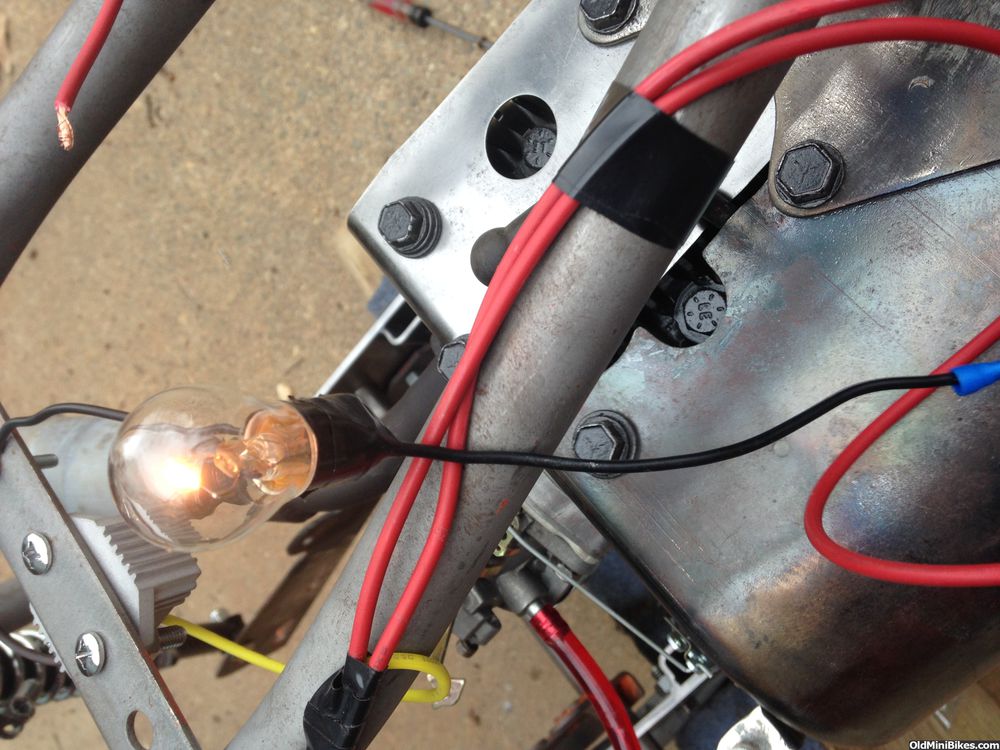
The light running off the regulator after the switch.
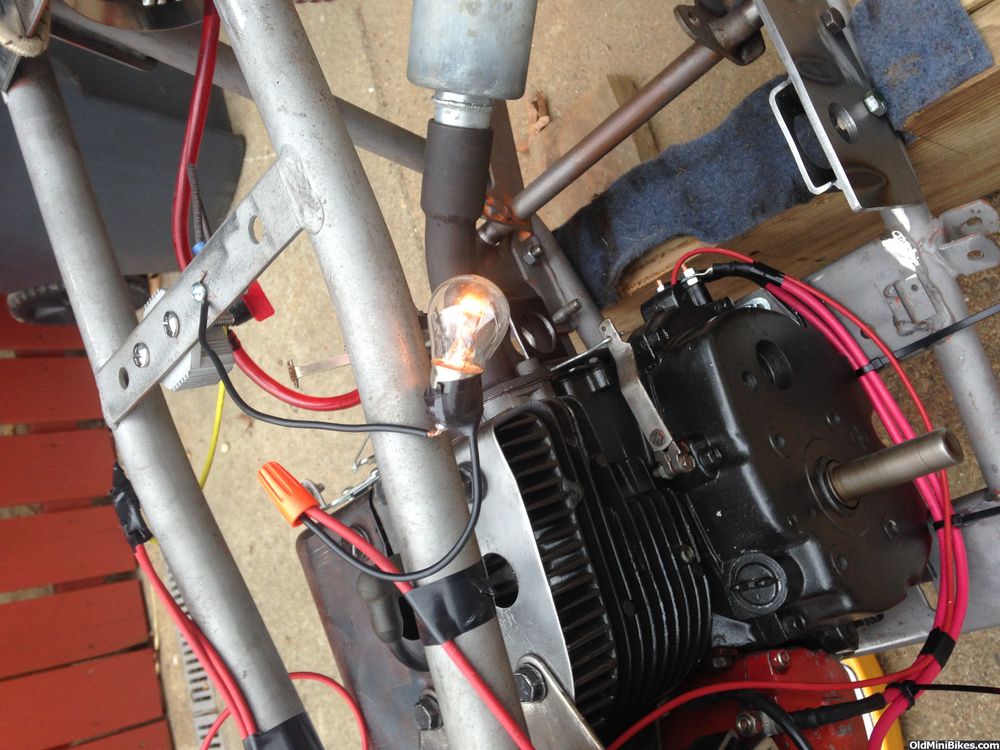
Here's a video of the engine being started and running at high idle. I purposefully set the idle up to get a decent voltage reading. Now, I can break down the bike and start the finish work. Oh, and by the way, you'll hear our Boxer in the background most upset that he can't be outside the fence with dad.
https://youtu.be/7PkJ5ksvuoM
To test the system, I started first with the diode. The manual says it should put out about 18-20 volts for it to test good. Once running, I used my multimeter and checked voltages at the blade fuse and, sure enough, got 19 volts at low idle. The next step was to check the voltage regulator. I first checked the voltage at the AC output from the stator and, at idle, I was getting about 8 volts at low idle and was right where it should be. I checked for output by wiring in a car lightbulb after the switch, and sure enough, it turned right on. The bulb does get brighter as I revved the engine up, but I think the regulator will cap the voltage as it is designed for a max 13.8v output.
I made up a simple hold-down for the battery. I'll do some more work to it.
Here's the light running directly off the stator.
The light running off the regulator after the switch.
Here's a video of the engine being started and running at high idle. I purposefully set the idle up to get a decent voltage reading. Now, I can break down the bike and start the finish work. Oh, and by the way, you'll hear our Boxer in the background most upset that he can't be outside the fence with dad.
https://youtu.be/7PkJ5ksvuoM
Your bike is superb and the work is amazing.
The Other Doc
Doc, I am curious. Why not run the lights off of the battery using it as a ballast so there is no dimming and you can use them with the engine off? All the alternator would do is charge the battery. The battery runs the product like a car.
Your bike is superb and the work is amazing.
The Other Doc
Your bike is superb and the work is amazing.
The Other Doc
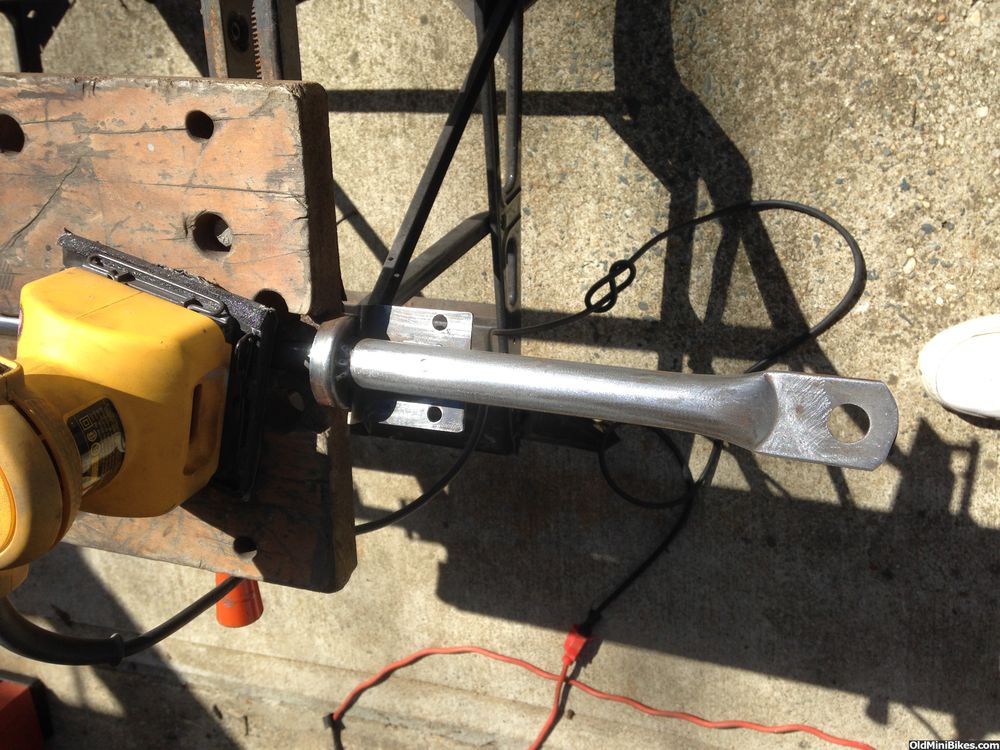
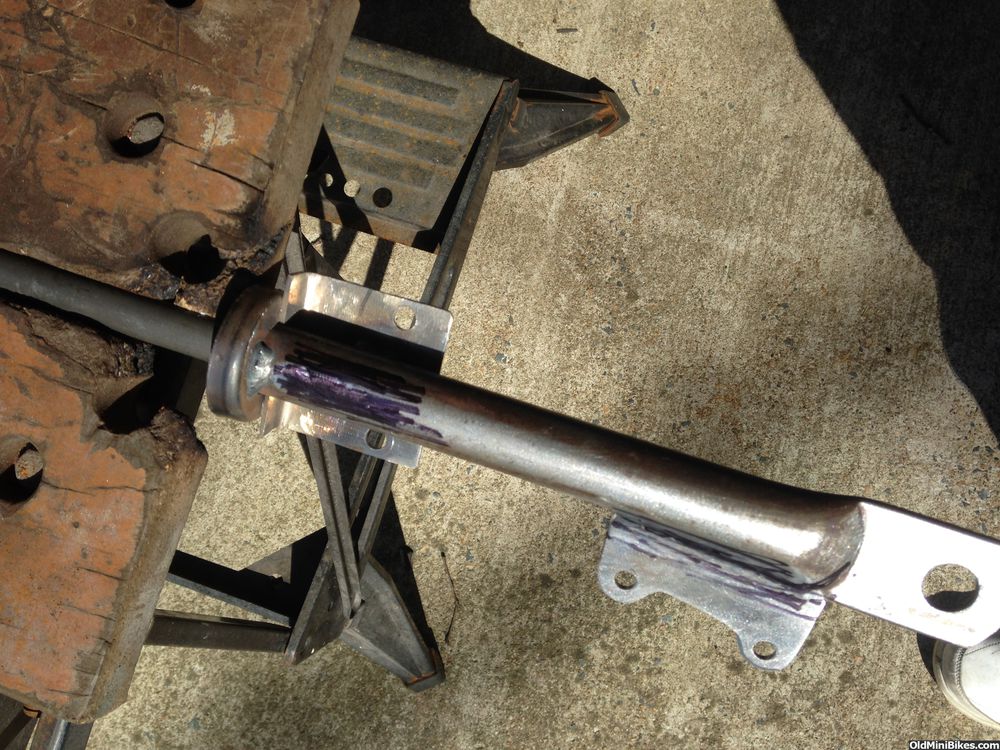
Cleaning up the little stuff...
Spent some time yesterday and today working on the frame and forks to get things cleaned up. I removed the divots on the front of the frame from the bike being dumped too many times and did the same to the forks triples (though this time with a touch of braze). The lower part of the triples was a bit mangled, so I had to twist it around a tad. I also drilled a hole in the trees for the headlight wires to pass through--it'll have a grommet. Fork lowers get cleaned up tomorrow.
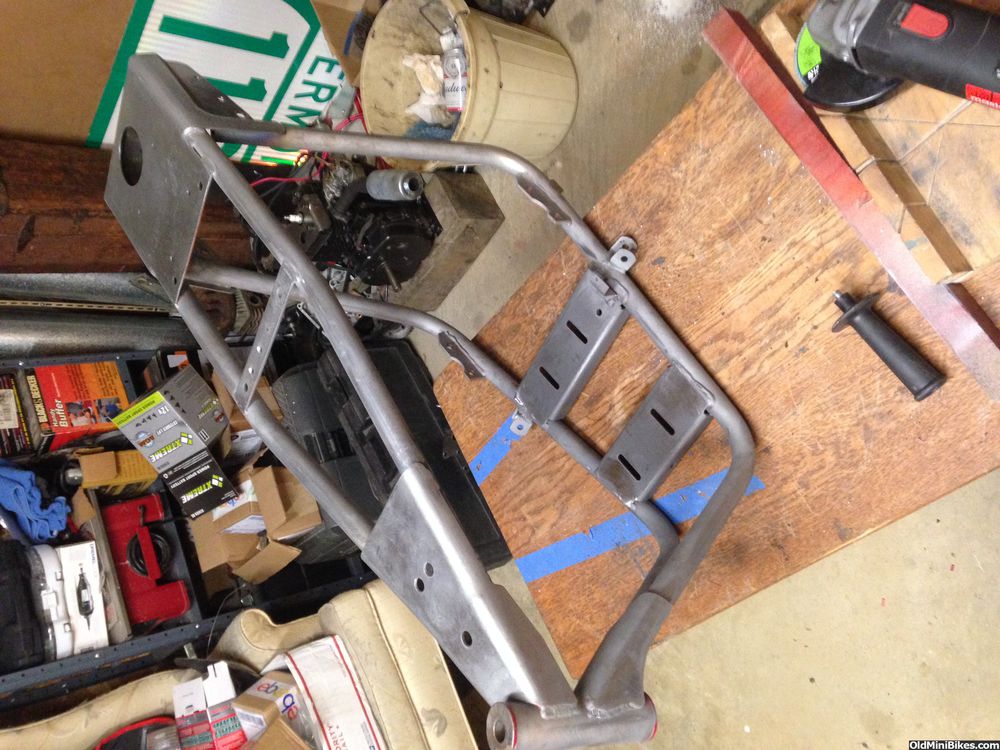
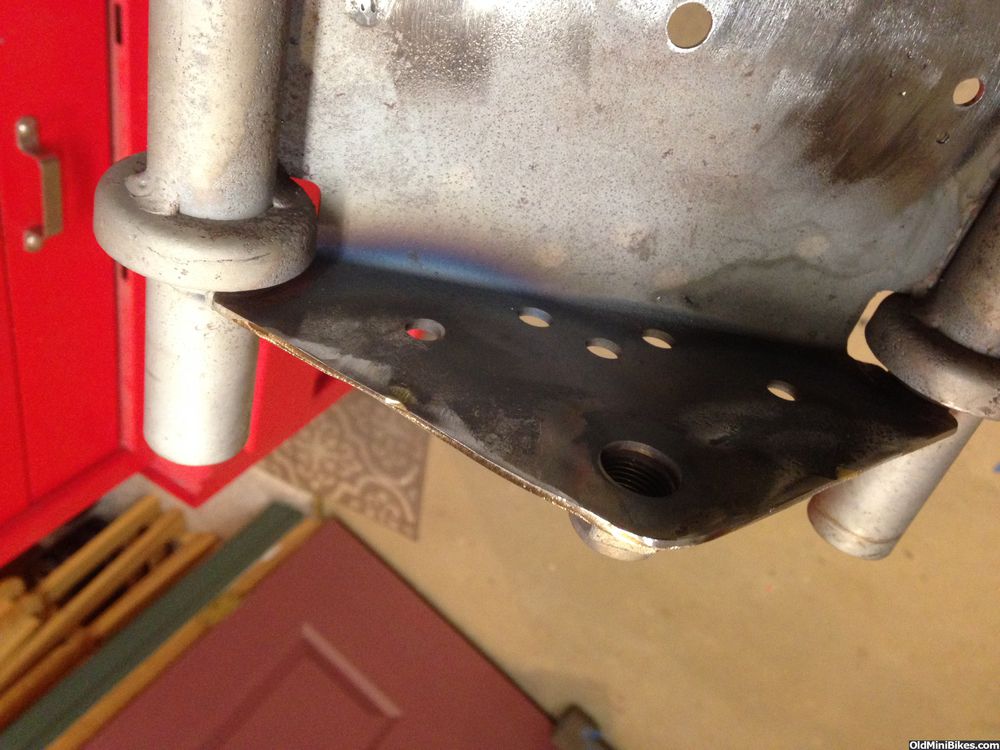
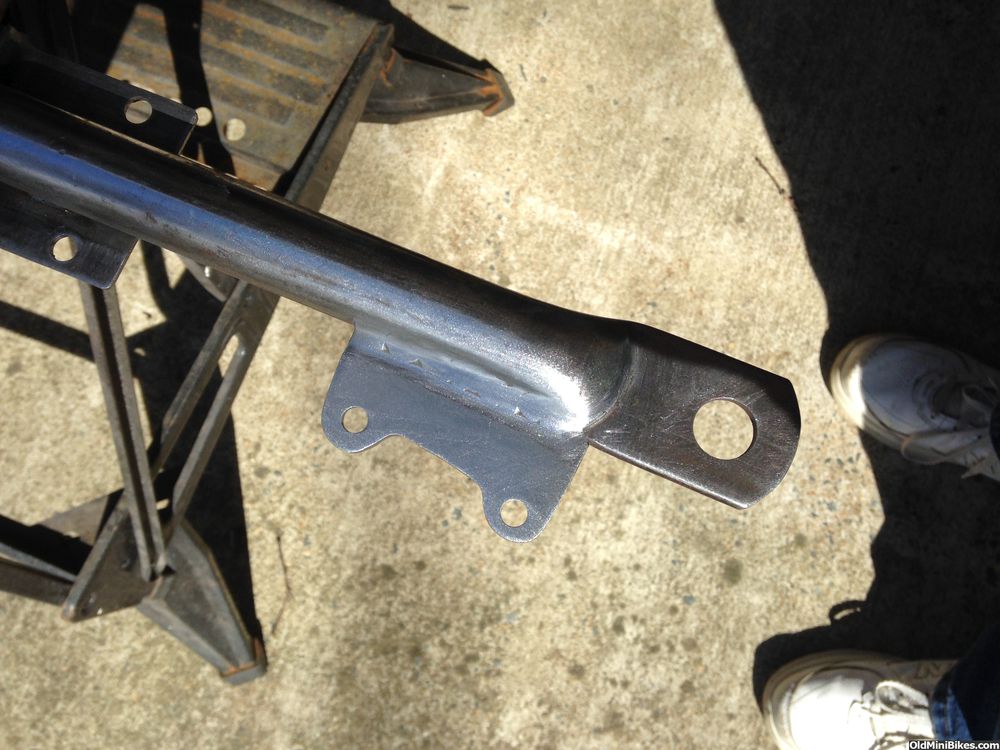
Finally, I needed to grind a bit of weld off the frame and swing arm plate to get it to fit flush to the frame tabs.

Another day or so of cleaning and she's ready for the coater.
Spent some time yesterday and today working on the frame and forks to get things cleaned up. I removed the divots on the front of the frame from the bike being dumped too many times and did the same to the forks triples (though this time with a touch of braze). The lower part of the triples was a bit mangled, so I had to twist it around a tad. I also drilled a hole in the trees for the headlight wires to pass through--it'll have a grommet. Fork lowers get cleaned up tomorrow.
Finally, I needed to grind a bit of weld off the frame and swing arm plate to get it to fit flush to the frame tabs.
Another day or so of cleaning and she's ready for the coater.
More piddling and cleaning...
Handlebars, Forks, fenders and grab handle were finished today. Lots of sanding to remove rust divots on the handlebars and forks. Nice to be outside finally.
I used a marker to locate the low spots--
This was basically carbon from heating and bending.
I know all this stuff is going to get blasted before coating...but there was just stuff I needed to clean up. Left to go are the air cleaner and the rear fender braces.
More piddling and cleaning...and a license plate bracket.
I had toyed with going with a K&N stle filter on this bike and decided not to. I sourced a V-70 air cleaner housing to allow some more air to get in. It's going to be powder coated to match the color of the bike and blower housing. It got stripped today along with an original set of rear fender braces (that I found rummaging around).
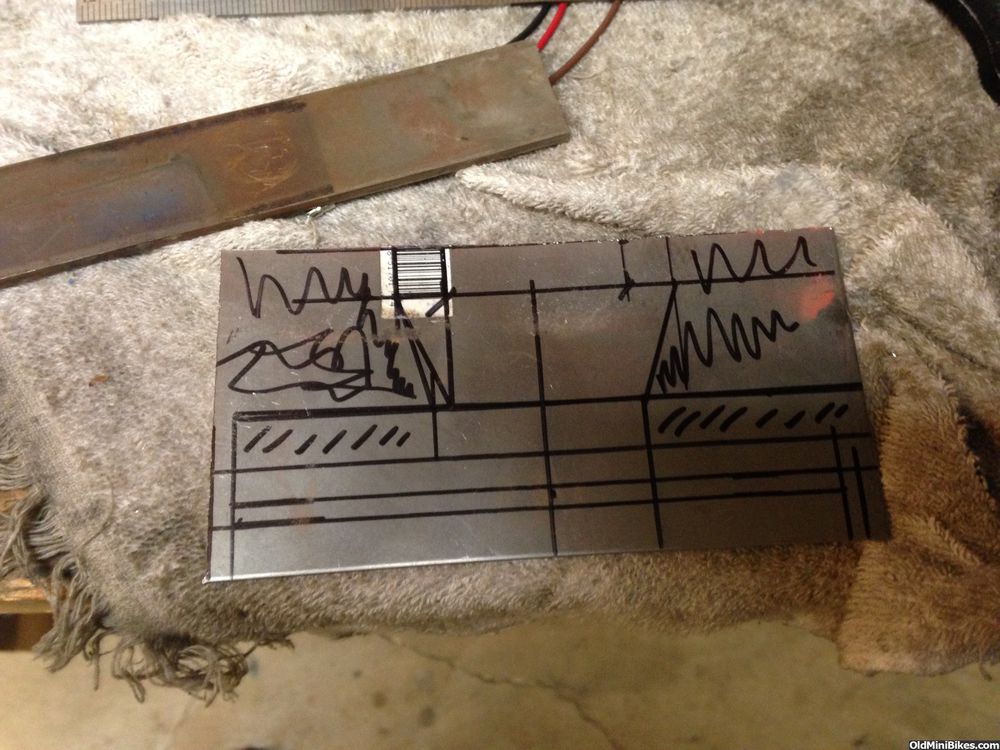
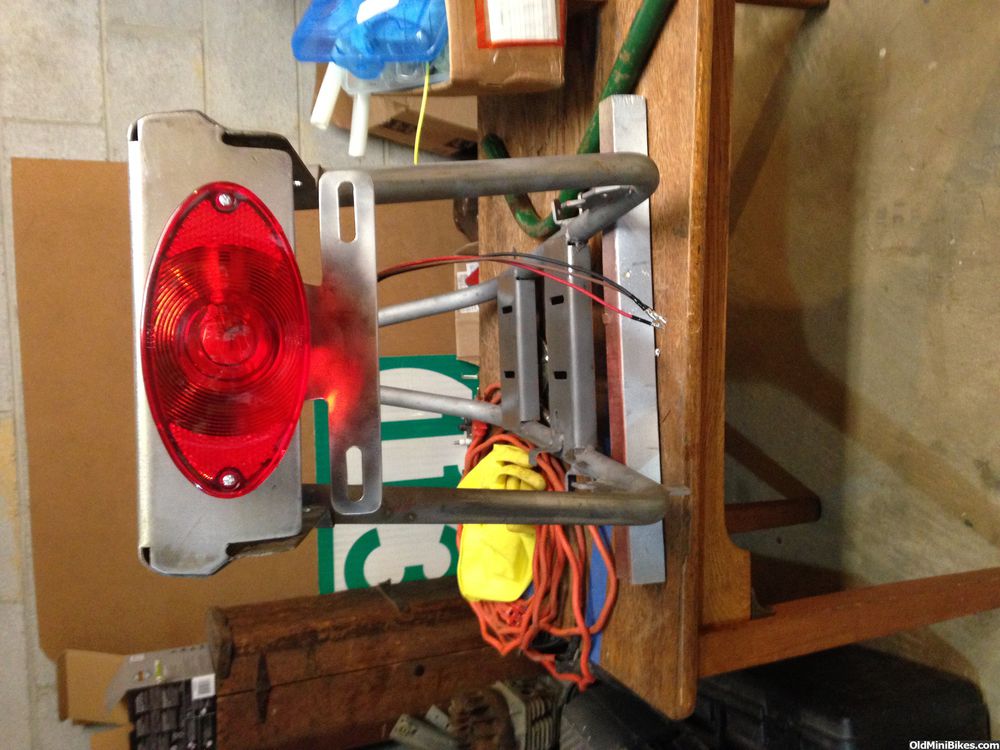
 Next up was a license plate bracket. I had a sorta template from the LED taillight I was considering using. I used thick gauge sheet metal to make this. Layout is below with waste areas marked.
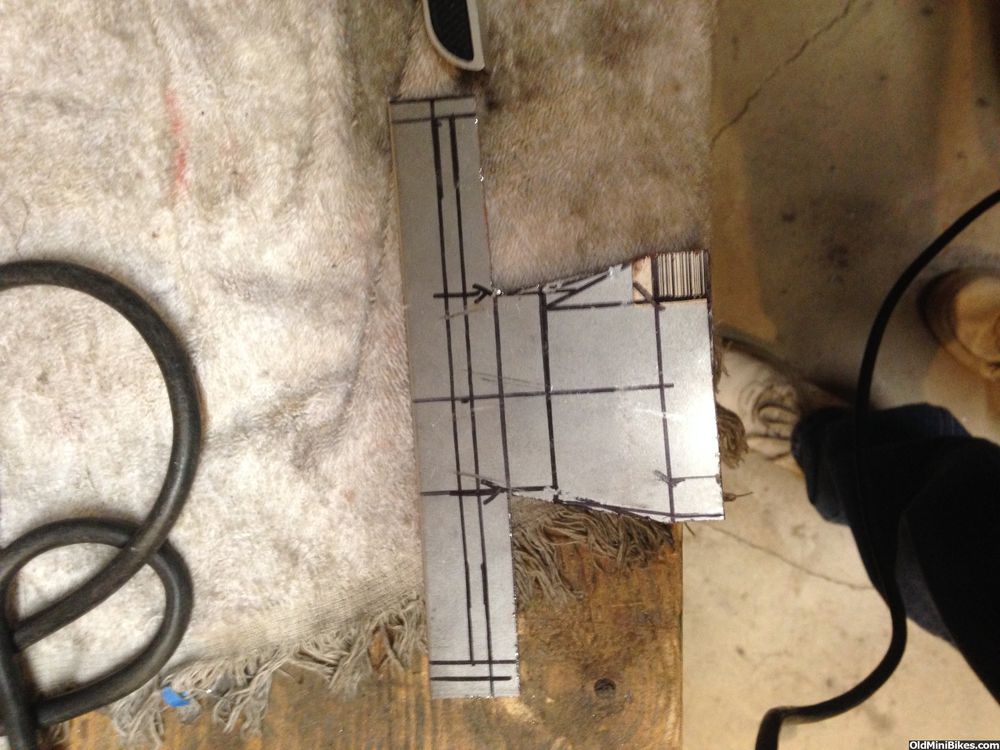
 Rough shape after cutting with the sawzall. You can see where I got the angles wrong.
I drilled holes to mount the bracket with the tail light assembly (a bit oversize to allow for adjustment). It also has an oversize hole for the taillight wire. Drilled pilot holes for the plate screws and filed them to size.
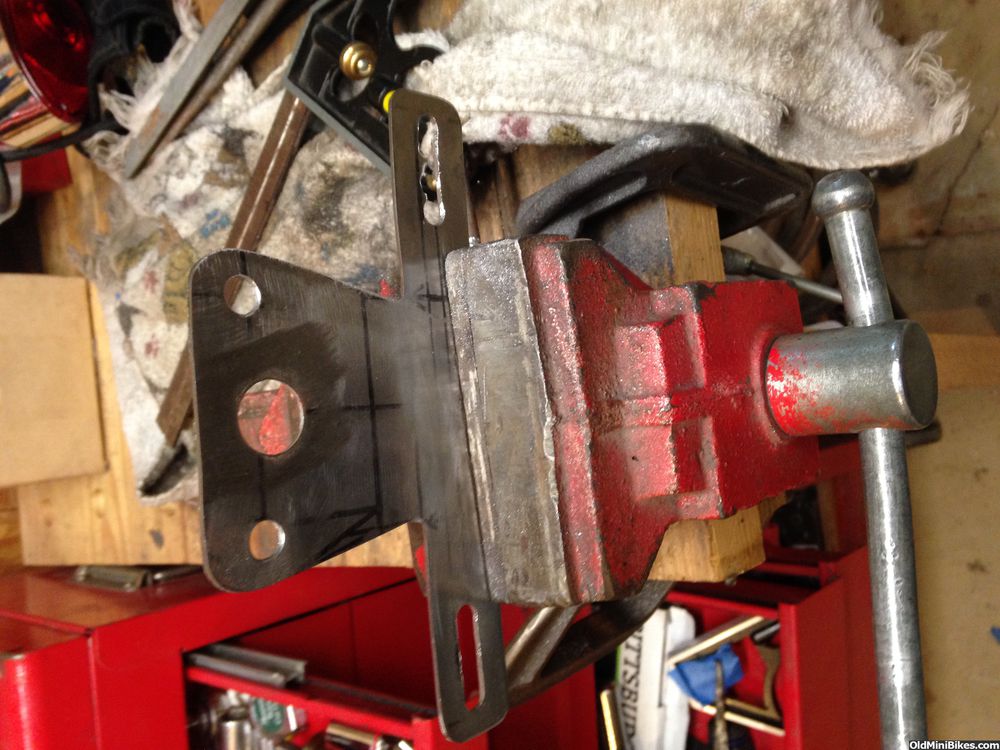
Then it was heated to bend it about 10 degrees toward the tail lamp.
 After bending:
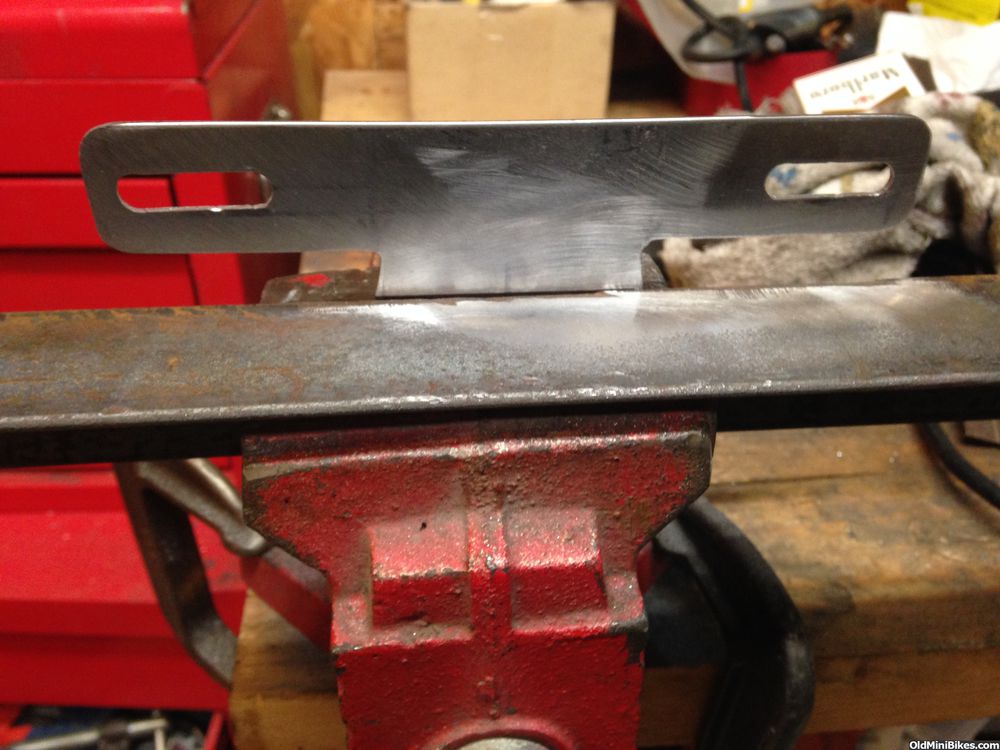
 And test fit on the frame.
Everything's ready for the powder coater....Make a trip over there tomorrow.
I had toyed with going with a K&N stle filter on this bike and decided not to. I sourced a V-70 air cleaner housing to allow some more air to get in. It's going to be powder coated to match the color of the bike and blower housing. It got stripped today along with an original set of rear fender braces (that I found rummaging around).
I drilled holes to mount the bracket with the tail light assembly (a bit oversize to allow for adjustment). It also has an oversize hole for the taillight wire. Drilled pilot holes for the plate screws and filed them to size.
Then it was heated to bend it about 10 degrees toward the tail lamp.
Everything's ready for the powder coater....Make a trip over there tomorrow.
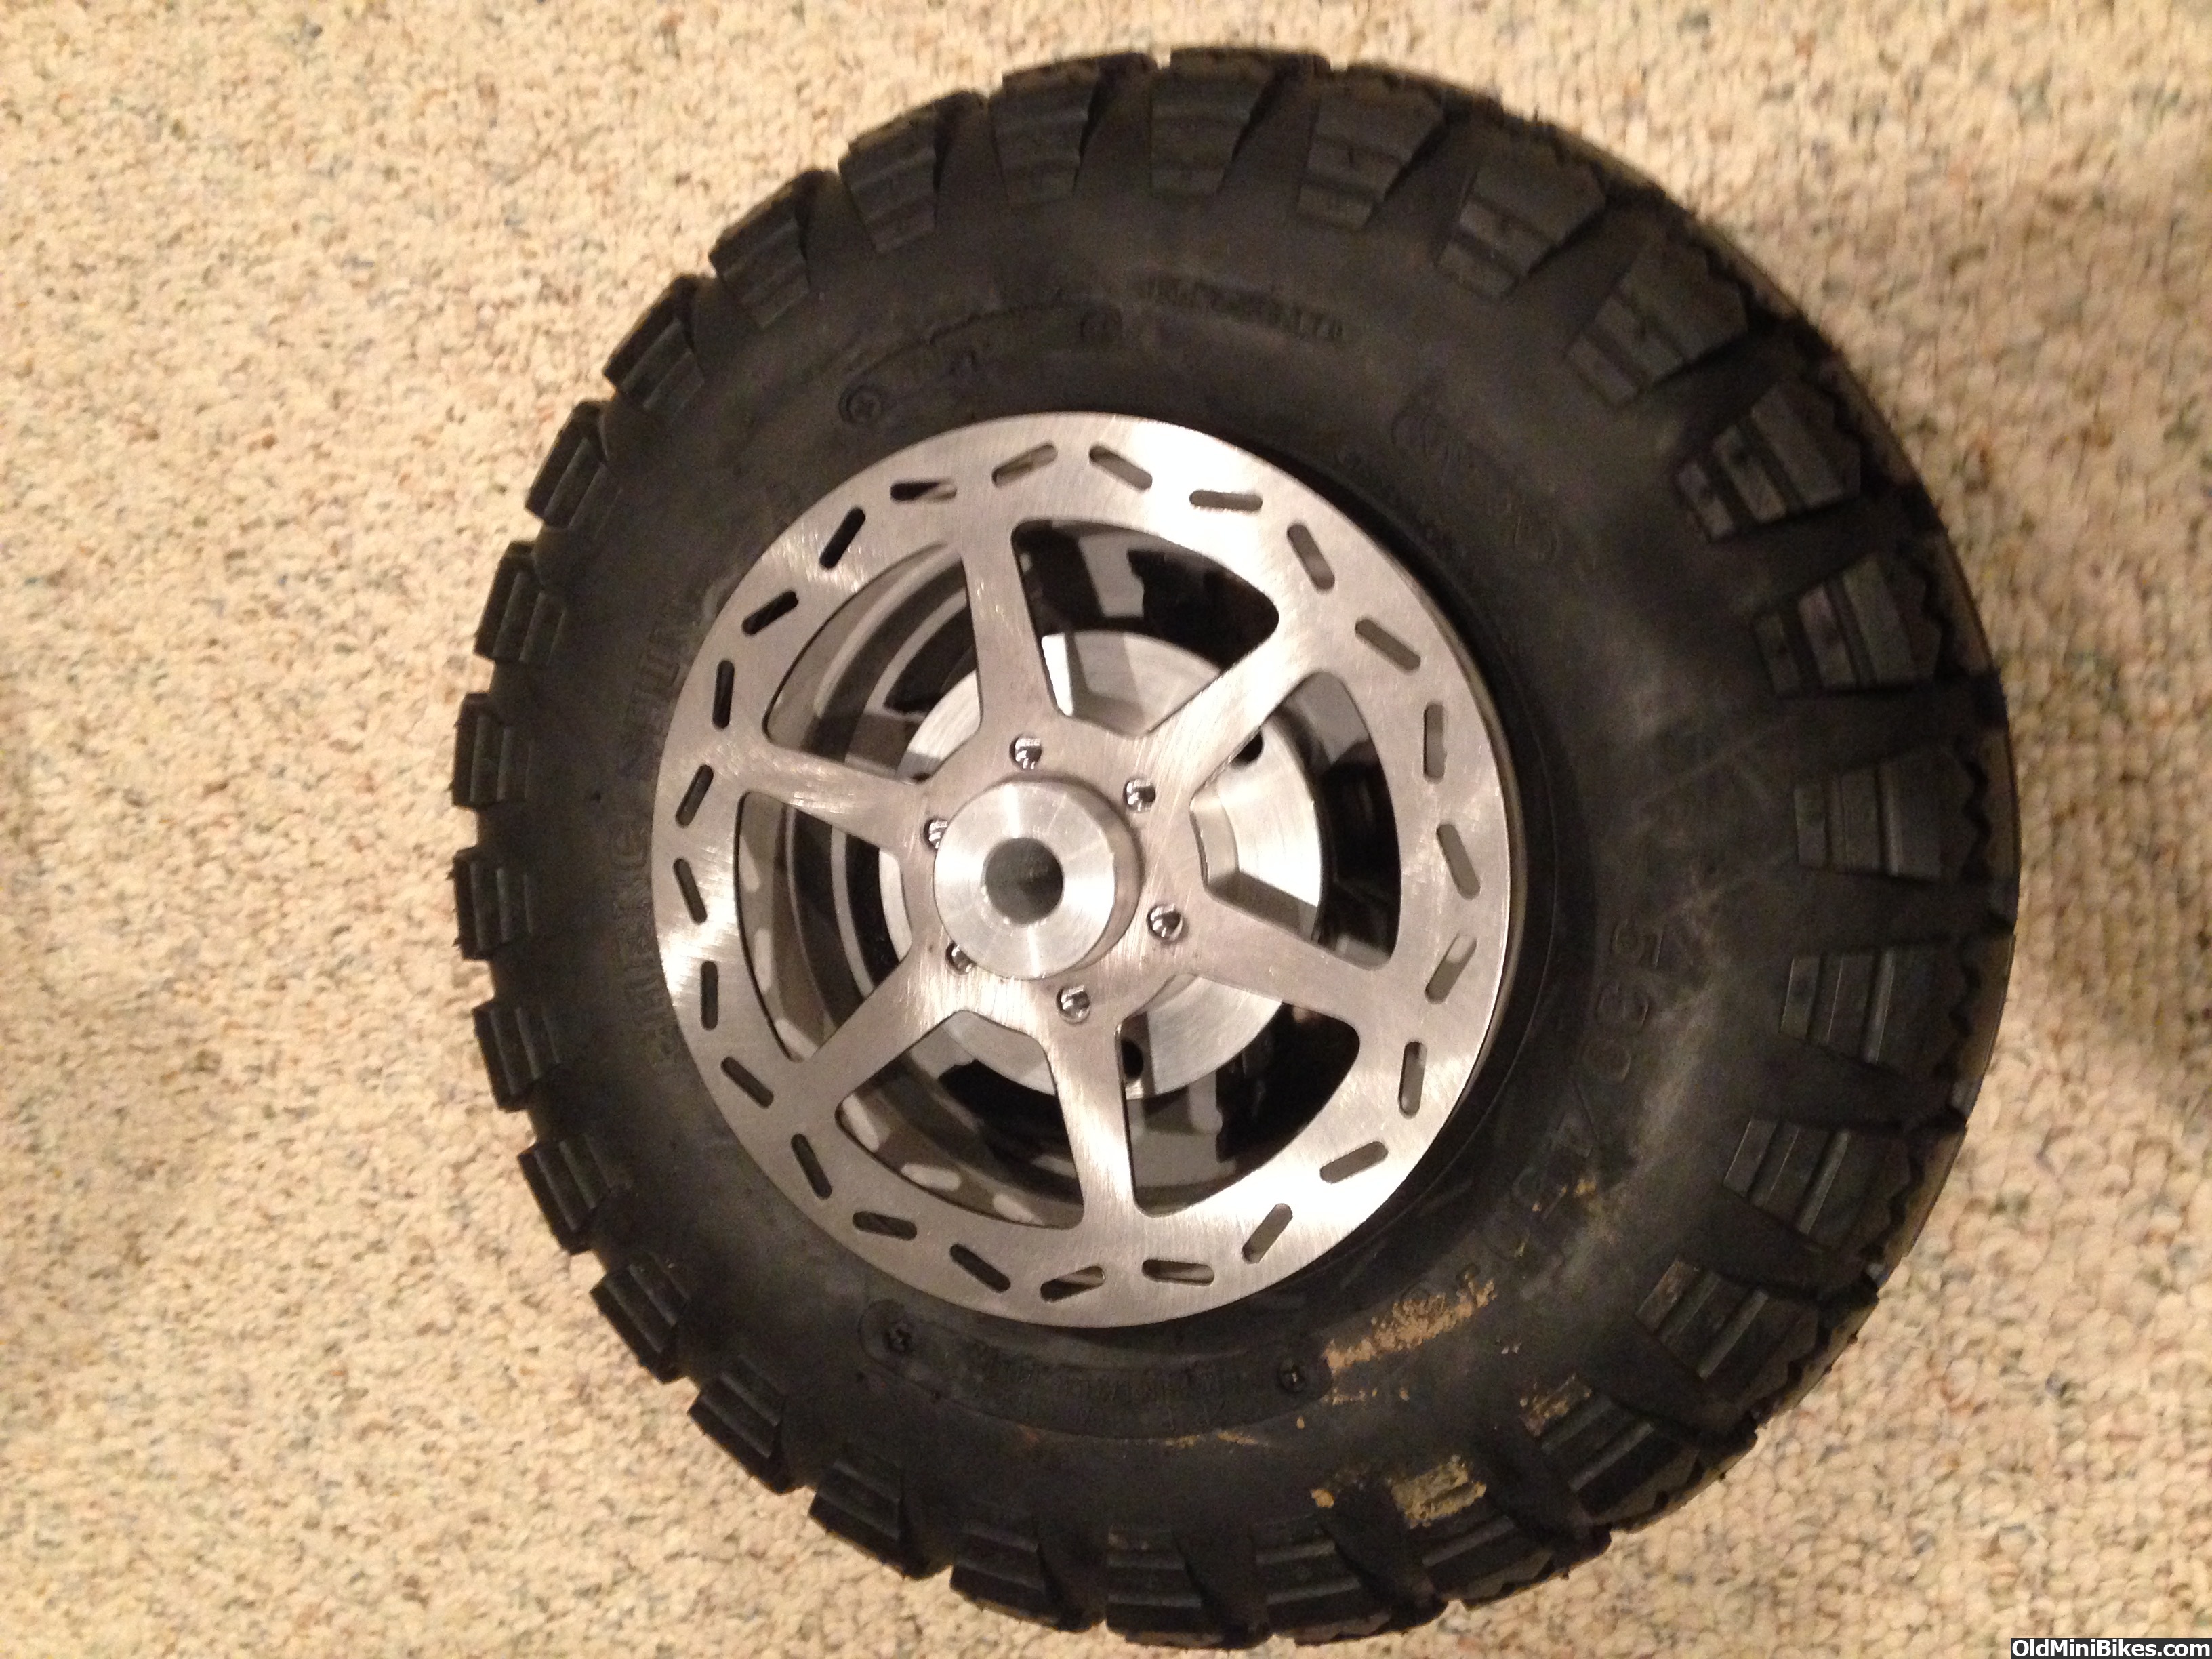
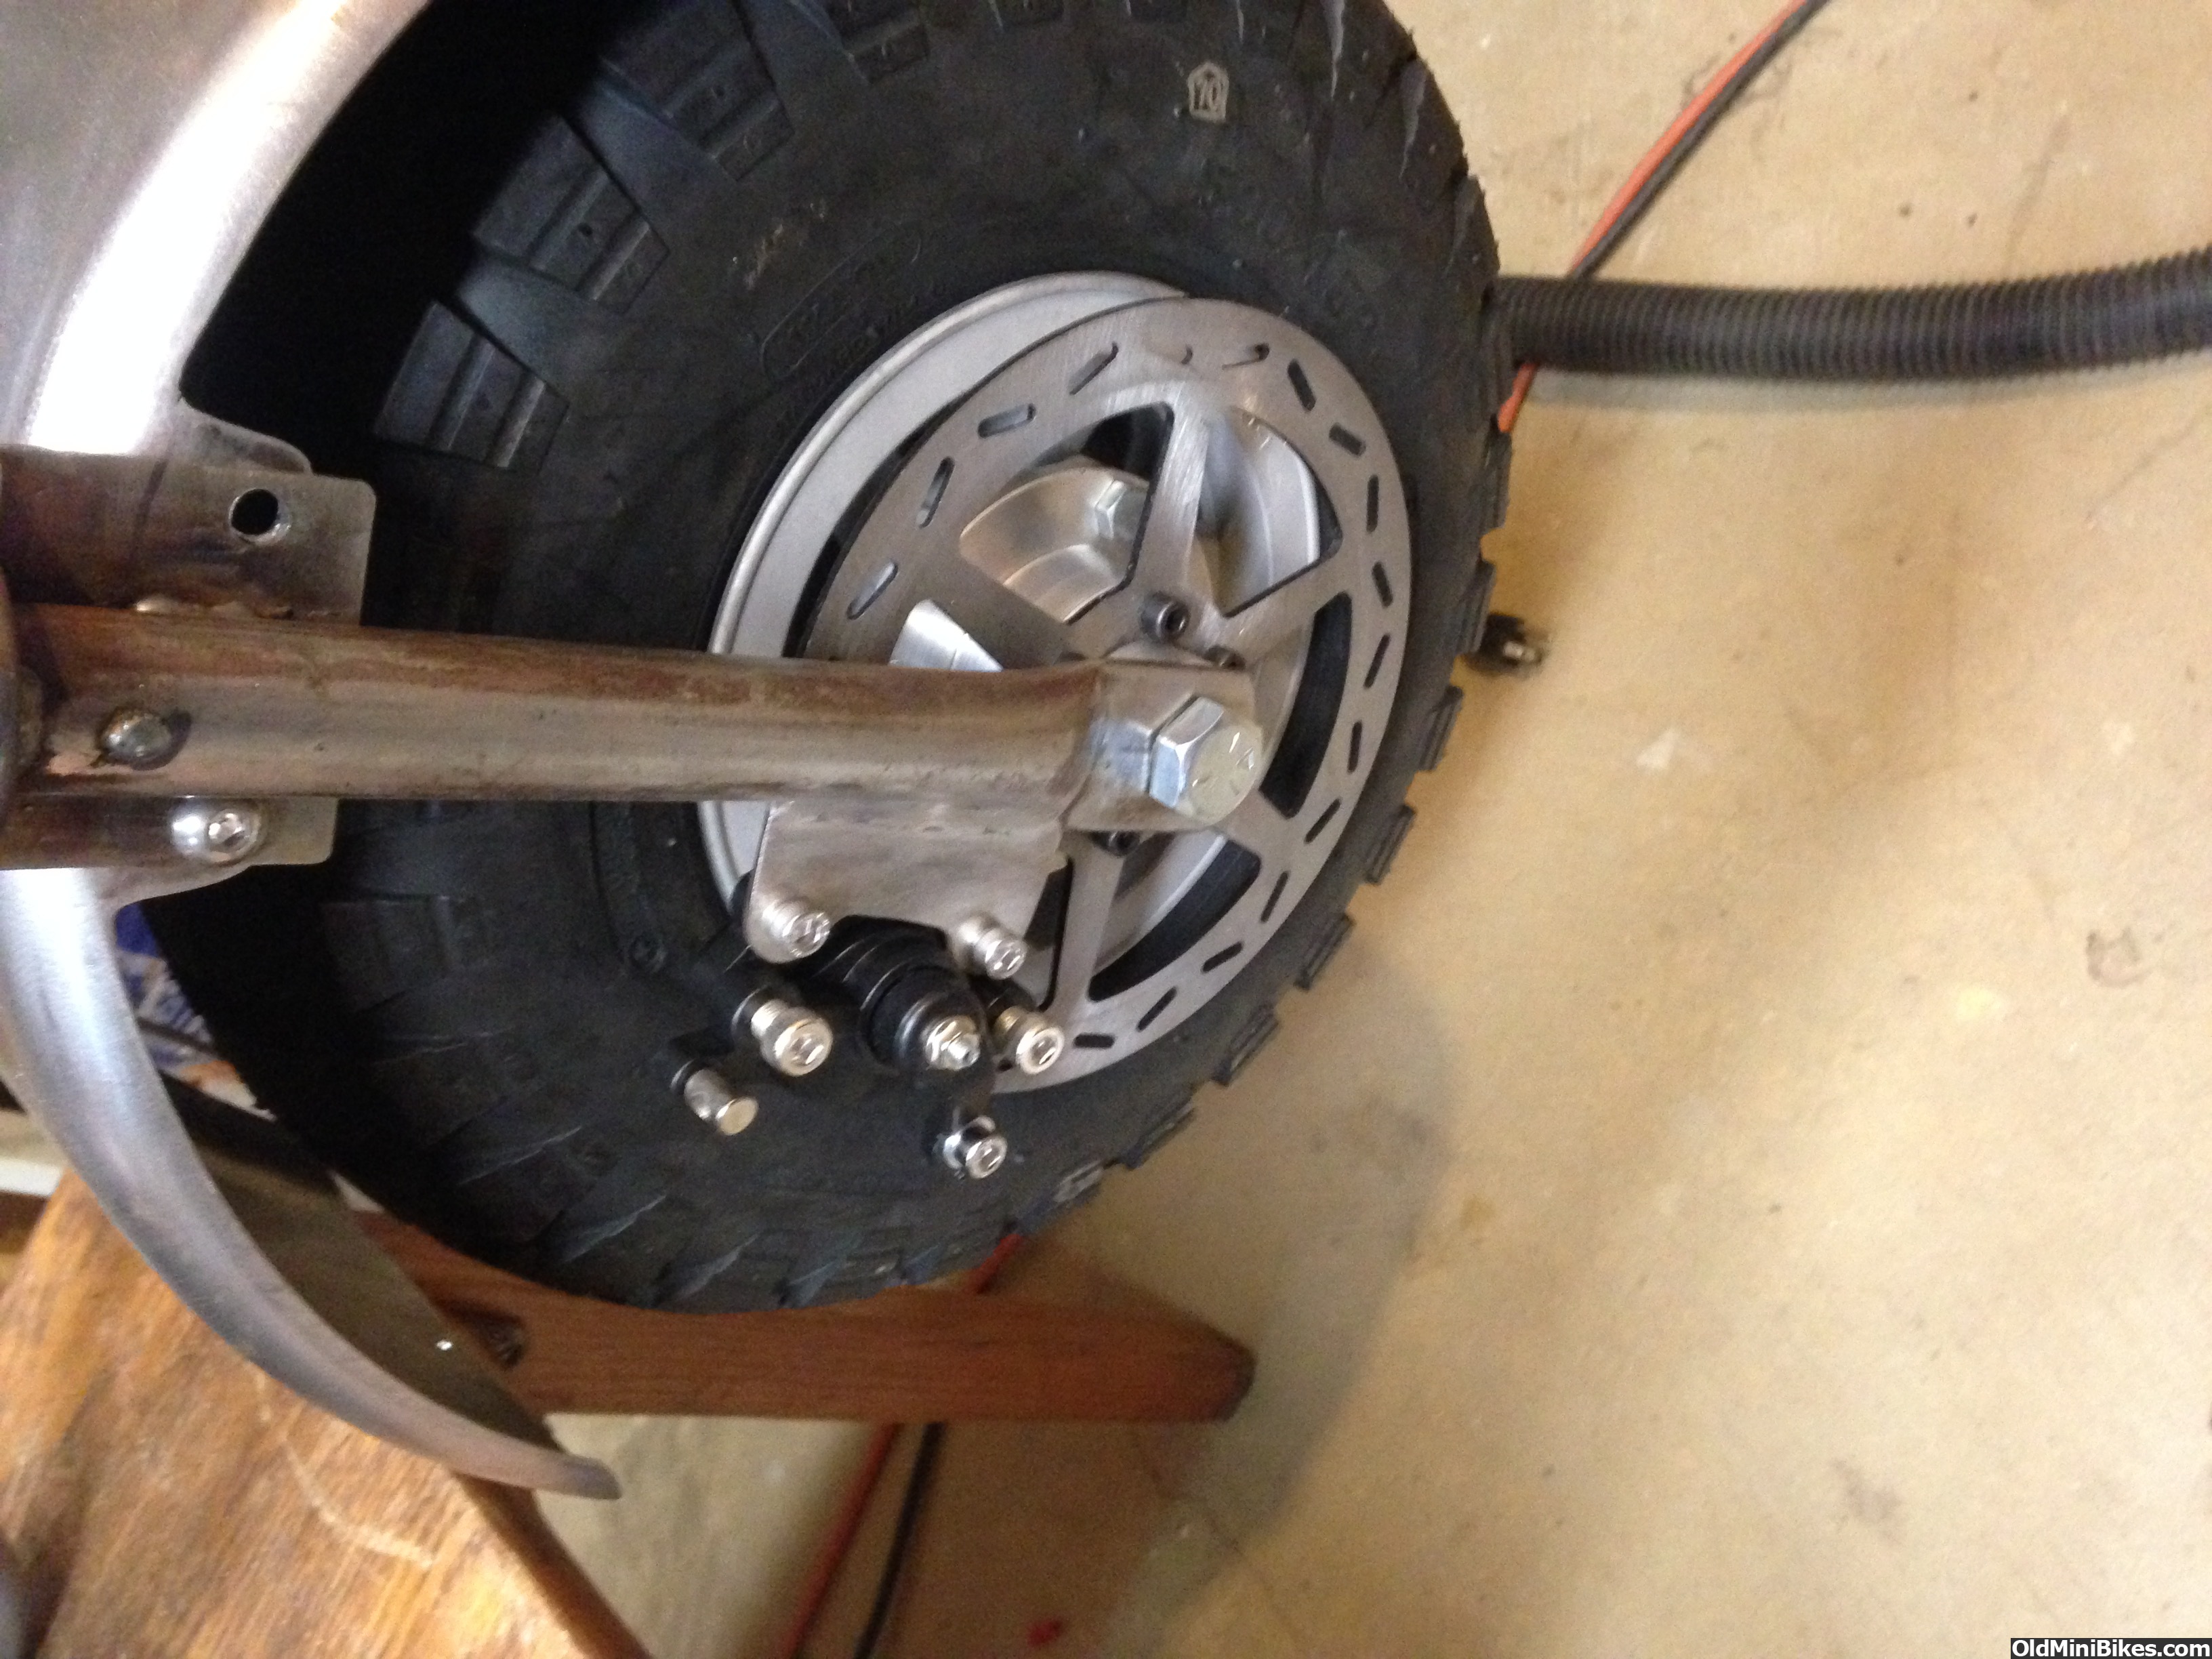
The hubs arrived today! Man, I was stoked. This was my first effort at CAD and to see how they turned out was just way cool. I used "teamxi" on eBay, got a great price and damn accurate work from them.
Here's the hub:
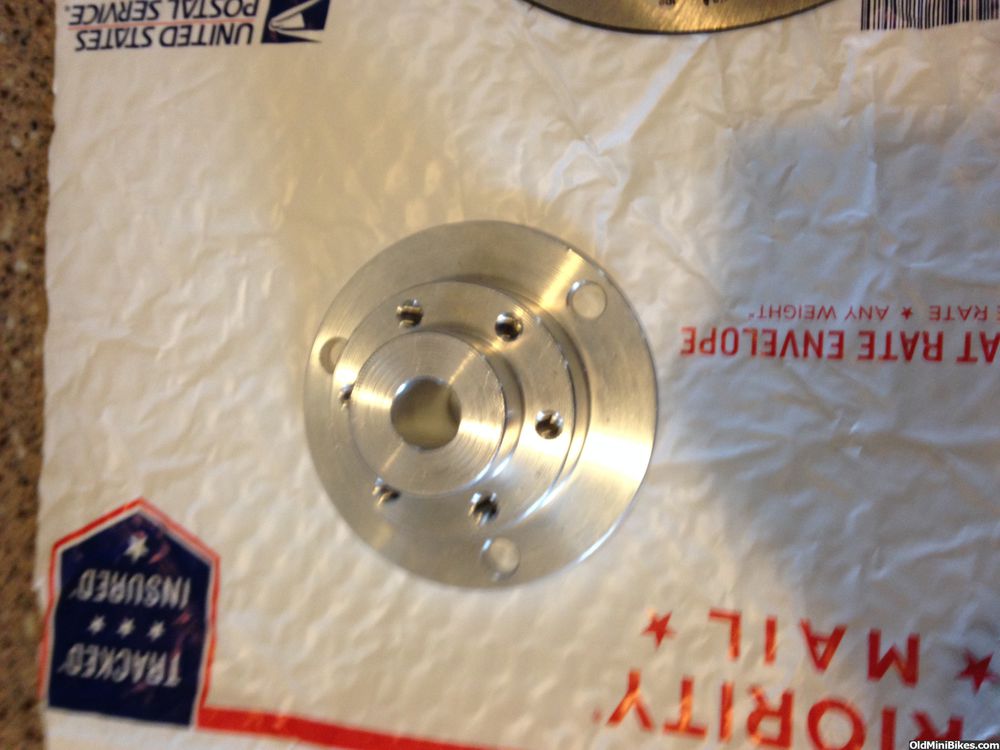
The disc is secured with 6-1/4-28 screws. The Motovox discs have really poor tolerances, so I had to work them for a bit. Both needed to have the center opened up 0.003" which I did with a grinding wheel in the drill press (about 15 min of time). Then the bolt holes were just awful, so they needed to be drilled out just a tad. But everything fit together!
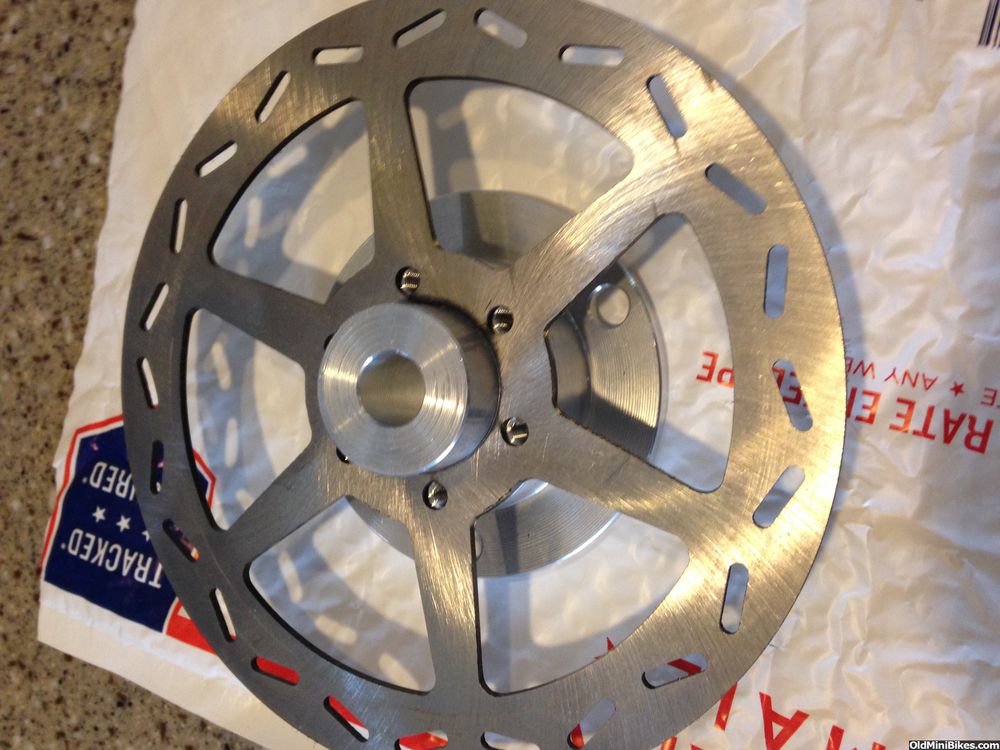
I only had time today to fit the front wheel and caliper. The hub needs to be perfectly centered on the wheel, so I used an axle just to make sure. Once it was bolted together, I did a test fit and a little grinding on the caliper mount--she's all there and works like a champ!

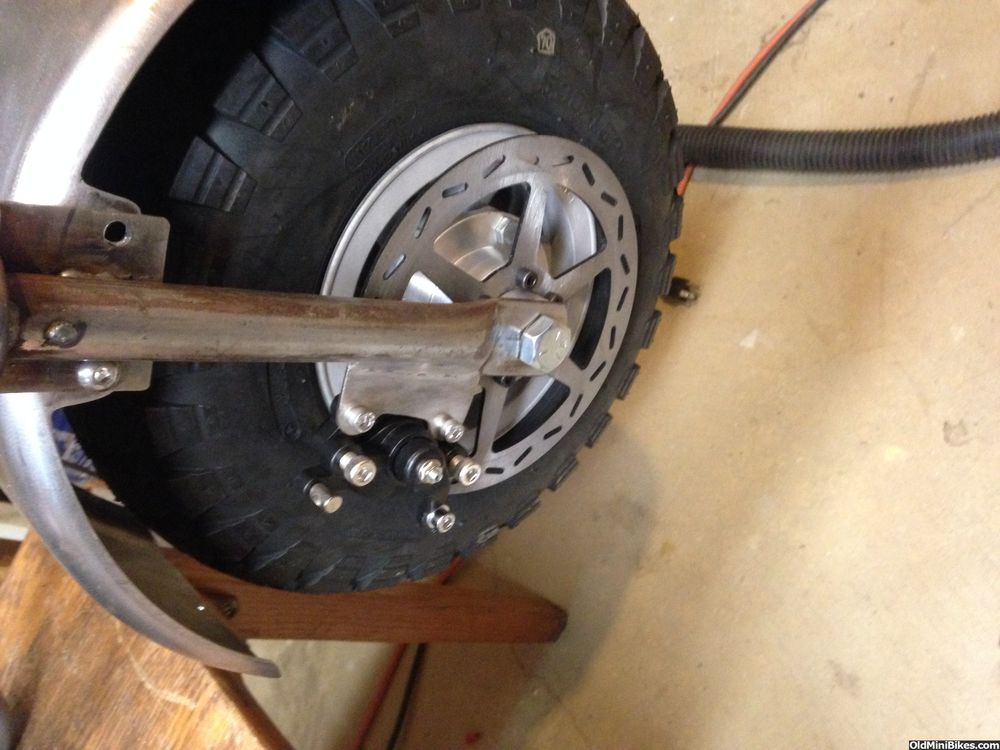
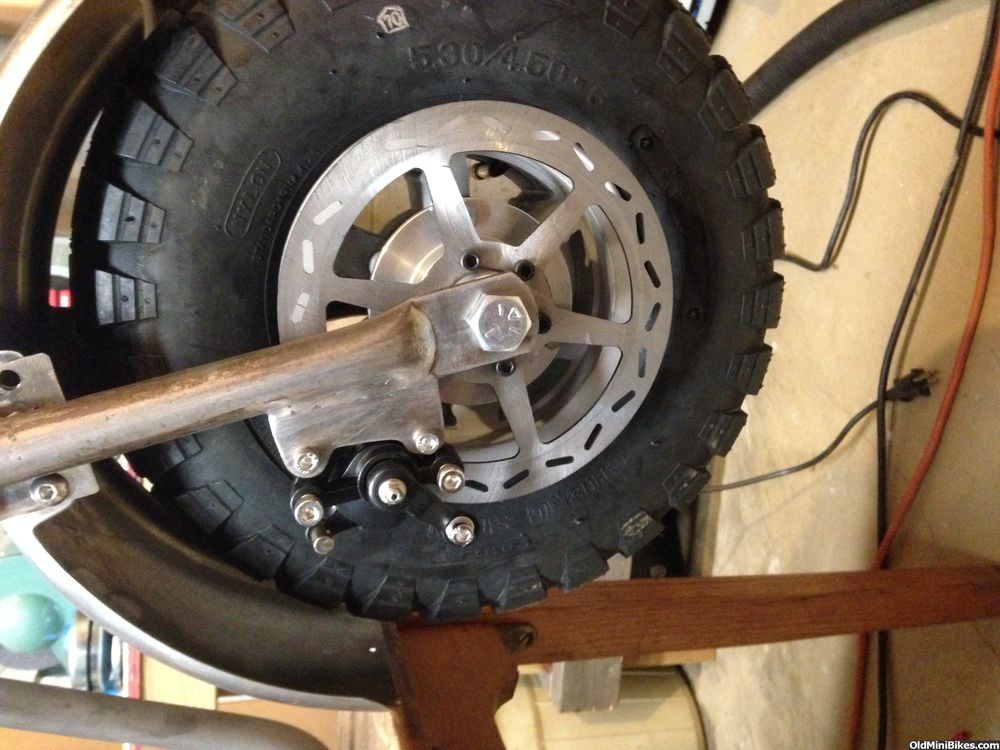
On to more electric tomorrow.....
Here's the hub:

The disc is secured with 6-1/4-28 screws. The Motovox discs have really poor tolerances, so I had to work them for a bit. Both needed to have the center opened up 0.003" which I did with a grinding wheel in the drill press (about 15 min of time). Then the bolt holes were just awful, so they needed to be drilled out just a tad. But everything fit together!

I only had time today to fit the front wheel and caliper. The hub needs to be perfectly centered on the wheel, so I used an axle just to make sure. Once it was bolted together, I did a test fit and a little grinding on the caliper mount--she's all there and works like a champ!

On to more electric tomorrow.....
It’s a cool piece but just doesn’t look like it will work well . JMO