English Wheel Build

#1
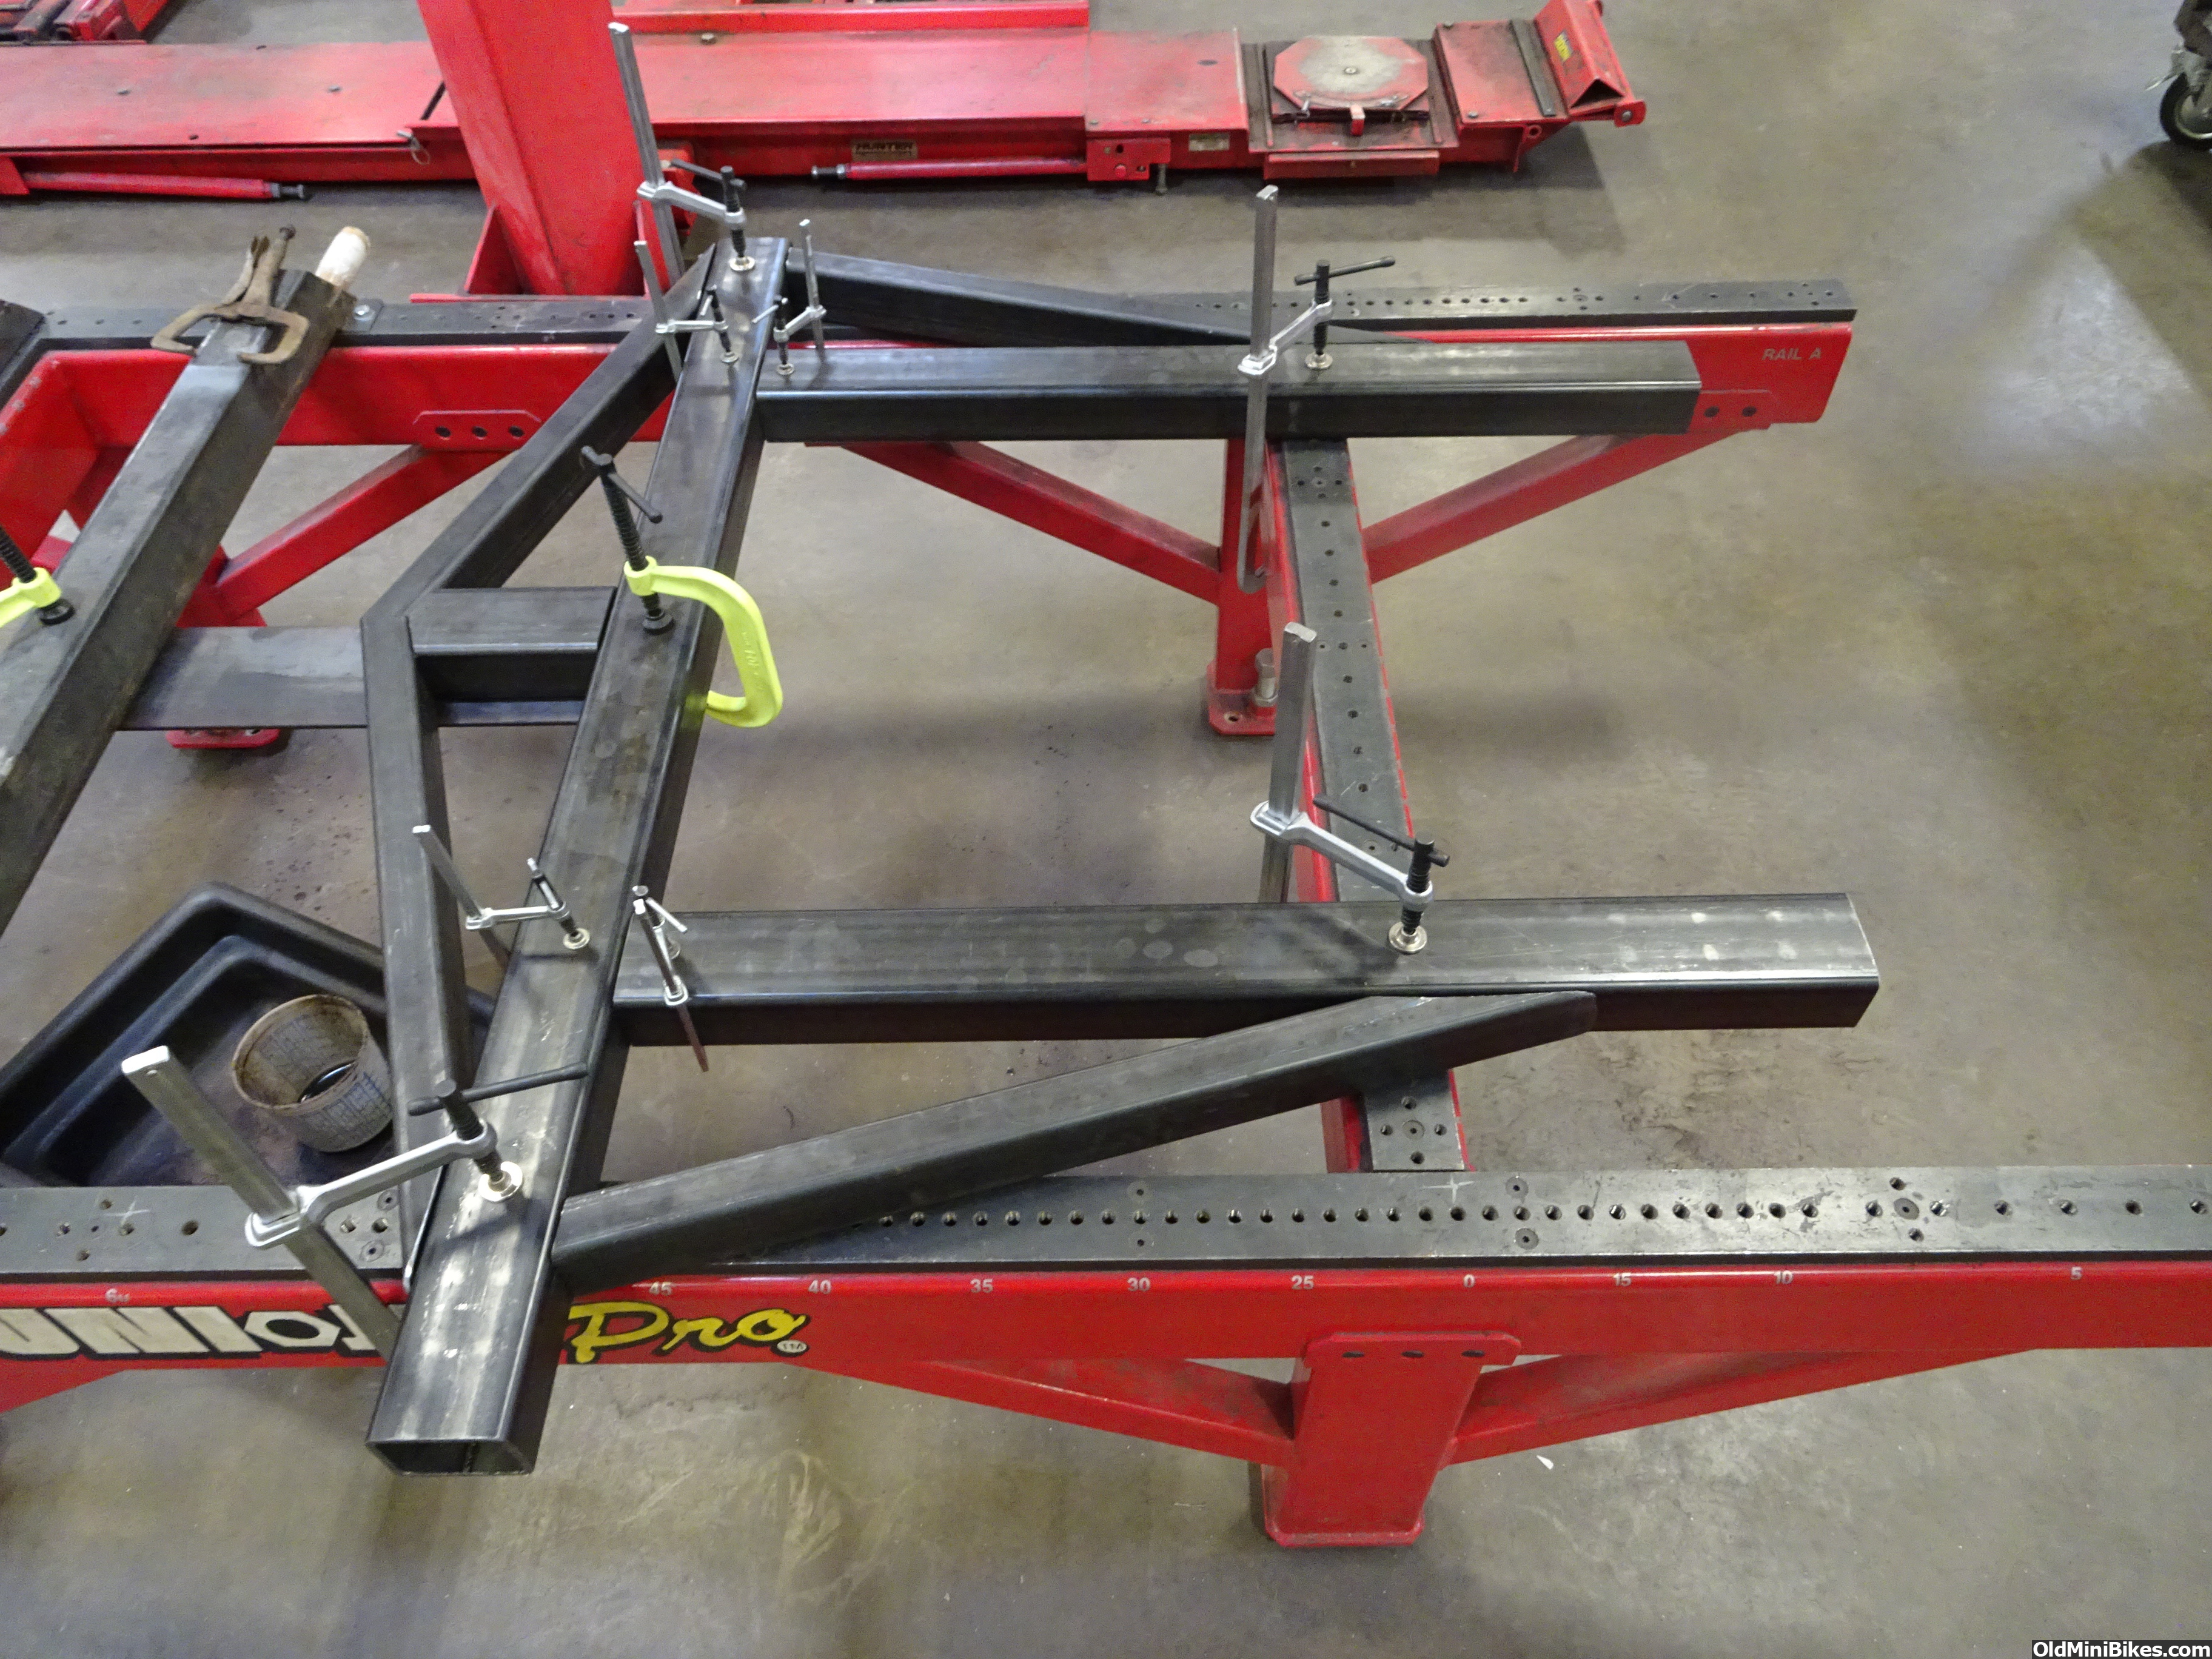
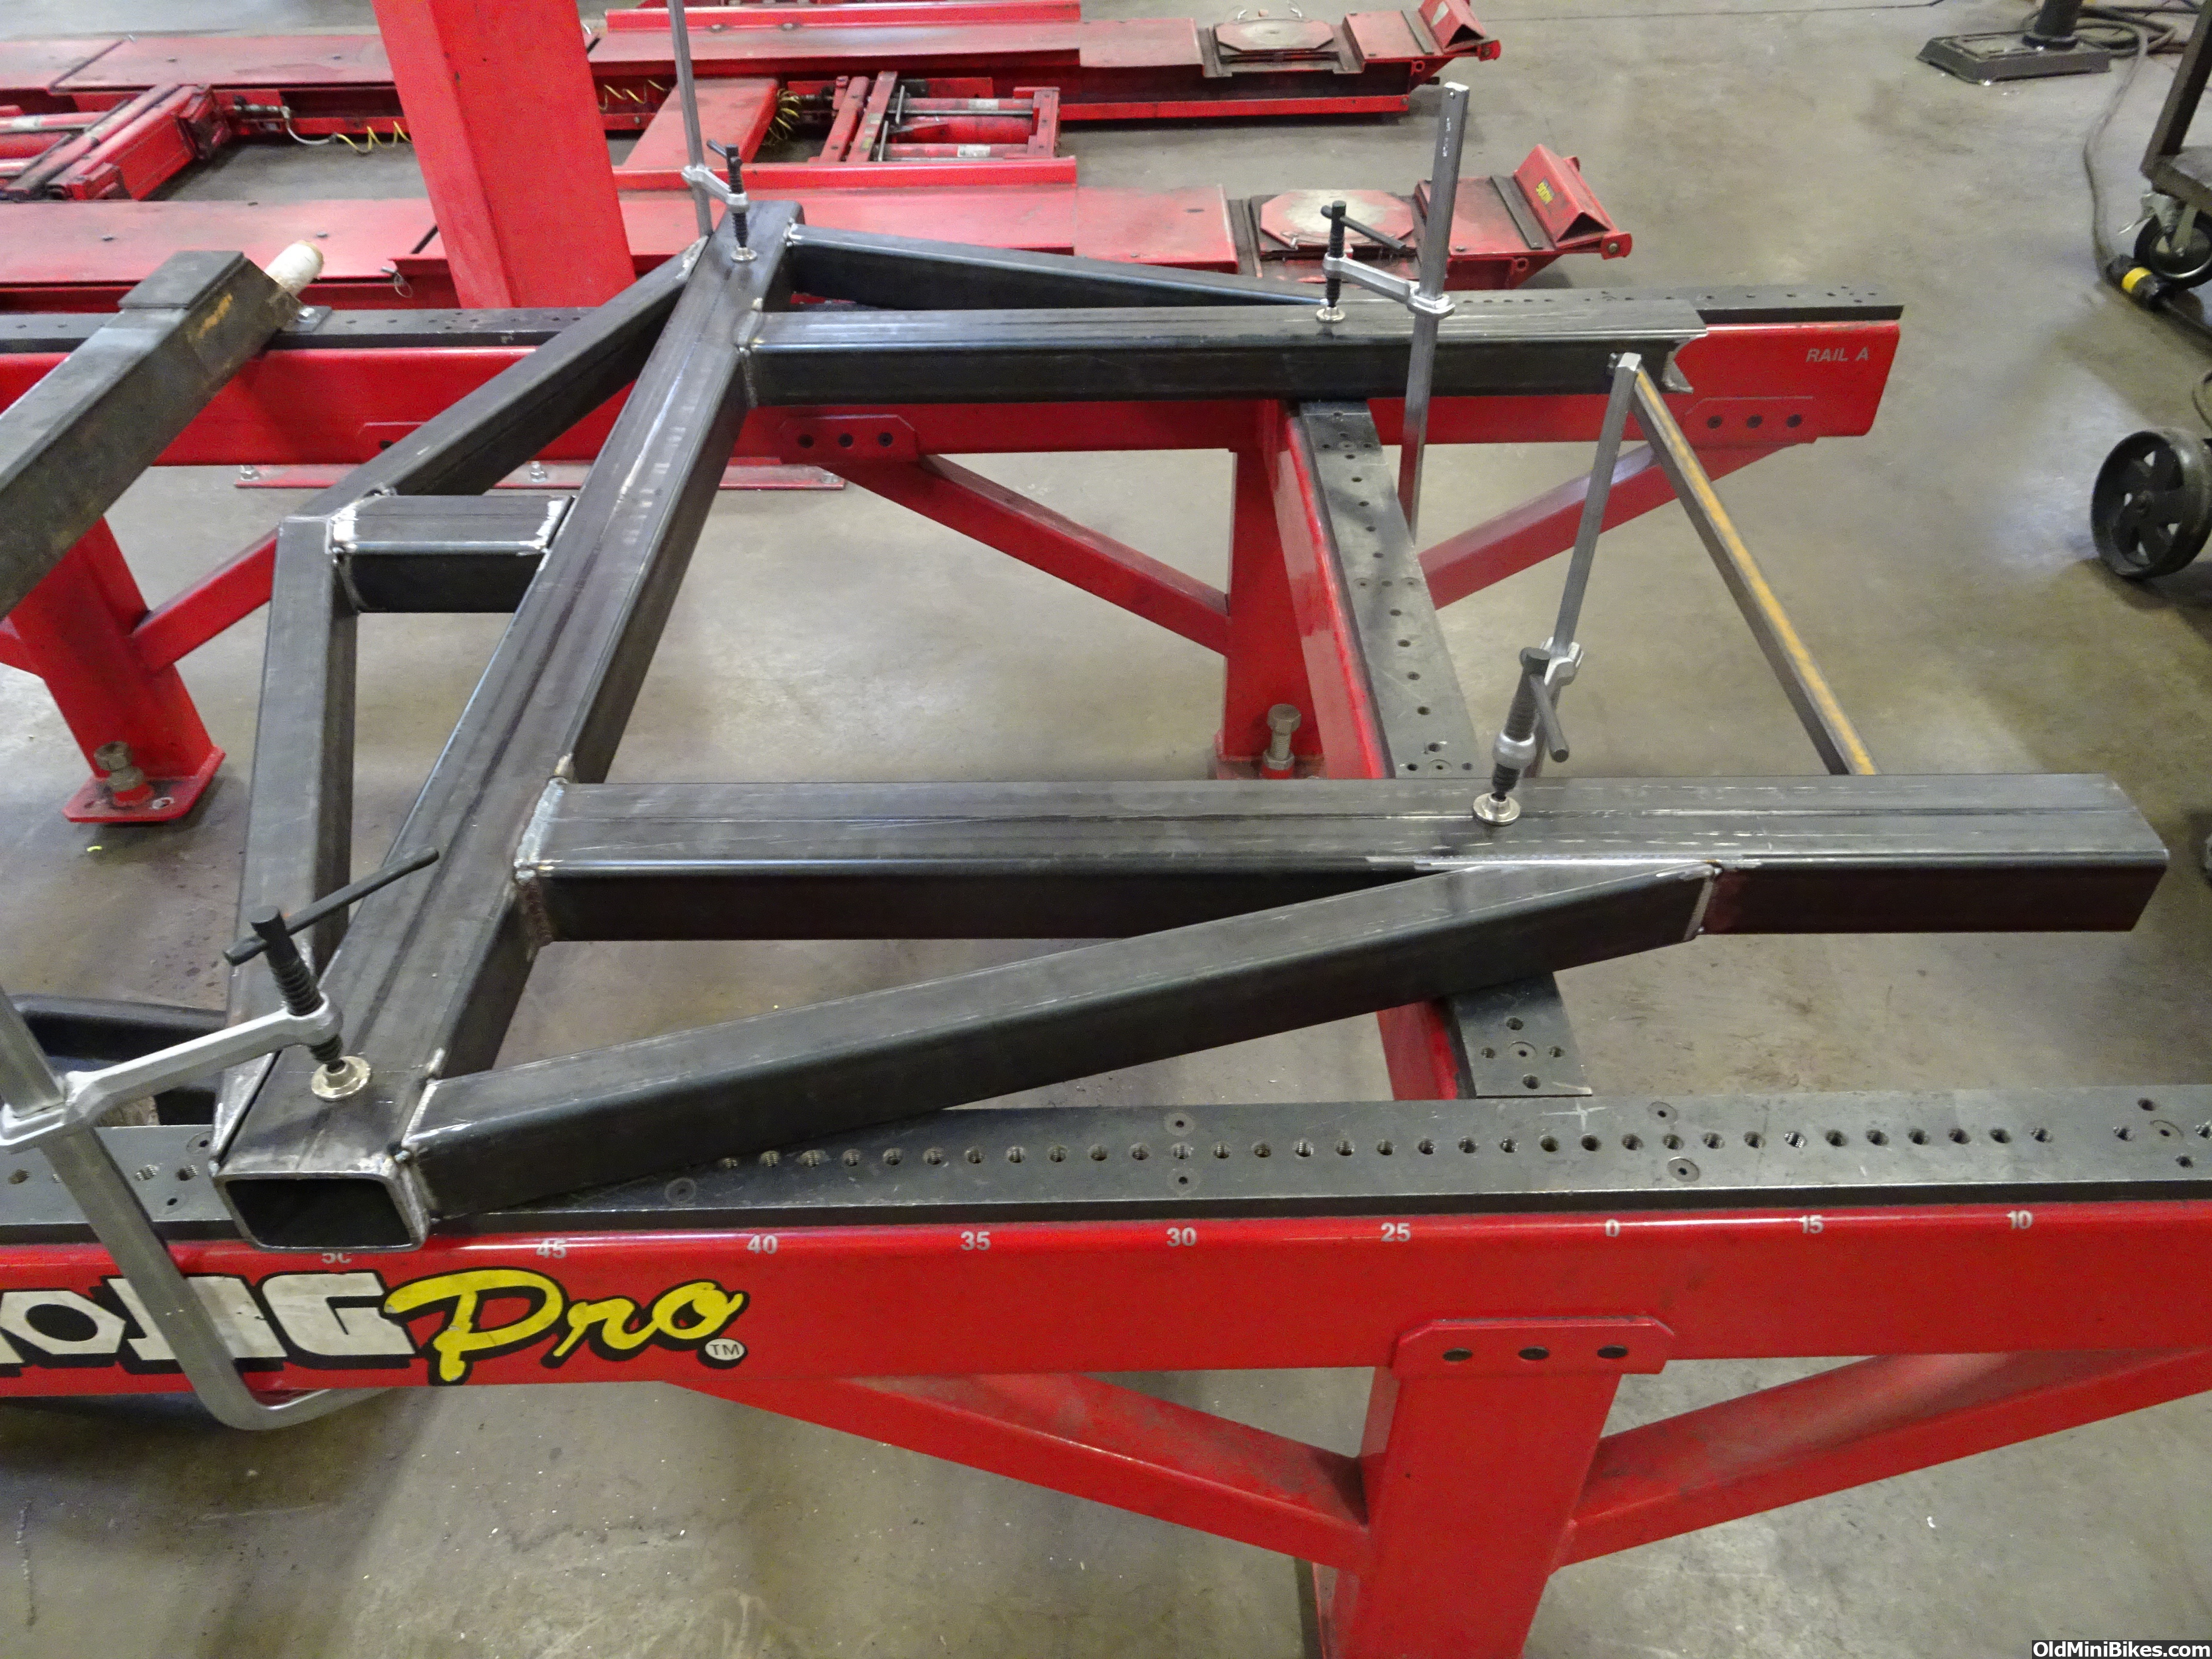
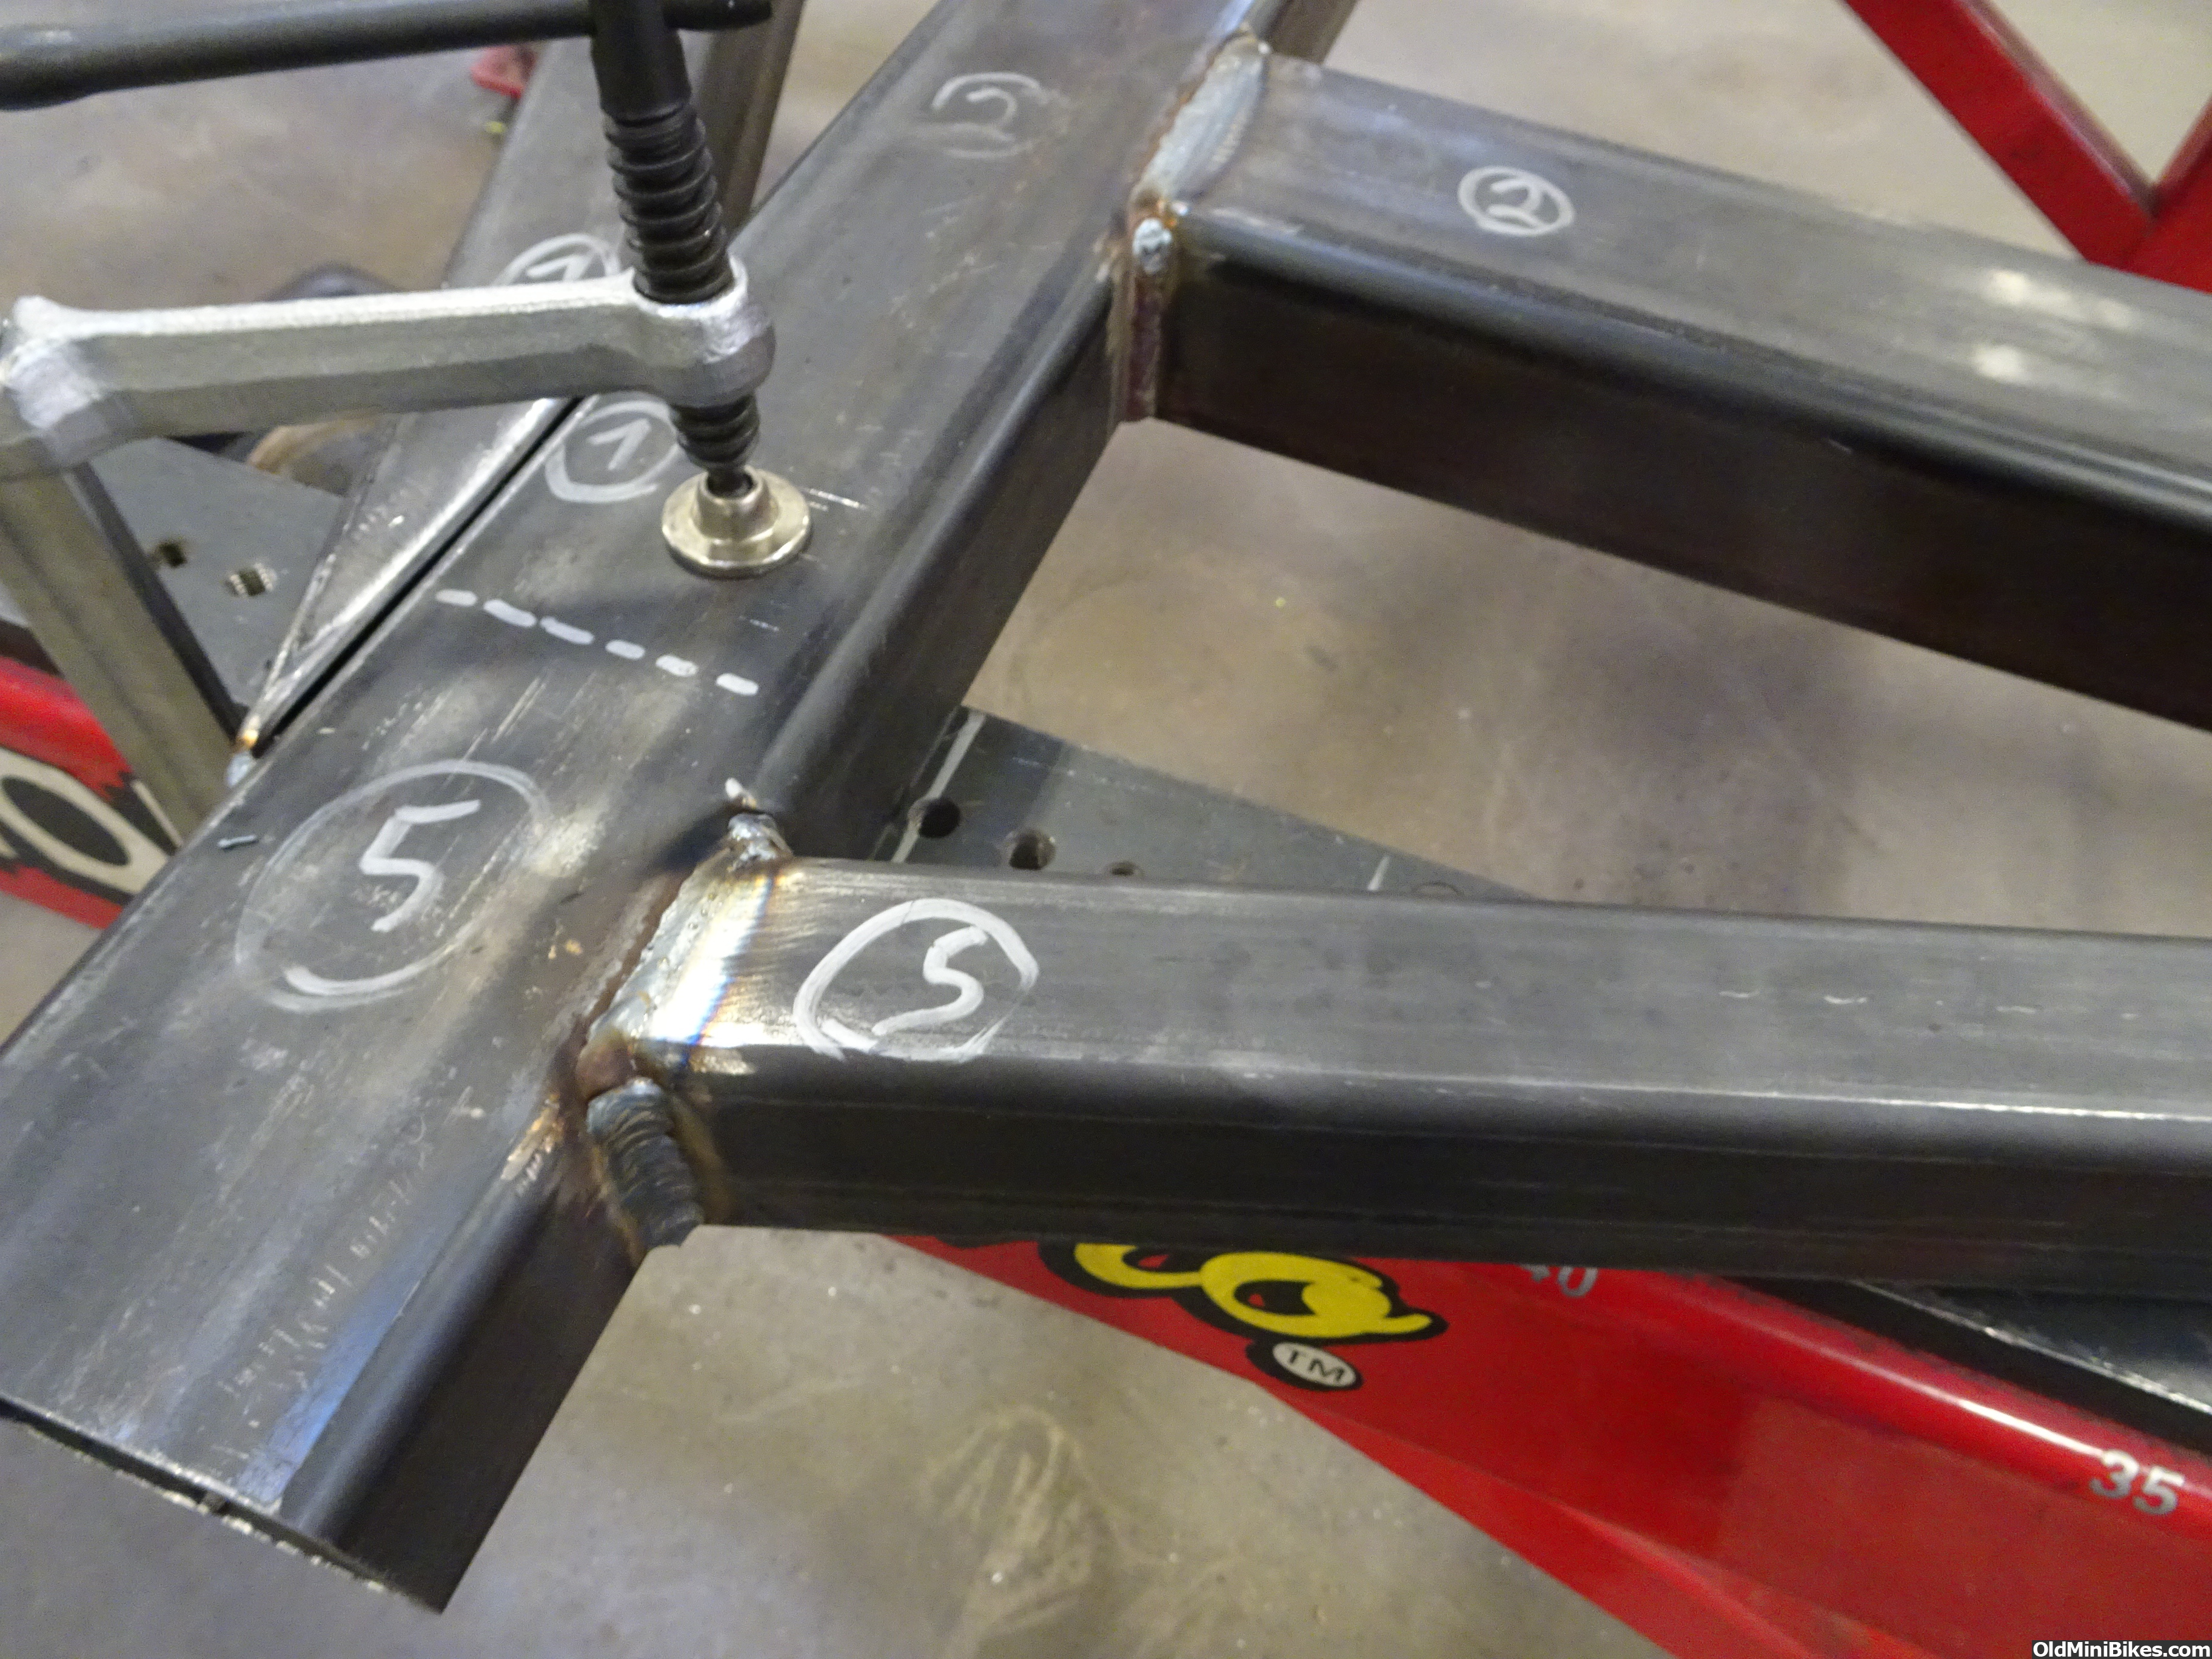
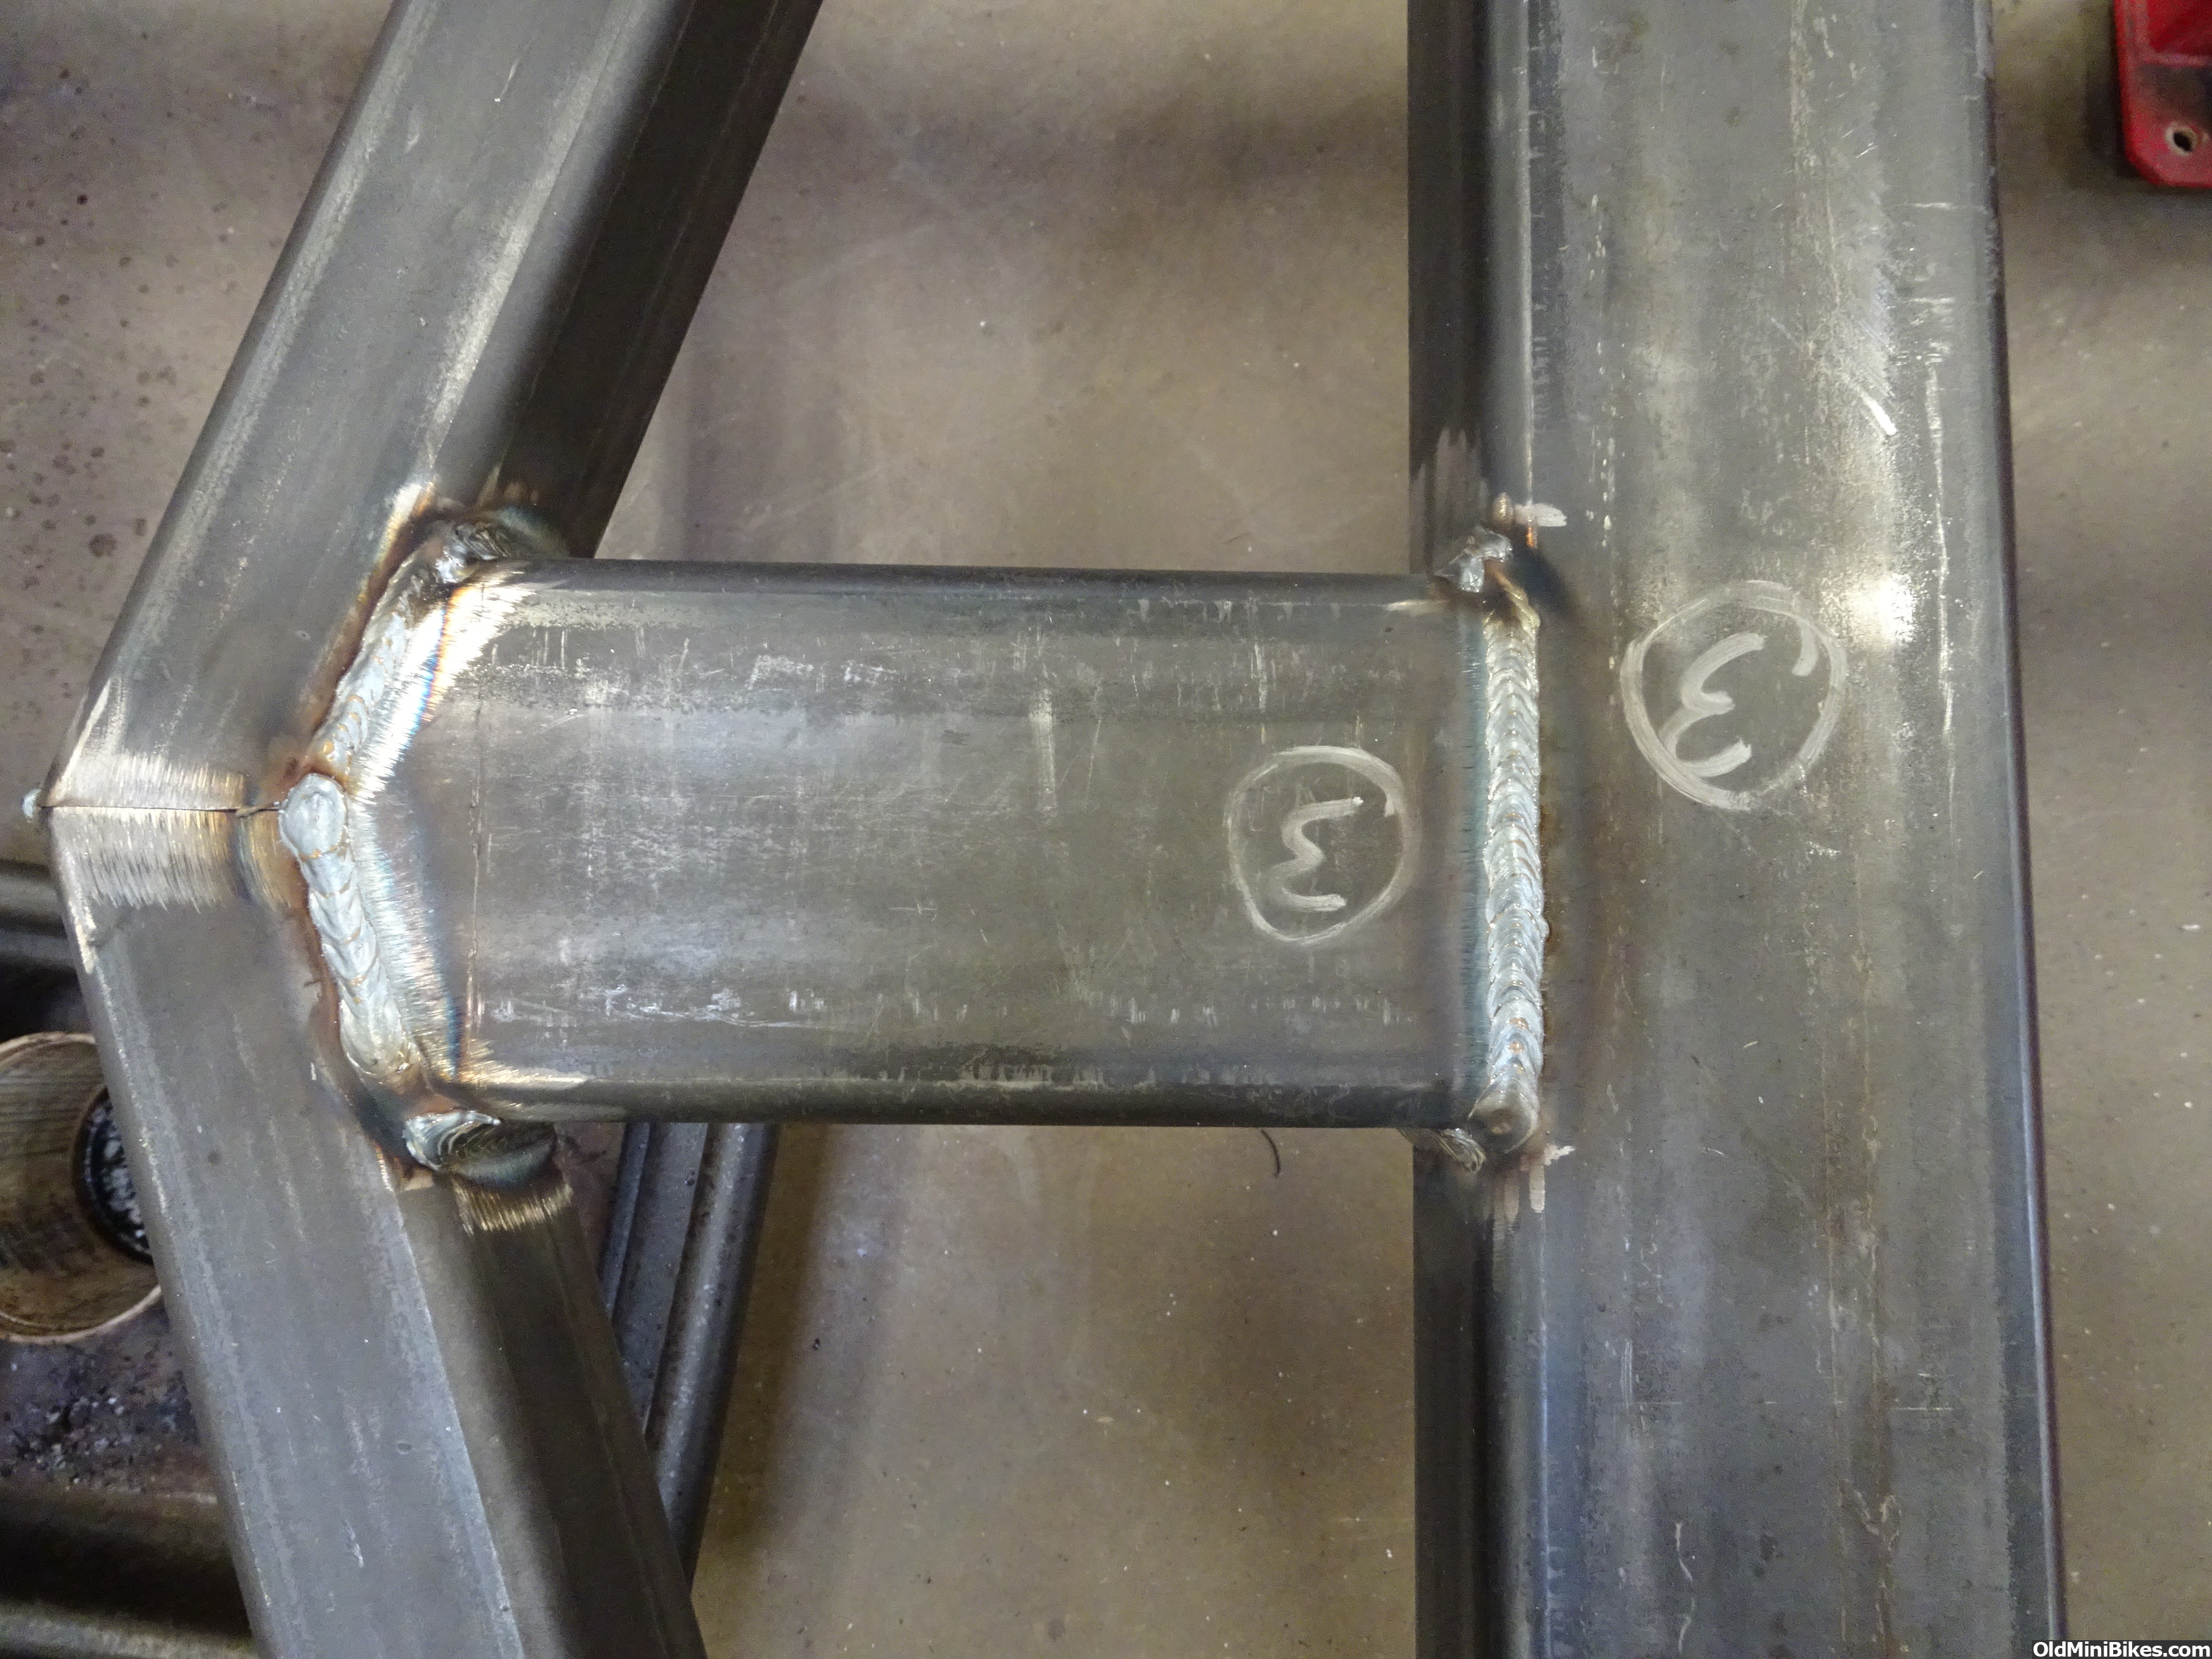
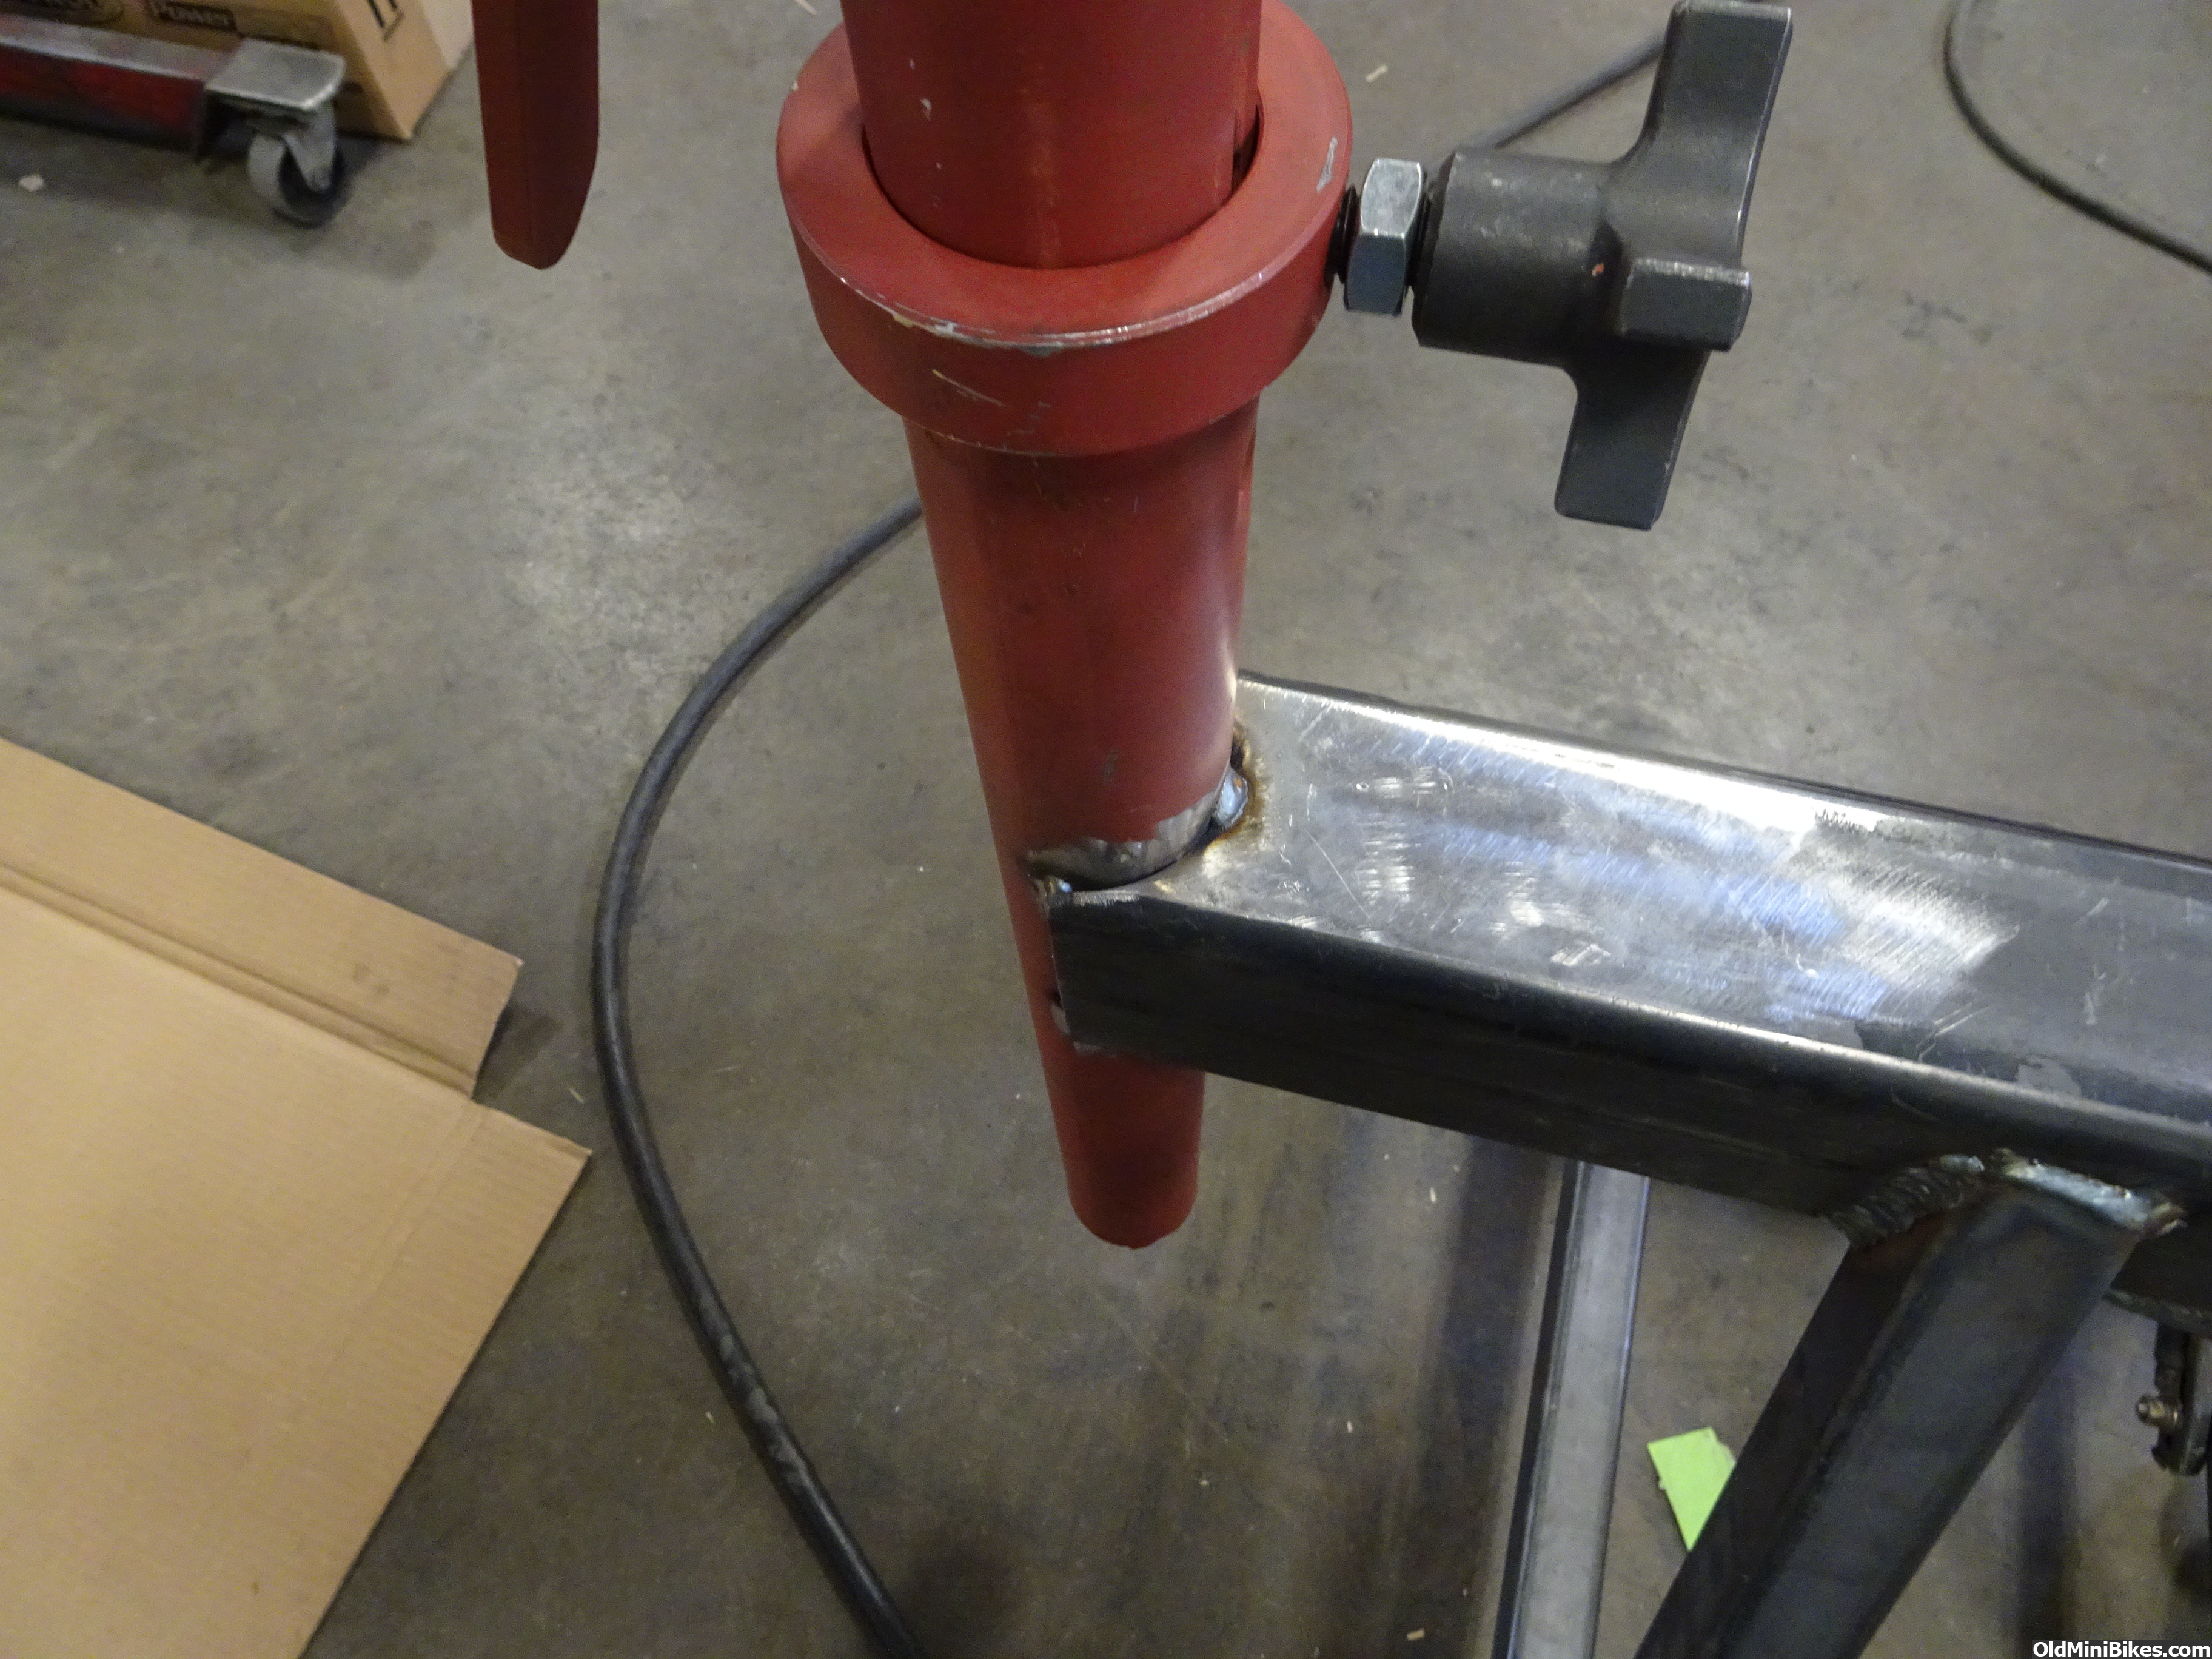
Just good old fabrication with box tubing.

I have been wanting a full sized English Wheel for a long long time.... Like 30 years.... Got a few extra unexpected dollars and bought a kit from Metal Ace.

44F U-Weld English Wheel Kit – MetalAce English Wheels & Metal Shaping Tools

I got lucky and found a guy selling a new kit that he had bought in 2000 or 2001 but never assembled. Saved $550.00. This guy had a Planishing Hammer and a Pulmax for sale as well. I sure would love to have the Pulmax but its the same old story... Don't have the extra funds, $18,000.00 plus the shipping. Its amazing what you can do with a Pullmax. The list of what you cant do would be way shorter.

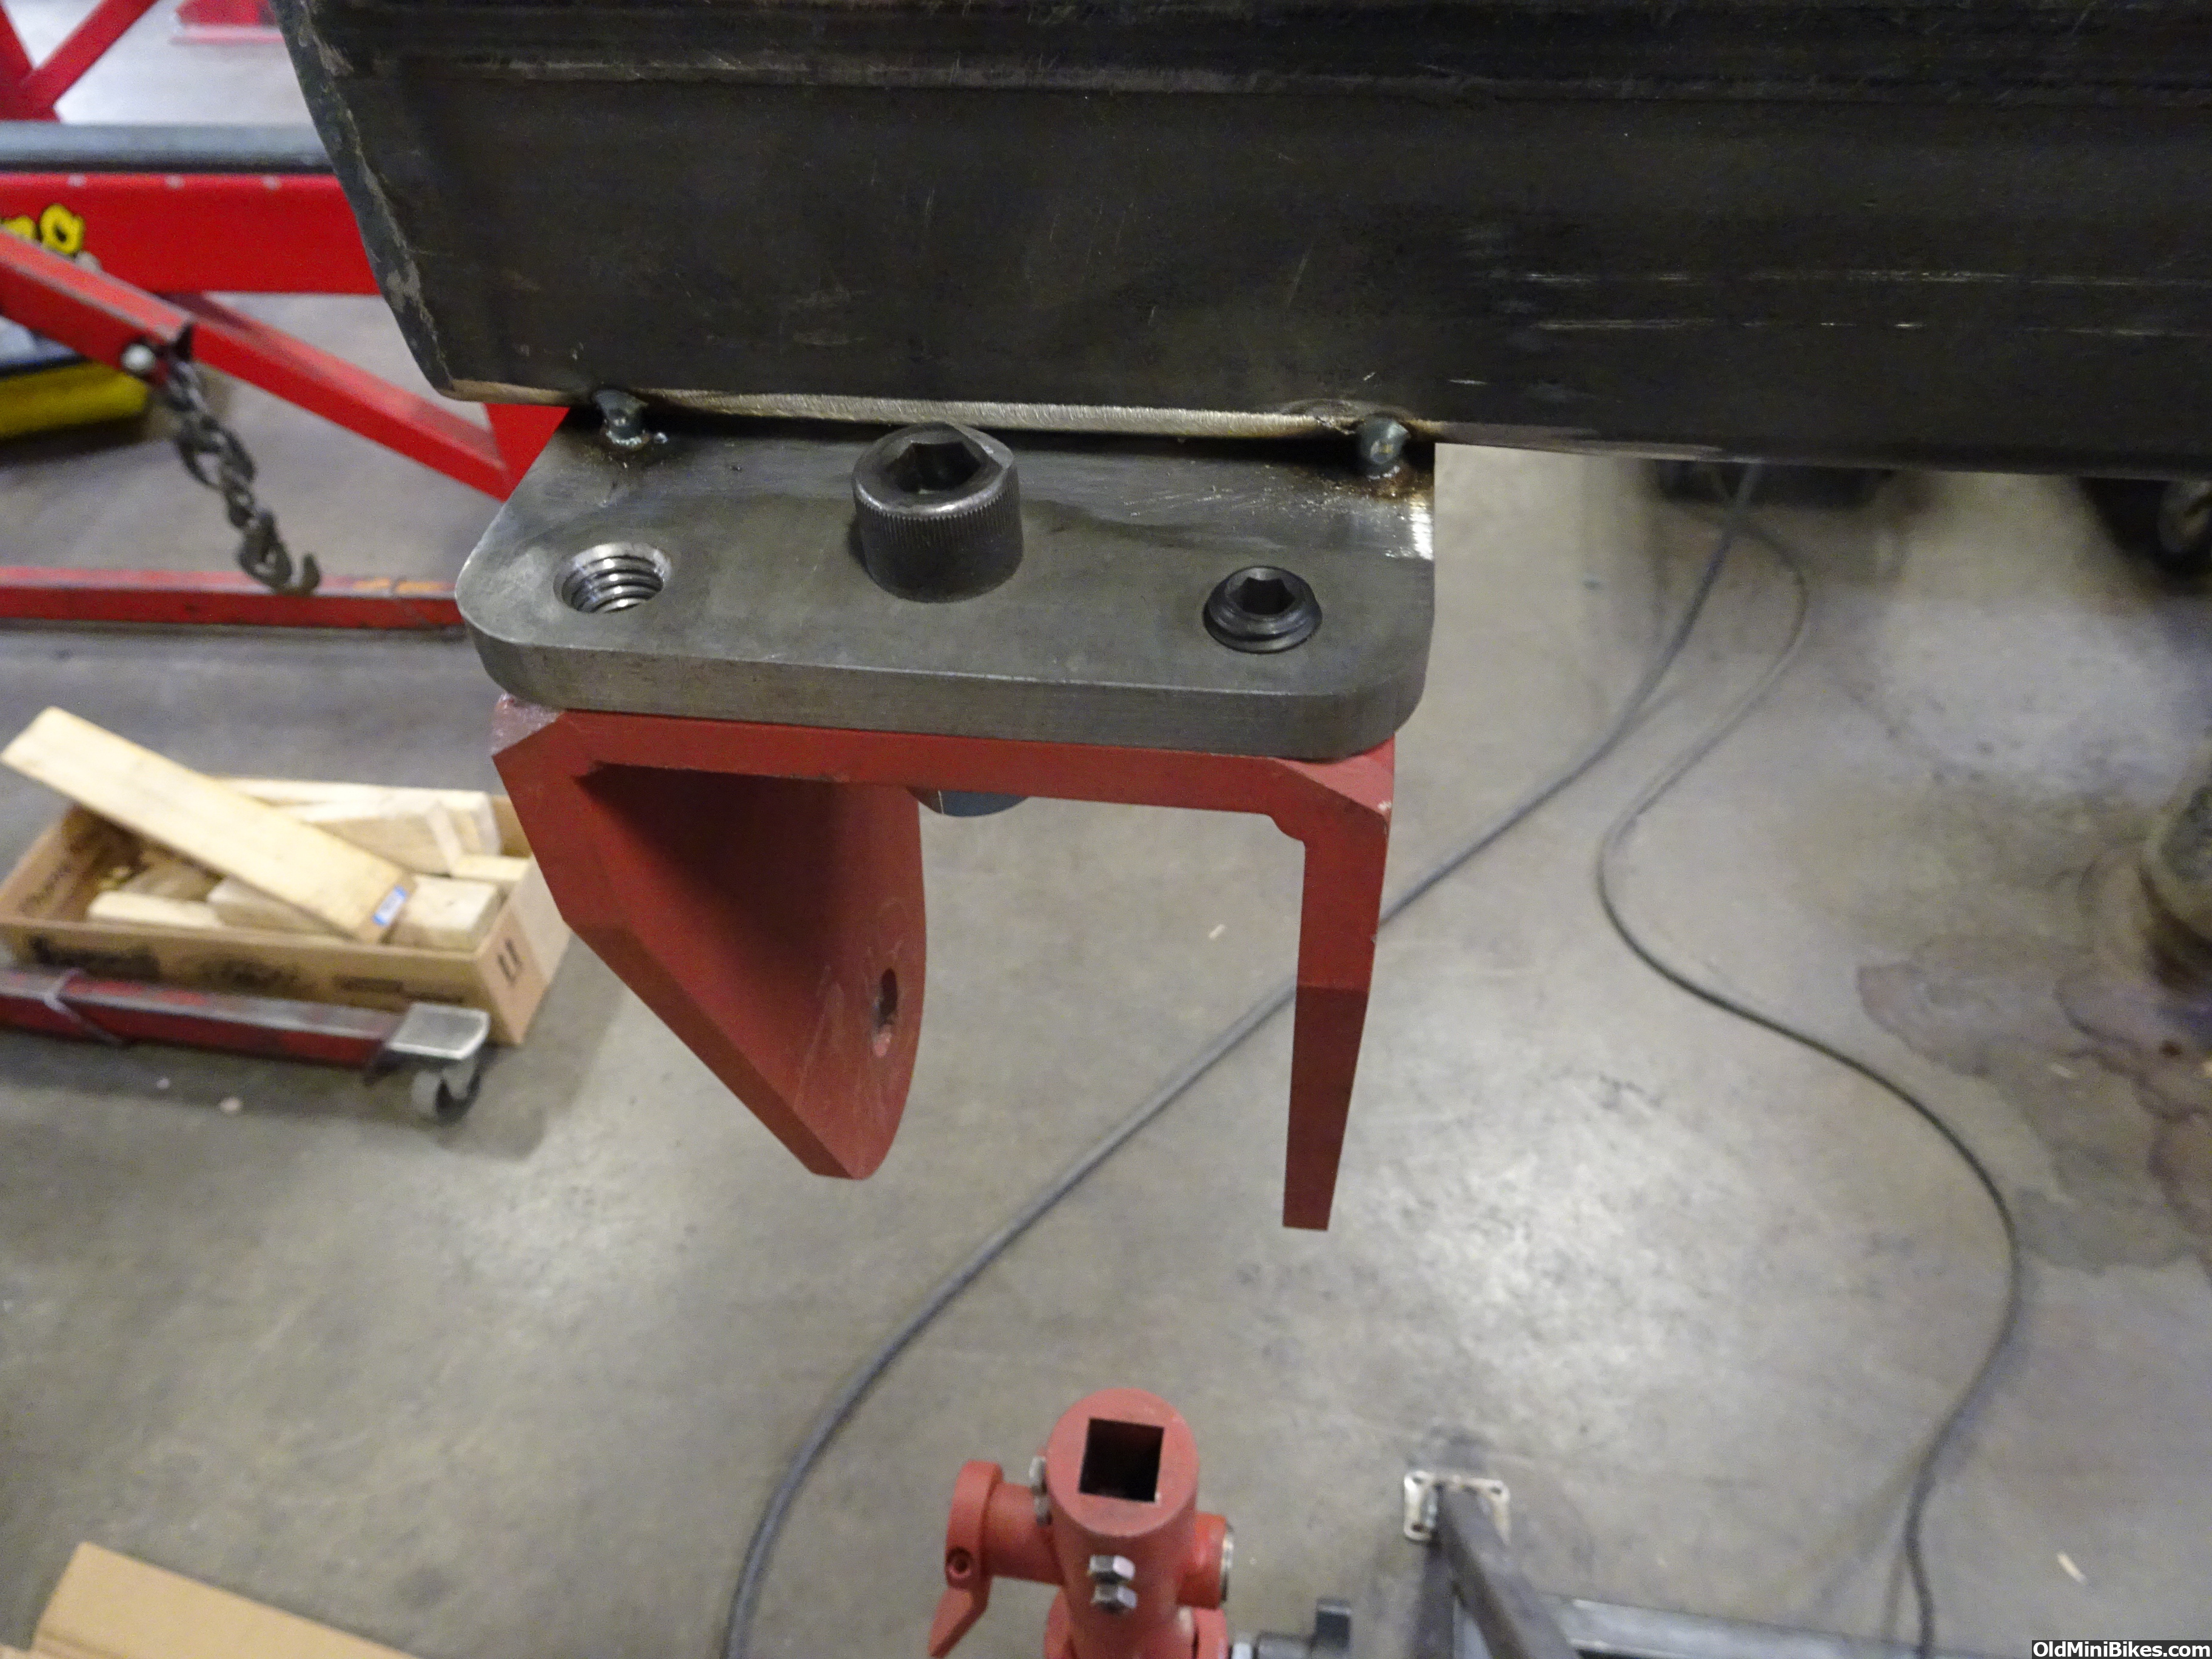
Then I had to buy the steel and boy has that price gone up.... $300.00 for 3 sticks.

1 stick of 4'' X 3'' X 1/4'' for the main frame.

1 stick of 2'' X 3'' X 3/16'' for the stiffeners.

1 stick of 2'' X 2'' X 1/8'' for the legs.

I never buy less than a stick as it is just as cheap unless they have a drop and you just need a short piece. I am going to lay this out and assemble it on the chassis jig table at school. Take advantage of the flat stable surface to clamp to and weld on. I should be able to get most of this done this week if not all.

Pics coming.

Doug

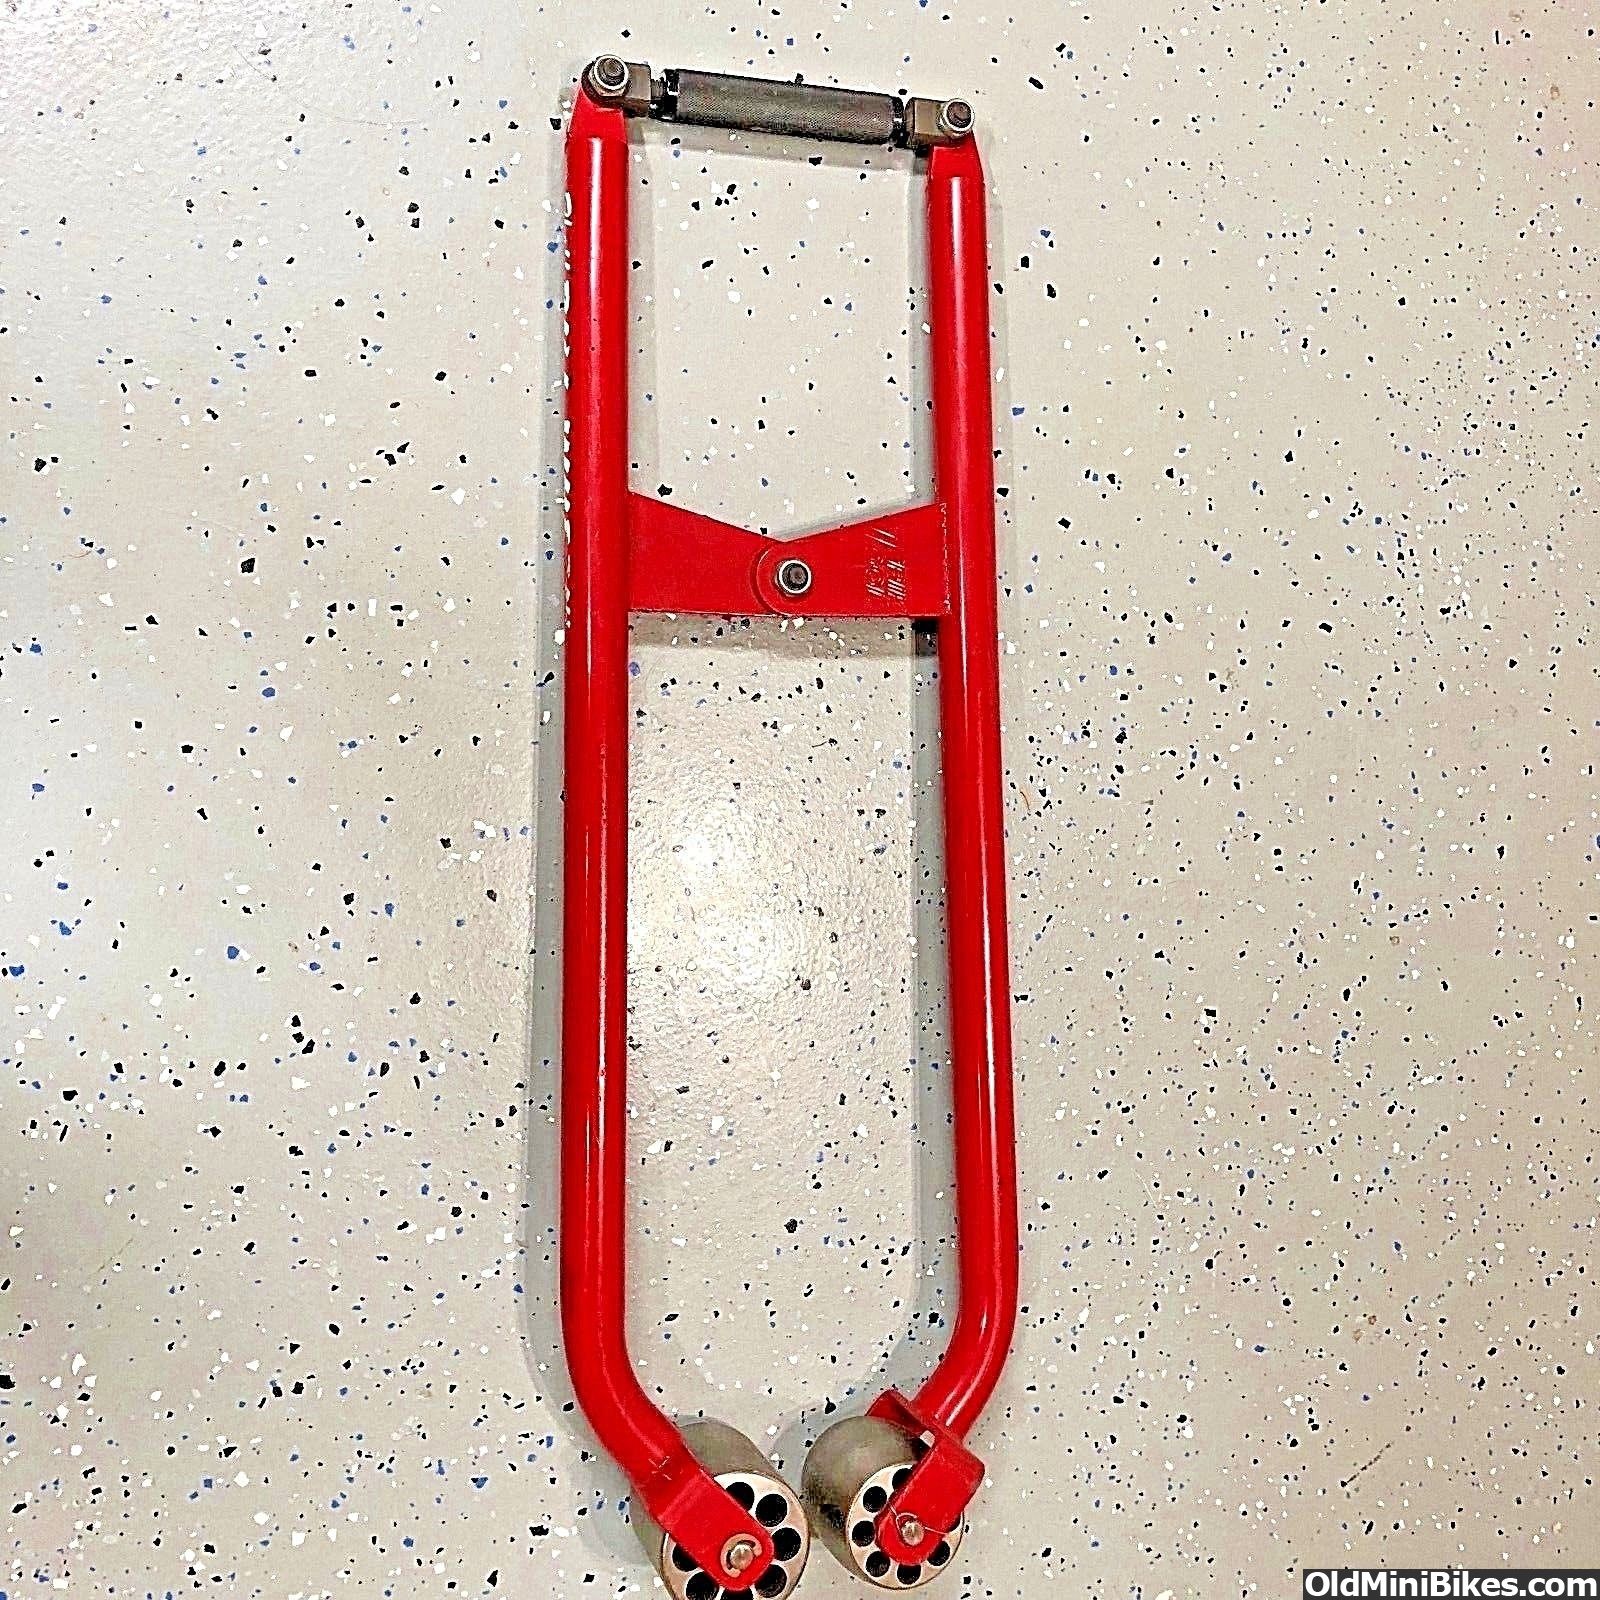
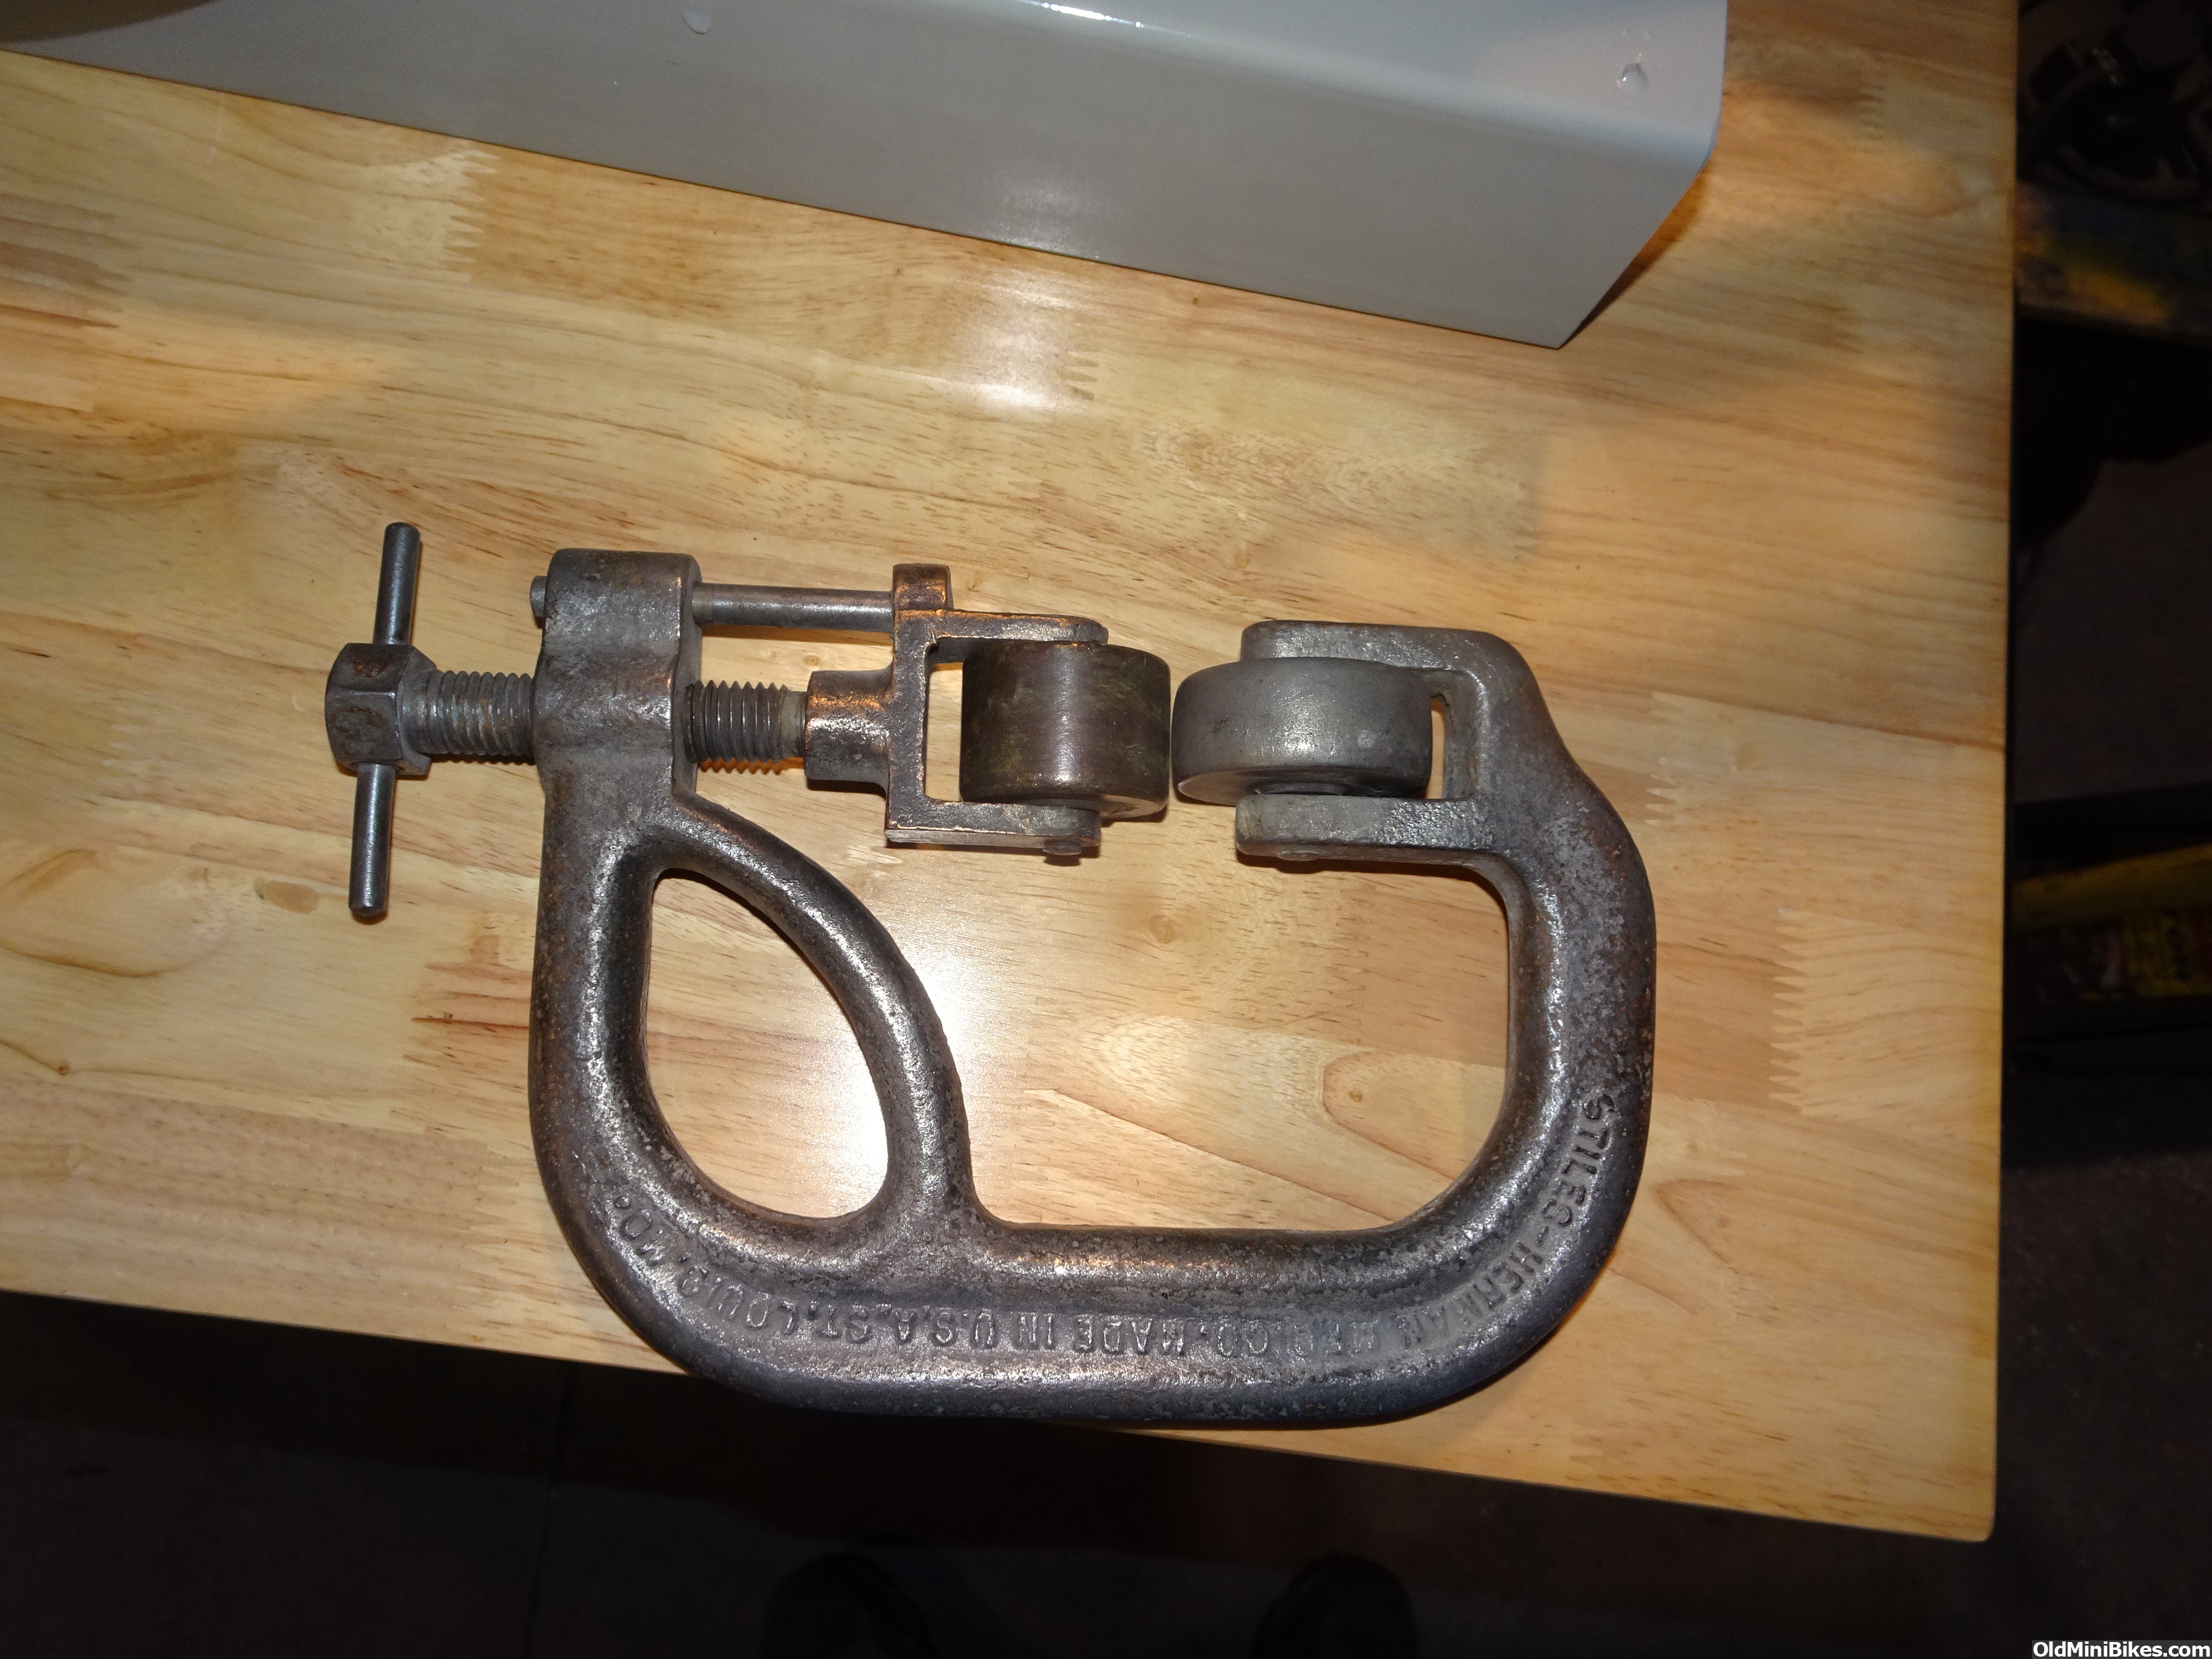
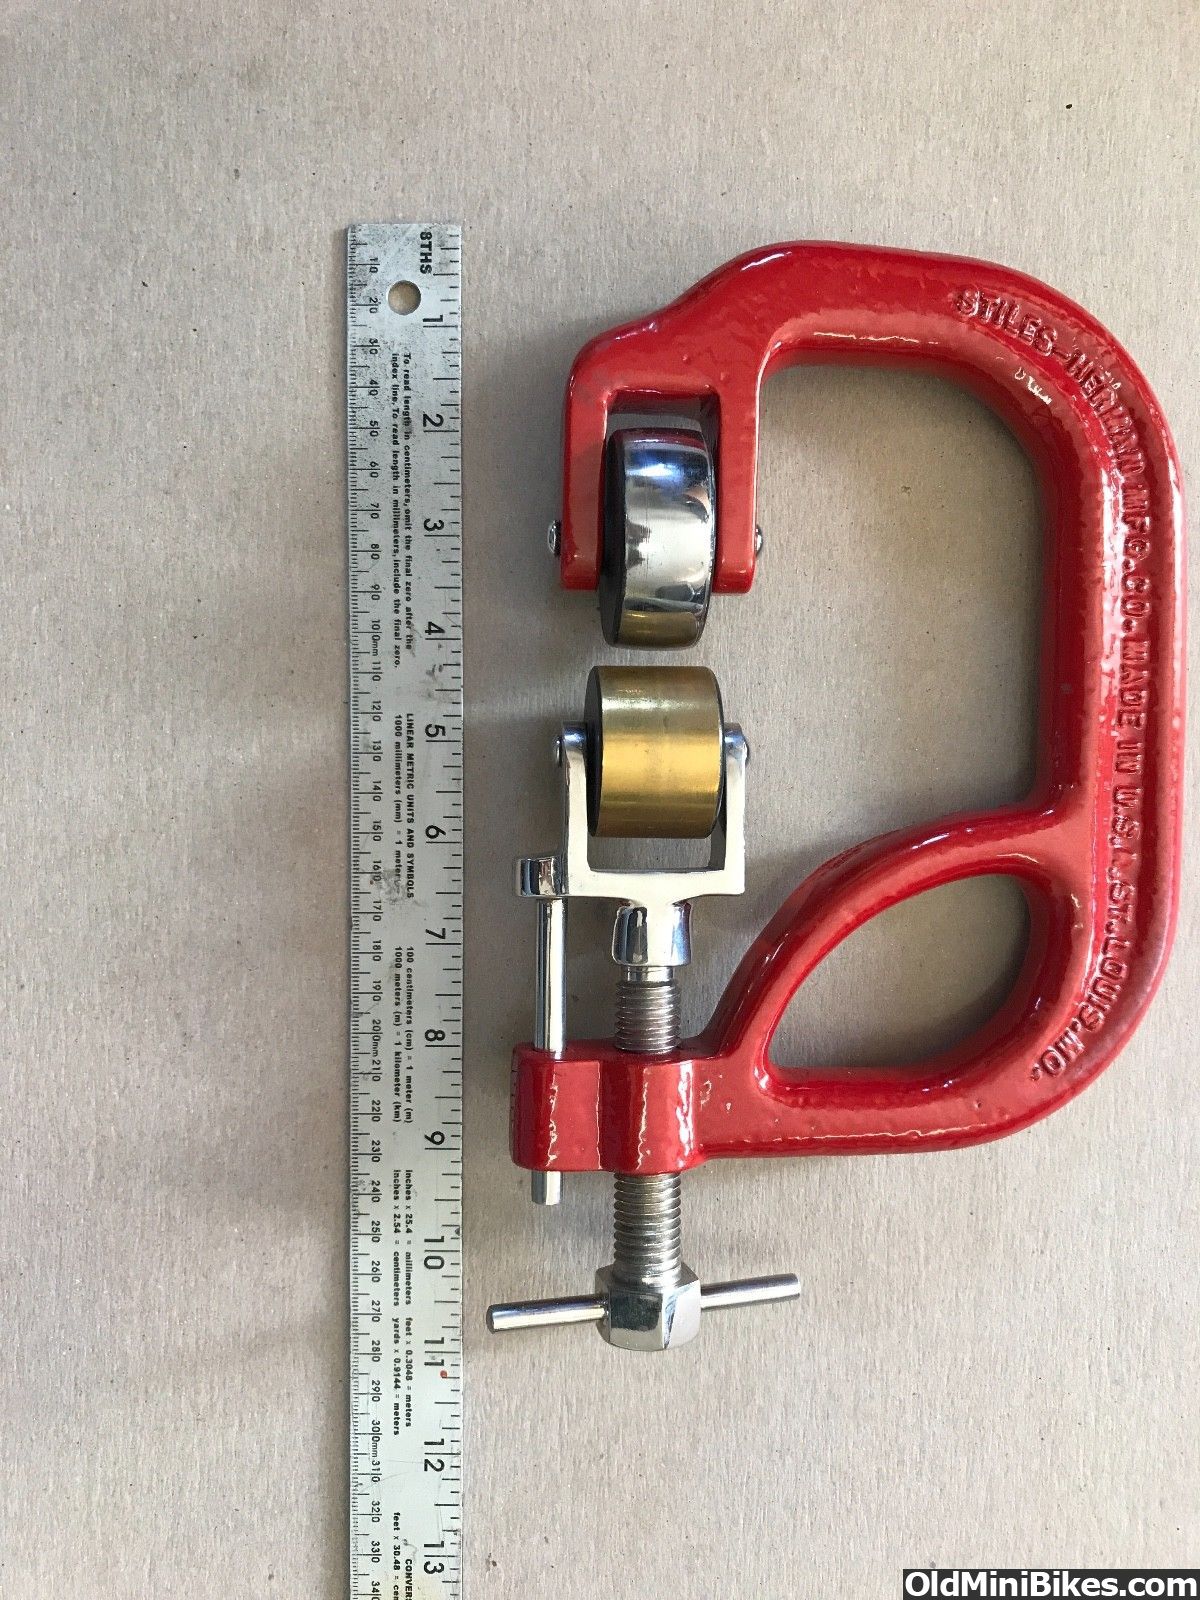
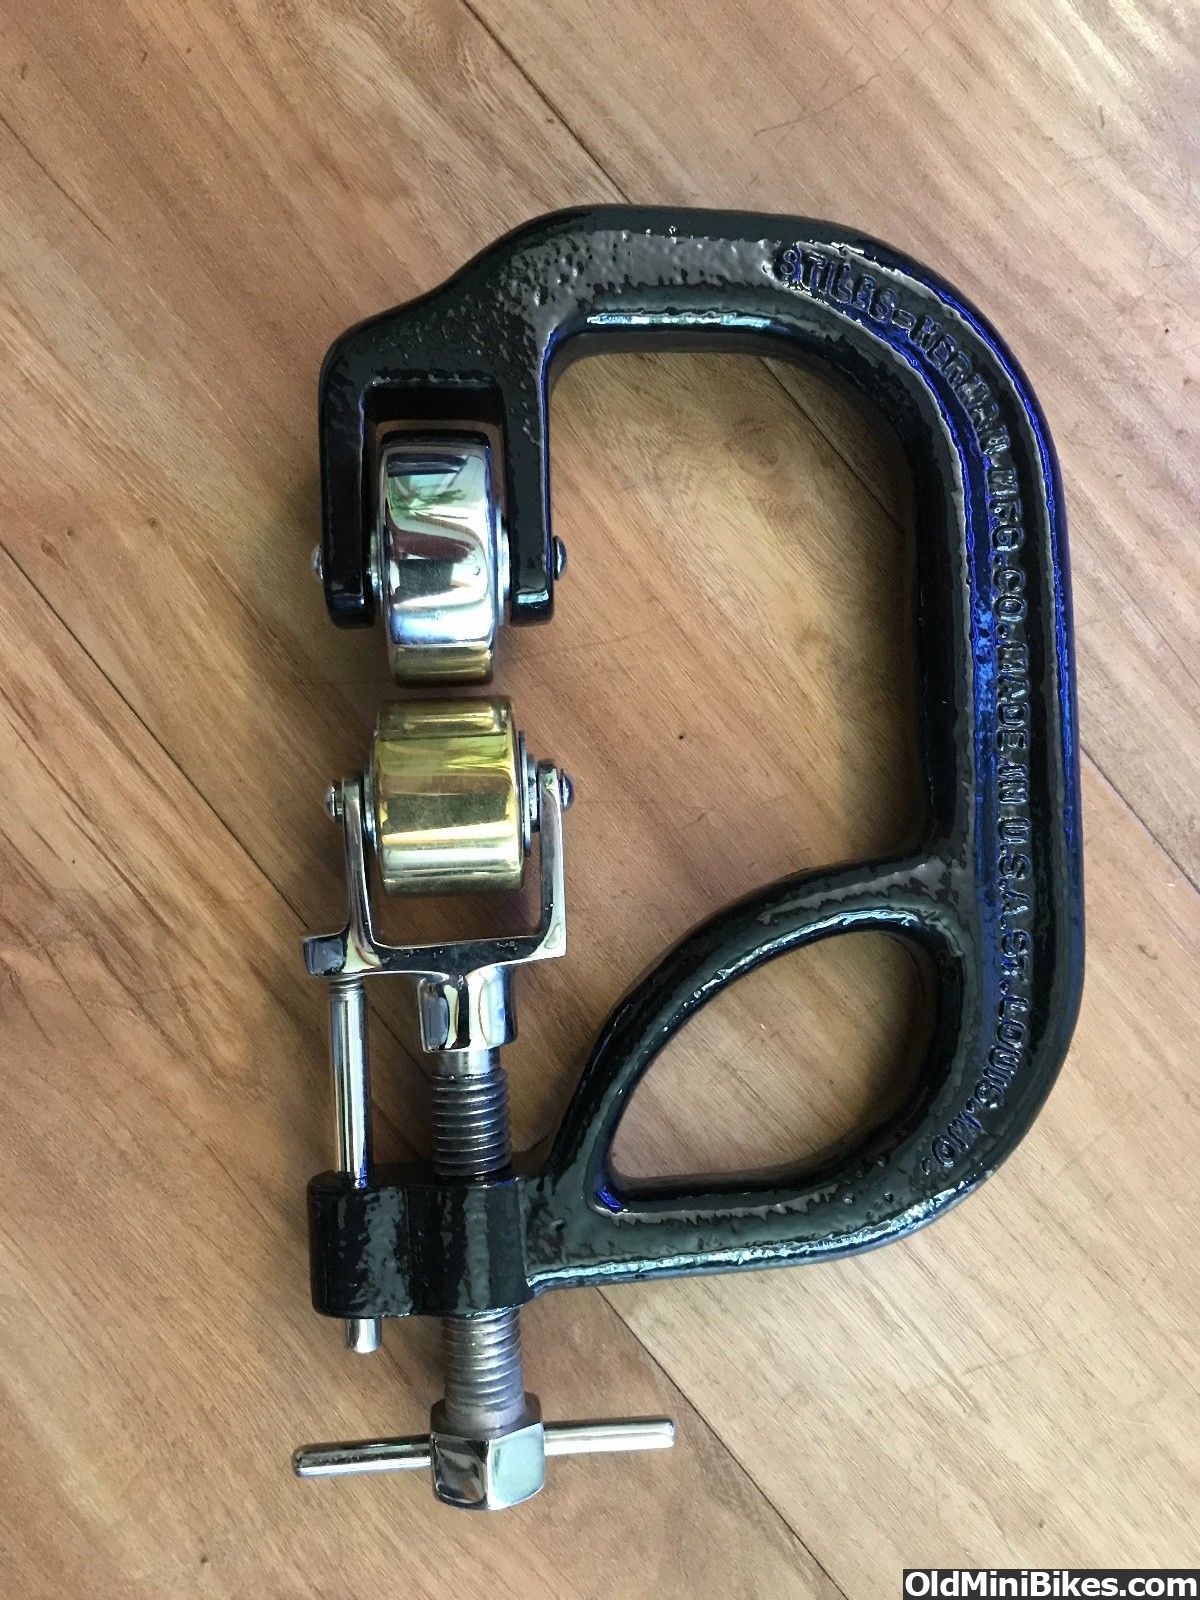
Anybody here have a wheel? I have a hand held wheel that I have been using for years and man it is a big help. Here is a pic.


#2
I’ve got access to a bench-top wheel. A big machine has been on my list for years as well.
Nice project. You’re gonna like all of that throat space on a bigger machine.
That hand-held wheel design is on my to-make list.
Thanks for posting this topic.
 
#3
We have been busy setting up the school race car so that we can venture to Greenville - Pickens Speedway and have a test session as part of the class activities. So that has taken up a bunch of time everyday.

I did get the steel to school and cut to length. I then brought the cut pieces that needed angle cuts home to cut on my Ellis band saw. I tried cutting one 73 degree angle by hand and it was a mess. Good fit on one side and a 3/8'' gap on the other side...

You can see the big gap in the nearest angle brace when it meets the straight arm in the lower right of the pic. Brought a new piece home today to cut with my band saw so that it will be right.

Here is the frame laid out on the frame jig table so I could check and adjust the fit of all the pieces. I will mark the weld areas, then take it back off and grind all the weld areas clean before I start welding.


More pics to come.

Doug
 
Last edited:
#4
Got a little more done today.

I marked all the weld areas before I unclamped anything. I only ground the mill scale off in the weld area just enough to accommodate the weld bead. Put it all back together and squared it up. Clamped the pieces down to the jig table and double checked every measurement. All was good. The directions call for 30'' between the 2 arms and says to make sure that they are parallel. I figured that it was clamped solid at the upright but was in need of a stiff leg on the free end. So I cut a 30'' piece of 1'' square tubing and welded it out near the end of the arms. Now I am confident that it wont move when I unclamp it and turn it over to weld the opposite side.

I only had time to weld the 2 arms to the upright but they are welded on all 4 sides. Now I can work my way around the other joints. I plan to weld the support arms solid onto the upright and then cut the tacks loose where they contact the arms. This will take and pull out of the joint if there is any. Then I can weld them in a relaxed state instead of the chance that they had a little preload on the arm. The supports on the upright will be done the same way. Weld the middle offset and then cut the tacks loose on the ends. This way there should be no preload in any of the welds.

I had to cut a 1.25'' radius in the end of lower arm to accommodate the jack screw. I had the arm cut to length already so I took a couple of pieces of scrap and pre drilled them with a 1/4'' bit. I then centered them on the end and tacked them in place. This gave the hole saw something to index in. Worked very well.

Here are some pics so far.


Last edited:
#5
Nice work. Great idea for accurately locating the hole saw. I’m gonna use that method today.
We have been using the Tap Magic fluid for all applications, it works fine. Drilling, hack saw and tapping done with it so far. At $4 a can, its a no-brainer.
Again, nice work here.
Hope this helps,
Steve
 
#10
Nice work. Great idea for accurately locating the hole saw. I’m gonna use that method today.
We have been using the Tap Magic fluid for all applications, it works fine. Drilling, hack saw and tapping done with it so far. At $4 a can, its a no-brainer.
Again, nice work here.
Hope this helps,
Steve
Steve I took a shot of the bottom side so that you can see how good it actually worked. I didn't rush the drill and just let it cut the half cut on the tubing. Once it went through it was a breeze with the hole saw.

 
Last edited:
#11
Got all the butt welds done today except for 2 where the back brace meets in the middle. Wish I had left a gap to fill and get full penetration. I will take the cut off wheel and create a gap Monday so that I can weld it properly.

Progress from today. Not very exciting but it is progress.


This is the butt joint that I need to open up with the cut off wheel.

 
#12
Thanks for the additional image. Great method for keeping things accurate.
I use CoolTool II whenever I’m working on harder steel or stainless. Any time I’ve got a USA made twist drill working, I use it. It makes tiny amounts of smoke at a pretty low temperature, so you’ve got plenty of warning prior to overheating an expensive drill bit.
Great thread, informative posts everyone, thanks all,
Steve
 
#13
Making progress. Got the frame finish welded yesterday and it now sits on its own legs.


This morning we started fitting the upper wheel and the jack screw. It was a struggle for some reason so we quit and went to lunch. Came back and cut it all off. We had tacked the jack screw in place and then tried to locate the upper wheel assembly to it. For some reason this just wouldn't come together. Started again but this time we located the upper wheel assembly and then fitted the jack screw to it. Worked like a charm.

Tacked the upper wheel assembly in place and then tacked the jack screw at the top center so that it could be adjusted to line up with the top wheel. This gave it a back tilt and a right - left adjustment.


It all pretty much fell into alignment this way and I tacked the jack screw with 4 good tacks so that it couldn't move. Double checked the alignment. All was good so I pulled the upper wheel and yoke along with the lower wheel and cradle. Welded it all solid and left it to cool. I am very happy with the results so far. There is a lot of adjustment built into this kit. You can adjust the upper wheel right and left a total of 3/4''. Plus the upper yoke has an adjustment set screw on all 4 corners so if there is a slight misalignment it can be adjusted back to zero. Plus the lower yoke has adjustment on the right and left end of the axle that will allow you to tilt the lower anvil to match the upper or to do a tight corner by kicking the anvil up tight on the edge.

Pics of it fully welded.


It should be a very good wheel. It is plenty heavy enough and should have good rigidity with just a minimal amount of flex. A little flex is not a bad thing as it is what makes the wheel work.

Looking forward to getting it home and painted. Should be soon.

Doug

Let me add... In the earlier pics you can see that I welded a stiff leg in between the arms out near the end. The instructions called for 30'' and the arms need to be parallel. "make sure the arms are 30'' apart" I cut a piece of 1'' X 1'' X 1/8'' wall tubing exactly 30''. It fit so well that it had a slight drag all the way from the main upright to the ends. So after all the welding was complete and it had cooled a couple of days.... I measured the spacing on the end. With it still welded in place it measured 30 1/16'' When I cut it out it did relax a little and then measured 30 3/16''. I can live with that. The jack screw has about 16 inches travel in it.... And you only need about .060 to .090 movement as an end result.
 
Last edited:
#15
I recently picked up this English wheel. They were actually a fender iron...... They are from the 40's and came in a set of 3. This one is the smallest.

And yes it is as small as it looks...


This one is on Ebay at the moment. It has been dolled up as they came exactly like the one that I have not painted and chrome plated...


His second one.


I paid $145 for mine and that is the average price for one. These 2 are $360 opening bid this time around. His first listing was $400 opening bid on both of them and $700 Buy It Now for one.... $750 Buy It now for the second one.... Can we say fishing???? Deep sea fishing....

Doug
 
Last edited:
#16
I assembled the wheel today to test for line up. I was pleasantly surprised to find that it had not moved at all after welding the jackscrew and the top plate in place. I didn't even clean the cosmoline off the wheels but I had to try it out. I looked around and found a 20 gauge piece of aluminum and started playing with it. It will flat move the aluminum. I need to invest a lot of time in learning the proper tracking pattern. It is so easy to move to far right or left and then you create ruts. The piece I played with today is pretty rough... I even wheeled it the narrow way just to see the results. It can get pretty ugly pretty quick. I could put a large radius anvil in it and take it all out and probably will once I get it home, painted, fully assembled, properly adjusted and start dedicating some real practice time to it. I was using to much pressure today and I new I was but I wanted to see it move... It caused ruts but I was very happy.

I have been looking at taking a class with Wray Schelin. He is an English Wheel master. Just watching his videos on YouTube is inspiring. Look around his website. The man can make anything. If you have a desire to have a stump to bend metal he has all kinds including what he describes as a "Home Depot" stump. Pro Shaper Sheet Metal LLC | Sheet Metal Shaping Services, Classes, And Tools

Here is a pic of the piece I played with today. Maybe 5 minutes of wheeling time. Just trying to get a feel for the tracking and the weight of the wheels. Heavy wheels make it hard to change direction and roll the other way.

Be kind.... I did a lot of wrong along with some right. I wheeled it the long way first and it achieved most of its shape that you see. I then wheeled it right to left and it didn't have very much affect on the shape. If you look close you can see the tracks in the smeared cosmoline...


At least it does what its supposed to do. Move metal. Now to learn how to finesse it and get better.

Doug
 
Last edited:
#17
Great thread FOMOGO. Interesting read with some nice little tips along the way. I can only imagine how satisfying it must have been to contour that first piece of sheet stock on a machine you built. So how long before you start making reproduction minibike fenders? :biggrin:
 
#18
Great thread FOMOGO. Interesting read with some nice little tips along the way. I can only imagine how satisfying it must have been to contour that first piece of sheet stock on a machine you built. So how long before you start making reproduction minibike fenders? :biggrin:
Thanks. In all seriousness fenders this Fall I hope. I have so much on my plate right now that it is running over. I will post the progress when I start on them. Step by step.
 
#20
Great thread! I also am very new to the English wheel and just made my first official parts. I've relied a lot on Lazze metal shaping for a resource.
Lazze is a good source but if you are not watching Wray Shelin you are missing out... He puts on a very productive wheeling class that is on my list to attend.

[video=youtube;xeXtezrmK3M]https://www.youtube.com/watch?v=xeXtezrmK3M[/video]

I hope that now that the weather is clearing up I can get some paint on the frame and finish the assembly of my English Wheel. This coming week I hope.
 
Last edited:
Top