Hi, I'm new to the forum and wanted to say hello. Not sure if I can of much help because I'm new to Mini Bikes and have no where near the experience I see most here have. Ha-ha I can help with copy machine & printer tech support. Been a tech for 40+ yrs. But that's a whole different forum...
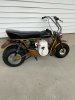
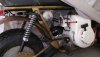
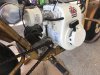
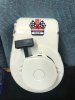
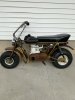
Anyway going to restore this Hilltopper I picked up a few months ago. I posted in another thread about needing the lighting accessory manual for the wiring. The manual is GTA-101-2. I will buy it if anyone has it.
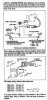
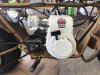
One of the questions was hoping to find out is the old TEC H50 engine has 2 yellow & 1 green wire in the 3 pin connector. From what I read TEC yellow wires are 6 VAC not DC and assuming the green is ground?
I have the regular Hilltopper assembly manual GTA-101 if anyone needs a copy but I saw someone already posted it on the forum.
Thanks
Anyway going to restore this Hilltopper I picked up a few months ago. I posted in another thread about needing the lighting accessory manual for the wiring. The manual is GTA-101-2. I will buy it if anyone has it.
One of the questions was hoping to find out is the old TEC H50 engine has 2 yellow & 1 green wire in the 3 pin connector. From what I read TEC yellow wires are 6 VAC not DC and assuming the green is ground?
I have the regular Hilltopper assembly manual GTA-101 if anyone needs a copy but I saw someone already posted it on the forum.
Thanks
Attachments
-
 354.4 KB Views: 73