Hemi build started

noseoil

Active Member
#1
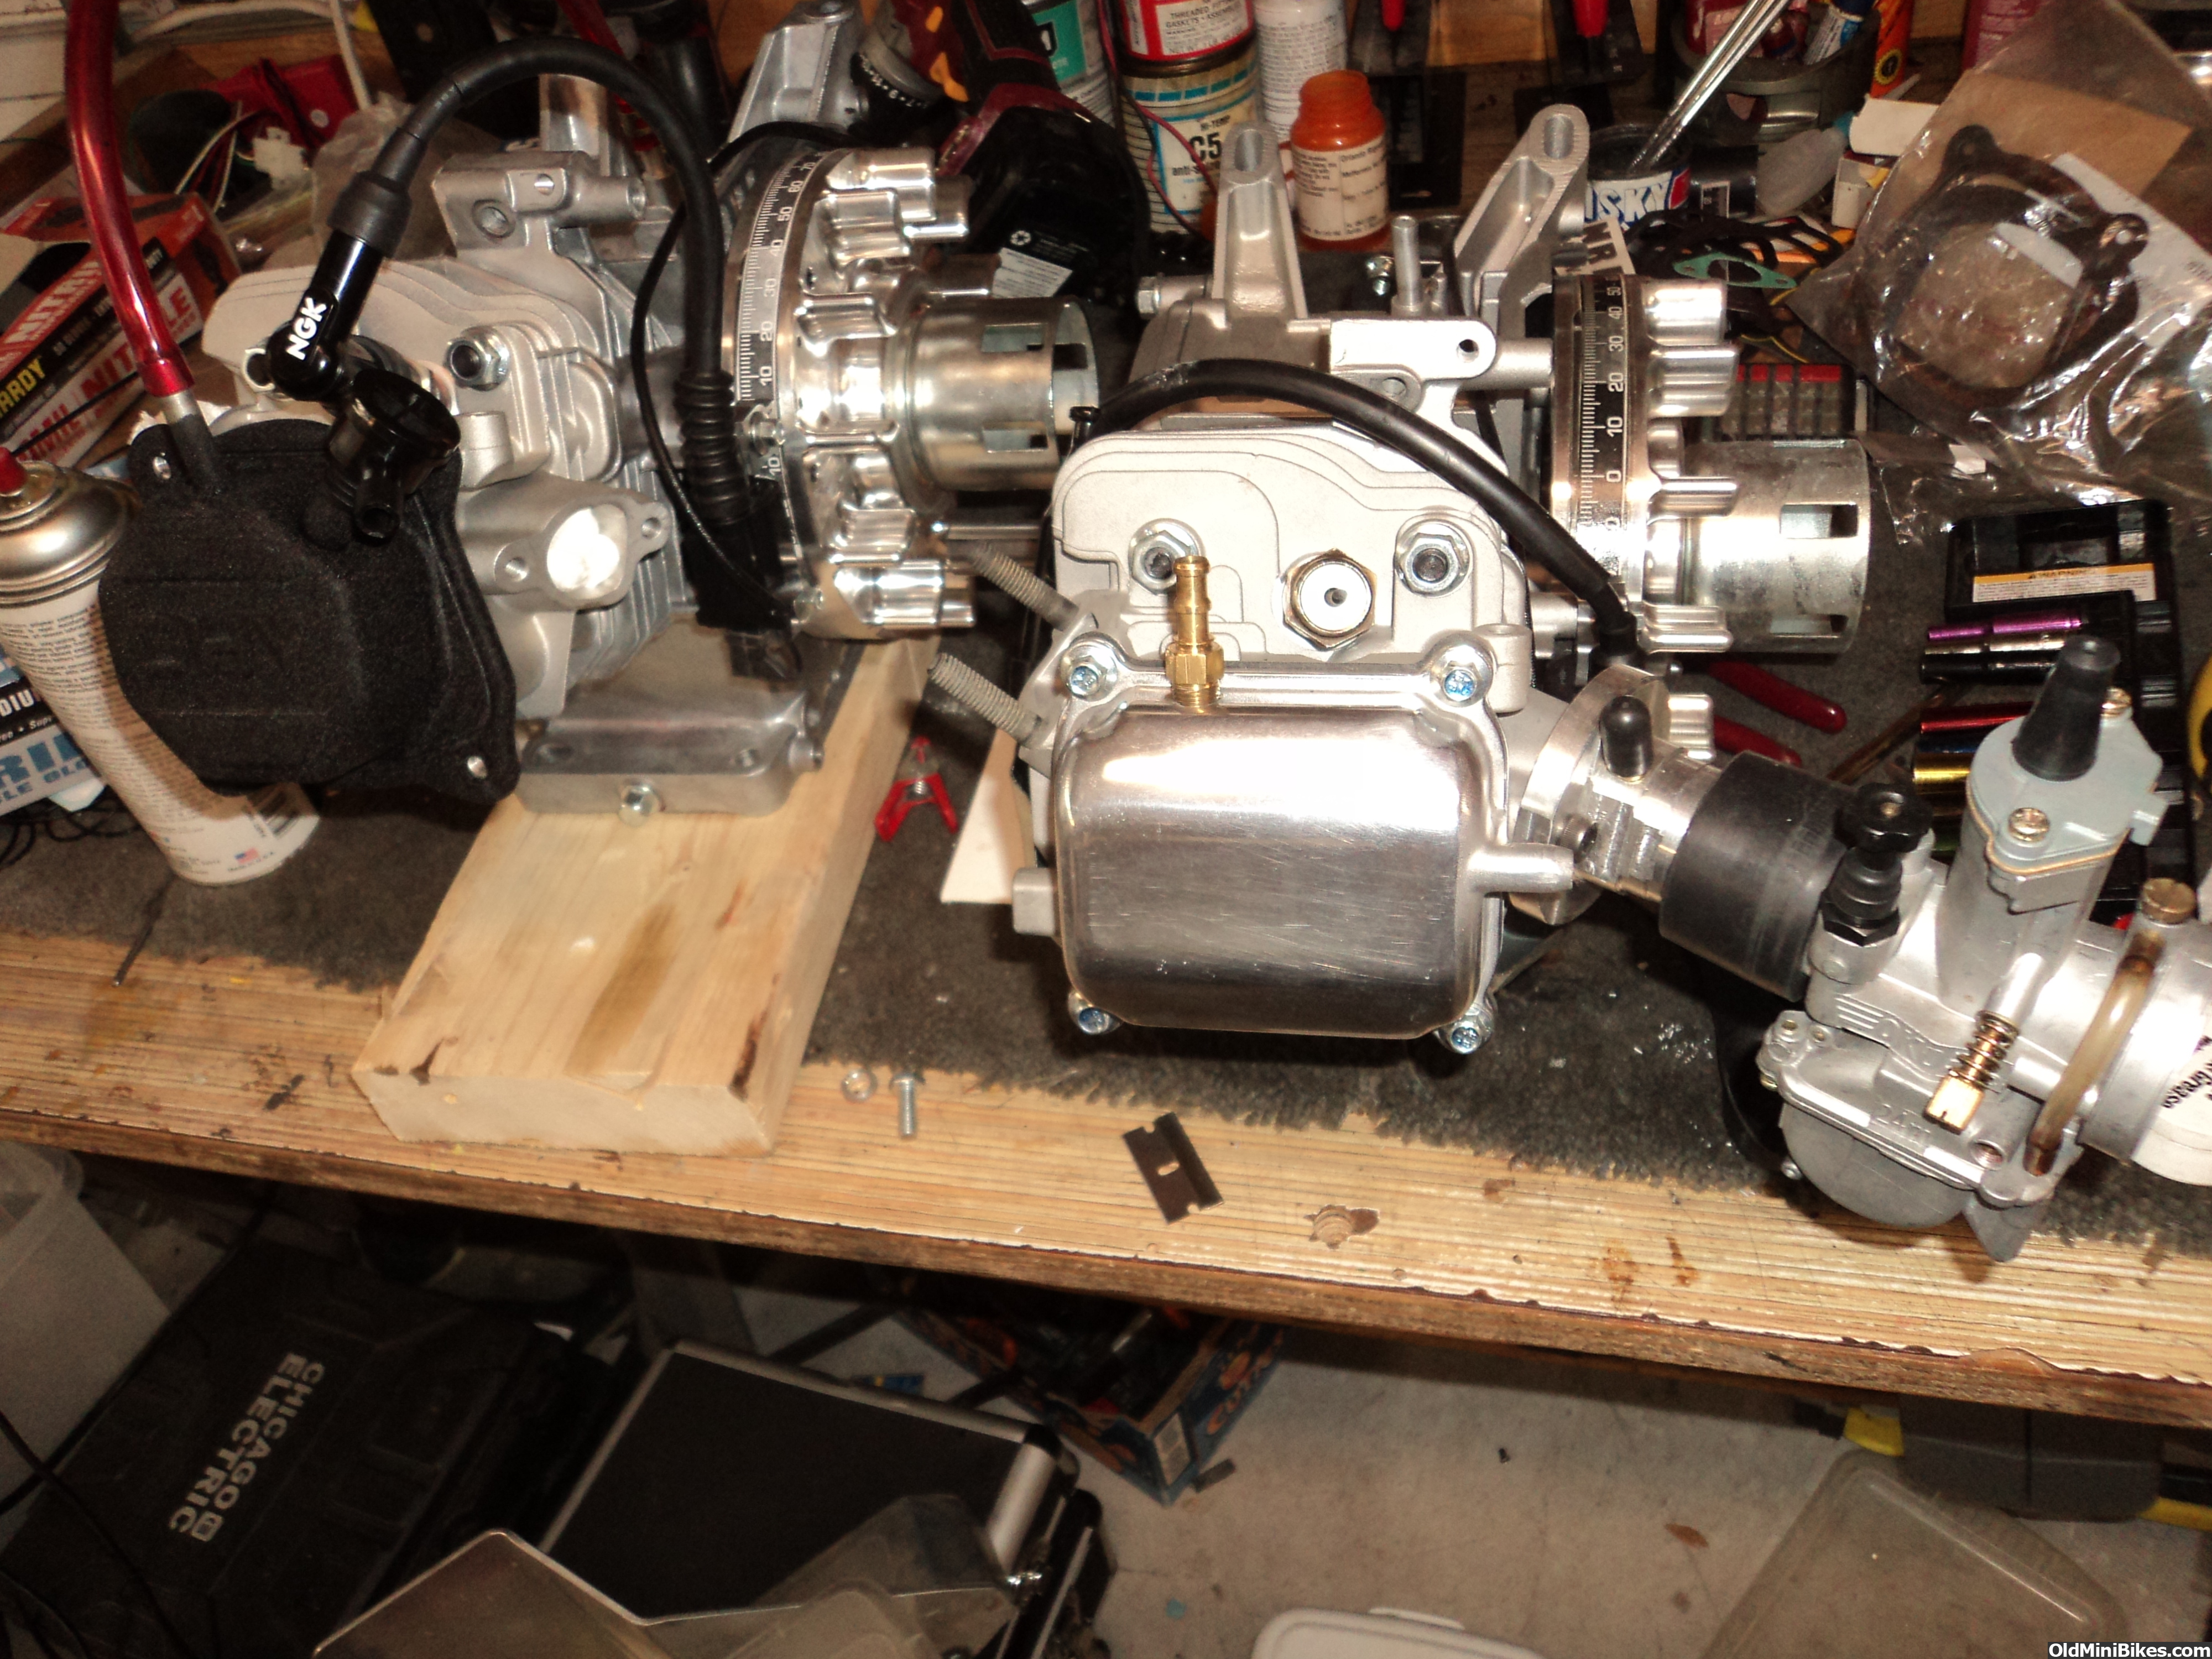
I'm building a motor for a new bike (I don't have it yet, more to come on that one later). Decided to build with the 212 predator (60363) I got with a coupon for $99.00 at HF. It's nothing too wild, but here's the plan so far.

Black Mamba cam 0.275" lift, 26# springs
Bullfrog's pop-up piston
+ 0.020" billet rod (piston is 20-22 thousandths in the hole now)
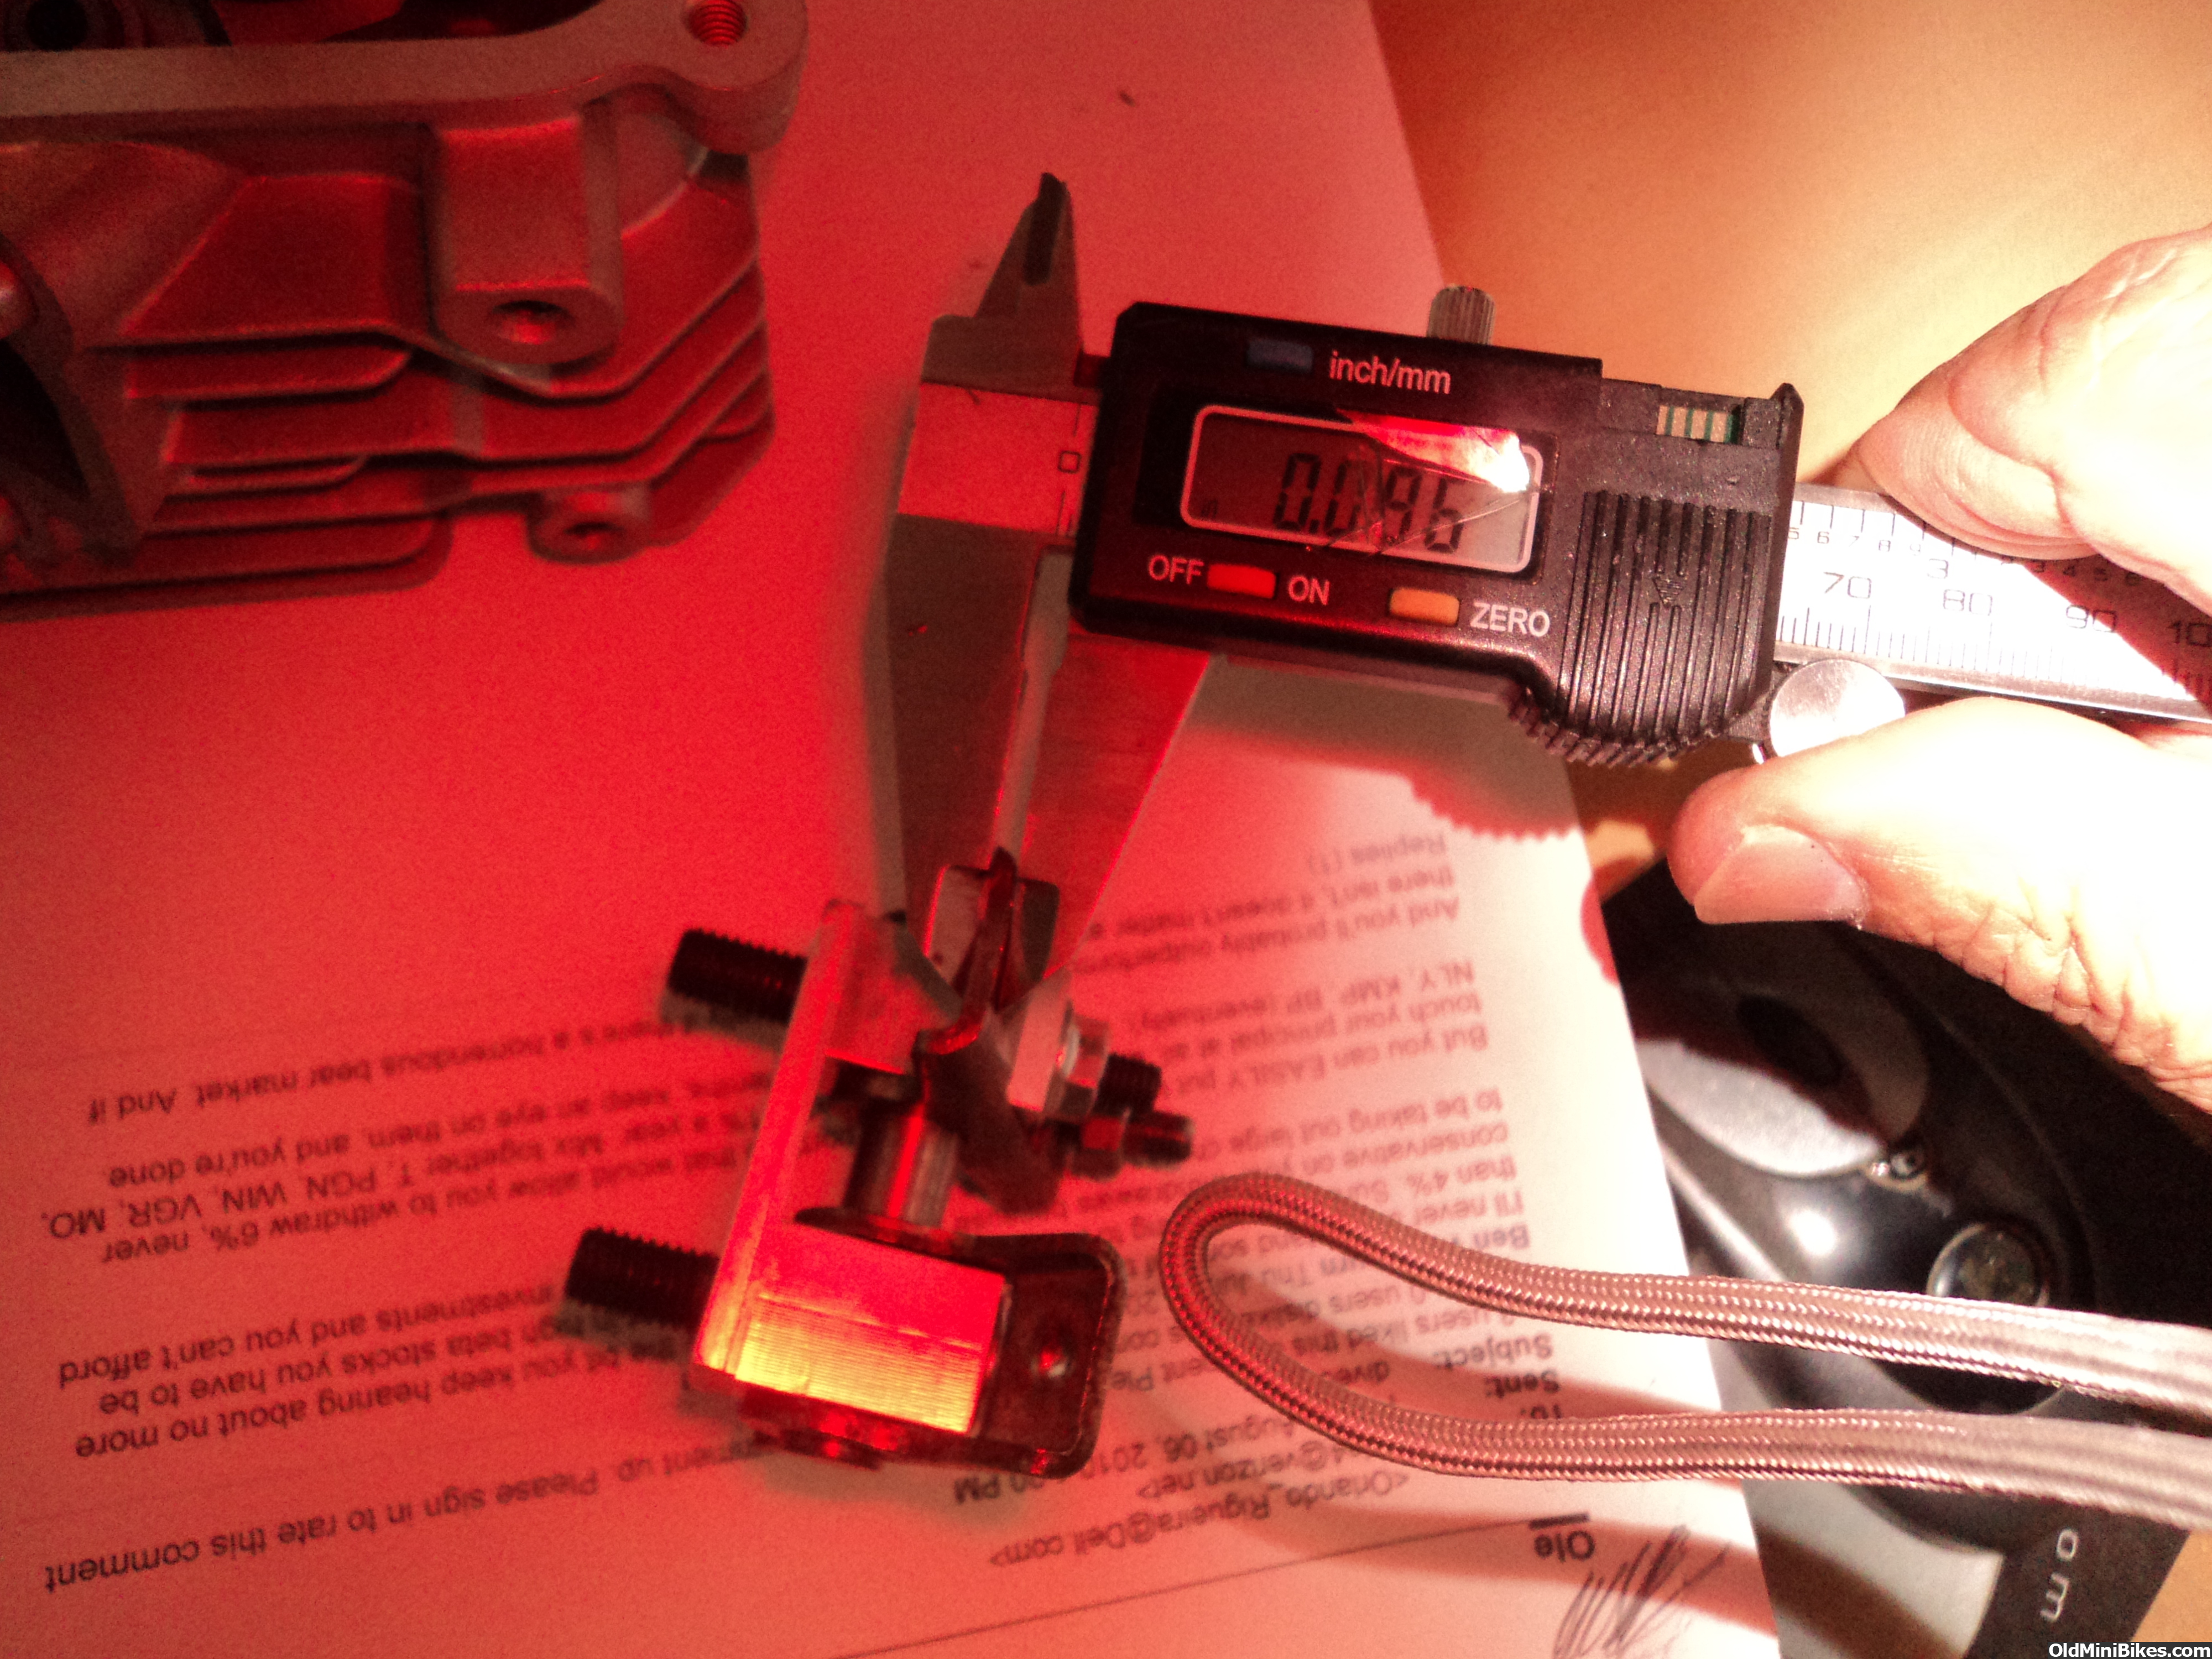
0.027" head gasket
SK100 billet flywheel
22mm Mikuni
24" X 1" OD header

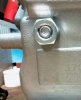
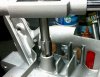
Going to stud the head & side cover to make things easier. If I have to take things apart to make changes, it won't strip the block with too much torquing & running fasteners in and out. The aluminum is pretty soft & I found some good threaded rod at my local supplier to make the studs. They had the flange washers as well.

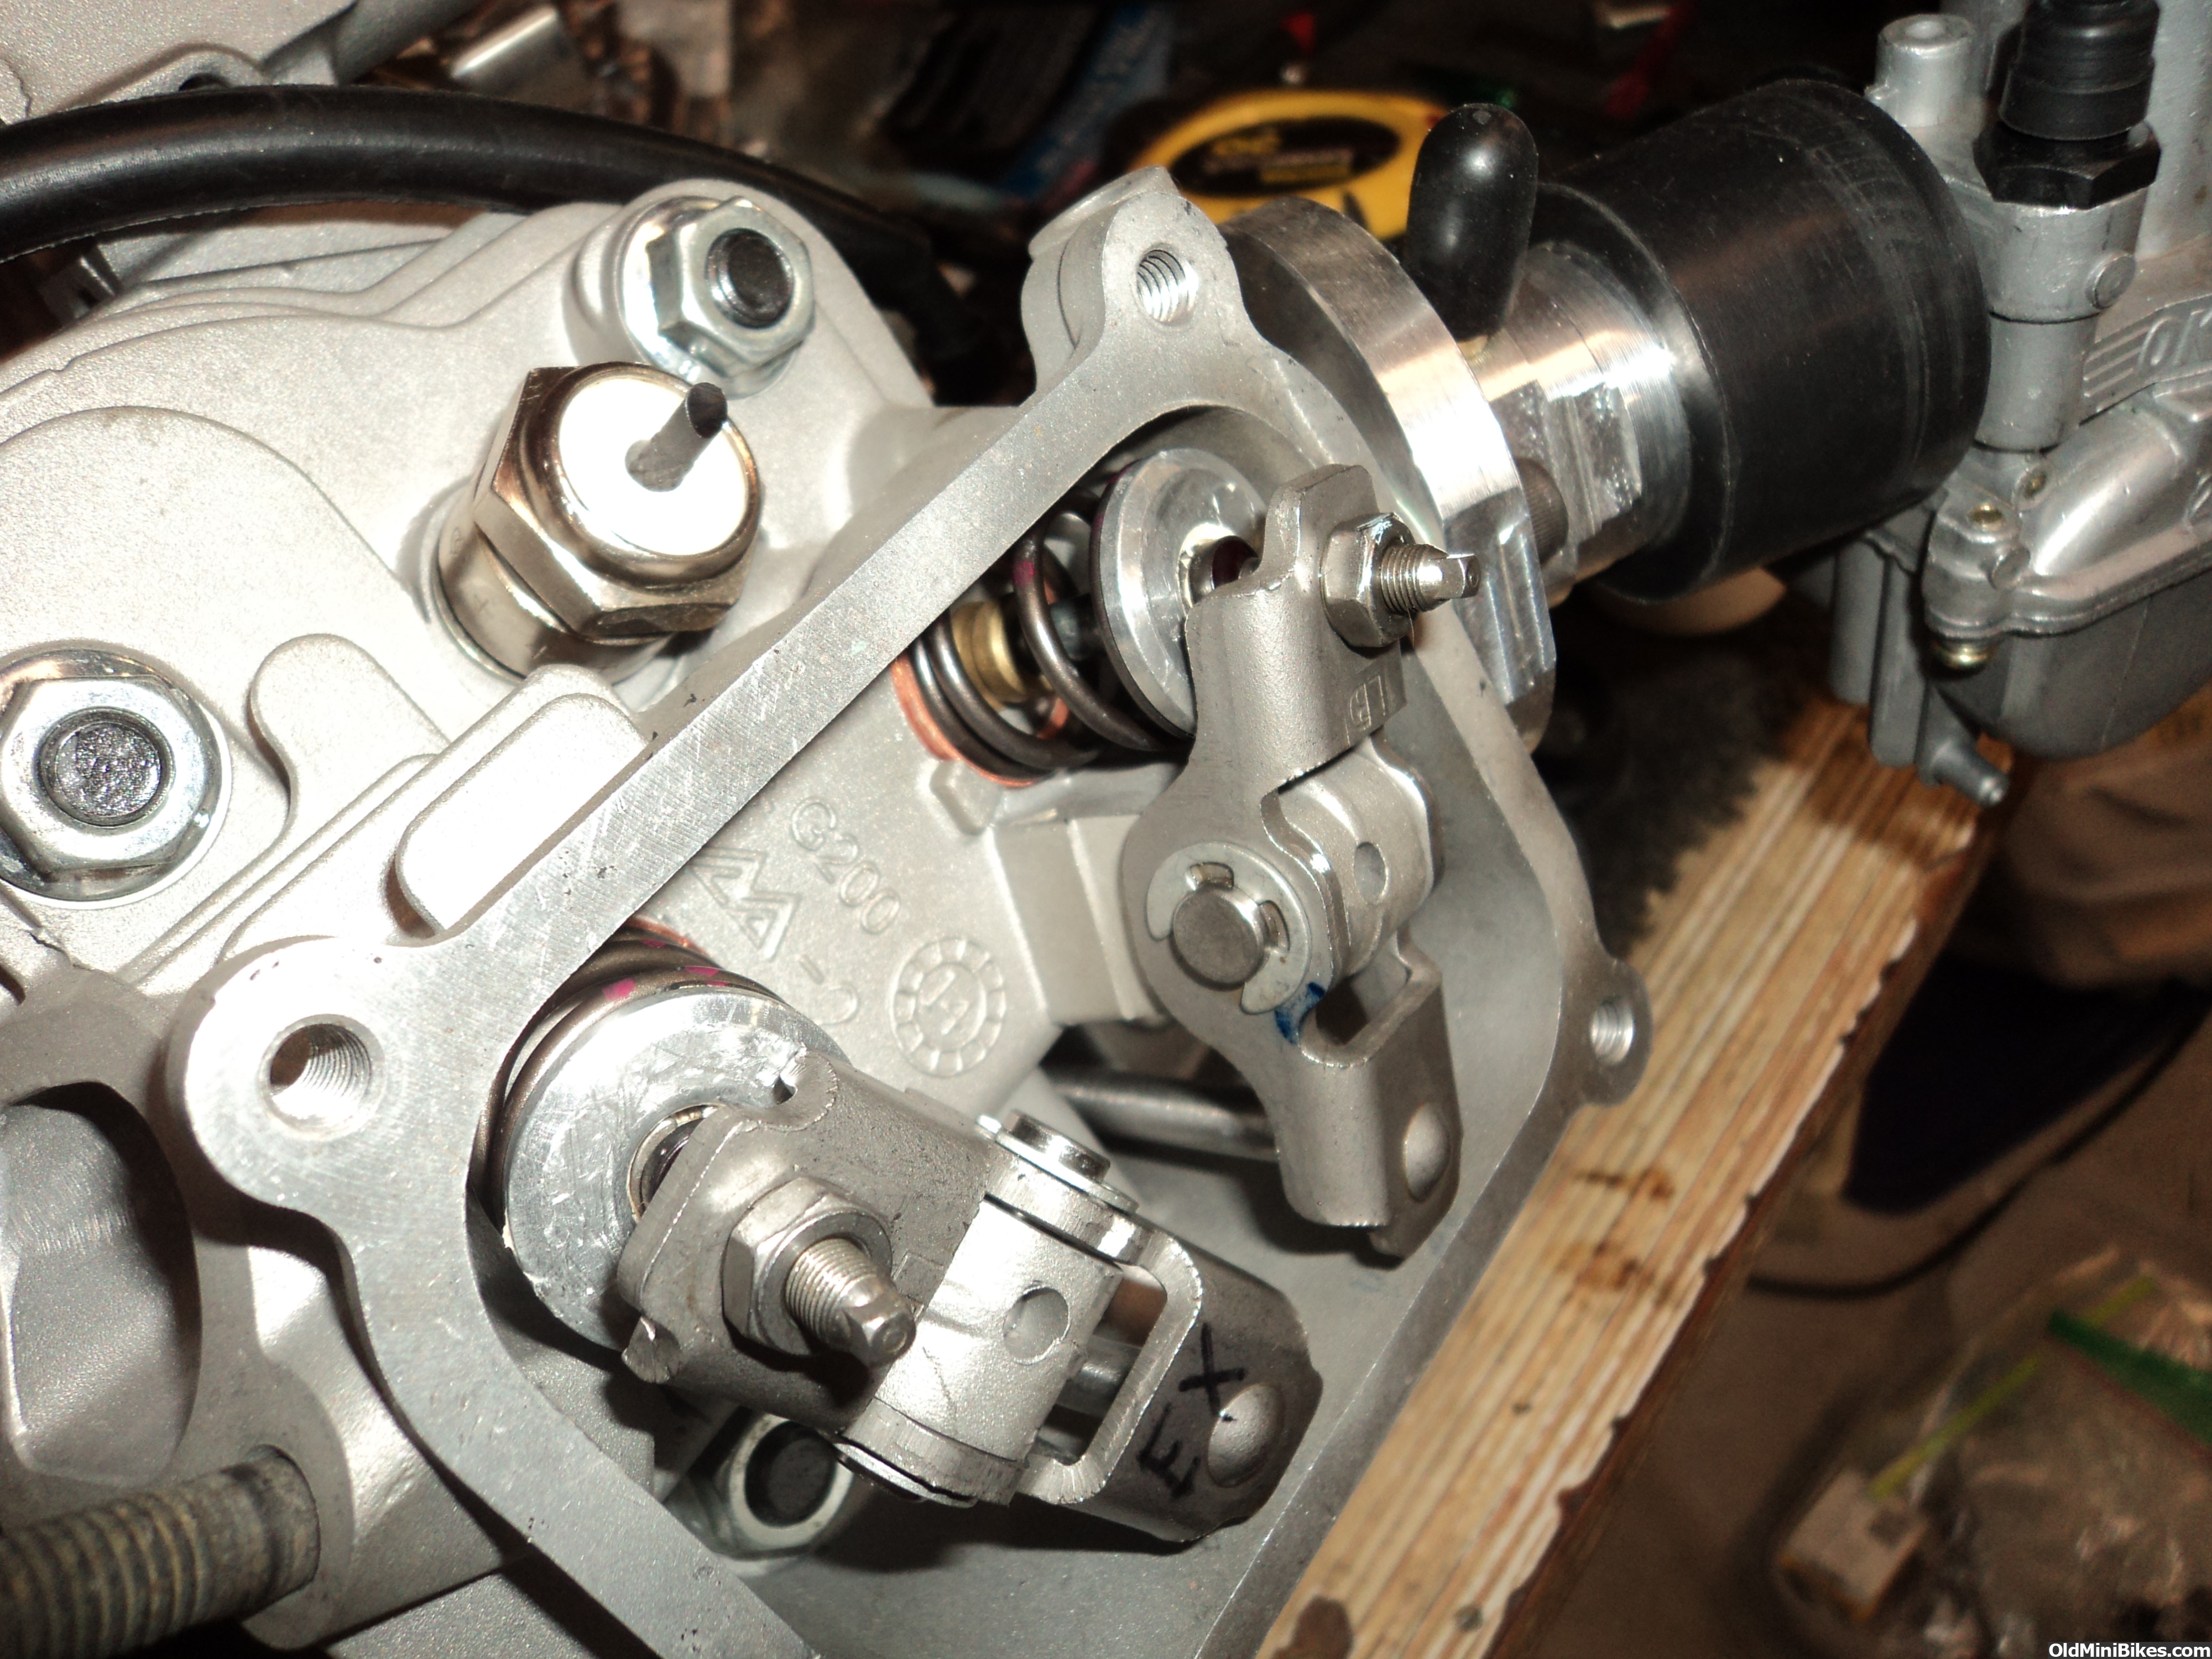
Target is a motor that will turn 7500 rpm, be fairly reliable & (hopefully) durable. Building more for top end than drag racing at this point. I've done a little bit of porting on the head, nothing drastic, just knocking off the hard corners & edges to increase air flow & hopefully let it breathe easier on the top end. Lapped the valves & using stock rockers so I don't have to worry about the rocker arms giving up unless I go over my target rpm limit. Not running ratio rockers on this motor as it's a first attempt for me at building. At some point this could change....

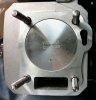
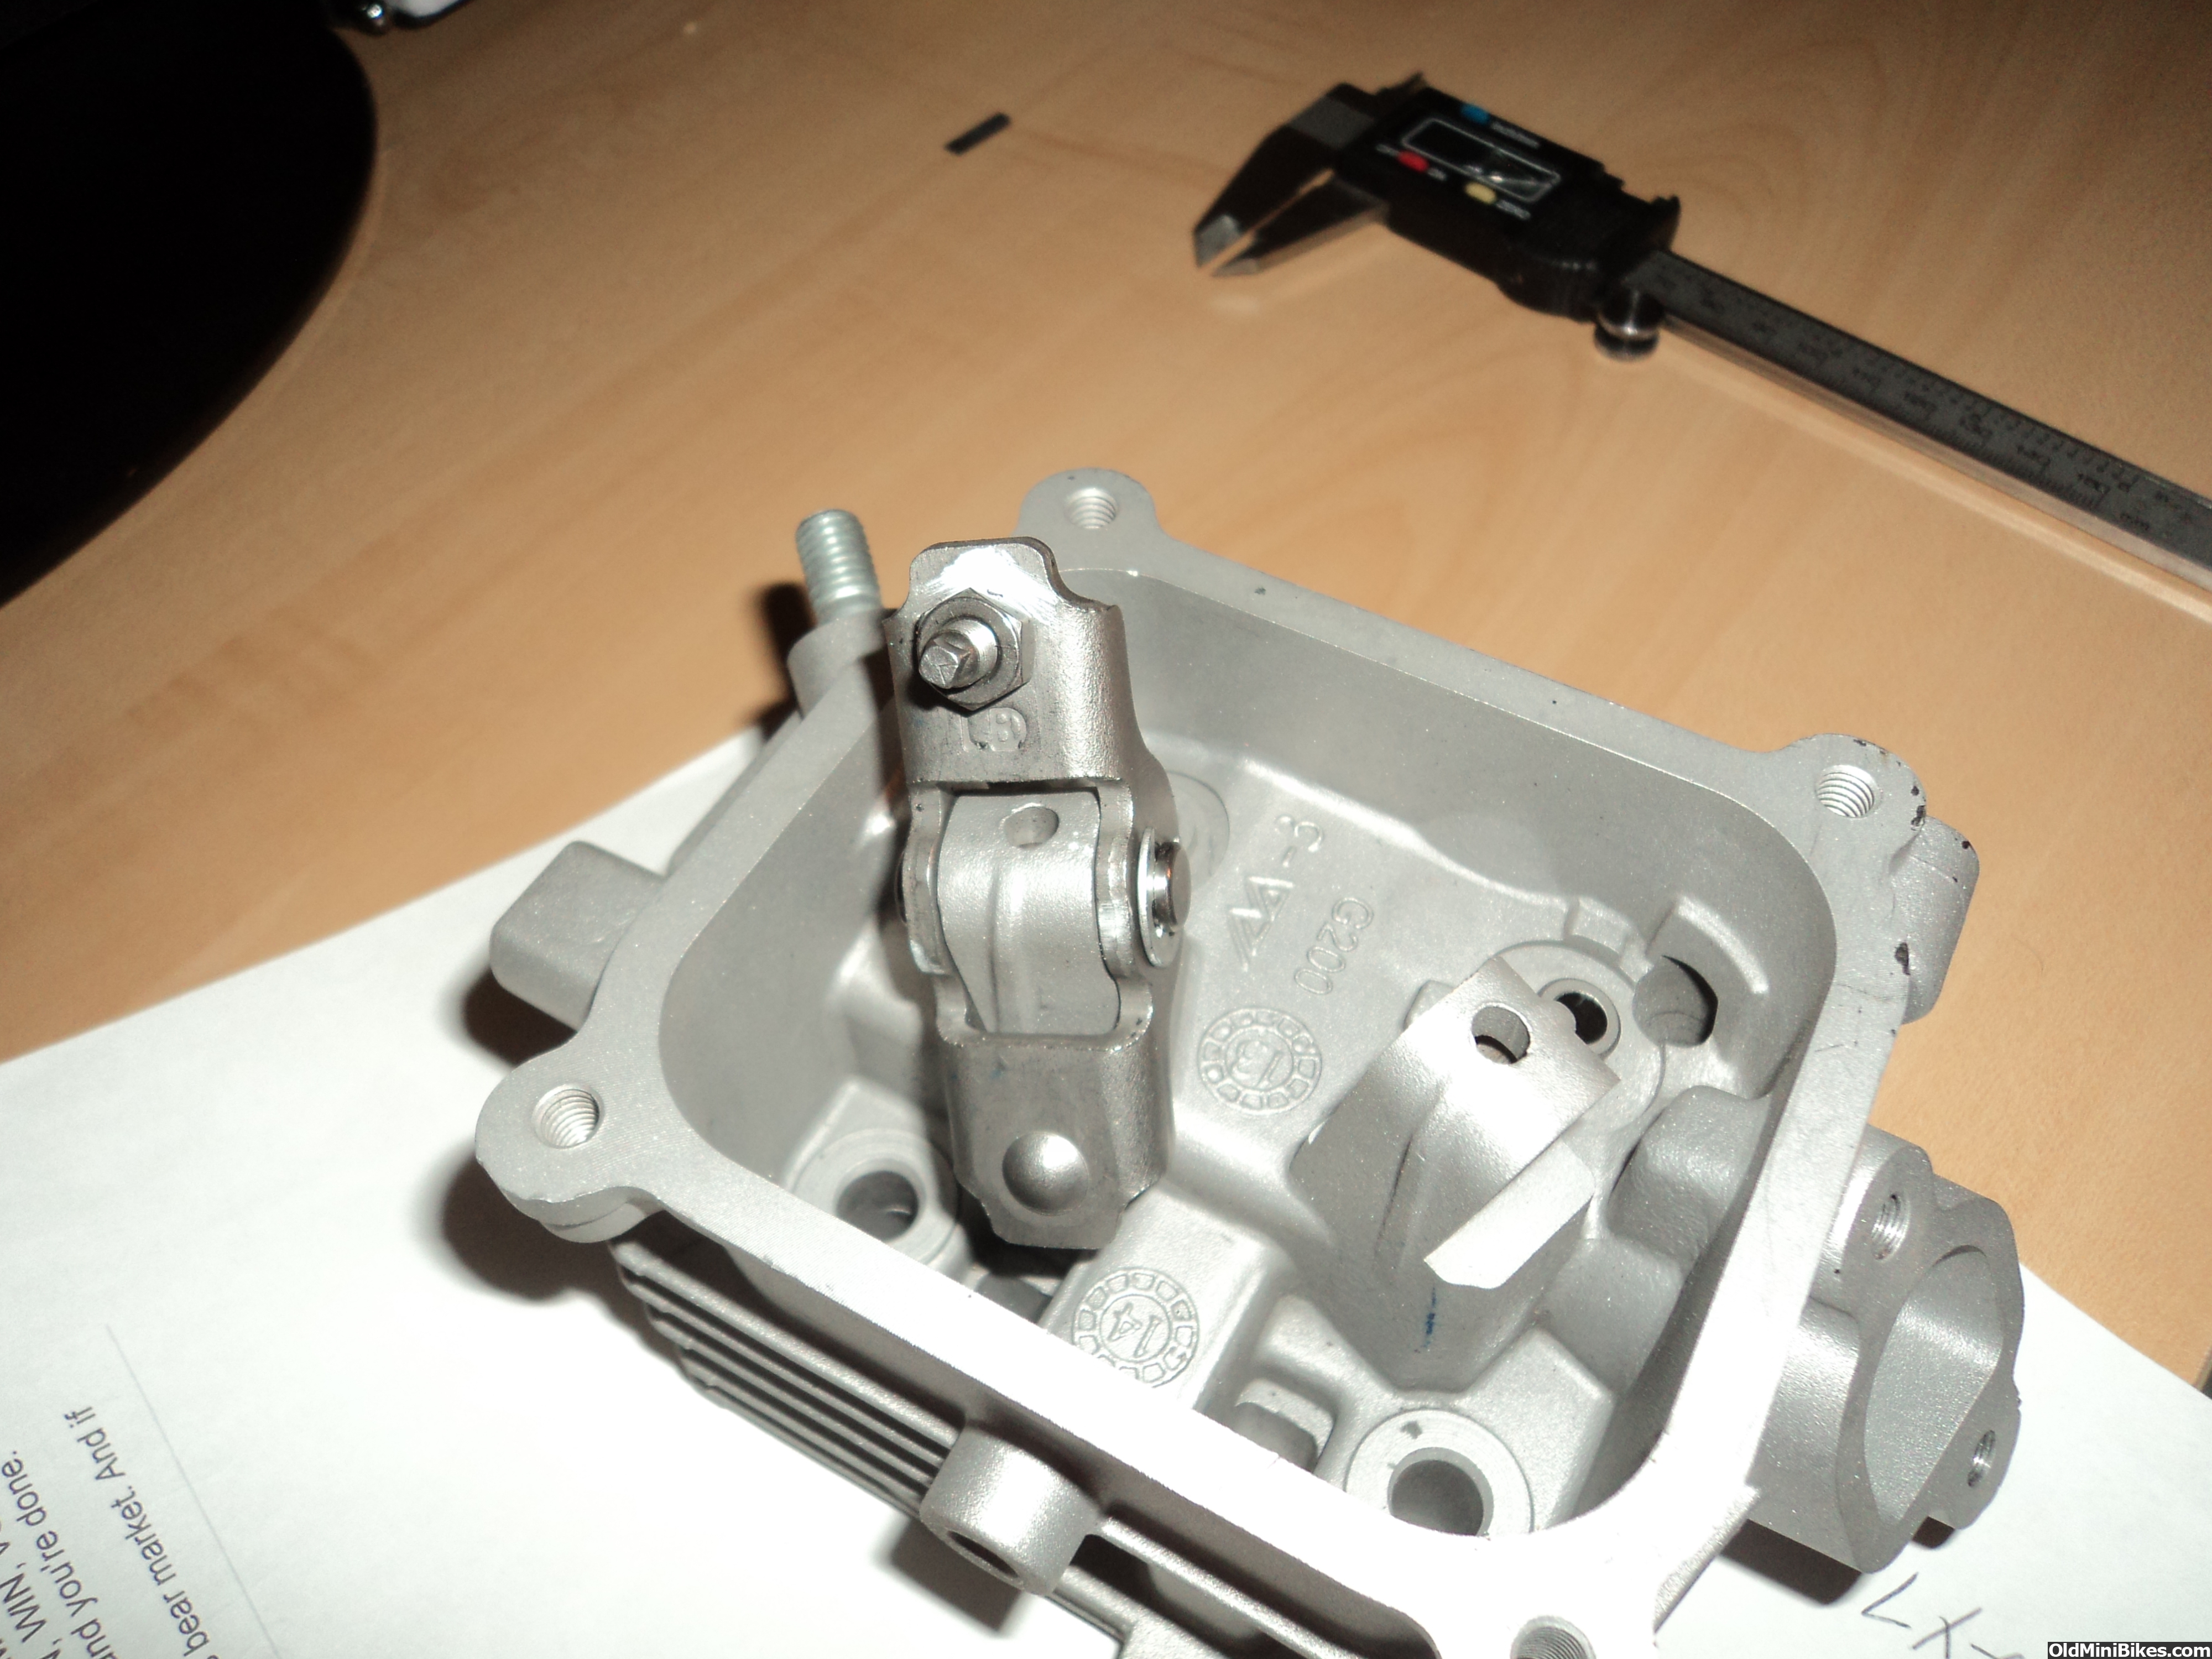
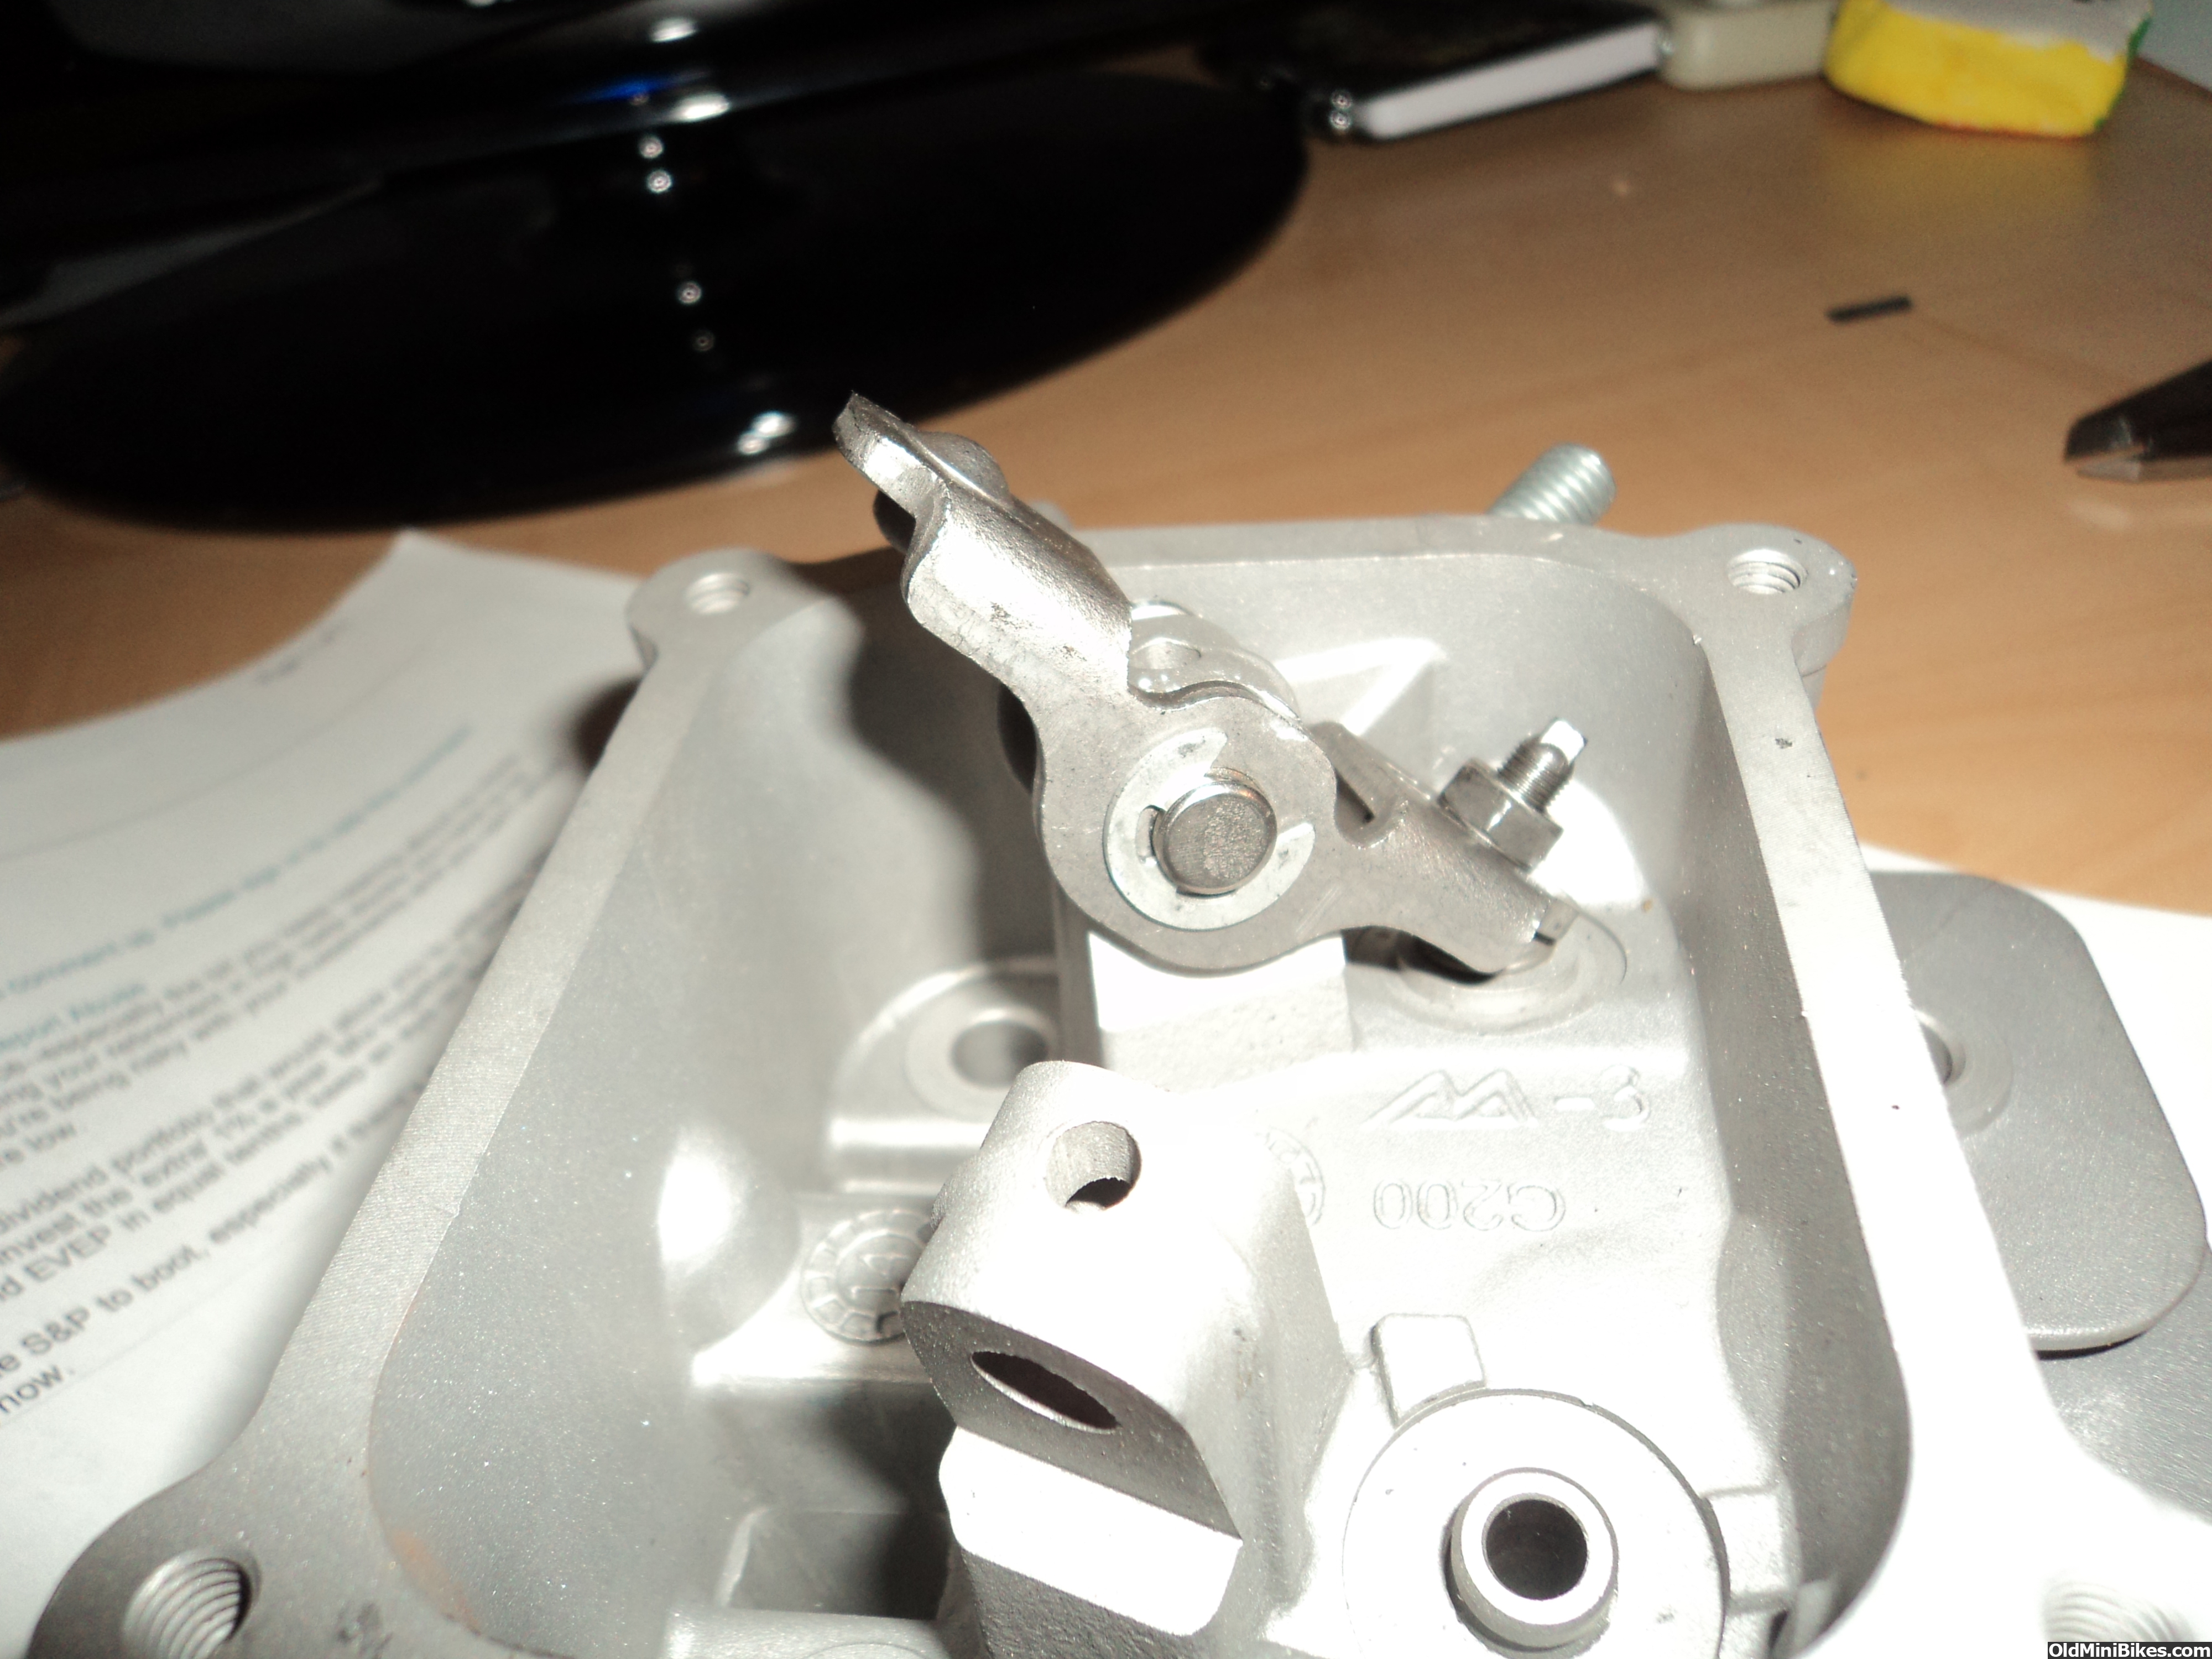
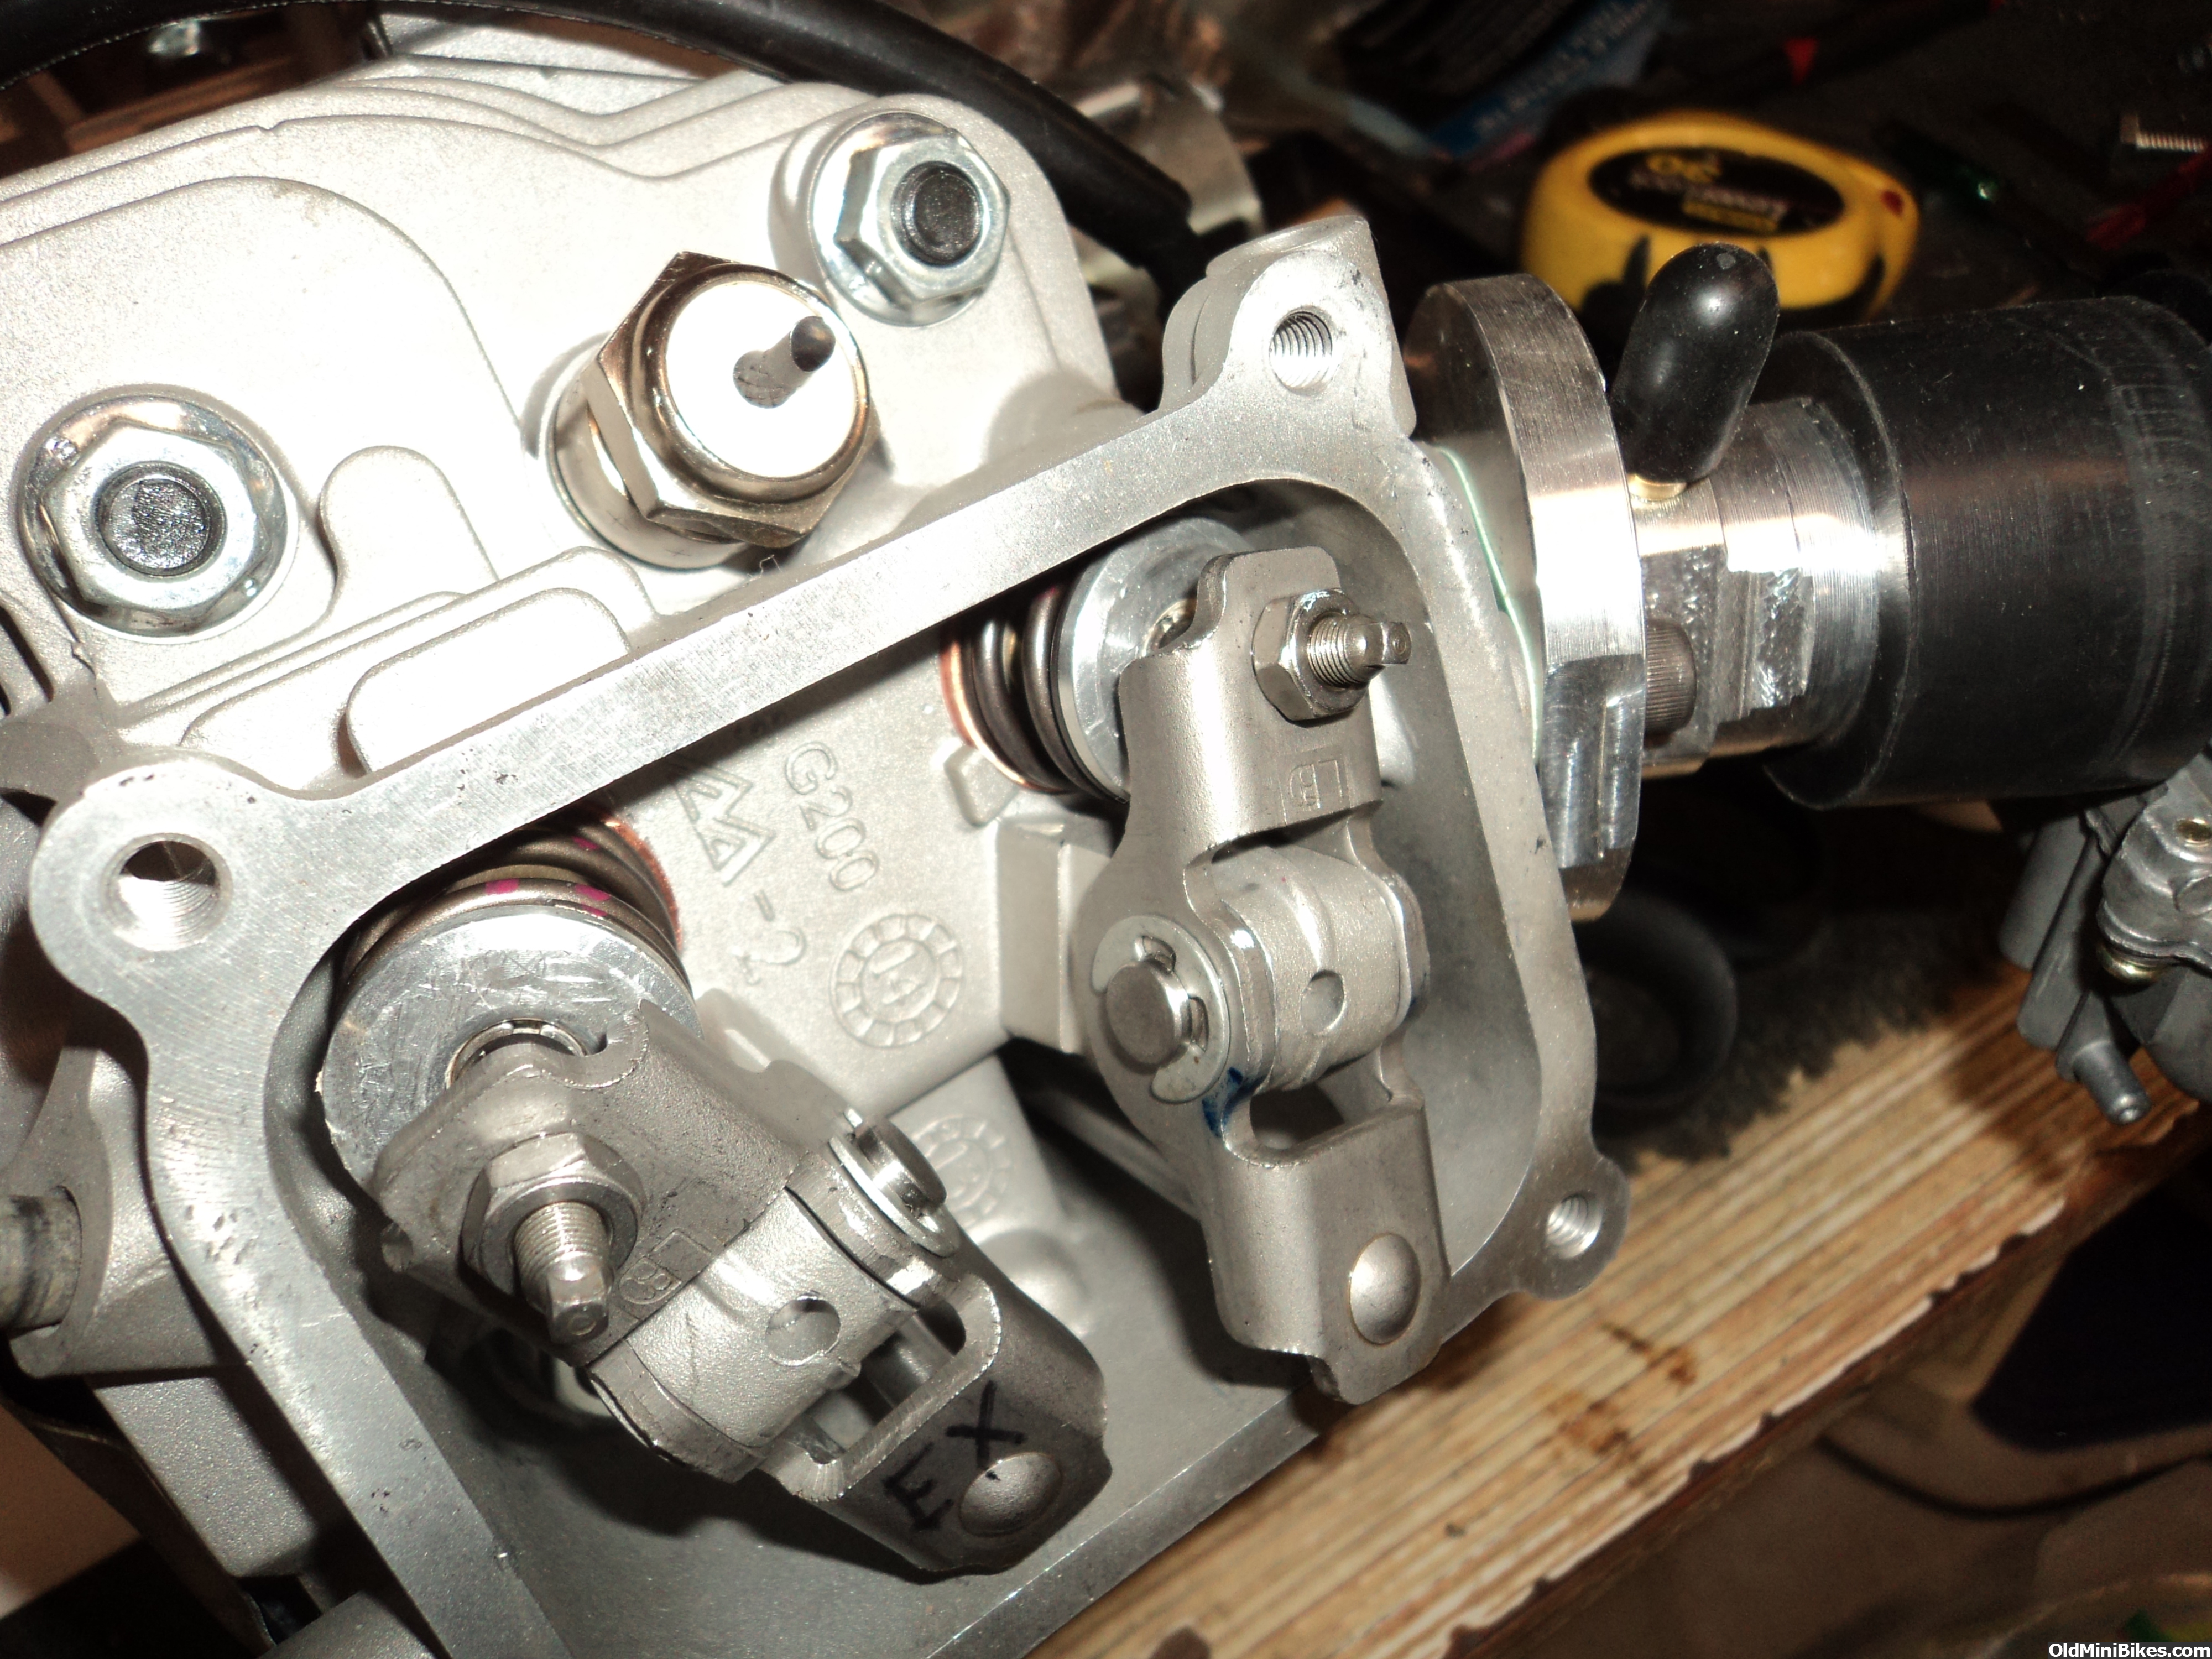
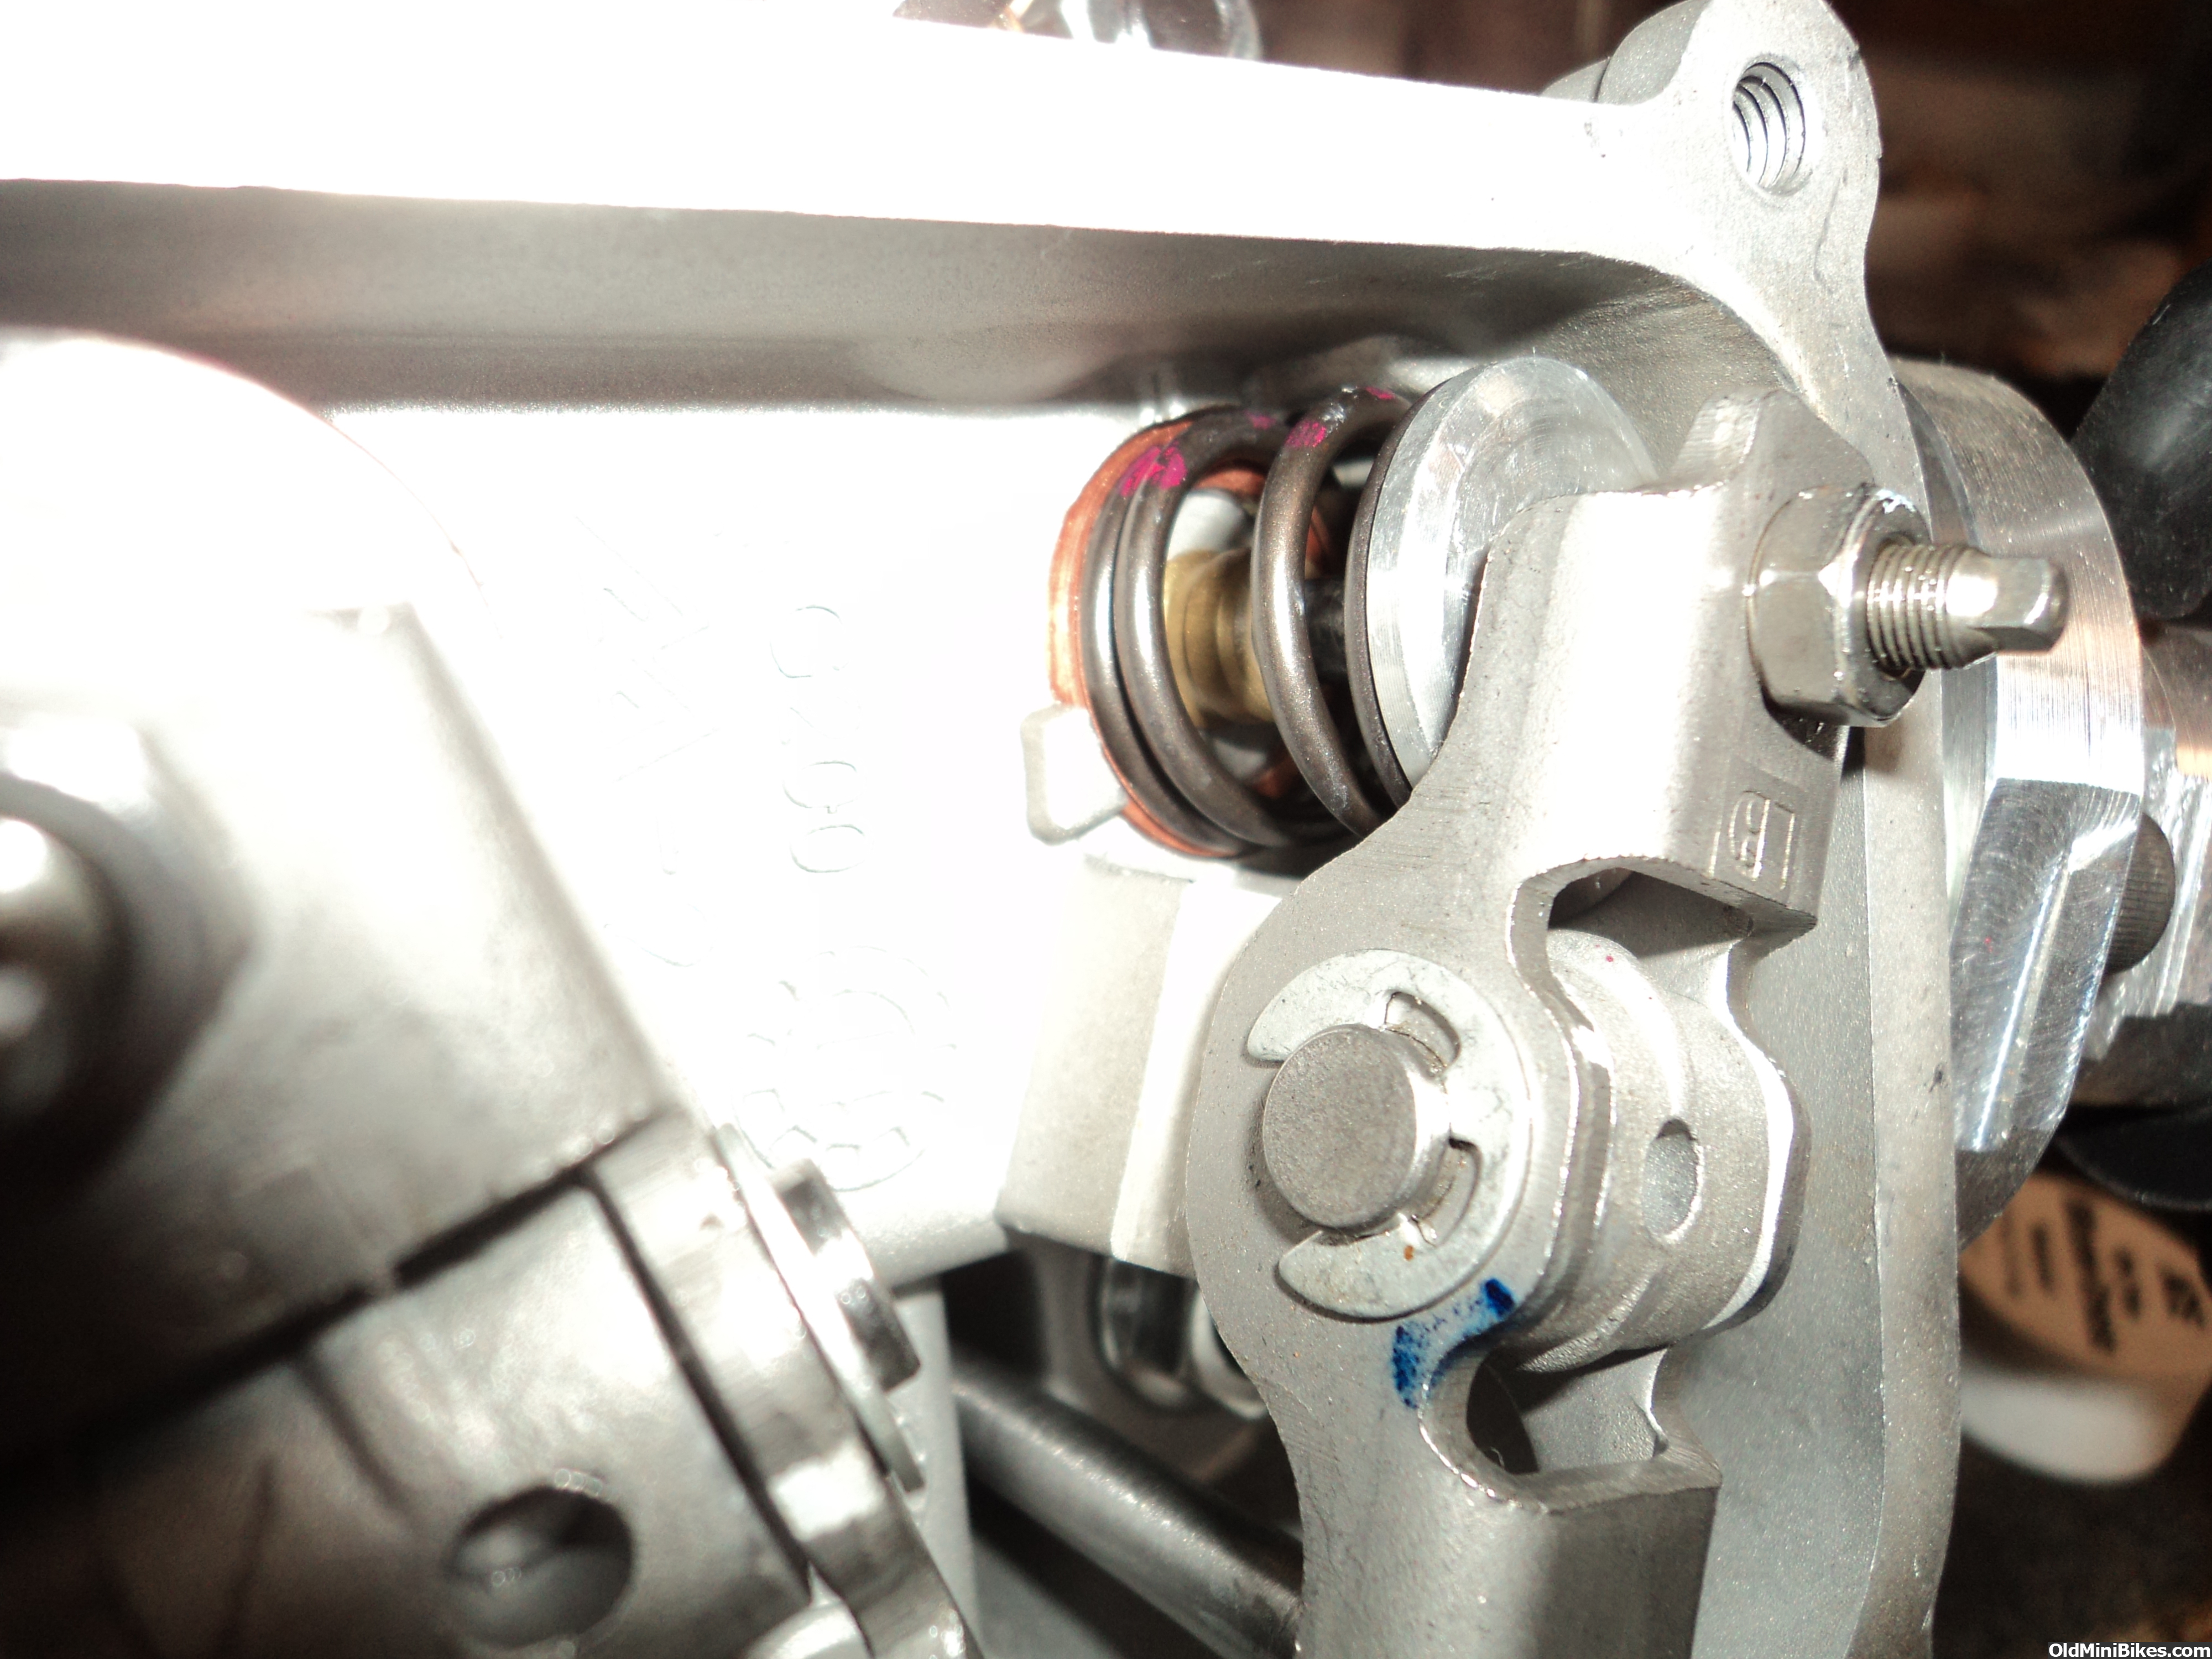
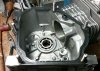
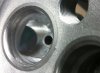
I'm just starting on the project, so there isn't much to show in the way of progress yet. Will post more as I go. The motor was run at the factory & that's all. It'll be run-in once I get it assembled & finished. Here's the head as I got it when it was taken off.

B4-s.jpg

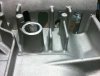
The intake runner opened up & radiused just a bit
Port.jpg

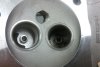
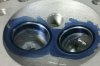
The seats lapped in the head
Seats.jpg

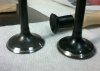
Valves showing marks on the faces from lapping, about right from the factory on this part of things
Valves.jpg

I've sent for a few parts & am waiting to get started.
 
#2
Sounds like a good start and you have measured your in the hole amount, glad you have done this and didn't ask "what length rod" should you get. The studs are a good idea as well for serviceability as well as cam changes. Great start to a first attempt. Your also ahead of the game running the mikuni.
 
Last edited:
#3
Sounds like a good combination. I have never used the stock valves and retainers but have built a few with black mamba and have never been disappointed.
 

noseoil

Active Member
#4
Thanks guys, appreciate the feedback so far. I'm hoping this one turns out well & just does what I want it to do. Still need to break down the block, but I'm waiting for parts to arrive so I have what I need to put things back together when it's all out in the shop.

Here's the studs in place on the block at the head. Checked with my supplier & he said it was a metric standard type of hardness, which falls between a grade 5 & 8 in our system. They seemed pretty tough to saw with the hacksaw, so I'm hoping they hold up well enough. Used some red locktite to set them in place.

StudsHead.jpg

Will do the same for the side cover. The crank end-play seems very sloppy when I tugged on it this evening by hand, not tight at all but it moves quite a bit. I need to check & see how much there is. Best amount should be about 0.010" to 0.015" for what I'm doing, right? Need to set up a dial indicator & see what's actually there, but it feels pretty loose now. Will report back with an actual number & gasket thickness. May need some more input once I have a real number to work with.
 
#5
Thanks guys, appreciate the feedback so far. I'm hoping this one turns out well & just does what I want it to do. Still need to break down the block, but I'm waiting for parts to arrive so I have what I need to put things back together when it's all out in the shop.

Here's the studs in place on the block at the head. Checked with my supplier & he said it was a metric standard type of hardness, which falls between a grade 5 & 8 in our system. They seemed pretty tough to saw with the hacksaw, so I'm hoping they hold up well enough. Used some red locktite to set them in place.

View attachment 98636

Will do the same for the side cover. The crank end-play seems very sloppy when I tugged on it this evening by hand, not tight at all but it moves quite a bit. I need to check & see how much there is. Best amount should be about 0.010" to 0.015" for what I'm doing, right? Need to set up a dial indicator & see what's actually there, but it feels pretty loose now. Will report back with an actual number & gasket thickness. May need some more input once I have a real number to work with.
You just might find some good information in this Thread by [MENTION=47323]OND[/MENTION] . Same thing you are building.

https://www.oldminibikes.com/forum/honda-clone-predator/102074-hemi-head-predator-build-60363-a.html

Doug
 

BWL

Active Member
#6
You'll be happy with that Mikuni. So many people want a big camshaft but don't have a carburetor to supply it. I'm still learning about this stuff all the time: Can the stock rockers handle 26 lbs?
 

noseoil

Active Member
#7
The stock rockers & valves should be OK with the lift & rpm range I'm planning on running. Next step up is welded rockers, but according to the people I asked, they should be fine for this build, if not, new ones will have to go in.

Made a crude setup to measure end play on the crank. HF dial indicator, it's ugly, but seems to work well enough. Here's the setup I came up with made from some scraps in the shop.
Crnk-Setup.jpg

Here's zeroed & at rest
Zeroed.jpg

With the crank pushed to the outside. I guess it isn't as bad as it feels, actually about 9-10 when moved & held in place, but it feels more like a half inch to me. I can still change it with a gasket, since this is the factory setup & end-play. Is this close enough to leave alone for the build?
Move.jpg
 
#8
It looks like .008 thousandths to me, based on your pictures. I would shoot for .010 and above end play. If its at .010 IMO you are fine. I have read by some of the well know builders that build for a living .015 is ideal.
 
#10
FWIW I run 37Lb springs with a Isky 230duration .330 lift cam with stock rockers. I do use alloy retainers, Cut the spring seats wider, and run 1/4" isky C moly pushrods and have had no issues on a couple of mini's I have run this on. Noseoil I read you posts on bobs and saw this response from a engine builder which really seems off to me so maybe I am missing something and you can show me. Here is the quote

"Now moving higher on lift you will need to notch the rocker so it does bottom out on the boss its mounted too.
You can get all the spring you will ever need without going any larger diameter on springs, nor do you want to over spring this head especially due to boss (Casting) breaking.. We have heli arc welded these boss to boost their strength in the past.. BUT now we usually just change heads if we are building a large engine."

Reading this made me think about my choices so I went out and did some measuring and checking and What I found is there is no way that the rocker hits the Boss its mounted to. Here are pictures of my 330 lift intake rocker at full open and full close. Then I took a bare head and the rocker can swing till each end hits the head and still it is nowhere close to hitting the boss. Then I measured a set of Stout Racing modded 1.3 to 1 (which they are not) rocker arms and they are similar to the hemi arms except the Stout ones are .095 thick and the hemi ones are.137 thick much stronger. I know you guys probably think I am an ass because I will ask questions when I see things that do not appear correct but I can tell you that there is a lot of misinformation being posted that is someone's opinion (and that is OK) but it is stated as a fact. That thread also said the rocker will fold up with 37 LB springs but I can tell you they are much stronger than the champions. The boss may break and I would not want BWL running one of my motors on the water for 20 minutes at WOT as I am sure they would blow up, but for 10 to 15 second WOT drag races they have held up fine.
 
#11
Ole, I have personally not messed with the hemi head but know based on your precise info and measuring detail you go through you are spot on. I wouldn't say being an ass at all, your more of a factual guy which is what is needed versus opinion.
 

noseoil

Active Member
#12
Ole, I greatly appreciate the input & your willingness to share factual information based on your builds & no, I don't consider you an a$$ for being honest & having a valid opinion backed up with real-world experience. The spring/rocker issue may come into play at a point further up the scale, but I'm not really interested in taking this build beyond what I've listed originally.

I'm curious what you think the "weak link" in my build would be. Is there something I've missed, neglected to address or overlooked for now? I know more things will come up, but is this basic motor going to work well enough if I do my part & build it with good tolerances, torques & assembly procedures?

It still sounds like at my targeted rpm range (7500), lift (.275) & spring pressure (26#), it should hold together and be able to run well as planned. Sustained rpms at 7500 & above might become an issue, but for now I'm thinking that touching that speed in short bursts should be OK. I'm sure if it turns up to 9000 I will find something which might not work.

Thinking I should maybe get a fatter side cover gasket, about 0.020" perhaps would be better for the crankshaft end play? Thanks guys for the input.
 
#13
Too much end play is bad. As long as I have some and crank is free with cover and gasket torqued I'm good. I have never had an issue so far with too tight or too loose. The only thing on your build that would concern me is the stock valves and retainers. I just went and measured a stock valve and the necked down diameter is 3.49mm then I looked at where it was cut with a 10x jewlers loop and the valve does have a radius on the top cut which is a good thing for strength. Being as I like to modify heads and have all the tooling I only had one modded clone engine years ago with stock valves and retainers and I think 26lb springs and it worked fine with a dyno .265 stock re grind which was basicallyastock cam with a reduced base circle.
 

noseoil

Active Member
#15
Should have some parts showing up soon, but I was wondering about the cam. Will I have to trim the block & crank to let it get past? If so, how much "extra" should I leave to make sure it's not going to hit anything at higher rpms? Figure I can use my grinder for the crank & a Dremel inside the block, if necessary. Is free-handing the crank good enough to deal with any contact points? No problems with balance if I grind enough to clear? I know it will change the balance point, but it just moves it on the curve with a single cylinder, right?

Here's the "Beast" which should make quick work of things on the crank. I made it for knife grinding, but it's nice to have for taking down metal or wood on small stuff. Figure I should make a jig to hold the crank in place for the grinding, so it's at least even & fairly smooth along the cuts. Thinking about a vertical axis rest to make the grind even & work properly. Just clamp a piece of plywood with a hole in it to the workbench & remove the tool rest to make the cuts. Should be quick & dirty this way.....

Finisheds.jpg
 
#16
What a great belt sander. Did you build that? Black mamba will not hit block but you should look at the area adjacent to the rod journal as some cranks have a raised area right outside the journal radius. Put the crank and cam in and slowly turn it over to see where it comes close. If it looks good put on the side over and make sure it rotates free. To visually check you need a cutaway side cover. Should have .060 to be safe
 
#17
Looking good man, should be a stout little beast!!:thumbsup:


DUDE I DIG THE KNIFE BELT SHARPENER!!!!!! looks like someone is a blade smith on the side:drinkup::drinkup:
 
Last edited:

noseoil

Active Member
#18
Ole & Possum, yep, it's a "home-build" made with parts from online & a buddy welds, so he did the welding for me. I cut parts for the frame & modded what I needed to so it will work. IMS here (Industrial Metal Supply) sells receiver hitch that's 1/4" stock, for the inner & outer tubing. Has a HF electric motor (TEFC, farm type), cnc parts, rollers etc from online. It's built like a tank, but runs well & is smooth. It will cut some steel pretty fast, so a gentle touch is all that's needed for most things. First metal work I've done, used to be a cabinet maker in a past life....

Prime3.jpg

Prime2.jpg

3rdIW-s.jpg
 

noseoil

Active Member
#19
OK, back to the block. Oil sender plugged, silicone & red Loctite
SenderPlug.jpg

Tapped governor hole for vent at top
GovTap.jpg
Gov-Tap.jpg

Studs in place for the side cover
Block-Sstuds.jpg
 

noseoil

Active Member
#20
Ole, thanks for the .060" dimension for the crank to cam clearance dimension. Shouldn't be too difficult to knock a bit off if necessary.

Was wondering about the valves on this motor. They're the 5.5mm stems, so I guess they will weigh more than the regular clone 5mm valves. Wondering if they're a bit more robust because of the stems, or not really that much different due to the bigger 25mm & 27mm faces. Down side is the added mass & higher inertia at higher speeds. Stainless is better for heat & strength in general, but I'm not wanting to spend more money if the stock valves are good & work well enough.
 
Top