j57little's - Roper Rebuild - (Vintage Class)

#21
The solder came out pretty good, filling the major voids, but I still had some small leaks and brought in the JB Weld (putty variety). The surface appears well sealed now and I will start the tank coating in a couple of days. It's a lot of work for a Roper tank that at best, was not a good looking tank - it always looked backwards to me because the widest portion is next to the seat. I sent the engine to a guy who has helped me with the deep dive engine issues in the past, but I have not gotten in back yet. There's a lot of work ahead! The good news is the inventory list. I have the two-speed clutch, new shocks, new wheels, new fenders, tires, the original seat, lift bar and an almost functional tank! And I have the frame graphics/decals.

One area that I will have to compromise on is the clutch cover. I suppose I'll have to call upon OldMiniBikes for that and the scrubber.
You can make a clutch cover very similar to the original shape and size with a little effort !
 

j57little

Active Member
#22
Yep, I was planning to make one, but some of the Ropers had a long, skinny style cover that attached to the frame at the rear. They have them like that at OldMiniBikes Warehouse so I bought one hoping to save myself a few hours. My last project (a Rupp Roadster) was so much more difficult because I wanted everything to be original, but for the Roper it will not be stock. I'm adding/upgrading all the things that I wanted as a kid - better wheels, etc., so it won't be stock - it will be better! I might have to forego the sissy bar, but speaking of wheels, my wheels arrived the other day - five spoke design. The hardest part was drilling a sprocket to fit, but that's done now. By the way, the cover in your photo is exactly like I remember from my Roper. Very nice!
 
#23
Yep, I was planning to make one, but some of the Ropers had a long, skinny style cover that attached to the frame at the rear. They have them like that at OldMiniBikes Warehouse so I bought one hoping to save myself a few hours. My last project (a Rupp Roadster) was so much more difficult because I wanted everything to be original, but for the Roper it will not be stock. I'm adding/upgrading all the things that I wanted as a kid - better wheels, etc., so it won't be stock - it will be better! I might have to forego the sissy bar, but speaking of wheels, my wheels arrived the other day - five spoke design. The hardest part was drilling a sprocket to fit, but that's done now. By the way, the cover in your photo is exactly like I remember from my Roper. Very nice!
Cool deal , if you bought the Astro wheels ( for future reference ) Old School Mini Bikes sells the sprockets with the correct 5 bolt pattern , not sure why OldMiniBikes doesn't have them [MENTION=1]Hent[/MENTION] . I made a grab bar for the back of my Roper , fine forum member OND bent up a piece of 1" tubing with very tight back to back 90 degree bend and I slugged and welded it in , came out pretty nice
 
#24
Should you decide to replace the tank I have two that are about as good as you can find, one is NOS the other is a rust free original paint example in fantastic shape. Neither are cheap at all though, PM me if you are interested.
 

j57little

Active Member
#25
Yes, I saw the bar you put on the back - very nice! That's a bit above my skill level. Interesting - I don't weld, but I work for a welding company - go figure. I wish I had the welding skills...and the equipment...and the space to weld!
 
#26
I didn't read this, but if you're talking about the flat sprockets, I do have the spacers for the flat sprockets, sitting on my lathe, along with some other products that I haven't gotten around to putting up and completing. [MENTION=31879]CarPlayLB[/MENTION]

Short handed at the warehouse a bit lately. I've got a lot in the works, just need some extra help.

Cool deal , if you bought the Astro wheels ( for future reference ) Old School Mini Bikes sells the sprockets with the correct 5 bolt pattern , not sure why OldMiniBikes doesn't have them @Hent . I made a grab bar for the back of my Roper , fine forum member OND bent up a piece of 1" tubing with very tight back to back 90 degree bend and I slugged and welded it in , came out pretty nice
 
#27
[MENTION=1]Hent[/MENTION] , actually talking bout the 5 hole sprocket to match the Astros , but the spacer is great too , I've always used threaded rod couplings to bolt the wheel halves together then bolt the sprocket to the rod couplings ?
 

j57little

Active Member
#28
That's a great idea. I drilled my own sprocket because I wanted it to be flat, but the spacers and rod couplings sounds like the way I want to go. I'll send a PM to discuss the spacers! Thanks!
 
#29
Yep, I was planning to make one, but some of the Ropers had a long, skinny style cover that attached to the frame at the rear. They have them like that at OldMiniBikes Warehouse so I bought one hoping to save myself a few hours. My last project (a Rupp Roadster) was so much more difficult because I wanted everything to be original, but for the Roper it will not be stock. I'm adding/upgrading all the things that I wanted as a kid - better wheels, etc., so it won't be stock - it will be better! I might have to forego the sissy bar, but speaking of wheels, my wheels arrived the other day - five spoke design. The hardest part was drilling a sprocket to fit, but that's done now. By the way, the cover in your photo is exactly like I remember from my Roper. Very nice!
I am adding/upgrading all the things that I wanted as a kid… Love it, having fun!!!
 

j57little

Active Member
#30
I appreciate the encouragement, and no, I have not given up, but the day job is really starting to really interfere with my mini bike activities. Major updates: chrome is in progress. It's costly, but I found a place that's really quick. I'll report back once I have a feel for the quality. The frame is far too rusty for me to do on my own so I'm having it blasted and powder coated with a primer finish. I just can't put the time into the project that would remove the rust pits, but it will look nice when its done. The tank is repaired and will get painted soon. The motor is done. Here are some photos - lots of new parts, wheels and sprocket. I really wanted the Astro wheels, but the problem is the five-bolt pattern - few sprocket options. OldMiniBikes warehouse sells a sprocket/brake drum combination, but I wanted a flat sprocket similar to the original so I drilled the holes with a pattern I made in Power Point. It seems to have worked.

Callout to Chipper - great idea on attaching the sprocket with rod connectors - that solves a couple of problems - thanks!

I should be OK to finish on-time, but I'm literally creating a mini bike out of a junk rust heap. It will get interesting!

Sprocket.jpg NewWheels.jpg NewParts.jpg


Question: anyone with Roper 2-speed clutch experience might be able to help - The original Roper clutch had a 2.5-inch flywheel on the jackshaft. The band brake was applied to this flywheel. Problem is, I see lots of 4 and 4.5-inch band brakes out there, but nothing in the 2.5-inch category. Any thoughts are appreciated.
 
Last edited:
#31
I'm pretty sure Allied Leisure sells the small band brake. Check out their Web site. If it doesn't show up, give them a ring. I'm 99% positive they have that band brake there.
 

j57little

Active Member
#35
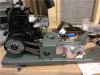
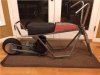
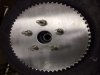
Progress! The chrome came back and no surprise, it was expensive! The good news is that it came back quickly and was nicely done.

The scrubber brake is missing in all the attached photos. That's because the one I had was so bent up that it would not be worth trying to straighten. Thanks to Chipper for a scrub brake in excellent condition! It will be welded into place once I get the rust pits taken care of on the frame.

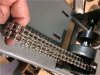
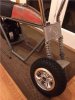
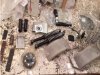
The two speed clutch came together pretty nicely - from several sources, but I have a few questions for the many experts out there:

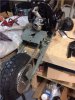
1) Please look at the photos. The original jackshaft used snaps rings to hold certain parts, but I am using lock collars. Once I am certain everything lines up just right I'll machine the slots for the snap rings. By the way, if anyone sees any problems in my jackshaft stack-up, please advise.
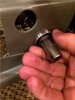
2) The bearings on the jackshaft ends should probably press into place with a bit of friction, but these spin pretty freely. I suspect that I’ve lost a bit of material to rust over the years and that’s not helping. Any thoughts on locking down the bearings are appreciated.
3) On the drive shaft clutch the directions say that it is designed for the open side of the clutch to face toward the motor, the opposite of the typical case where the open side of the clutch faces away from the motor. The problem is that I cannot get the sprockets on the PTO shaft to align with the sprockets on the jackshaft unless I mount the driver clutch in the typical position. Is there a problem mounting the driver clutch as seen in the photos?

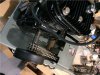
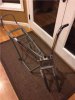
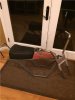
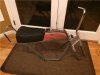
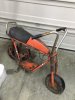
The frame has been media blasted and reveals some serious pitting as I expected. I can do a lot of grinding or use a lot of body filler (or both) to deal with the pitting, but any ideas on this topic are appreciated.

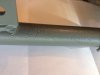
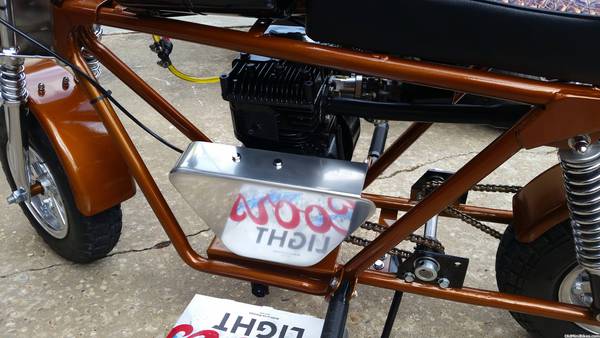
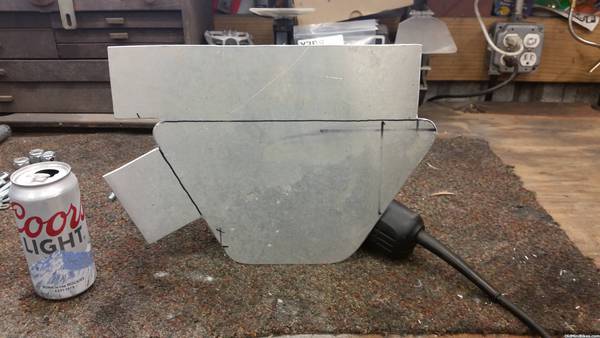
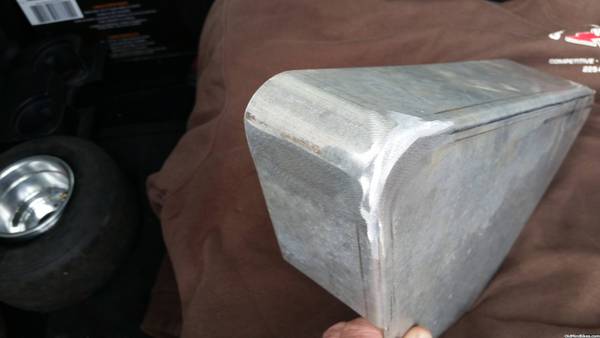
The fuel tank was really rusty inside. After rust removal, soldering and sealing it appears leak-free and functional. The good news is that the outside is pretty much dent-free.

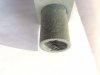
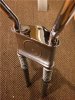
Finally, the front shock springs have been a real problem. Getting springs to clear the struts and still fit into the end cups is the challenge. The original springs were a pretty light gauge, but any springs I’ve found are heavier and either the OD or the ID or both are wrong. Any thoughts on a front shock spring source are welcome.

IMG_1017.JPG IMG_1018.JPG IMG_1023a.jpg IMG_1024a.jpg IMG_1026a.jpg IMG_1028a.jpg IMG_1035a.jpg IMG_1037a.jpg IMG_1040a.jpg IMG_1041a.jpg IMG_1043a.jpg IMG_1044a.jpg IMG_1045a.jpg
 
Last edited:
#36
Your primary (engine) clutch IS installed properly. That is the only way it can be installed and still have the sprockets line up with the jackshaft sprockets.
Michael
 
#39
For the bearings you can use thin aluminum shims. Like beer can.or Coke can.
Or JB Weld.
In addition, we have used metal tape for this application if it is just slightly loose. Just a wrap or two around the bearing will do it. If it is REALLY loose and flopping in the breeze you will need to build it up with a bead of weld and grind it back down to the correct tolerance.
Michael
 
Top