New member Fox Frankenstein

#41
Things continue forward, sorta. Made some flanges for headers. The process of making them is the same as the shock brackets I made. Been fiddling with the shock bracket placement for clearances. Lastly, today I painted my Briggs block with a flat black 2000 degree rustoleum. I also took the 6 seconds it takes to hone the cylinder as well as run a wire brush bit down the intake and exhaust valve guides. Now, when time allows, I can hone out the exhaust and intake. Exhaust mostly to get rid of the threading and smooth it out with some 400 grit. Intake because I want it a little bit bigger, about 4mm bigger diameter. Not much else has gotten done. Tomorrow, if time/weather allows, I'll paint the Tec block. Tec blower housing and other bolt on bits will get primer/paint separate.

Header Flanges.jpg Trailing Arm Fitment.jpg Briggs Painted.jpg

About the only other thing of note is that with switching to the Briggs and 3/4" shaft I'll be using a comet clutch that my Dad bought and doesn't intend to use on his project/s. I'm still digging up material on this setup as it looks to be symmetric and not the typical a-symmetric modern ones.

Comet Clutch.jpg Comet Clutch Grooves.jpg Comet Clutch Back.jpg
 
#42
Well, I've run out of nuts and bolts to wire wheel. Both engine blocks are painted. And finally, my engine parts showed up. Well, all except the second 22 lb valve spring. So...I guess I'll mostly build the Briggs... Hopefully the second spring ships soon...

Anyway, pictures of progress. Note: Shiny aluminum bits for the Briggs.

Parts collected.jpg Tec Painted.jpg
 
#43
Wee, the fun never really ends does it? While waiting on my second valve spring I got some other things done. Mostly lots and lots of painting. Let's begin with the Briggs though.

I got all the internals back in this thing. The rod was just following the instructions that ARC sent along with it. After that I stuffed the tappets and cam back in. With the piston, it's important to note which way it goes back in. Some have a fancy arrow on top, this one had an X cast on the wristpin underside that goes flywheel side. Some day in the future this thing may well get cracked open again to change out the cam.

Then I put a light layer of Permatex on the sump and side cover sides to sandwich the new gasket in. There is the thought that you can just go "good-n-tight" with the side cover bolts. I set them to 75 inch pounds like the specs say to. You'll notice the white gunk all over in there, that is engine builders grease. Good ol' engine oil is fine for assembly but since I have this stuff laying around, why not use it.

Internals Installed.jpg Side Cover Sealed Up.jpg

Then we get to the back of this thing and the valve spring I have. I say singular since the second one won't arrive till Monday. This is getting a pair of 22lb valve springs, going higher and a stock cam will start seeing excessive wear very quickly. I don't have the proper valve spring compressor for small engines and had to get...creative. I used a door panel puller to get under the keeper and push it up into it's lock position. This is much easier, especially with heavier springs, than zip ties. Another interesting note is that I used valve caps that are actually meant for a Tecumseh, but the springs between the Briggs and HM80 are almost identical and thus it will work. This will save the top from wear and my springs don't have binding issues. In the future when I change out the cam I'll change the keeper to a 2 part automotive style keeper and locks.

Something else worth noting is the exhaust and intake have been ported. The intake was taken to 0.890" to match the ID of the intake pipe that will be used. The Exhaust was taken out to 1.050" just getting the threading out of it. The Exhaust was then sanded lightly with 200 grit to smooth it a bit and ended at 1.055". The intake was left 80 grit rough because turbulence is good on intake.

22LB Valve Spring.jpg Valve Spring Installed.jpg

The last part is just some pics of the painting that has been going on. You can see the frame and fenders in primer. The forks in the final Ford engine blue that the frame will also get. Finally, the head cover with its final paint.

Frame & Fenders Primed.jpg Forks Painted.jpg Head Cover.jpg

One final thing to leave everyone with. Plugs are great for painting. It's a great idea to keep rubber and plastic caps and plugs that things we buy over time around to get future use plugging holes for painting.

Plugs.jpg
 
#45
Today the second 22lb spring came in for my Briggs build. Got that in using the same method previously noted and finished up the rebuild. The head cover was torqued to spec in the service manual for 130000 engines. I used the same method of a .020" aluminum gasket I made sandwiched between Permatex as I did for the Tecumseh.

Flywheel was torqued down to 55 lb/ft. I read that raptor spec is 75 but kept it to the stock 55. The coil was gapped to 0.035" as the ARC flywheel came with instructions to use at least 0.030". It still produced very significant spark at 0.035" gap on the stock coil.

For this engine I decided to keep the original blower cover as original as possible and simply pulled the recoil off and gave it 3 coats of clear after washing it off and scrubbing it with a brush. The final product without and then with the blower cover are shown below. There is a wire coming off the coil for the kill switch that cannot be seen.

The engine tested having spark and much more compression than an old 5HP tiller engine. I suppose I should put it up to a compression test to see what the final compression is but it's definitely higher than the bone stock engine.

Briggs minus Blower Cover.jpg Briggs Complete.jpg

Another item that came in was the new fork springs. These were ordered a company called WB Jones. They aren't an exact match but they will work. Bikes being restored to original with boots over the springs won't even see the difference. (Link)

Fork Springs Attached.jpg Fork Springs.jpg

As a last Item. The HM80 was finished up yesterday. It now sits wrapped up in a box awaiting a future life on another bike. It has compression and produced spark. It just needs a frame better suited to its size. The decal is obviously not an original style but I like it. It's better than the original idea of a decal of William "Tecumseh" Sherman. I got the decal from some site that makes stickers and decals called RedBubble.

Tec Finished.jpg

Anyway, that will likely be the last update for this week. Tomorrow includes a 12 hour drive to Kentucky for the Buick Gran Sport nationals. Hopefully we sell most of the stuff we're hauling down there and come back with less than we left with.
 
#46
Well, got back from the car show yesterday. Everyone sort of packed up because Saturday was forecasted to have rain, and it did. The 3 days I was there was a good time though. Sold some big and heavy parts, got interest in a tour of the pole barn of GS parts to maybe offload more parts. Got to watch drag races where the exhibition cars, one was a 6 second car and the other could do a wheely through the 120 foot mark.

Today was sort of a lazy day. Finished reassembling my forks. Pretty easy to do, grease up the lower forks and slide the outer fork tubes over it. I'll get a pic of them in later.

Another item was setting the paint tent back up and getting back to painting. Down to the last bits of painting to do with the kickstand, sissy bar, and the frame itself. Picture of the frame for your viewing pleasure below. Once it's no longer tacky in a few hours I'll start getting clear coats on it.

Frame Painted.jpg

The last item is the wheels. They've been painted, reassembled and trued/centered. Some of the spokes will need grinding so they don't poke the tubes, but that's fairly normal with spoked rims. Anyway, rather than the normal of just painting the entire thing I only painted the outer rim and leaving the hubs/spokes as their shiny selves. This pic was actually taken before leaving for the car show, hence why the Briggs doesn't have the blower cover on in the background.

Wheel Assembled.jpg
 
#47
Well, I made a ton of progress and then had a gigantic set back. To start, I got the bike basically reassembled after painting and the engine mounted in the frame. Everything was looking great. Today I finished fabrication of the intake and exhaust with the exhaust running under the seat and heat taped. Below we can see the bike as it was before attaching the exhaust and intake. It came out looking really great. I was super excited, especially to be able to break in the engine now that it had everything attached again.

2023-05-24 Left Rear.jpg
2023-05-24 Right Rear.jpg

Then we get to disaster time. I put oil in the engine and gas in the tank. It fired on the second pull after it drew in some gas and air which was a great feeling and it was time to just sit with this beast buzzing away like a hive of pissed off hornets. Everything going great for a solid 10 minutes and it even stopped burning oil after a few minutes as the new rings sat in place. I even got it idling without choke after about 5 minutes. Then it suddenly started puking oil out of the breather, a solid 2 or 3 oz of it. Then it gave a mighty backfire and died. While this was happening the carb started puking gas. It now pulls over extremely hard and sometimes sticks like it's hydro locking and the aftermath can be seen below.

I didn't think much of the gas puking as it should have been an easy fix, probably just the needle sticking from sitting for a while at odd angles. What did peeve me is that the paint I got that said it's gas/chemical resistant apparently isn't very resistant. Where the carb dumped gas on the frame is now stripped to the primer. So with a few weeks till I return to my own home left and pretty much left with stripping the entire frame down and repainting it with an actual catalyzed paint this is getting benched for a while.

I'll tear the engine side cover open to see if it screwed anything up on the bottom end and pull the plug to see if the firing chamber filled with oil and that fixes the locking problem. But without a setup at home to spray it's going to be a while before I can get to repainting the bike frame. Anywho, I'll update in the future when I can start working on getting this a mobile bike again.

Disaster.jpg
 
#48
Welp, here's the bike as it currently sits. I'll just enjoy it while building the wiring harness for it. After that is done I'll get around to stripping and repainting the thing. Repainting and wiring harness will be happening once I'm back at my home as that day is fast approaching. I guess when it comes time to strip the paint I can just dip it in a tub of gas.

2023-06-07 Front.jpg
2023-06-07 Side Rear.jpg

Anyways, as the madness takes hold, another project begins to take form.

2023-06-07 Its got a Hemi.jpg
 
#49
I made a chain tensioner thing. It's a fairly simple setup utilizing one of the clamp on brackets like the license plate holder has. This then had a 1 1/4"x3" hunk of steel bolted to it with a spring that holds a gear on a bearing. The spring on sandwiched between the plate and bracket is actually meant for a self-closing fridge door, think it's meant for an LG fridge. I figured if it can close a split fridge door that usually has 20 lbs of stuff in it that it can handle tensioning a chain and it does so pretty well.

Fabrication of the plate was the fairly standard cutting out with a plasma cutter. Grinding it down on with a grinding wheel. Stepping the holes up on a drill press to get the final item. It's not pretty but it gets the job done. This is also a mock up before giving it the plate final shaping and paint. This also leaves me feeling much better about the chain as it does have wildly varying tension levels as the swing arm rotates.

2023-06-09 Tensioner.jpg
 

Minimichael

Well-Known Member
#50
Welp, here's the bike as it currently sits. I'll just enjoy it while building the wiring harness for it. After that is done I'll get around to stripping and repainting the thing. Repainting and wiring harness will be happening once I'm back at my home as that day is fast approaching. I guess when it comes time to strip the paint I can just dip it in a tub of gas.

View attachment 302393
View attachment 302394

Anyways, as the madness takes hold, another project begins to take form.

View attachment 302396
All in all a great job. And a very capably accessorized bike, to boot! I like the way you create, my friend. But you didn't explain what had happened with all the fluids, either! Too much oil for being on a slant? And the carb? Why? Any word yet?
 
#51
All in all a great job. And a very capably accessorized bike, to boot! I like the way you create, my friend. But you didn't explain what had happened with all the fluids, either! Too much oil for being on a slant? And the carb? Why? Any word yet?
Carb was at too much angle on the intake leaving it to overflow and come out the filter side. That was fixed by modifying the intake with ~20 degrees instead of 35ish. With the oil, I had too much in and when the case pressure came up with revs it would fire out the breather. This led to other complications, like the spark plug getting coated with oil and the sump getting gas in it. The hitch like it's seizing turns out to actually just be the compression stroke catching on the approach to TDC and the cam not having a compression release. I haven't measured the compression but it's enough to stop the engine from turning over if you're in the wrong part of the cycle when pulling on the recoil cord to start.

Interestingly, it's running great on a 130 main jet. However, much like the Tecumseh, the pilot jet seems to be too small and has trouble maintaining an idle off choke. I'll have to look up a pilot jet kit to have a few to swap out. I currently have the needle set to the highest I can on the clip and the idle mix set out ~4 turns. Setup like that it will idle for about 30 seconds once it's warmed up before dying from a lack of fuel. Turning the idle screw in even half a turn and it won't even idle when warm and just cut off, so it's not a case of too much fuel.

Sorry for not really going in depth on that. It was the end of a long day and defeat was not a pleasant flavor at the time. Overall, the problems I ran into was because of me getting too fast while trying to push for a finish without making sure I had everything right. Projects I've done in the past didn't have nearly this level of basically everything being custom work and I've had to learn to have more patience quite a bit on this project.

Anyway, while I had the engine off the bike and was tracking down where I went horribly wrong with this, the recoil spring broke. This, I guess, isn't terribly surprising considering the spring was original to the engine from 1996 and was pretty rusty. After putting an OEM replacement spring in the recoil rope snapped on a compression stroke and also required replacement. The picture that shows the rope kind of dangling is because I have to move the knot again. The engine when I got my fingers on it originally had not been terribly well maintained (see previous post with stuck open intake) and had likely sat outside for a long time on various things over the years. I mean, the oil ring was literally worn down to the side of the piston, no wonder it used to smoke harder than a blue hair on a hot streak at the penny slots.

The current gearing on the bike comes out to 4.2:1, so it's not pulling rooster tails. Especially with a Max Torque clutch that engages at 2200 RPM. However, it is an amazing cruiser and likes to literally coast along at 15 mph with barely any throttle. The biggest problem I run into right now is the tires on it are very wishy washy on the dirt roads around here. They're obviously meant for pavement and it's noticeable with how the bike wants to float around into grooves in the dirt and gravel.

I don't know if I posted it but the torque converter wouldn't work without heavy modification to the engine mounting plate. The driven is too big to fit in the space meant for the larger gear on a 2 speed clutch and I didn't want to hack up that area or modify the engine plate to move the engine over and mount the driven outside the frame. That's okay though. The bike gets moving fast enough for my comfort with a centrifugal clutch.

Another item is it does have a right hand brake on it for when I get a front brake setup on the bike. I have the hydraulic line and caliper for it, I'm still combobulating how I want to get the front disc setup done. I may end up getting a more modern spoked front that can handle current bolting for accessories. I may also end up getting a disc and modifying it to fit, provided I can find one similar to a Fox disc. Getting a Fox disc seems to be out of the equation at the moment since when they come up it's attached to a wheel and usually is going for $90+ for a rusted out rim. I also need to either get or build a clutch/chain guard for it as I don't really need/want to get a pant leg caught in the clutch or have a chain slap my leg.

I'll have to put the bike up on a block to take a video of it running and put that up soon.
 
#54
I made a short video of the bike starting and idling. Very short video, actually I think youtube automatically made as one of those shorts since it's vertical video and under a certain time. Either way, here's the bike running. It's not nearly as loud as I feared since lots of reviews of the RLV muffler complained about it barely muffling the engine and having heard this thing with just open header, it is incredibly silent in comparison.

Since I apparently can't embed the link as a direct video for some reason. Here is just a link:

https://youtube.com/shorts/2ihL5JWrUaE?feature=share
 
#55
Well, I did some math on the compression ratio. The bike now sits at ~9.48:1 compression with the thinner gasket. I also managed to take it for a test ride. On dirt roads the tires do very poorly, as expected, and the 3 miles to pavement I averaged 25 mph while sliding and bouncing around. I was then able to get it on pavement where I averaged 55 mph for 5 miles one way and 5 miles back to the dirt road. 55 mph average has the engine spinning at about 4700 rpm according to the gear ratio calculator I'm using. Before turning around I noted there was no smoke coming from the tailpipe or engine so not burning oil or overheating. Same when I got back to the dirt road, no signs of overheating when I stopped. There also was no signs of puking oil out the breather nor the screaming of oil starvation.

I also wasn't really pushing the throttle hard during this except when going up hills. Flat road I could maintain 55 mph according to the phone app with somewhere around 5/8 throttle and the bike would ramp up if I gave it more. The only thing I noticed is that it's probably getting too much gas right now with the #130 main jet and I'll be bumping it down to get tuning finalized. I got it to idle on the pilot jet, it just has to sit 3 1/2 turns out and thus I should get a set of pilot jets to bump that size up and not have the screw turned so far out for the idle.

The only hitch I ran into was on the dirt road back. I must not have had the engine mounting bolts cranked down hard enough and the washboard just worked the nuts loose. I lost 3 of 4 nuts and ended up pushing the bike back the last 1 1/2 miles. I put new nuts with lock washers on and really cranked it down this time. I'll change the oil when I get back home as the bike is packed in a trailer now for the trip but I don't foresee any issues since I didn't have any knocking or smoking during inspections while it idled after the 5 mile trips.

Regardless of all those words. Resounding success on the rebuild of the engine and the bikes overall functionality. Future updates to come as I move on to the front brake and wiring harness, then finally repainting the thing with catalyzed automotive paint when I'm back at my own home.
 
#57
Heyo,

Been a long while since any sort of update. Well, update time. I've since gone back home to MN where I've since gotten caught up in typical home ownership maintenance things like mowing the lawn. I also ran into car trouble that appears to be a cascade of issues that have led to draining some oil since the last oil change left it over filled and pushing oil into the cylinders. That also lead to misfires and a clogged catalytic converter. So, a set of fouled plugs replaced, extra oil drained, new ignition control module and soon a new catalytic converter (thankfully they're cheap for 2.2L ecotec cars) and the car should be back to not spending piles of money on it.

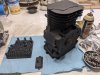
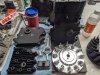
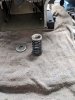
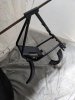
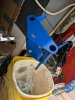
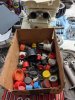
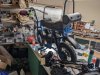
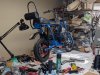
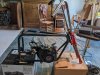
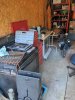
In between the car, I also did a carb replacement on my snowblower and started setting up a working area in the garage via the act of actually cleaning the garage. Don't worry about the oven, I got plans for that thing that involve reassembly into a larger oven in the future. Also, not seen in the picture is a band saw I brought back home with me that has had it's wiring fixed and is operational again.

2023-08-09_2.jpg

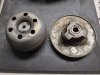
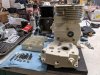
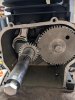
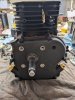
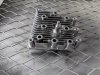
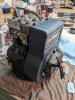
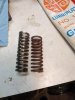
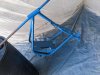
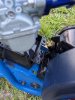
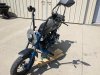
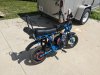
But, onto the important thing about this, the bike...that can be seen in the picture above... Not a ton happened with it since getting back. I pulled the engine off and drained the oil. No metal chunks or shavings came out and giving it a shake after draining yielded no ominous rattling, so I determined it was good to go internally. Really what it's waiting on right now is a set of slow jets and main jets to come in and Friday I should be back to retuning the carb. I'm going to be putting on a larger slow jet, not sure what size yet but most people with 212's use a 17.5, so probably start there. I also noticed the plug had excessive carbon built up on it and will be dropping down to a 120 main jet to start since the 130 was what it used to run the HM80 that is sitting on a shelf. The picture is actually a day old and the Hemi Predator is sitting next to the HM80 where the jack stands are in the pic...

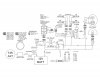
The last bit of this update is that I've started on the new wiring harness for the bike. Not a ton of headway has been made on it yet but I've started at least. Currently the wiring for the headlight and horn is completed. I'll be getting going on the main runs and updating again soon. By the time I get this done I should also have the alternator and rectifier ordered and can figure out how to incorporate them into the build. Currently I'm considering running the alternator off the jackshaft. I really would have liked to have an engine with a PTO off the cam to run the alternator but that isn't in the cards for this build. Even with the alternator not constantly running it should be able to keep the battery charged since I won't just be sitting idle all the time. Anyway, all the primary wiring for running things from the battery is going to be 20 ga as everything running at once, including the horn, is still under 5 amp total, it's 3.8 amp total if I recall correctly. The alternator to the battery will be 16 ga with a 20 amp in line fuse. And just in case you don't feel like scrolling back up to it, I've added the wiring diagram I'm using to this post.

2023-08-09_1.jpg Wiring Diagram.jpg

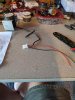
As I've been getting into the wiring the process has been pretty simple. With a single 20ga wire I've stripped it long and bent it over in half then tinned it with some solder. Then just crimp it into its connector and solder again. 2 wires I'll cut normal length, twist together, then tin them before crimping and soldering. The idea behind this is that hopefully they will never come loose from the connectors. I'll get some pics as I get into the main runs of the process, but the text explanation should be pretty straight forward.

As a final bit on the bike. I did some more research on getting it licensed and in MN the process seems to be very easy and doesn't seem to involve an actual inspection of the bike. To get a plate on the bike I'll have to register it with the DNR (department of natural resources) as an OHM (off highway motorcycle), that gets a tab that has to be renewed every 3 years. I can then use the DNR registration at the DMV to get an OHM license plate for road use. I will have to get my motorcycle endorsement for the plate and will have to get insurance as well. Insurance, apparently, can be had fairly easily by telling the insurance company it's similar to a Honda CT or Navi. I can then legally take it on roads and highways that don't have on/off ramps and a speed limit of 55 mph or less.

Anyway, it's gonna get light out soon so the dog will need walking. I'll get some more wiring done today and remember to take some pics of the process to share.
 
#60
VeritableFox, the detail in your wiring diagram is very impressive!
Thank you. I spent some time looking at electrical diagrams in an attempt to be able to recreate what electrical drafters do for clear and concise wiring diagrams. It was then a matter of drawing my own in NanoCAD and a few revisions/redlines later that thing was created to be able to print to an 11x17 paper size.
 
Top