Rupp Hustler 1972 Restoration

#1
Rupp Hustler 1972 - Restoration Project


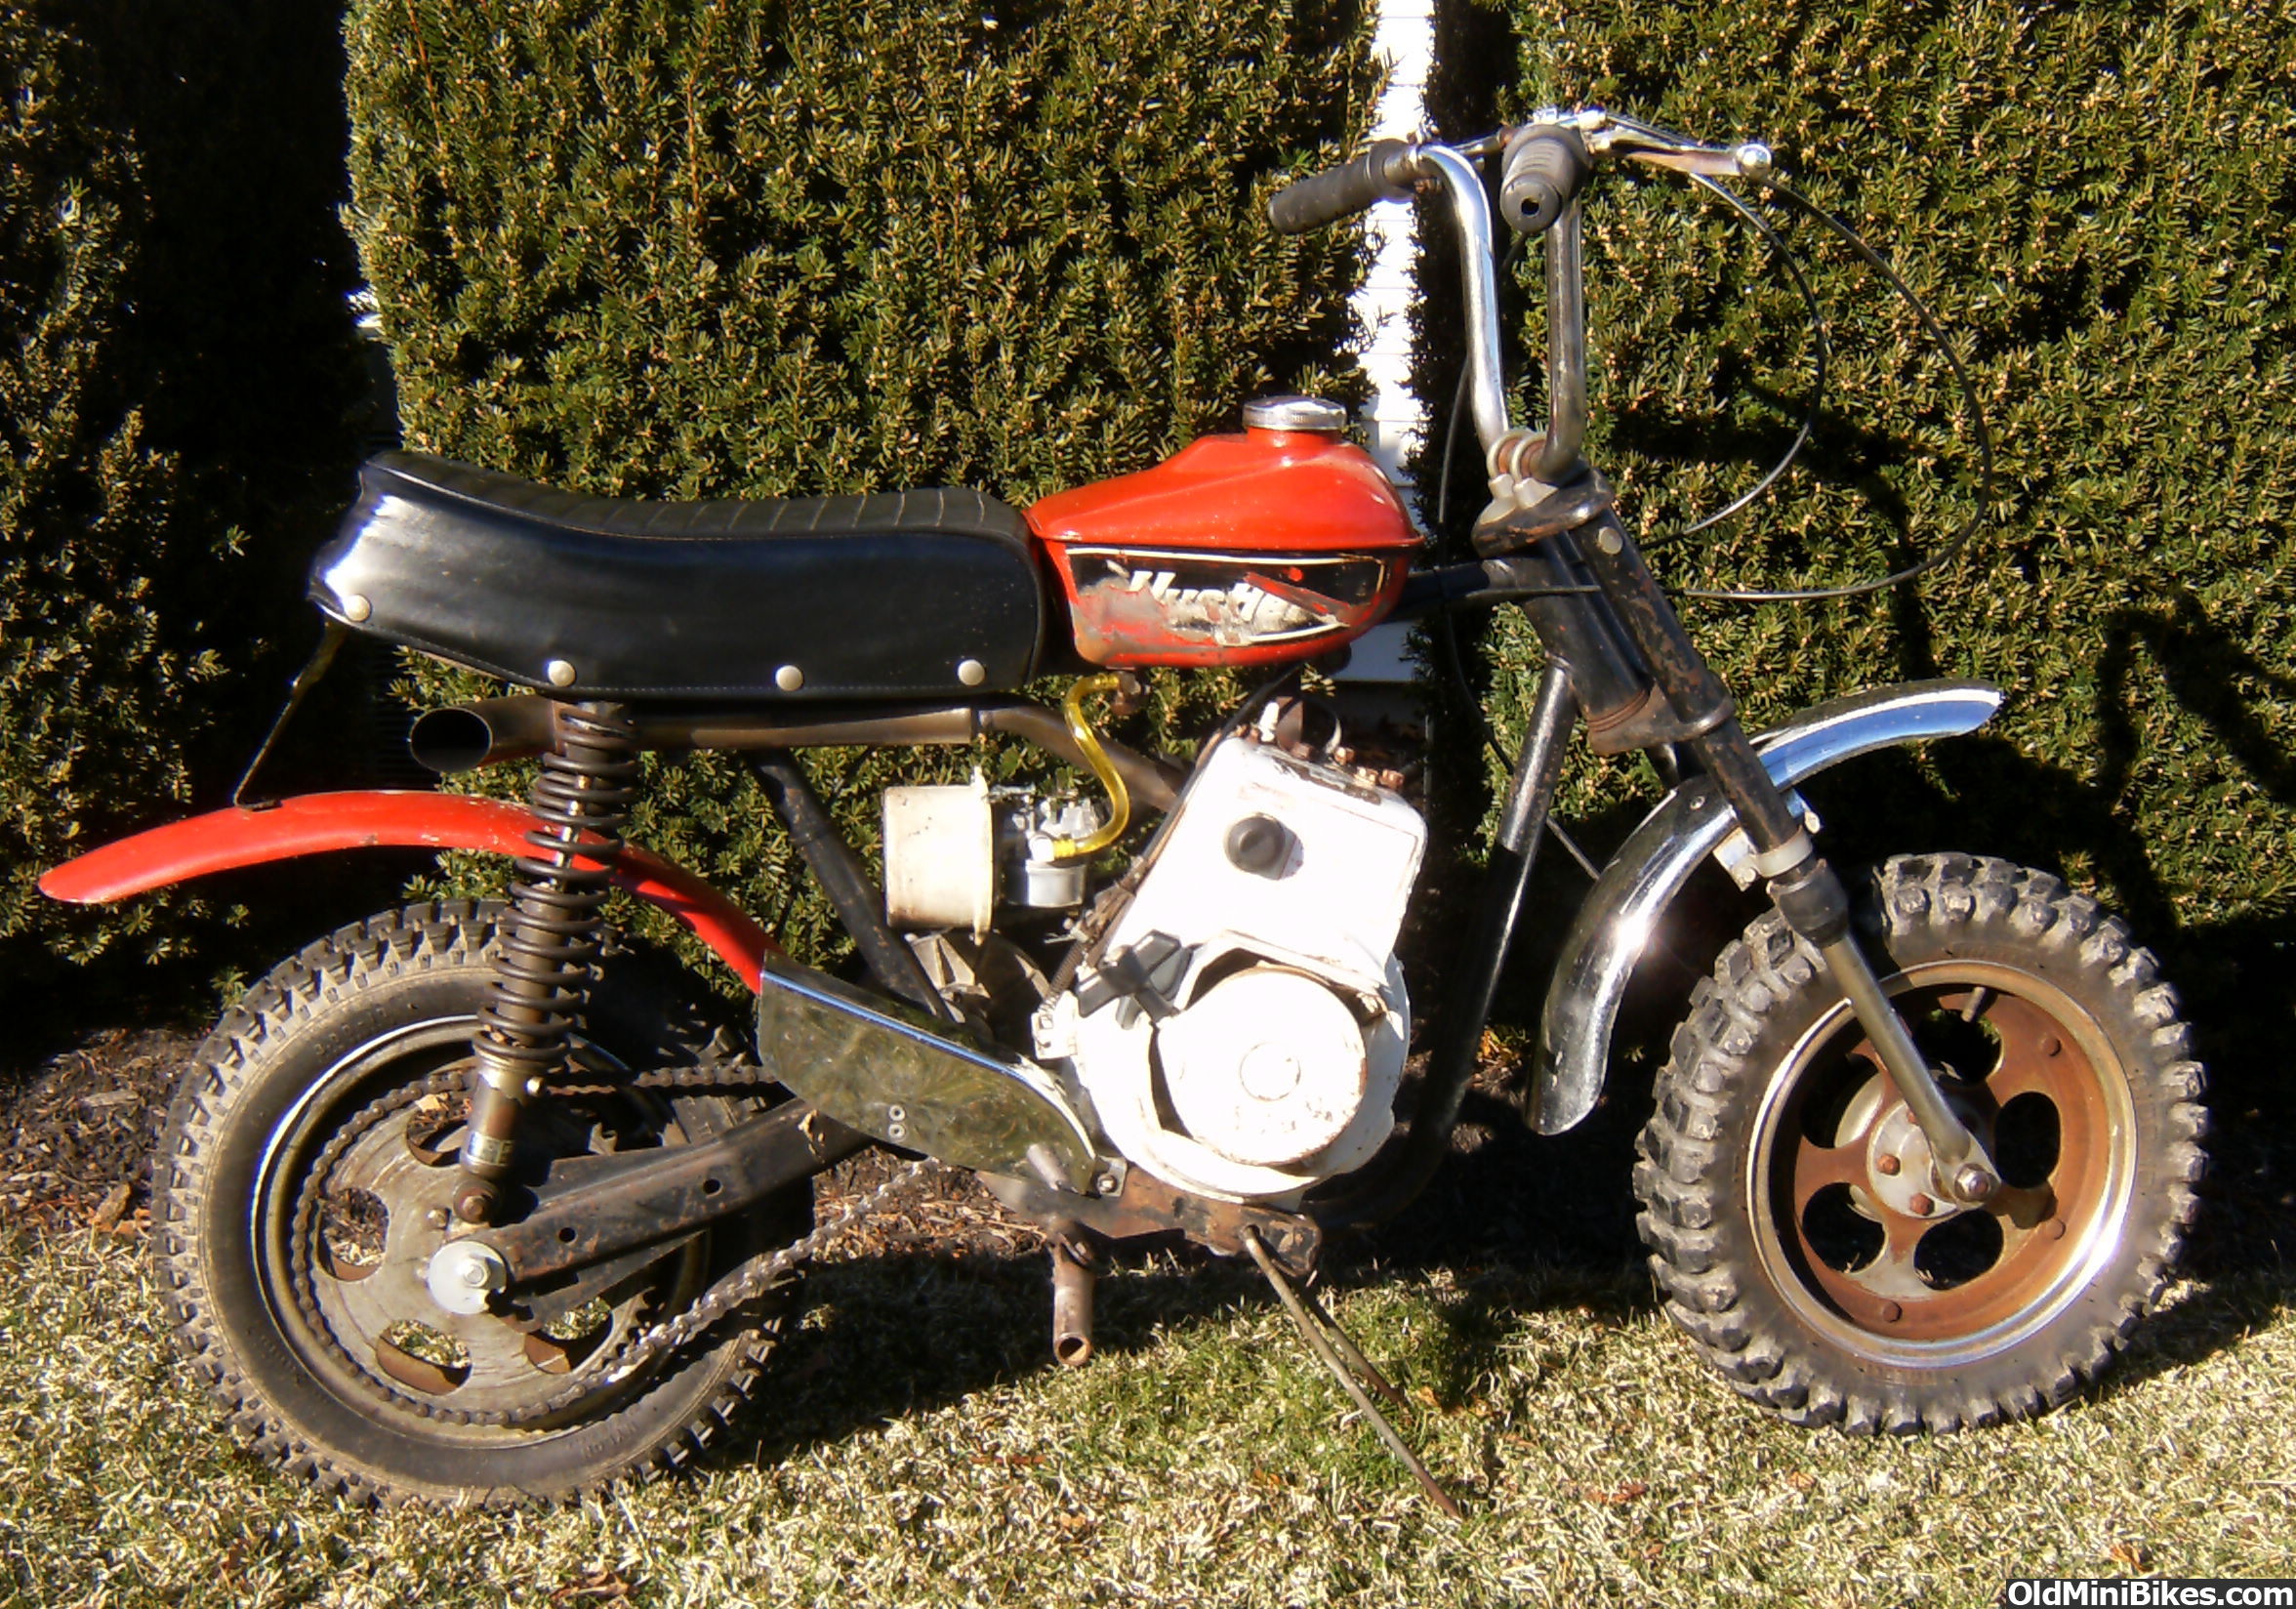
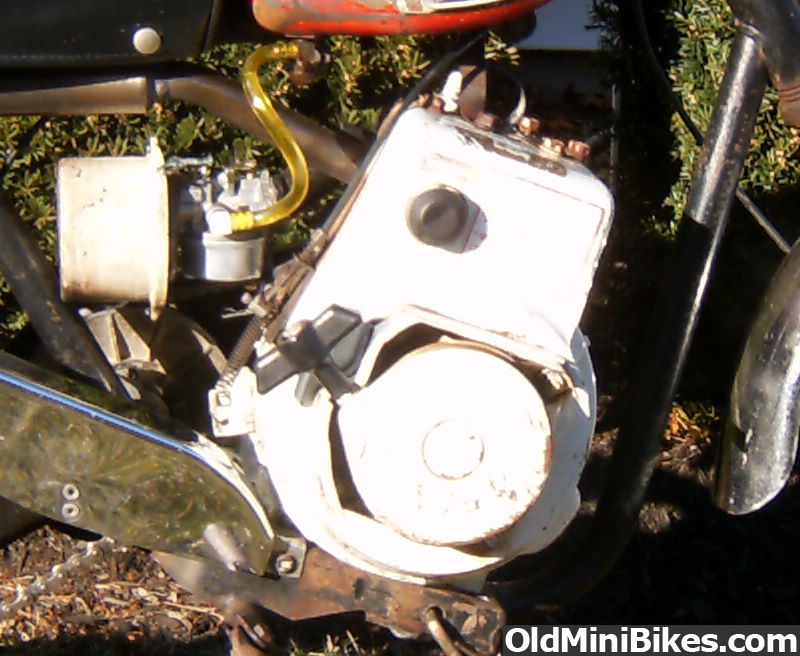
Here it is, the beginning of my addiction, a before picture of a 1972 Rupp Hustler.


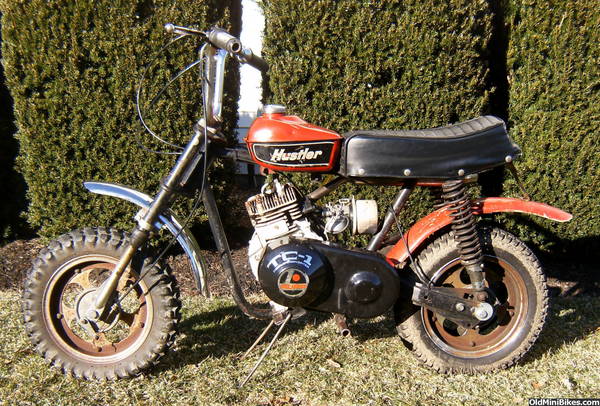
As mentioned above, it all started with a 72 Hustler that I found locally on Craigslist. After driving 60 miles each way it was in the garage ready to come back to life.

The Hustler was a good start for a restoration project. After all, it hardly ran, had quite a bit of rust on the mag wheels, and the red tank mounted on a black frame with one of the Hustler decals all scraped up was enough to convince me that this was the one to restore.
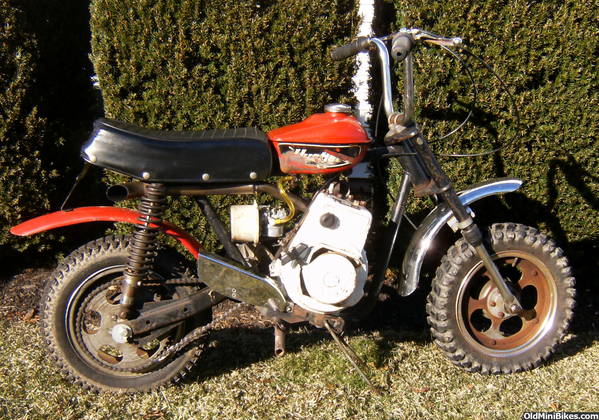
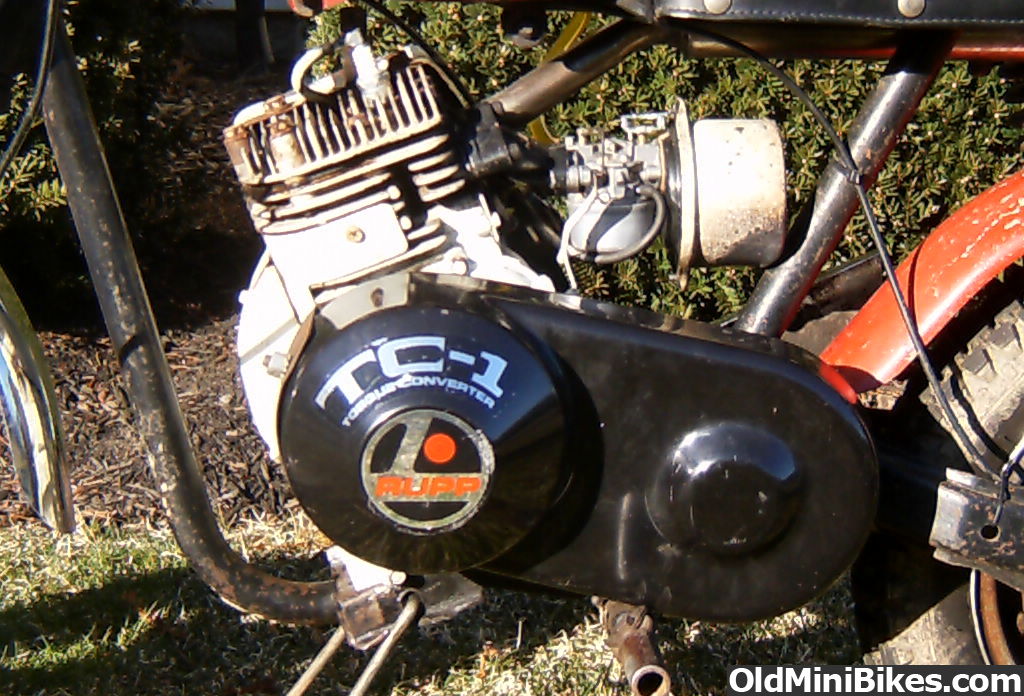
 
#2
Off with the front/rear wheel and next separate the wheel halves. The fun part was taking the tires off the wheels. However, heating up the mag wheel with a propane torch made this process go fairly smooth and I was able to save the tires. I found that applying uniform heat on the metal wheel and being carefull to stay away from the rubber worked the best. I do recommend that you either do this outside or use a box fan to ventilate your work area.

Below are some pictures of the front and rear wheel sets. These are the 10" Mag Wheel used on the Hustler and Scrambler. I believe that the scrambler is the same wheel set up minus the front brake.

Front Mag Wheel - With 3.00 x 10 Pirelli MT-74


Rear Mag Wheel - With 3.00 x 10 Carlisle


The pair of 10" Mag Wheels are ready for a road trip to get media blasted and powder coated. Chrome plating was considered being that there were no rust-thru spots. However, these wheels spent enough time outdoors to make them good candidates for powder coating.

 
#5
Heating the wheels really worked well. The side grinder was my next tool of choice.

Next was to take the TC Cover and engine off the frame. The engine is not original but it's a nice Tecumseh HS50 off a snow blower with the slanted 20 degree intake manifold.

Tecumseh HS50


I was able to find a better blower housing (minus the primer)


With the engine off the frame, the Jackshaft and Driven next.
 
#6
TC Belt, Jackshaft, Driven and Sprocket are ready to come off the frame.


Looks like these parts were recently replaced


The Sprocket is a 10T


And the Torque Converter Driven only had two of the three Wear Blocks. The spring and wear blocks were replaced.

 
#9
Your engine is pretty well the same motor as the the HS50's that belonged in some off the slanty Rupps. The only BIG difference is yours might be electronic ignition, and the blower motors have the bulkier shroud and iron flywheel. You can get the rounded shroud and throttle stuff and aluminum flywheel on Evilbay but it might be pricey as hell. Those ones usually go high for some reason. I'd say run what ya got. Looks pretty great to me. The HS50 slanted intake is a nice piece by itself. People would kill for that thing.
 
#10
Thanks Minibikedude. Yes-all original red tank and rear fender and black frame.

I decided to keep the original red tank and found another good tank with the typical handlebar dents on the front top sides. Below is the Fuel Tank and Fender after making a trip to get media blasted.

Tank and Rear Fender Before Paint


The inside of the tank was fairly clean and I used Acetone and Drywall Screws to free any rust and old gas. I also pressure tested the tank and noticed that there were two small leaks on the front seam. I was able to repair the leaks with 50/50 bar solder and careful use of a Mapp Torch. I highly recommend to pressure test a tank before paint. The last thing you want to see is a new paint job and decal set lift of the tank after you fill with gas!!

If you've never used a torch and solder on fuel tanks I recommend that you either have a radiator shop do the work or buy a few extra tanks to master the skill. Also REMEMBER to remove and wash out any gasoline from the tank!!!!!!!!!!!!!!!!!!!!! :doah:

I was concerned about protecting the tank from rust so I did some research and decided to line the tank with Red-Kote Fuel Tank Liner. This product is red in color and fairly thick, almost like straight 50 weight oil on a cold day. Before lining the tank I cleaned the inside with Acetone. I also thinned the Red-Kote with Acetone when I was ready to line the tank.

The Red-Kote sets quickly and to get a neat even application I thinned the product in a dixie cup with just a splash of Acetone. I later used a small paintbrush to apply the Red-Cote on the inside portion of the Tank Fill neck, plugged the tapped fuel outlet in the bottom of the tank, poured in the thinned Red-Cote and quickly moved the tank side to side to spread the product. I first coated the bottom, rolled to the sides and worked on the inside top last. When finished I set the tank upside down leaning towards the seat side of the tank so that any remainder would not lump up i an area visible to the eye.

This product really works well and from what I read does not flake off like some of the other fuel tank liners.

Tank and Rear Fender - Before Paint
 
#11
Restored Kid- I kept the HS50. It's got points and condenser and It does have a cast iron flywheel with the plastic fins.

The HS50 was cleaned with Brake Fluid and stripped down. The cylinder wall was fairly smooth and the valves and head was pretty sooty. But they cleaned up nice.

Tecumseh HS50


Tecumseh HS50 Ready for paint. Dupli Color High Heat 1200 Degree worked great. It's a nice finish for the engine. The prep work was Brake Fluid, Wire Wheel and Acetone before painting.


I used the same rattle can for the engine and tin work. The Blower Housing got a special treat and was sent out to get media blasted and powder coated high gloss black.


The Blower Screen, Starter Cup, Bolts and Head was sprayed silver, same Dupli Color 1200 Degree paint.


Replacement Blower Housing Decals were ordered. Plug, Points and condenser was replaced .
 
#12
Well you got it apart, you could port the intake and exhaust ports and lap the valves, It makes them run better, I went with a custom intake and carburetor on my Hustler.
 
#13
Yup yup.. I honestly think those were about one of the best Tejunksy motors they ever made. They all like to blow up if you go running the hell out of them with no oil and stuff but white HS50 with points / iron / plastic flywheel is early 80's snow blower or something and those are good strong runners. I sold a guy one of that exact same flywheel just the other day from here. :thumbsup: Ole minibikes.com is a pretty great site. Once you are used to the ins and outs it's all good. Yeah lap your valves like he was telling you, also when you do that you'll want to set the clearance from the lifter to the valve stem because they get too long as valve material burns away and will cause the engine to not be able to make compression... Hells yeah RUN that beast.. I had one of those Hustlers for a while but she was burnt up.. They are a thrasher though. Like little dirt bikes. I like the mags because they are not as common. Yeah you got a nice one. :thumbsup:
 
#14
Minibikedude-your Hustler looks awesome and it sounds like it runs fast.

I did clean up the intake and exhaust ports. Amazing how much left over casting material there was in each port. I removed sharp edges, did not change the geometry and polished the ports. I did not lap the valves and I'm using the 5HP Slanted intake.
 
#15
OH YEAH dude thats a no crapper there. A port polish job and big ole strait pipe will make a hell of a difference on about any of these small engines. They were never intended to max the cam out taking huge gulps of air and shitting thunder. HAHA!! But they will if you open their throat and uncork it's ass. You'll be burning doughnuts before long :freakout:
 
#19
Minibikedude-your Hustler looks awesome and it sounds like it runs fast.

I did clean up the intake and exhaust ports. Amazing how much left over casting material there was in each port. I removed sharp edges, did not change the geometry and polished the ports. I did not lap the valves and I'm using the 5HP Slanted intake.[/QUOT

I like to hot rod my Rupps, I got a Blackwidow clone I have to finish, I,m doing a HS with a aluminum flywheel for it, This engine on my hustler is seeing how much I can get out of it and keep it reliable. Brandt with Ruppparts has some very fast HS50 engines, with his help I made it a lot faster than stock set up. I still got a few things to do to it, I want the bike to do 55-60 mph with me on it, I,m 6 foot tall and 250lbs.
 
#20
Minibikedude-your Hustler looks awesome and it sounds like it runs fast.

I did clean up the intake and exhaust ports. Amazing how much left over casting material there was in each port. I removed sharp edges, did not change the geometry and polished the ports. I did not lap the valves and I'm using the 5HP Slanted intake.[/QUOT

I like to hot rod my Rupps, I got a Blackwidow clone I have to finish, I,m doing a HS with a aluminum flywheel for it, This engine on my hustler is seeing how much I can get out of it and keep it reliable. Brandt with Ruppparts has some very fast HS50 engines, with his help I made it a lot faster than stock set up. I still got a few things to do to it, I want the bike to do 55-60 mph with me on it, I,m 6 foot tall and 250lbs.
HOLY crap man, 6 foot 250 at 60 MPH on ten inch wheels. You are wild as the rest of us. lol They will do it though. Hell a factory Rupp is good for damn near 50. I was getting 40 out of my burnt up Hustler that barely went anymore. Those things go like hell. :scooter:
 
Top