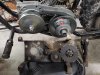
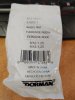
I just went through all this with my Warrior MB200 over the weekend. I bought a cheap chinesium TAV2 torque converter off amazon for $78, bought the stage 1 performance kit from GPS (open element air filter and adapter, larger main jet, exhaust header), and unhooked the governor. With stock valve springs and the chinesium TAV2, my add on tach said I was spinning right around 4krpm. Billet flywheel and rod are next upgrades - coming in the mail sometime this week. Off the line torque is enough to pick the front end up even with my 260lb butt on it. No issues climbing steep hills back on my property. Measured top speed of 41mph. I had to grind off the threaded cover mount boss on the 5 o'clock position on the knock off TAV2. I've seen where people raise their engine an inch, cut off a huge chunk of the backing plate, carve off two of the driven pully bearing boss support webs, etc. I didn't have to do any of that with this TC. My engine has a 3/4" shaft. One thing you do need to be aware of - my crank is not internally threaded. I did have to do some grinding with my dremel on the internal key of the slider spacer for the drive pulley to allow a shank lug nut to fit inside and grab onto the end of the externally threaded crank. Took all of 10min with the dremel. The part number of the lugnut I bought at Autozone is Dorman 611-107.1. I think it was like $1.50. It's an M12-1.25 shank style lugnut like we used to use on the multi-fit cragar mags. Some things to consider:
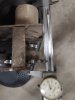
- Center exit pipes will not work with your bike. The fender and center frame support under the seat are in the way. I picked the center exit "trumpet" pipe and had to cut 4 inches out of the middle, rotate the angle, and weld it back together. It is VERY loud. I will be purchasing a cheap pit bike muffler off ebay to tone it down.
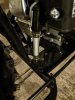
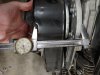
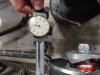
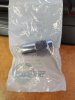
- Your crankshaft is most likely externally threaded. The lugnut I mentioned above is necessary to mount the drive pulley on your crank.
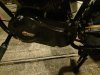
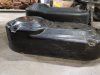
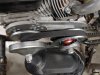
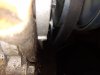
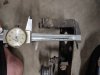
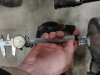
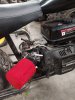
- You will need to grind the threaded cover mounting boss (at the lower right hand corner or 5 o'clock position) off the back of the backing plate in order to clear your frame. I did not have to elongate engine mount holes in the backing plate as I have seen others do, nor did I have to carve up the backing plate. I did smack the heat shield/cooling tin up against the cylinder fins for another 1/8" of clearance for the backing plate. You will need to file or grind about 1/16" off the internal keyway on the slider spacer in order for the lugnut to fit through.
Attachments
-
 1.2 MB Views: 19
 -
 1.4 MB Views: 20
 -
 1.7 MB Views: 25
 -
 4.3 MB Views: 21
Last edited: