I will try to lay out the steps we use to fabricate the half scale NASCAR chassis that we build in the Motorsport program at Greenville Tech.
This is a basic description of the steps involved with box tubing. I will do a complete round tubing thread after this one.
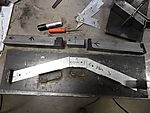
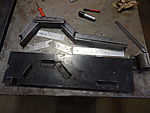
One rule of thumb that I have lived by for as long as I have been welding is " The better the fit, the better the finish". Keep this in mind as you cut and fit parts and you will get better joint fit up and better welds too. Look closly at the pics of the rear frame rail and you will see a prime example of this very thing. You can see the actual fit of the joints after they are clamped and tacked in the jig. Then you can see the finished weld. Look at the difference in the weld appearance with a tight fit and a gap in the joint.
I cant stress enough how much you need to have a plan of parts fit up and welding order. Somethings are covered by another part and once you have welded the second part on you cant go back and weld the previous part.
1 - We have patterns for 4 things on the frame. The front frame rail, the rear frame rail, the front cross member and the truck arm cross member.
2 - Lay out your patterns or your sketch of what you are planning. I find that if I sit down and draw it out as close to scale as I can it flows a lot better.
3 - Decide what stock you need and then cut your stock to length. For the main frame rails we used 2'' x 3'' box tubing. For the front and rear frame rails we used 2'' x 2'' box tubing.
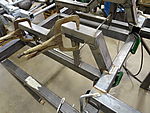
4 - Now is the time to do any miter cuts or offset cuts that are needed. Both front and rear frame rails required multiple miter and step cuts to complete the proper fit. Once you have all the pieces fitted to one another then you are ready to tack all the pieces together.
5 - When tacking the pieces together use a quick but solid tack on all the corners of the joints. This way you start welding at a tack and end at a tack. A good weld will burn through the tack and leave a solid weld bead.
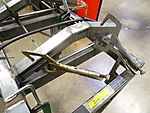
6 - If you can weld the parts in a jig fixture then do so but leave them clamped in place until they are fully cooled. Metal fixtures are best but a good wood fixture will hold a part in place just as well.
7 - If you have a master jig then you are now ready to fit the parts in the master jig. Our chassis uses a master jig so our front and rear frame rails were added after our main frame rails were fitted. We now have a complete frame rail front to rear and it is all clamped in the master jig until the final welding is done on everything that will be attached to the rails.
Jigs and patterns.
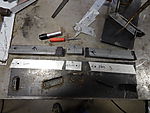
Parts cut, fitted and tacked in the jig.
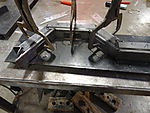
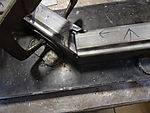
Parts welded and waiting to cool.
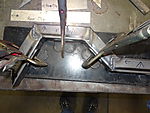
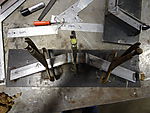
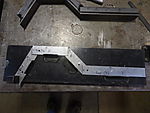
Frame rails assembled and welded in the master jig.
More coming tomorrow.
Doug
This is a basic description of the steps involved with box tubing. I will do a complete round tubing thread after this one.
One rule of thumb that I have lived by for as long as I have been welding is " The better the fit, the better the finish". Keep this in mind as you cut and fit parts and you will get better joint fit up and better welds too. Look closly at the pics of the rear frame rail and you will see a prime example of this very thing. You can see the actual fit of the joints after they are clamped and tacked in the jig. Then you can see the finished weld. Look at the difference in the weld appearance with a tight fit and a gap in the joint.
I cant stress enough how much you need to have a plan of parts fit up and welding order. Somethings are covered by another part and once you have welded the second part on you cant go back and weld the previous part.
1 - We have patterns for 4 things on the frame. The front frame rail, the rear frame rail, the front cross member and the truck arm cross member.
2 - Lay out your patterns or your sketch of what you are planning. I find that if I sit down and draw it out as close to scale as I can it flows a lot better.
3 - Decide what stock you need and then cut your stock to length. For the main frame rails we used 2'' x 3'' box tubing. For the front and rear frame rails we used 2'' x 2'' box tubing.
4 - Now is the time to do any miter cuts or offset cuts that are needed. Both front and rear frame rails required multiple miter and step cuts to complete the proper fit. Once you have all the pieces fitted to one another then you are ready to tack all the pieces together.
5 - When tacking the pieces together use a quick but solid tack on all the corners of the joints. This way you start welding at a tack and end at a tack. A good weld will burn through the tack and leave a solid weld bead.
6 - If you can weld the parts in a jig fixture then do so but leave them clamped in place until they are fully cooled. Metal fixtures are best but a good wood fixture will hold a part in place just as well.
7 - If you have a master jig then you are now ready to fit the parts in the master jig. Our chassis uses a master jig so our front and rear frame rails were added after our main frame rails were fitted. We now have a complete frame rail front to rear and it is all clamped in the master jig until the final welding is done on everything that will be attached to the rails.
Jigs and patterns.
Parts cut, fitted and tacked in the jig.
Parts welded and waiting to cool.
Frame rails assembled and welded in the master jig.
More coming tomorrow.
Doug
Last edited:

