Thinking about picking up some chrome spray paint for the handle bars.
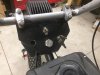
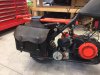
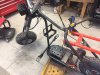
So all intek/animal/206 Briggs engines have the “studs” in the block for an alternator and starter. Whether they are drilled and tapped for it depends on the model. (From what I can tell, the animal blocks are all drilled and tapped). On my version of the Intek, all 4 holes were drilled. And only the top 2 were tapped.
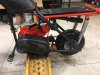
I tapped the bottom “studs”. They use #8-36. And ordered 2 more bolts from Briggs to attached new alternator that should push out 5 amps DC with my flywheel. Below was the previous alternator...

Here is the new alternator...
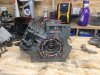
This new set up, if it works should be enough to run lights and have enough extra to top off the battery for the 12v starter that also on the way, and not sure if it will fit/work yet.
I tapped the bottom “studs”. They use #8-36. And ordered 2 more bolts from Briggs to attached new alternator that should push out 5 amps DC with my flywheel. Below was the previous alternator...
Here is the new alternator...
This new set up, if it works should be enough to run lights and have enough extra to top off the battery for the 12v starter that also on the way, and not sure if it will fit/work yet.

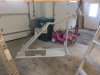
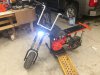
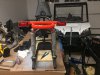
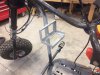
Okay. We got some work done. Rear “running” lights, which are side board LED lights from the local Tractor Supply, are installed on the fabbed up light bracket. Drilled holes to run the wiring inside the tubing to clean it up a bit. So it’s at a very exciting part at my build. I have a second Briggs in the build on the side that will hopefully run enough amps off the stator to run lights and top of off the battery. Along with a 12v starter getting 300 cold cranking amps from a lithium tiny battery. This is what I think about at night. Anyways, enjoy some pics...
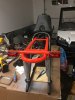


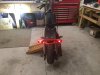
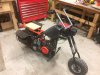
Quick update: all rattle canning has been done. I believe this will be the paint job for the summer. This will allow me the whole riding season to figure out any changes I may want to do. Then next winter I will take it all apart for the final powder coat. Trust me, I want a good looking bike, but I can tell already I’m gonna want to ride it all the time this summer, not looking at it apart in the garage.
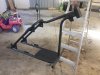
That’s the same for the engine. I’m gonna leave the current engine I’ve built up for it on for the summer. The final plan is building another intek with charging capabilities and 12v start as well. Anyways. Enjoy this pic of how she’s getting together so far.
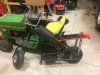
That’s the same for the engine. I’m gonna leave the current engine I’ve built up for it on for the summer. The final plan is building another intek with charging capabilities and 12v start as well. Anyways. Enjoy this pic of how she’s getting together so far.
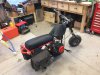
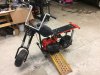
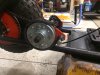
We had a warm weekend in Michigan. In the high 40s. And I did a lot of riding. SOl MUCH FUN. One thing is clear... the seat needs to get done. Also, I need lock-tite on the exhaust bolts. I lost one and the other was super loose. Also, the battery box needs to get done and wiring to complete. But at this point she’s very rideable and a lot of fun . My final gear set up has been engine to a 30 series torque converter to a 10 tooth jack shaft in to a 14 tooth jack shaft out to a 48 tooth tire sprocket. She still has enough low end to wheelie but enough high end to get to 45 mph.
Oh. And brakes needs to be installed.
Oh. And brakes needs to be installed.
Last edited:
We have had some success with the exhaust fastener issue. We took the threaded nuts, put them flat on the anvil of the bench vice and hit them with a 4 pound shop maul. The idea is to only deform them a bit, just a bit. Enough to resist turning, but not enough to deform the studs. Practice with some throw-aways first. Or buy two of the pre-dimpled nuts from the hardwre store pull-out trays. I forget what they’ve called.
Hope this helps,
Steve
Hope this helps,
Steve