Hi all...been lurking here for a while and found a lot of good information here as I embarked on my project to update my Baja Warrior minibike. Figured now that it's all done, I would share the final result and how I went about stuffing a 14.5 Briggs INKEK into the Warrior's frame. Hold on, this is a long one with lots of pictures.
I picked up the bike 100% stock with virtually no use off a craigslist ad about a year ago, paid $300 for it. Still had the 12mph governor screw in place on the clone 6.5 motor. I bought it as a toy and figured it would be fun for "small town USA" summers where there are a fair amount of trails and dirt roads. I was right, and I put about 1000 miles on that Baja last summer(I mounted a $9 wal-mart bike speedometer on it and just set it to the tire circumfrence, was fairly accurate when compared to a handheld GPS). Me and one of my friends that I lived nearby beat the living crap out of this bike over the summer...blasted into 2' deep puddles at WOT(resulting in at least half a dozen hydrolocks), the governor was ziptied to about 32mph with the stock 10:1 gearing, it was jumped, wheelied, even towed kids in a wagon. I know it was used far beyond it's intended use, and I never expected it to last the summer. But it did, the motor still started first pull, ran fine, and short of the clutch being about done(shoes were gone and one spring was broken), it was fully functional.
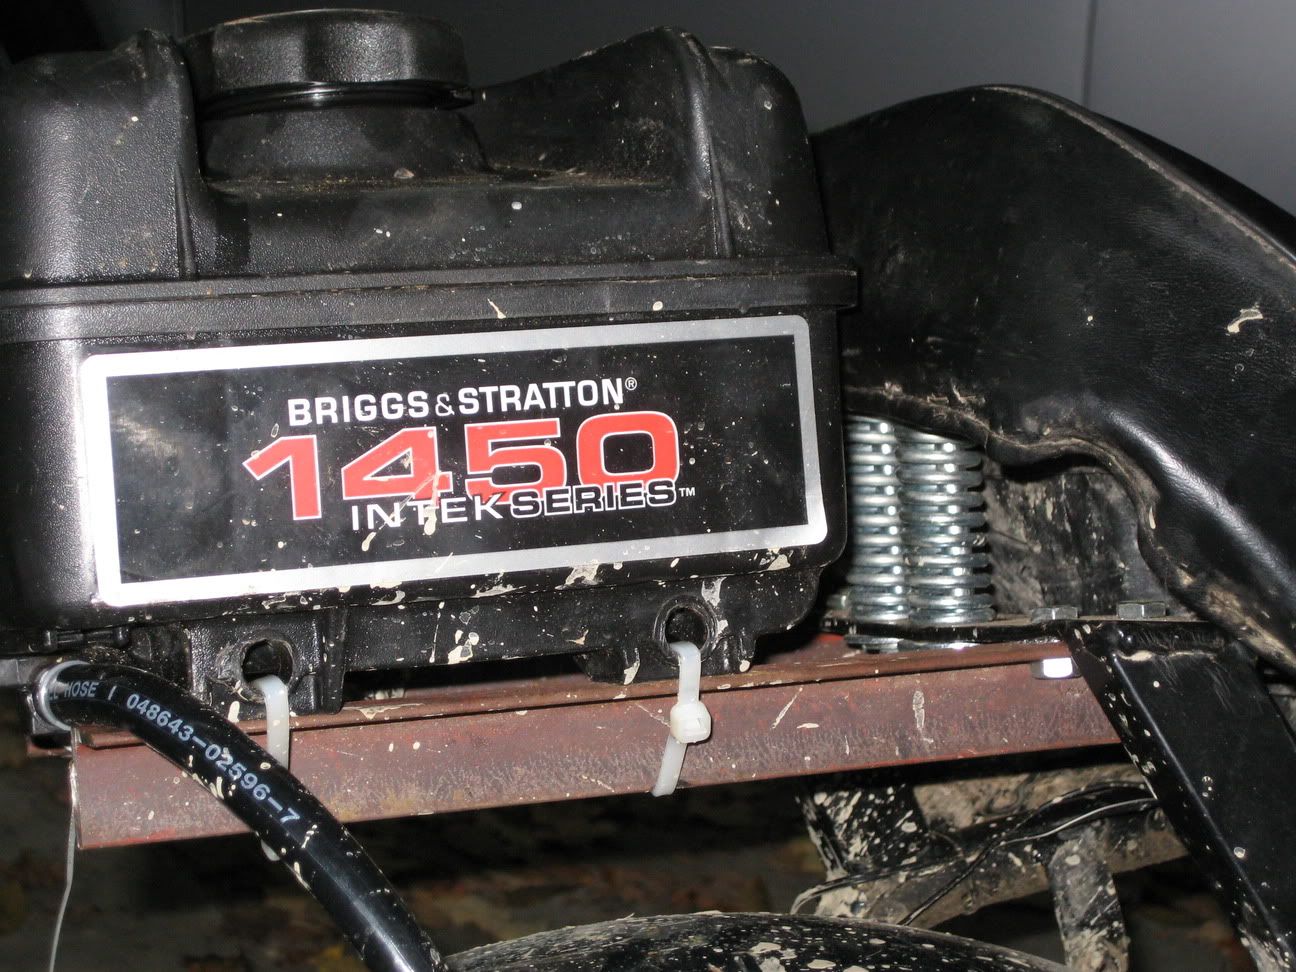
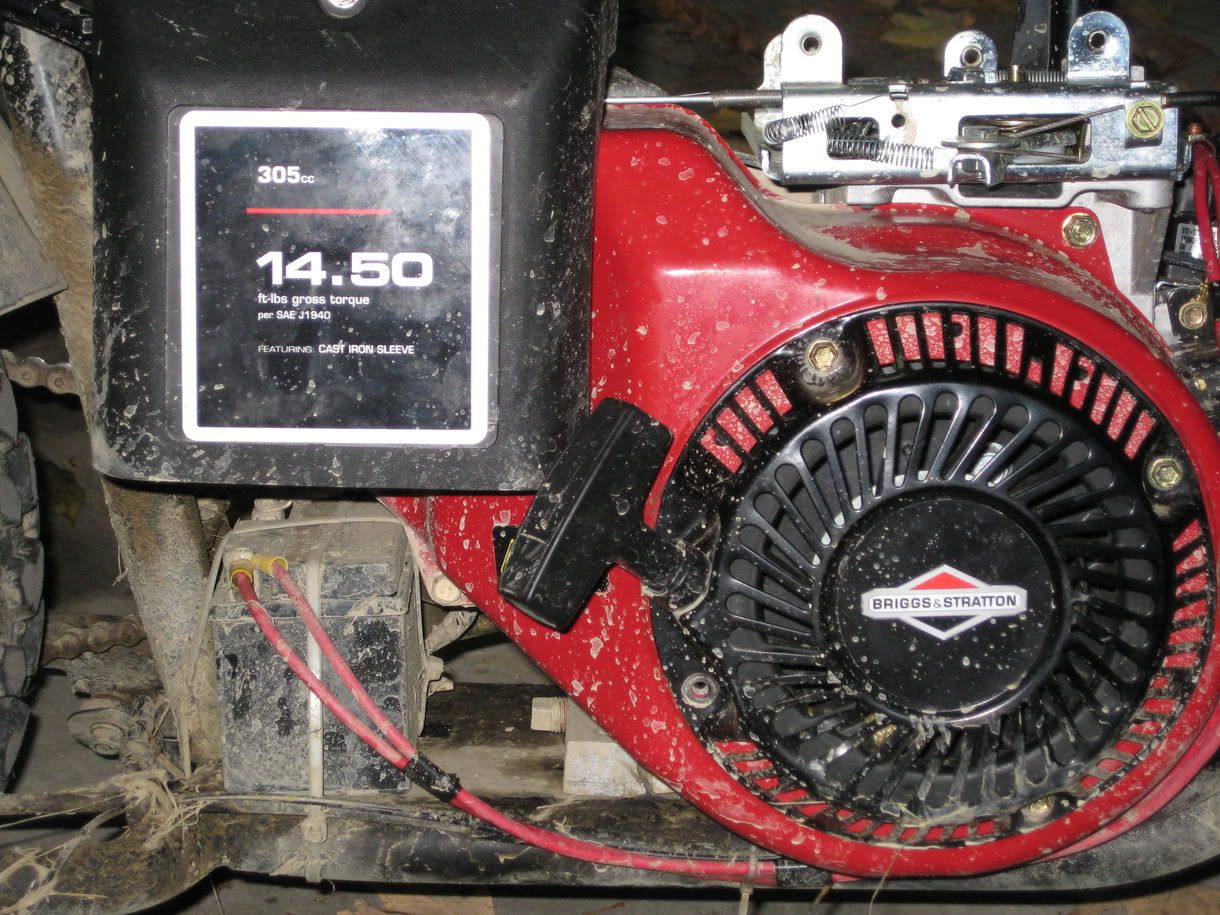
But the motor just didn't have enough "oomph" for my use. Steep hills, loose terrain, and mud it had trouble in. Either had to hit it with a running start, or burn the crap out of the clutch trying to bog through it. So I started looking for a bigger engine, something cheap off craigslist. Found a 110cc pit bike motor with a 3spd autoclutch for $250 and almost went for that, but it was still only 5 hp. Even with a 3spd, I was afraid it wouldn't be much better than what I had. Then the deal of the century came up. A brand new-in-box 2008 Briggs and Stratton 1450 INTEK series, with electric start and DC output, for $120. The catch? It was dropped in shipping and had a crack in the oil pan right under one of the 3 drain plugs. Snatched that right up and I was off. This motor retails for about $900.:thumbsup:
First, the oil pan fix. It leaked oil like a sieve initially. I thought about just trying some JB weld over the crack, but from looking at the pan it seemed that each drain plug was fed by an enclosed channel to the crankcase. I popped the side cover off, and I was right. The problem drain plug had a small, maybe 1/2" hole in the case that fed the drain. Some hi-temp "play dough" putty sealed that, RTV'd the case back together and the oil leak is gone.
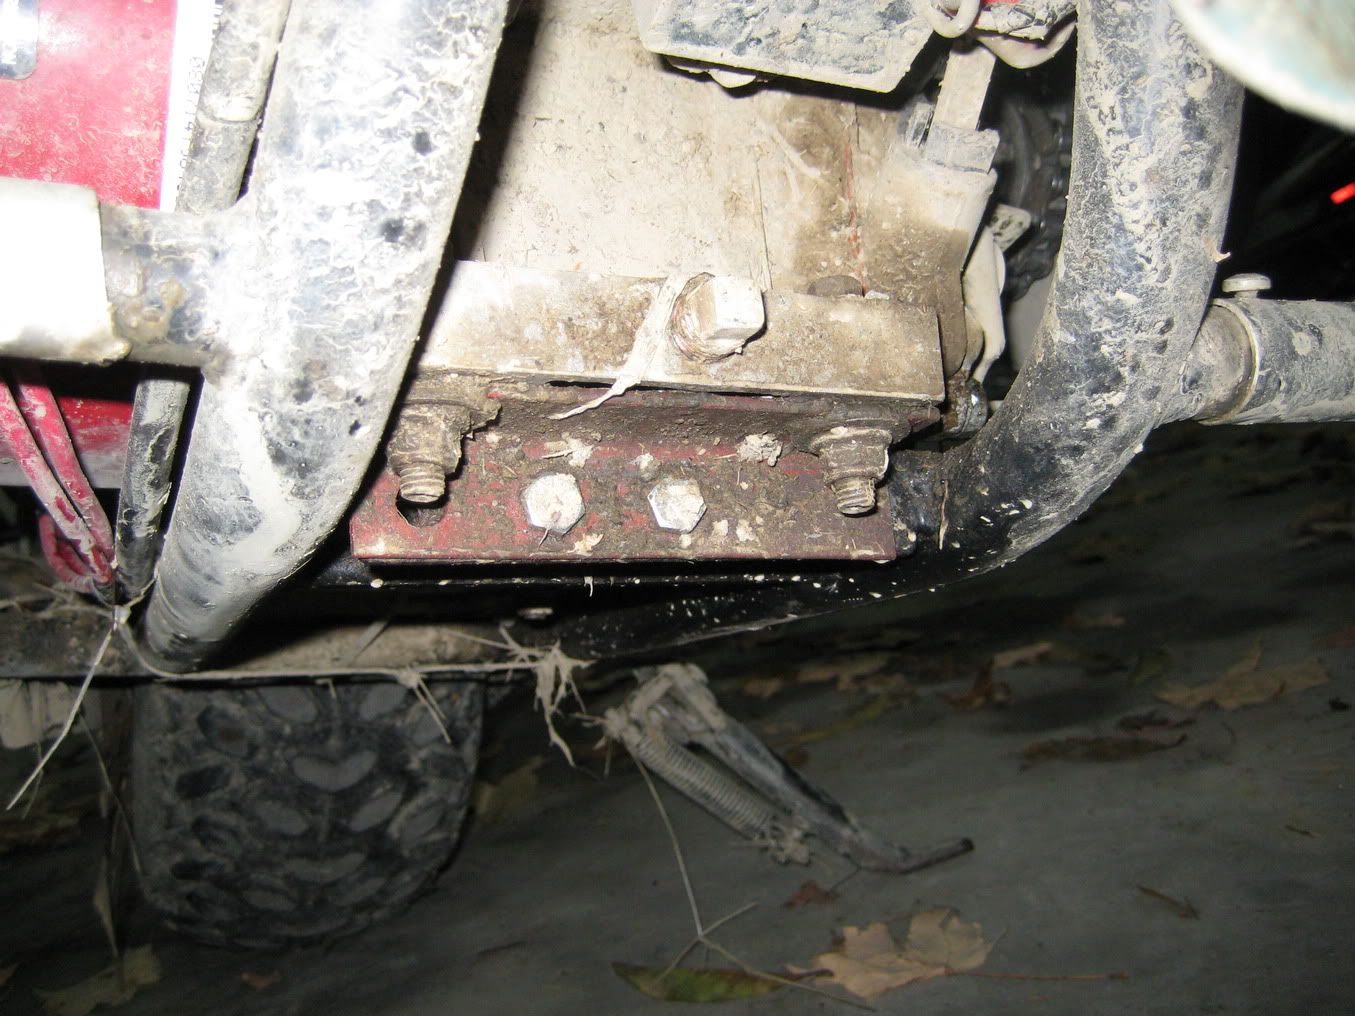
Next, making it fit into the frame. The old motor was 196cc, this one is 305cc. It would fit in the frame, but the front mounting holes hung over the front of the frame by about 3/4"(that's with the OHV cover bumped right up against the downtube under the seat). So I fabricated an extender out of a piece of 1" angle iron. Fortunately, the front of the engine mounting plate had a flat face, making the angle iron make a near perfect 1" extension to the plate. Popped a couple holes in that flat front and bolted the extender into place. Positioned the motor in the frame, and slid it as far right as it would go(the right corner of the motor's mounting plate would hit the right downtube, but that proved to be just far enough to make the jackshaft output line up(almost) with the rear sprocket. More on that later. Here's a shot of the angle iron "adapter":
Now the motor was bolted in, it was time to hook up the driveline. First issue, was finding a suitable clutch, since this motor has a 1" shaft. 1" bore centrifugal clutches are not easy to find. I ended up ordering an inboard/outboard NORAM clutch from Heeter's...ran me $160, more than the engine! Oh well. Another quick note: B&S engines use fine threads on EVERYTHING, so I was dashing to the hardware store constantly to get a fine threaded version of a bolt I already had. The old jackshaft plate didn't quite fit on the B&S motor, in that the big bearing assembly at the back hit the plastic oil fill cap. I removed the cap, and used more play-dough to plug the hole(oil could still be filled through the big dipstick tube). Now the jackshaft fit, and after finding four 5/16"x1" fine thread bolts to bolt the jackshaft plate to the motor, I was good there. Mounted the clutch "inboard" and used it's set screws to hold it in place in line with the jackshaft input gear. Except the output and rear sprocket didn't quite line up any more, they were about 1/2" out of line. I removed the back wheel(this was extremely difficult and I destroyed the threads on the axle using a 5lb sledge to hammer it out, not sure why it was so hard), and took off the sprocket. I put four thin washers between the hub and sprocket, and re-used the original bolts. This shifted it actually a bit too far over I discovered after I re-installed, but it was still damn close and I left it alone. NOTE: This failed a couple days later- the bolts just cleaved off. I replaced the original 1/4" pot metal bolts with 5/16" Grade 8 steel bolts, and used two thicker galvanized washers instead, which is as close to perfect alignment as you can get. That exhaust I garbage-picked from the scrap pile at my college BTW. Haven't had a problem since.
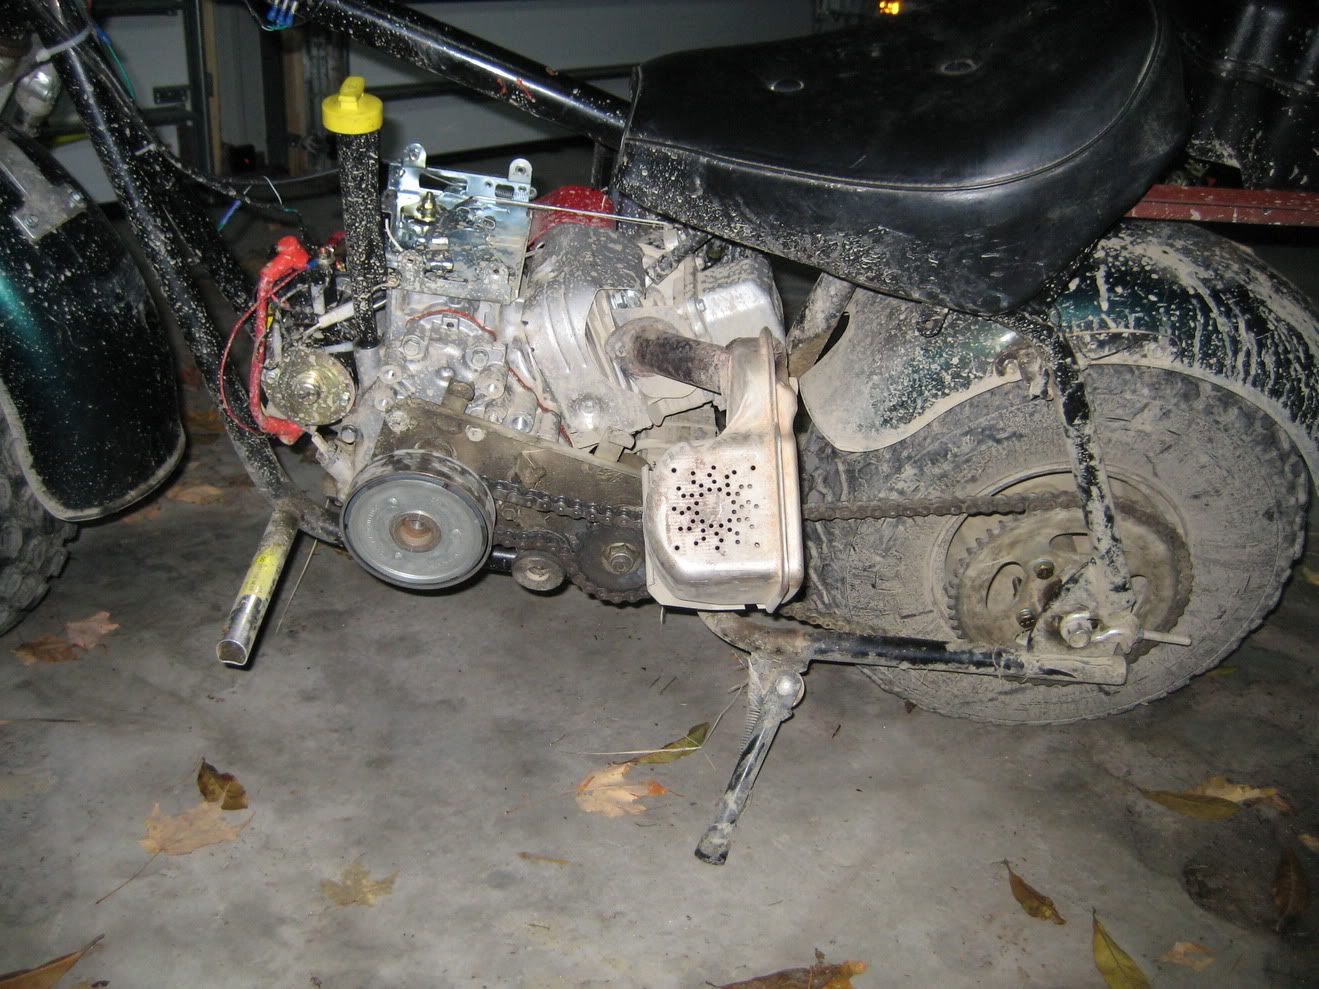
Here's a shot of the finished driveline:
The gas tank wouldn't fit in the frame mounted on top of the motor, so it had to find a new home. I used two pieces of angle iron, about 10" long, to make a little shelf for the gas tank behind the seat. Bolted the iron to the crossbar that also supports the seat. Popped a couple holes in the iron and bolted the tank into place. Got a longer piece of fuel hose and a filter, and hooked that up. A nice side effect is that when the bike sits level, the fuel tank is tipped slightly back, and the fuel drain is in the back, so the tank will run 100% dry. I also added springs to the seat to quasi-compensate for it being a hardtail frame. Two 5/16x4" bolts, two little sheet metal rectangles, and a couple washers. Took like 10 minutes and comfort is dramatically improved. This pic shows the side that is ziptied to keep it from bouncing, but don't worry, the other side is bolted. It is very solidly mounted.
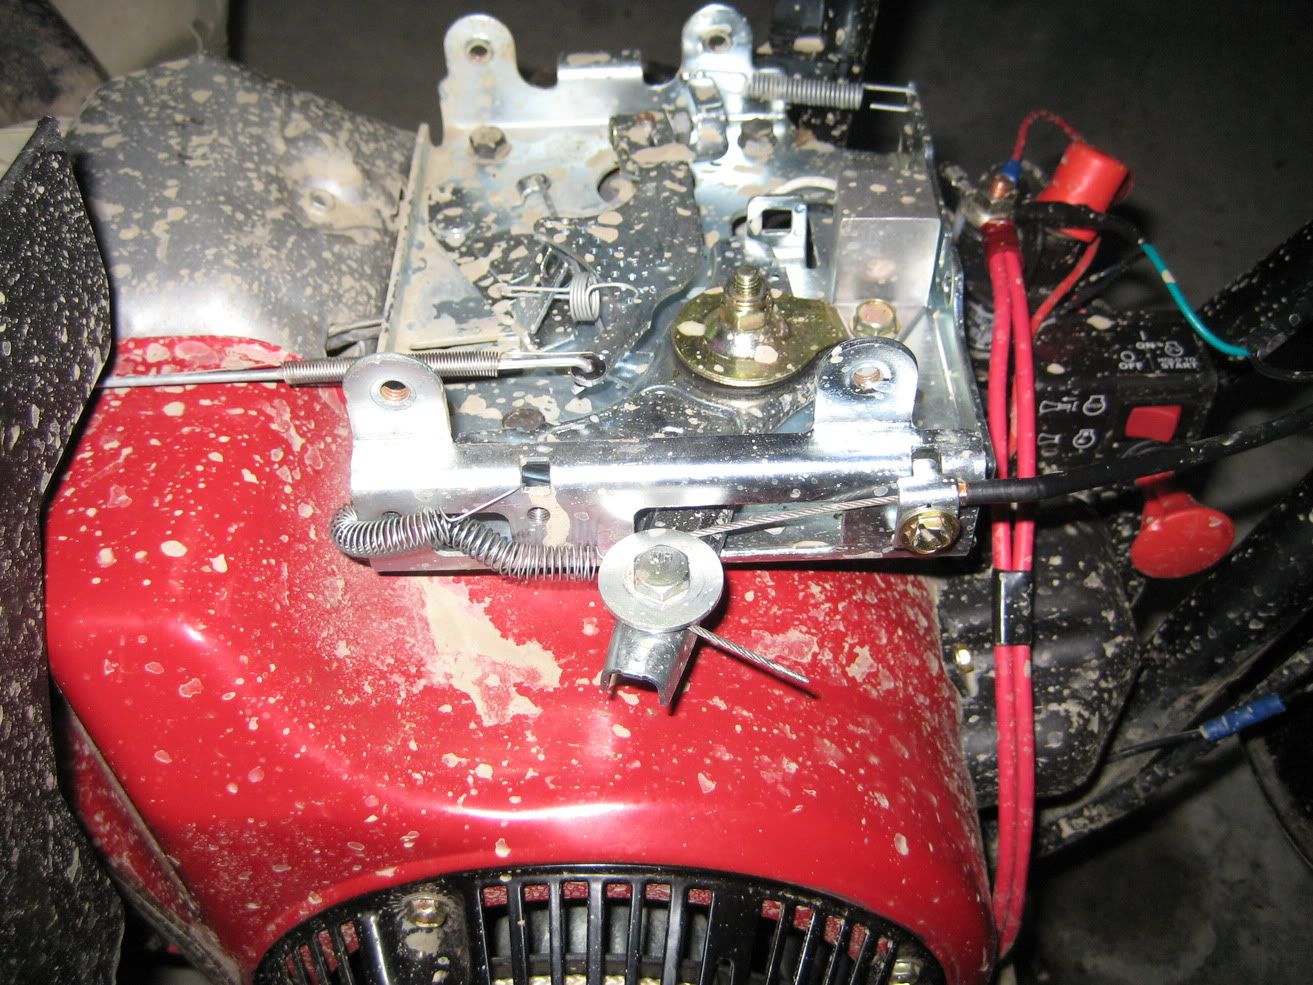
Now it was just hooking up the electrical and throttle. The guy I picked up the motor from gave me a throttle cable holder for the motor, but said you could get the little clip and any Briggs dealer for a few cents. Used a bolt and big washer to secure the cable to the throttle lever, and a spring to return it(loosen the locknut on the governor to make the lever move freely).
Electrical was pretty straightforward. Found a little midget battery at Tractor Supply (Exide BL-3s) for $40, that fits nicely under the cylinder head. Made myself battery cables by doubling up some 10ga wire(don't know if doubling was really necessary but better to be safe). Drilled a hole in the engine mounting plate and bolted one for ground, and sent the other to the motor's solenoid. Electric start! w00t! I would never have paid extra for an electric start minibike, but since the motor came with it I figured I might as well use it.
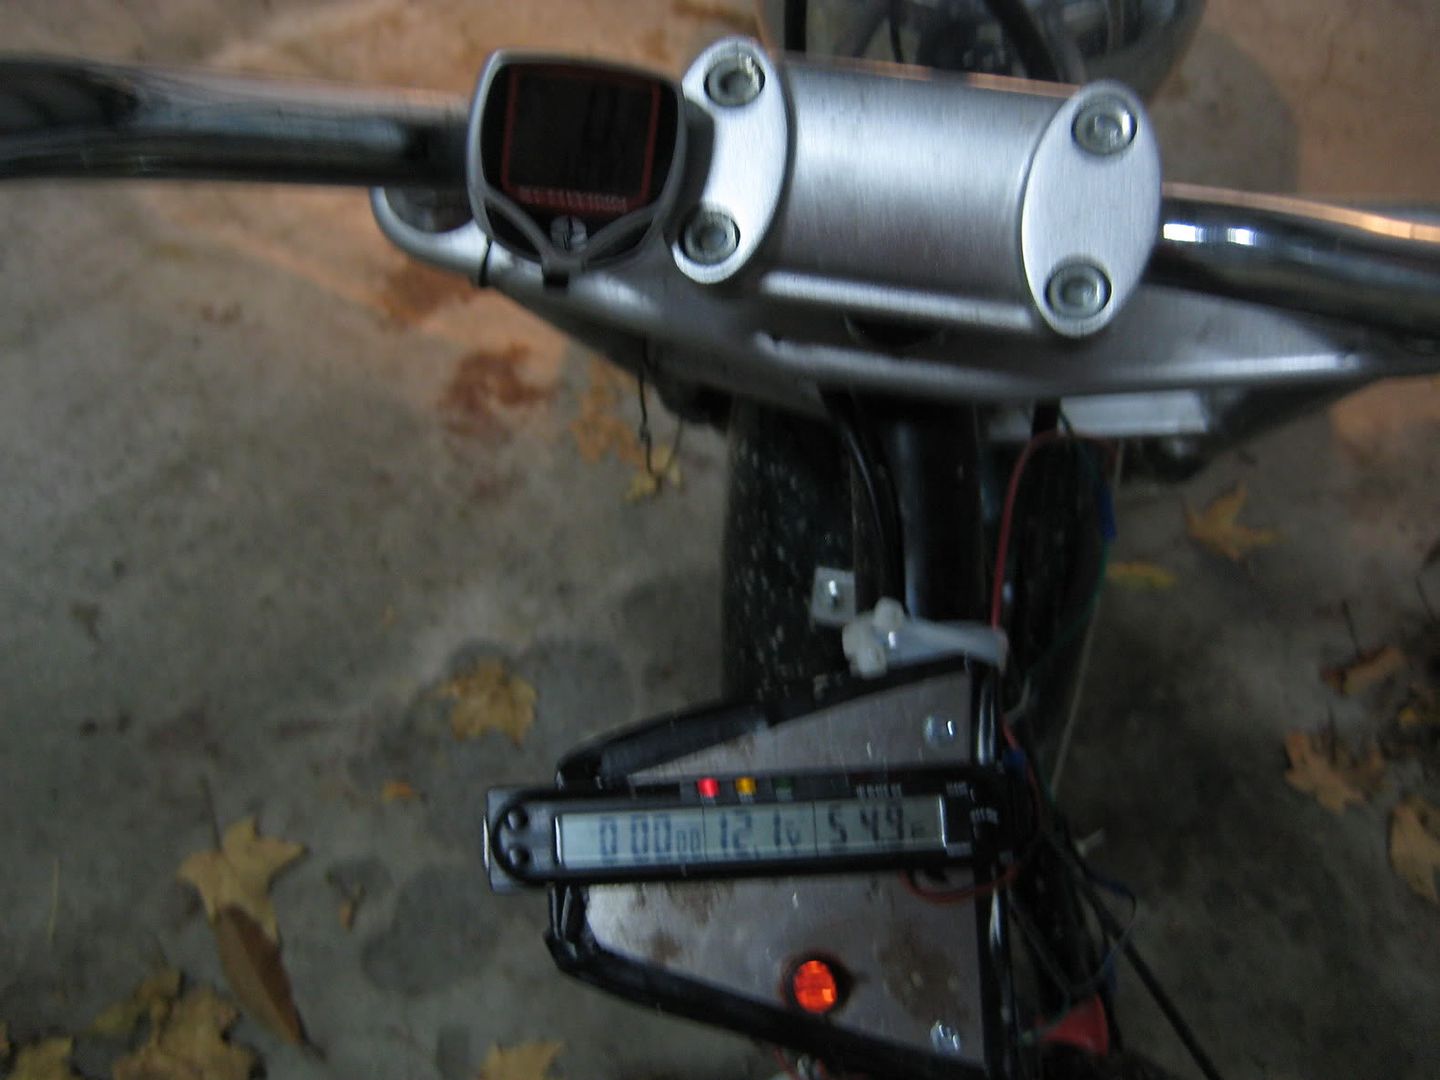
I added a tail light(harbror freight, $1.99 for two), a red LED pod I found in the shop(makes the engine's fins glow at night), and wired up the original headlight again. Also added a stopwatch/temperature/voltage gauge I had lying around the shop from a motorcycle I sold, so I can monitor charging. Put all the lights and stuff on a switch, mounted on a panel I made of sheet metal and used self-tapping screws to bolt it to the frame, where the faux gas tank used to be.
And the finished product:
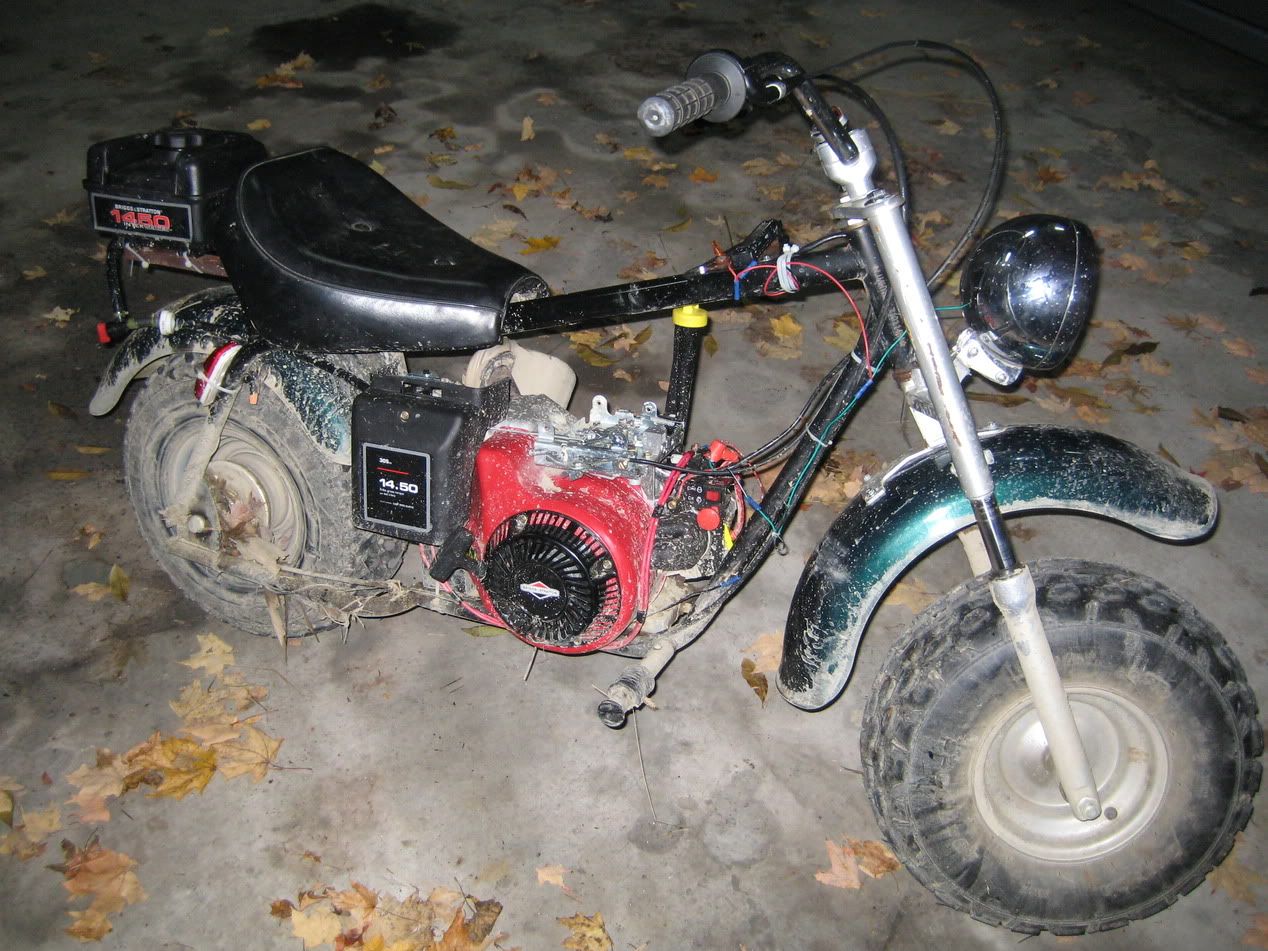
With 11hp and 14.5lbs of torque, with a 7.1:1 gear ratio(this clutch has 14 teeth, the original had 10), this thing really boogies. Get going about 10mph, lean back and dump it, the front end pops right up, and stays up for a good 3-4 seconds. Climbs hills the old engine would bog down and stop on. With the governor in it's "fastest" spring hole(but not ziptied or tampered with), it'll do about 37-38mph, and get there damn quick. And it will do 38 going up hills too, since 38 on flats is only about 1/4 throttle, the governor just opens it up a bit more and it maintains speed up hills. I weigh about 180, and I have not found anything (within reason) this thing won't go through. Water nearly up to the carb, no problem. Mud to the axles, you get one hell of a rooster tail and it keeps churning along.
I was hoping to put a torque converter on it, but they've proven very difficult to find, and prices for ones available seem to be astronomical, and it's got so much giddy-up now, I'm debating if it's really necessary. I'd be doing about 60mph with a .9 overdrive! 8^O Maybe if some of those cheap chinese made ones make their way over here I'll go for it. Any idea on what will be replacing Comet?
Well, there ya go. The total cost was about $300, and took me about 15 hours total time. IMO definetly worth it. It's not the most classy looking thing, but I've always put function over form anyway. I have a brand new, never used muffler and muffler heat shield that should fit any newer Briggs motor 8hp and up if anybody wants it. The old motor is sitting around also, if anyone in the Troy, NY area wants it for anything. Starts first pull and runs great, compression is still good, $50.
I picked up the bike 100% stock with virtually no use off a craigslist ad about a year ago, paid $300 for it. Still had the 12mph governor screw in place on the clone 6.5 motor. I bought it as a toy and figured it would be fun for "small town USA" summers where there are a fair amount of trails and dirt roads. I was right, and I put about 1000 miles on that Baja last summer(I mounted a $9 wal-mart bike speedometer on it and just set it to the tire circumfrence, was fairly accurate when compared to a handheld GPS). Me and one of my friends that I lived nearby beat the living crap out of this bike over the summer...blasted into 2' deep puddles at WOT(resulting in at least half a dozen hydrolocks), the governor was ziptied to about 32mph with the stock 10:1 gearing, it was jumped, wheelied, even towed kids in a wagon. I know it was used far beyond it's intended use, and I never expected it to last the summer. But it did, the motor still started first pull, ran fine, and short of the clutch being about done(shoes were gone and one spring was broken), it was fully functional.
But the motor just didn't have enough "oomph" for my use. Steep hills, loose terrain, and mud it had trouble in. Either had to hit it with a running start, or burn the crap out of the clutch trying to bog through it. So I started looking for a bigger engine, something cheap off craigslist. Found a 110cc pit bike motor with a 3spd autoclutch for $250 and almost went for that, but it was still only 5 hp. Even with a 3spd, I was afraid it wouldn't be much better than what I had. Then the deal of the century came up. A brand new-in-box 2008 Briggs and Stratton 1450 INTEK series, with electric start and DC output, for $120. The catch? It was dropped in shipping and had a crack in the oil pan right under one of the 3 drain plugs. Snatched that right up and I was off. This motor retails for about $900.:thumbsup:
First, the oil pan fix. It leaked oil like a sieve initially. I thought about just trying some JB weld over the crack, but from looking at the pan it seemed that each drain plug was fed by an enclosed channel to the crankcase. I popped the side cover off, and I was right. The problem drain plug had a small, maybe 1/2" hole in the case that fed the drain. Some hi-temp "play dough" putty sealed that, RTV'd the case back together and the oil leak is gone.
Next, making it fit into the frame. The old motor was 196cc, this one is 305cc. It would fit in the frame, but the front mounting holes hung over the front of the frame by about 3/4"(that's with the OHV cover bumped right up against the downtube under the seat). So I fabricated an extender out of a piece of 1" angle iron. Fortunately, the front of the engine mounting plate had a flat face, making the angle iron make a near perfect 1" extension to the plate. Popped a couple holes in that flat front and bolted the extender into place. Positioned the motor in the frame, and slid it as far right as it would go(the right corner of the motor's mounting plate would hit the right downtube, but that proved to be just far enough to make the jackshaft output line up(almost) with the rear sprocket. More on that later. Here's a shot of the angle iron "adapter":
Now the motor was bolted in, it was time to hook up the driveline. First issue, was finding a suitable clutch, since this motor has a 1" shaft. 1" bore centrifugal clutches are not easy to find. I ended up ordering an inboard/outboard NORAM clutch from Heeter's...ran me $160, more than the engine! Oh well. Another quick note: B&S engines use fine threads on EVERYTHING, so I was dashing to the hardware store constantly to get a fine threaded version of a bolt I already had. The old jackshaft plate didn't quite fit on the B&S motor, in that the big bearing assembly at the back hit the plastic oil fill cap. I removed the cap, and used more play-dough to plug the hole(oil could still be filled through the big dipstick tube). Now the jackshaft fit, and after finding four 5/16"x1" fine thread bolts to bolt the jackshaft plate to the motor, I was good there. Mounted the clutch "inboard" and used it's set screws to hold it in place in line with the jackshaft input gear. Except the output and rear sprocket didn't quite line up any more, they were about 1/2" out of line. I removed the back wheel(this was extremely difficult and I destroyed the threads on the axle using a 5lb sledge to hammer it out, not sure why it was so hard), and took off the sprocket. I put four thin washers between the hub and sprocket, and re-used the original bolts. This shifted it actually a bit too far over I discovered after I re-installed, but it was still damn close and I left it alone. NOTE: This failed a couple days later- the bolts just cleaved off. I replaced the original 1/4" pot metal bolts with 5/16" Grade 8 steel bolts, and used two thicker galvanized washers instead, which is as close to perfect alignment as you can get. That exhaust I garbage-picked from the scrap pile at my college BTW. Haven't had a problem since.
Here's a shot of the finished driveline:
The gas tank wouldn't fit in the frame mounted on top of the motor, so it had to find a new home. I used two pieces of angle iron, about 10" long, to make a little shelf for the gas tank behind the seat. Bolted the iron to the crossbar that also supports the seat. Popped a couple holes in the iron and bolted the tank into place. Got a longer piece of fuel hose and a filter, and hooked that up. A nice side effect is that when the bike sits level, the fuel tank is tipped slightly back, and the fuel drain is in the back, so the tank will run 100% dry. I also added springs to the seat to quasi-compensate for it being a hardtail frame. Two 5/16x4" bolts, two little sheet metal rectangles, and a couple washers. Took like 10 minutes and comfort is dramatically improved. This pic shows the side that is ziptied to keep it from bouncing, but don't worry, the other side is bolted. It is very solidly mounted.
Now it was just hooking up the electrical and throttle. The guy I picked up the motor from gave me a throttle cable holder for the motor, but said you could get the little clip and any Briggs dealer for a few cents. Used a bolt and big washer to secure the cable to the throttle lever, and a spring to return it(loosen the locknut on the governor to make the lever move freely).
Electrical was pretty straightforward. Found a little midget battery at Tractor Supply (Exide BL-3s) for $40, that fits nicely under the cylinder head. Made myself battery cables by doubling up some 10ga wire(don't know if doubling was really necessary but better to be safe). Drilled a hole in the engine mounting plate and bolted one for ground, and sent the other to the motor's solenoid. Electric start! w00t! I would never have paid extra for an electric start minibike, but since the motor came with it I figured I might as well use it.
I added a tail light(harbror freight, $1.99 for two), a red LED pod I found in the shop(makes the engine's fins glow at night), and wired up the original headlight again. Also added a stopwatch/temperature/voltage gauge I had lying around the shop from a motorcycle I sold, so I can monitor charging. Put all the lights and stuff on a switch, mounted on a panel I made of sheet metal and used self-tapping screws to bolt it to the frame, where the faux gas tank used to be.
And the finished product:
With 11hp and 14.5lbs of torque, with a 7.1:1 gear ratio(this clutch has 14 teeth, the original had 10), this thing really boogies. Get going about 10mph, lean back and dump it, the front end pops right up, and stays up for a good 3-4 seconds. Climbs hills the old engine would bog down and stop on. With the governor in it's "fastest" spring hole(but not ziptied or tampered with), it'll do about 37-38mph, and get there damn quick. And it will do 38 going up hills too, since 38 on flats is only about 1/4 throttle, the governor just opens it up a bit more and it maintains speed up hills. I weigh about 180, and I have not found anything (within reason) this thing won't go through. Water nearly up to the carb, no problem. Mud to the axles, you get one hell of a rooster tail and it keeps churning along.
I was hoping to put a torque converter on it, but they've proven very difficult to find, and prices for ones available seem to be astronomical, and it's got so much giddy-up now, I'm debating if it's really necessary. I'd be doing about 60mph with a .9 overdrive! 8^O Maybe if some of those cheap chinese made ones make their way over here I'll go for it. Any idea on what will be replacing Comet?
Well, there ya go. The total cost was about $300, and took me about 15 hours total time. IMO definetly worth it. It's not the most classy looking thing, but I've always put function over form anyway. I have a brand new, never used muffler and muffler heat shield that should fit any newer Briggs motor 8hp and up if anybody wants it. The old motor is sitting around also, if anyone in the Troy, NY area wants it for anything. Starts first pull and runs great, compression is still good, $50.
Last edited: