Larger sprocket...
- Thread starter Bowling
- Start date

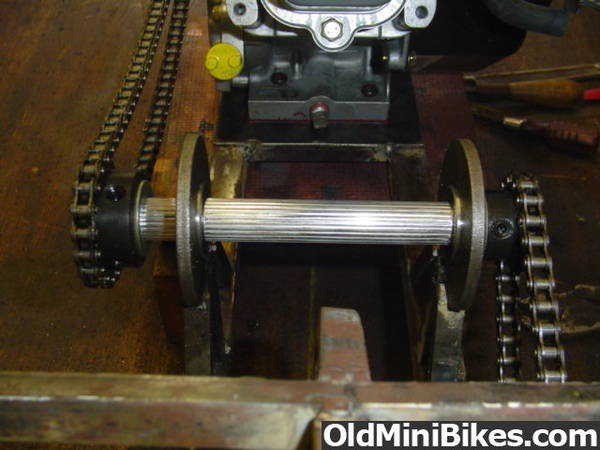
On most minibikes, the jackshaft side that drives the rear wheel sprocket doesn't need a locking collar for it's bearing...the sprocket is usually placed against the bearing, holding it in the hanger. The one pictured has a washer between the sprocket and bearing to correct the alignment.
The locking collar is included in the kit to be used on the driven sprocket side...the clutch position on most engines sticks out away from the frame, and the bearing on this side may come out of the hanger if not collared or sleeved.
I personally use sleeves instead of collars so I can grease the jackshaft inside the sleeve, and it's protected from corrosion and can be disassembled much easier in the future. I also sleeve the entire jackshaft to prevent any side-to-side movement of the sprockets and bearings.
It's important to note that the bearings are inserted into the hangers from opposite sides...they go into the hangers from the outside, so they are being held into the hangers by the sprockets or sleeves/collars, and not pushed out of the hangers.
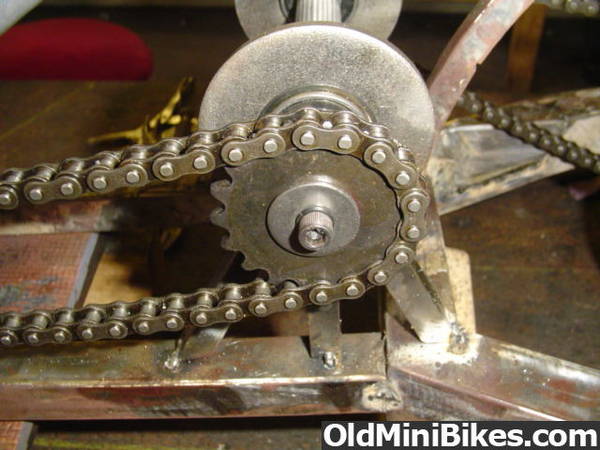
It's also important to use a threadlock compound on the sprocket setscrews...I use a 'temporary' strength compound so I can disassemble the setup later if necessary...they also offer 'permanent' strength, but jackshafts usually require maintenance...the sprockets and bearings wear, and require replacement.
The setscrews are prone to loosening from vibration and centrifugal force...if the sprockets become loose enough to move outwards on the jackshaft, it is possible for the engine crankshaft to snap completely off. The tensile strength of the steel jackshaft is much greater than that of the cast iron crankshaft, so the breakage usually occurs at the engine.
I trim my jackshafts to length after I've aligned the sprockets, removing excess weight. I also centerbore and tap both ends of the jackshaft and install sprocket retaining screws...also with threadlock compound, along with a retaining washer and a lock washer.
This is the same setup as used on the crankshaft to retain the clutch. If anyone would like me to modify their jackshaft to this type of setup, I'll do it for free...it's important that a lathe is used to drill the shaft, to ensure the bore is perfectly centered and straight into the shaft. I'll even install stainless steel retaining hardware before I mail it back to you, to save you a trip to the hardware store.
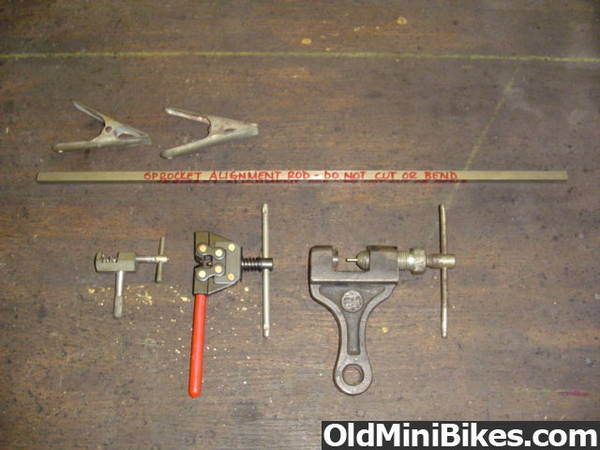
Just some chain 'breaker' tools in different sizes, and a sprocket alignment rod with clamps...I use a square rod...this tells me if the sprockets are both aligned and perpendicular to the frame...if the flat side of the rod won't rest completely flat against the faces of both sprockets, then something (engine, wheel) isn't sitting square in relation to the frame.
regarding doodle bug
Bought my son doodle bug. We enjoy it. Loosened govorner. Tightened throttle cable. We are new to engines. Got these tips on line. Thank you. Running faster after few hours break in as I have read. Will a larger sprocket in back make it faster on the start as he grows? He is currently 75lbs. And won't this then cut back on top speed. I forgot to count the teeth before leaving it up in wisconsin. Does it originally have 60 teeth? We were thinking of making the sprocket smaller. Saw a 54 and 40 tooth sprocket on line. Any opinions on how this would make the minibike perform? We don't really want to get into welding, so jack shafts are out. Learned about that here. It's been an education. How much performance will exhaust modification add? What is the simplest exhaust modification we can do? Any simple air filter suggestions? I did read about the panty hose. Thank you.
Bought my son doodle bug. We enjoy it. Loosened govorner. Tightened throttle cable. We are new to engines. Got these tips on line. Thank you. Running faster after few hours break in as I have read. Will a larger sprocket in back make it faster on the start as he grows? He is currently 75lbs. And won't this then cut back on top speed. I forgot to count the teeth before leaving it up in wisconsin. Does it originally have 60 teeth? We were thinking of making the sprocket smaller. Saw a 54 and 40 tooth sprocket on line. Any opinions on how this would make the minibike perform? We don't really want to get into welding, so jack shafts are out. Learned about that here. It's been an education. How much performance will exhaust modification add? What is the simplest exhaust modification we can do? Any simple air filter suggestions? I did read about the panty hose. Thank you.
A jack shaft will give you the best of both worlds. You can easily change the gearing for hill climbing or for driving on the freeway. However this a redesign and it won't be plug and play. There are three basic jack shaft conversions. The first requires welding on brackets to the frame. The second mounts under the engine and the third which I'm recommending mounts on the side of the engine.
See: Reducers
The Max-torque side mount conversion will require the least amount of redesign. But since the kit was designed for a go kart you will have make a few changes. Example: The gear they provide is for 41 chain. Most mini's run with 35 chain so the gear will have to be replaced. The mount is drilled for a Briggs engine, so the mount may have to be re-drilled. And you may want to run your clutch outboard instead of inboard to minimize any adjustments you will have to make to the alignment of the rear chain.
For replacement gears check out: Comet Kart Sales - All Mini Bike & Play (Fun) Kart Parts, Fun Kart Part, Brake Band, Brake Lever, Brake Cable, Twist Grip Throttle, Cable Stop Jackshaft, Jackshaft Gears, Sprockets
Good luck.