Hello,
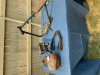
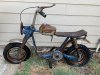
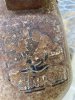
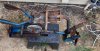
I went ahead and purchased a Rupp Scrambler 1970 ish or 71... I think- Based on the wire wheels I assume that it is a 70. It is covered in rust and dirt, missing a ton of parts, and I probably paid way to much for it... But I wanted it and it was worth it in my eyes. I had no idea what the color was when I bought it. I was thinking that it was a green color or a baby blue. I was actually very wrong, it looks like it has a very rich deep blue that revealed itself after a freshwater rinse to remove most of the caked-on dirt from the past who knows how many years.
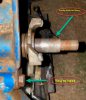
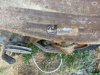
Everything seems to be more surface rust and I will go ahead and drop the penetrating oil today and start the teardown process, begin cataloging what parts I will need to get. All the joints seem solid, there are no broken or bent limbs. (in exception to the tank, it has a couple of dings upfront that can possibly be hammered out.) Overall, I am happy and if you can shed any light on it I would greatly appreciate it!
Thanks,
~James
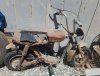
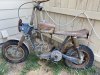
I went ahead and purchased a Rupp Scrambler 1970 ish or 71... I think- Based on the wire wheels I assume that it is a 70. It is covered in rust and dirt, missing a ton of parts, and I probably paid way to much for it... But I wanted it and it was worth it in my eyes. I had no idea what the color was when I bought it. I was thinking that it was a green color or a baby blue. I was actually very wrong, it looks like it has a very rich deep blue that revealed itself after a freshwater rinse to remove most of the caked-on dirt from the past who knows how many years.
Everything seems to be more surface rust and I will go ahead and drop the penetrating oil today and start the teardown process, begin cataloging what parts I will need to get. All the joints seem solid, there are no broken or bent limbs. (in exception to the tank, it has a couple of dings upfront that can possibly be hammered out.) Overall, I am happy and if you can shed any light on it I would greatly appreciate it!
Thanks,
~James


")