I did it again...I purchased another Doodle Bug and will have another project.
It started with me buying my daughter her DB30 ( which I P&P, removed governor, and added a header pipe). Then I bought one for myself and renamed it the Doodle Devil ( added Devil's tail sissy bar, side mount gas tank, TC with 7" driven, street tires, 53T sprocket, removed gov, big jet and e-tube, air filter and header). I also added detachable leaner style type side car with Devil horns ( that is where my 5 year old boy with special needs will ride.
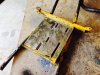
Now I needed one for the wife and my 3 year old son. I wanted to do something cool and thought I would take a wack at trike build (I use to race ATC's in the 80's and love 3 wheels).
I plan on extending about 6" and adding a dumbmy set of handle bars with foot pegs for a child to sit in front of the adult. It will have a live axle (because that is what I have at the house), torque converter, and wheelie bar. I also have a 5hp Briggs flat head with gov removed, P&P, header, and manifold to accept clone carb bigger jets.
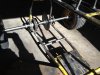
I have a 40" axle and the wheelbase of a DB30 is approx 36" so adding 6" seems logical.
This is the place to be for MB's and trikes. Everyone has already been helpful ( " Thank you " ) so it is time for me to start this build thread.
It started with me buying my daughter her DB30 ( which I P&P, removed governor, and added a header pipe). Then I bought one for myself and renamed it the Doodle Devil ( added Devil's tail sissy bar, side mount gas tank, TC with 7" driven, street tires, 53T sprocket, removed gov, big jet and e-tube, air filter and header). I also added detachable leaner style type side car with Devil horns ( that is where my 5 year old boy with special needs will ride.
Now I needed one for the wife and my 3 year old son. I wanted to do something cool and thought I would take a wack at trike build (I use to race ATC's in the 80's and love 3 wheels).
I plan on extending about 6" and adding a dumbmy set of handle bars with foot pegs for a child to sit in front of the adult. It will have a live axle (because that is what I have at the house), torque converter, and wheelie bar. I also have a 5hp Briggs flat head with gov removed, P&P, header, and manifold to accept clone carb bigger jets.
I have a 40" axle and the wheelbase of a DB30 is approx 36" so adding 6" seems logical.
This is the place to be for MB's and trikes. Everyone has already been helpful ( " Thank you " ) so it is time for me to start this build thread.
Attachments
-
![IMG_5442[1].JPG](/forum/data/attachments/2/2432-98b65dfff1be618817af13ac2a5d5d8f.jpg) 2.5 MB Views: 80
2.5 MB Views: 80 -
![IMG_5444[1].JPG](/forum/data/attachments/2/2433-04877ec9643c94c479fa4ca800de7e70.jpg) 2.7 MB Views: 68
2.7 MB Views: 68 -
![IMG_5443[1].JPG](/forum/data/attachments/2/2434-493cab0db2531c4b15e27636de95392b.jpg) 2.4 MB Views: 110
2.4 MB Views: 110
![IMG_5461[1].JPG](/forum/data/attachments/2/2527-146db1a56e9ffce94483519b58e725c6.jpg)
![IMG_5462[1].JPG](/forum/data/attachments/2/2528-6b91a07bc71ef487a24faf496285687e.jpg)
![IMG_5463[1].JPG](/forum/data/attachments/2/2529-f8ba82af90821b69e4a634775c44ce3a.jpg)

![IMG_5471[1].JPG](/forum/data/attachments/2/2817-5da25025e0bd9cadc0c8fd3938a43f8f.jpg)
![IMG_5475[1].JPG](/forum/data/attachments/2/2818-fc3a4666ca700670278b73da62c7dab8.jpg)
![IMG_5476[1].JPG](/forum/data/attachments/2/2819-ad7761868a92202580563574cd1499a9.jpg)
![IMG_5477[1].JPG](/forum/data/attachments/2/2840-69598de547686e349ff9ebd24254bfb4.jpg)
![IMG_5479[1].JPG](/forum/data/attachments/2/2871-bfbe61cd40ff3b9943174ef33404e0d5.jpg)
![IMG_5481[1].JPG](/forum/data/attachments/2/2872-c5f12bfc33ba7c561813944ae551536d.jpg)
![IMG_5482[1].JPG](/forum/data/attachments/2/2873-d54d750e0696280a3a61cd774d0f17d1.jpg)
![IMG_5507[1].JPG](/forum/data/attachments/3/3123-21ef5dcff626aafd98815596fad37aa1.jpg)