Forgot, I actually did run that engine in on video a few months back, Nothing spectacular really other than it runs and produces voltage. I modify the 45 degree exhaust fittings and open them up a bit as they are so choked down so my engines like this are a little more raspy sounding.....
[video=youtube;lZDBrYPldY8]https://www.youtube.com/watch?v=lZDBrYPldY8[/video]
[video=youtube;lZDBrYPldY8]https://www.youtube.com/watch?v=lZDBrYPldY8[/video]
Last edited:
Been trying to get this part of the project taken care for quite some time.....The seat grommets!
Karen redid the seat for me long time back, I have been trying to find suitable Grommets though for like the past year :doah: I actually found them right away last year, but what they are being sold as and the descriptions were usually pretty vauge and did not give actual measurments. Costing $15 for a package of 5 of them (best deal I could ever find) I wanted to be pretty sure they would work.
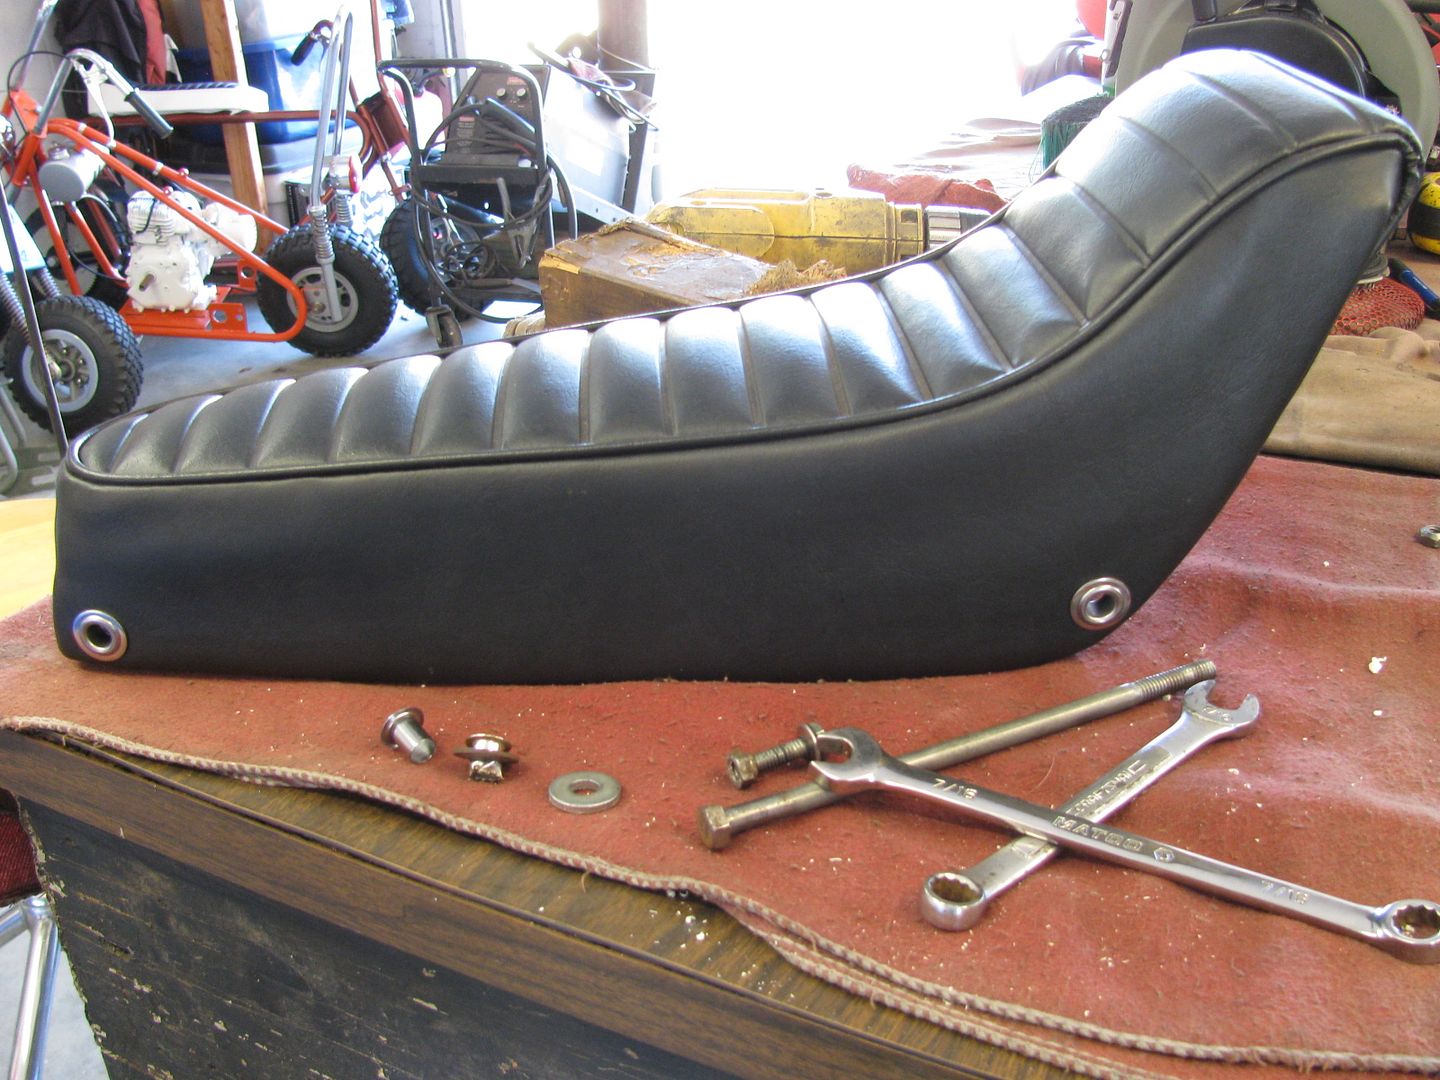
Here is a pic of the orginal as it came off the pan, Its all mangled but I did my best to get it off the pan in one piece for reference, and of course the other is the replacement I found....I choose to use a stainless washer so I would not have to really worry about it rusting or anything.

The replacement is actually sold as Musical drum vents used for making a or rebuilding a drum. I sucked it up recently, ordered a set of 5 and crossed my fingers they would in fact work. they did, in fact other than being a little longer (which turns out to be a good thing as you get more edge once crimped and rolled on the backside) they are a great match :thumbsup:
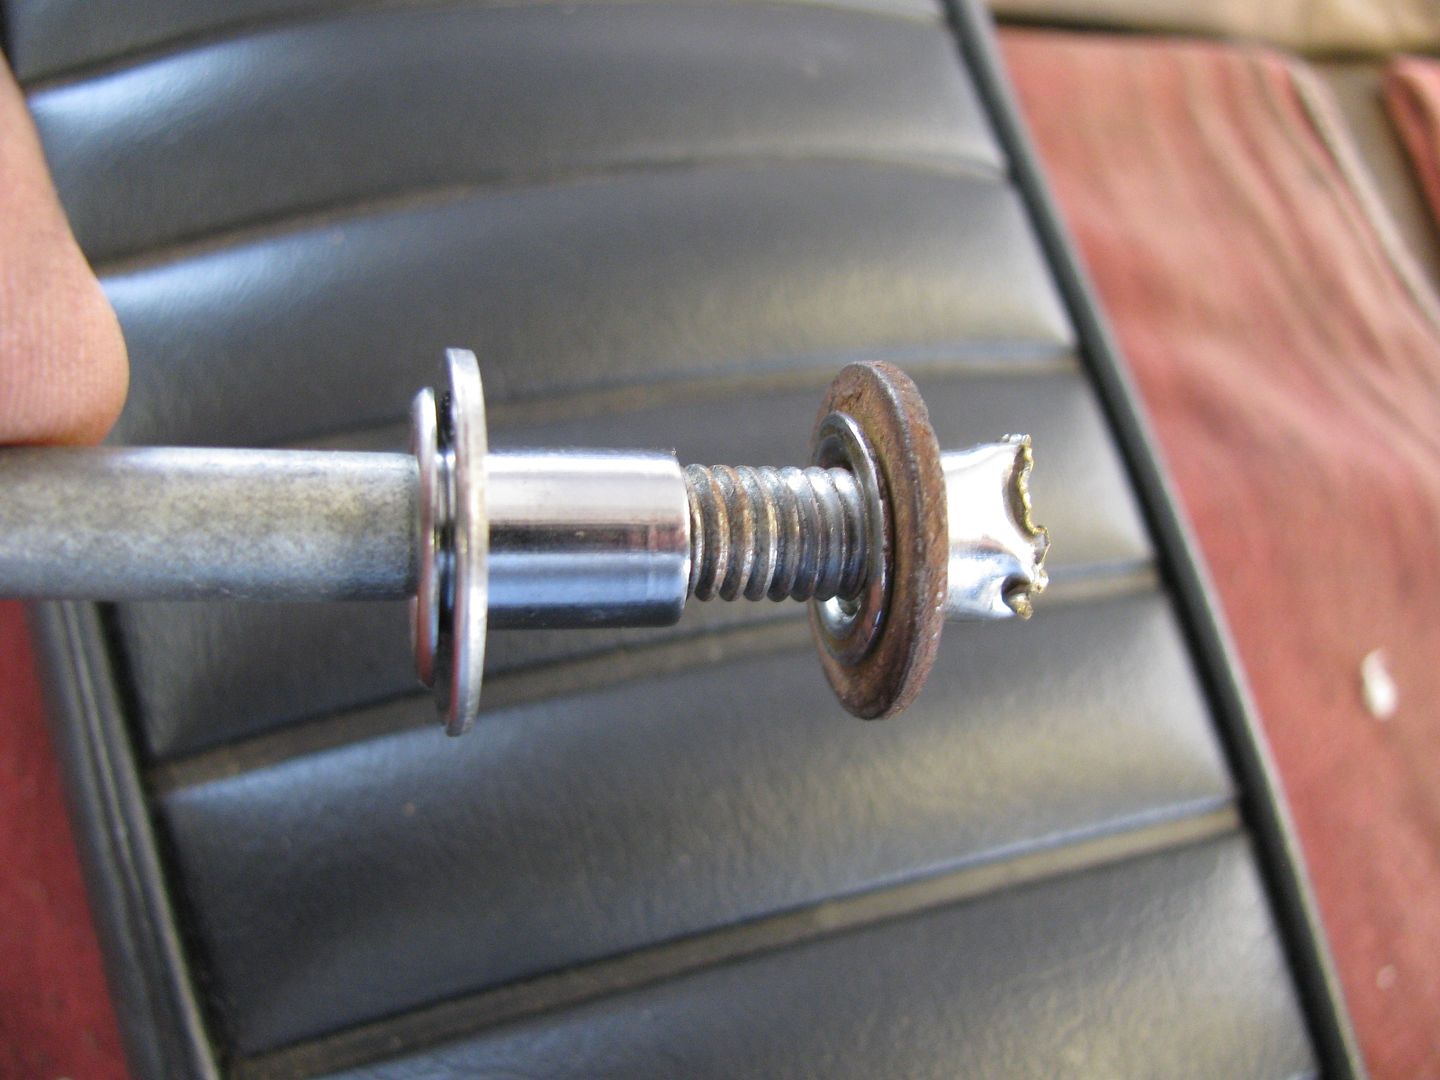
To install them I made a "tool" by using a bolt, a sealing washer flipped backwards (it had a V shape to it and a tight fit to keep it centered....and its all I could find that would work in garage this morning :laugh") , and I threaded and old school locknut on backwards so the the flare could be utilized (I ran a thread chaser through the nut a few times to get through the crimps so it would thread on the bolt easy):
, and I threaded and old school locknut on backwards so the the flare could be utilized (I ran a thread chaser through the nut a few times to get through the crimps so it would thread on the bolt easy):

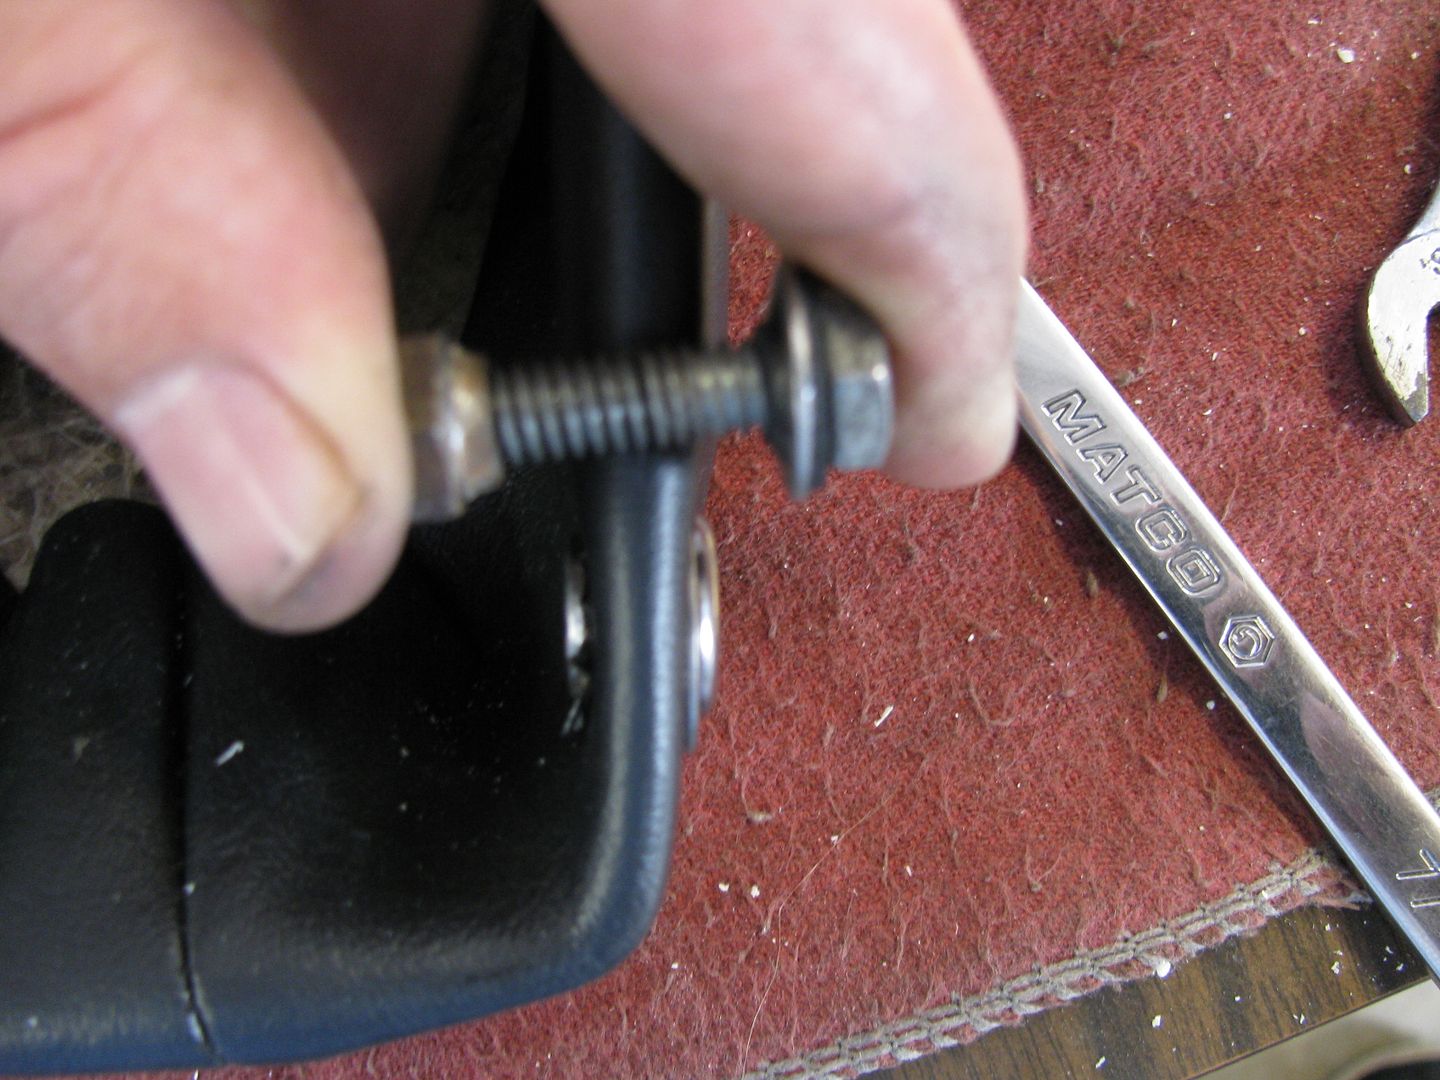
crude, but funcitional, you just run the bolt through the grommet when installed through seat and tighten the bolt and nut up a bit with some wrenches, the flares will keep it centered and it rolled the inside lip over perfect :thumbsup:
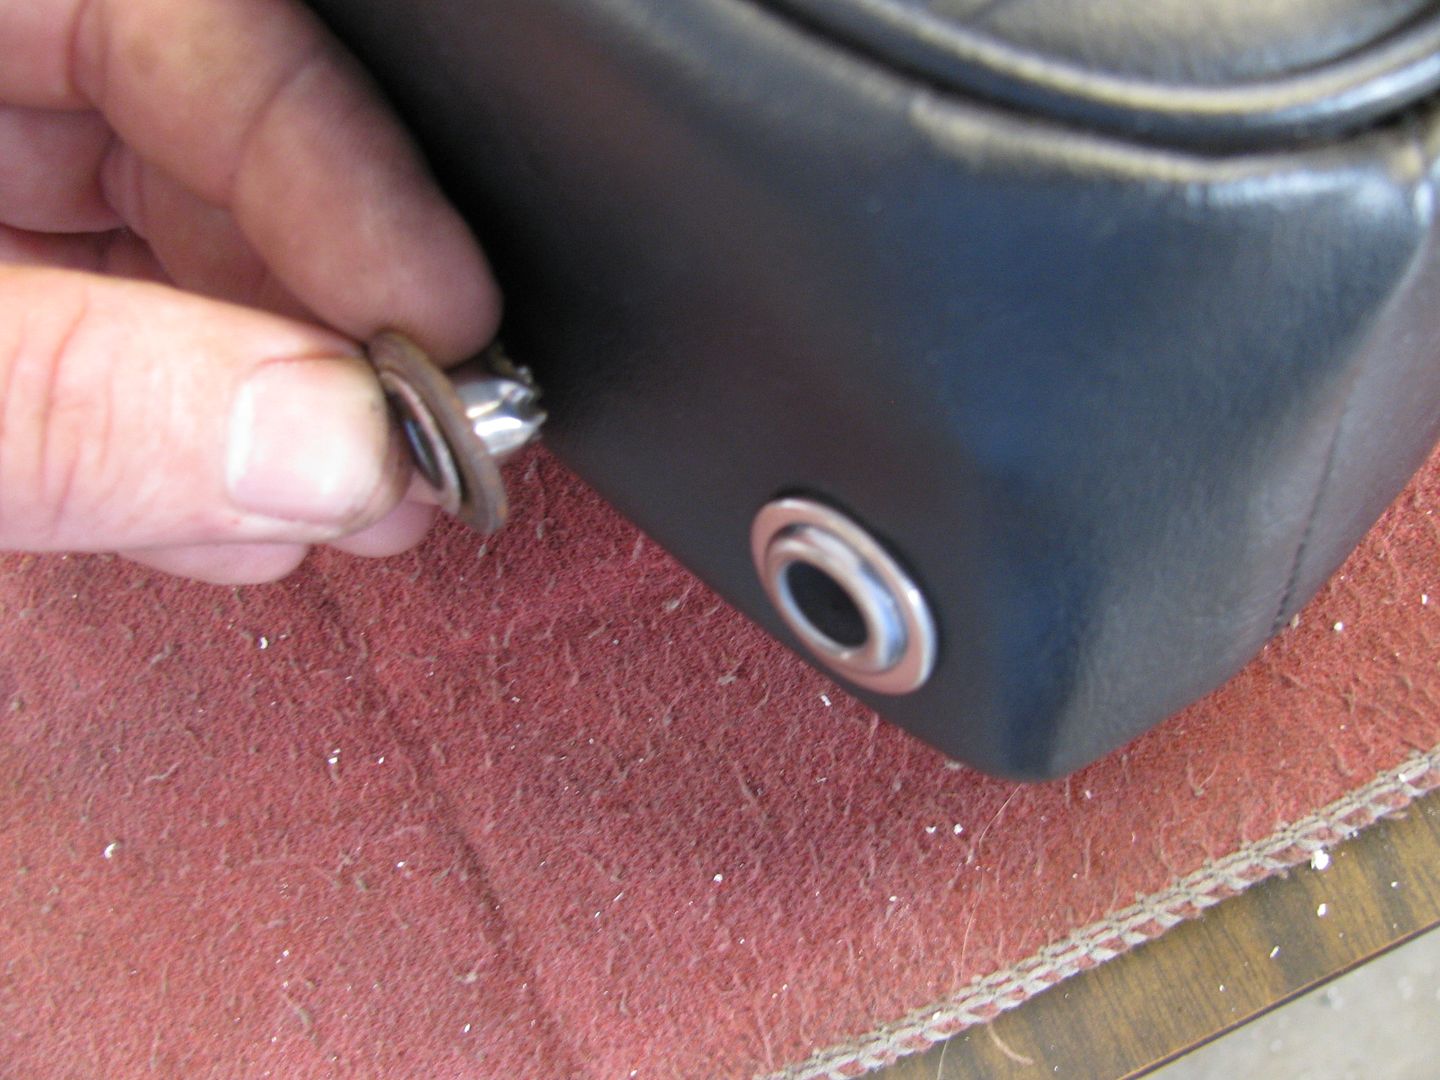
I installed them just like the OG came off the seat before

Came out pretty good

You would think that this might get me motivated to finish the bike....Not really :laugh:
Karen redid the seat for me long time back, I have been trying to find suitable Grommets though for like the past year :doah: I actually found them right away last year, but what they are being sold as and the descriptions were usually pretty vauge and did not give actual measurments. Costing $15 for a package of 5 of them (best deal I could ever find) I wanted to be pretty sure they would work.
Here is a pic of the orginal as it came off the pan, Its all mangled but I did my best to get it off the pan in one piece for reference, and of course the other is the replacement I found....I choose to use a stainless washer so I would not have to really worry about it rusting or anything.

The replacement is actually sold as Musical drum vents used for making a or rebuilding a drum. I sucked it up recently, ordered a set of 5 and crossed my fingers they would in fact work. they did, in fact other than being a little longer (which turns out to be a good thing as you get more edge once crimped and rolled on the backside) they are a great match :thumbsup:
To install them I made a "tool" by using a bolt, a sealing washer flipped backwards (it had a V shape to it and a tight fit to keep it centered....and its all I could find that would work in garage this morning :laugh
, and I threaded and old school locknut on backwards so the the flare could be utilized (I ran a thread chaser through the nut a few times to get through the crimps so it would thread on the bolt easy): 
crude, but funcitional, you just run the bolt through the grommet when installed through seat and tighten the bolt and nut up a bit with some wrenches, the flares will keep it centered and it rolled the inside lip over perfect :thumbsup:
I installed them just like the OG came off the seat before

Came out pretty good

You would think that this might get me motivated to finish the bike....Not really :laugh:

Finally drug this out and got some color laid down on it today, I used a 1969 Camaro orange as I had seen it referenced as being a decent match for the Bonanza orange. I used a single stage Dupont Nason urethane paint, I used grey primer sealer though so it may be a touch darker than intended (its also pretty dark in my cave of a garage).

Since I can't afford to run with the big dogs and chrome my alternative to cover the extensive repairs on the bars was paint. Not in love with doing this but it what I had to do:

I ended up sleeving the fork upper fork section bringing tubing up into the bars past the top tree and flush with the upper section so it wont interfere with the bottom pieces that bolt in. It got welded at the top seal like it should and I did my best to make it that it could be worked with and chromed maybe by someone if they really wanted to still. It shroud also be a little stronger at that point which seems to be an issue with these chopper forks.
Sent from my iPad using OldMiniBikes mobile app powered by Tapatalk
This bump is for another member, with pictures to go along with post #43 pertaining to the seat grommet replacement as some pictures got moved in my last photobucket cleanup.....
@manchester1
@manchester1