Custom home made added lift cam?
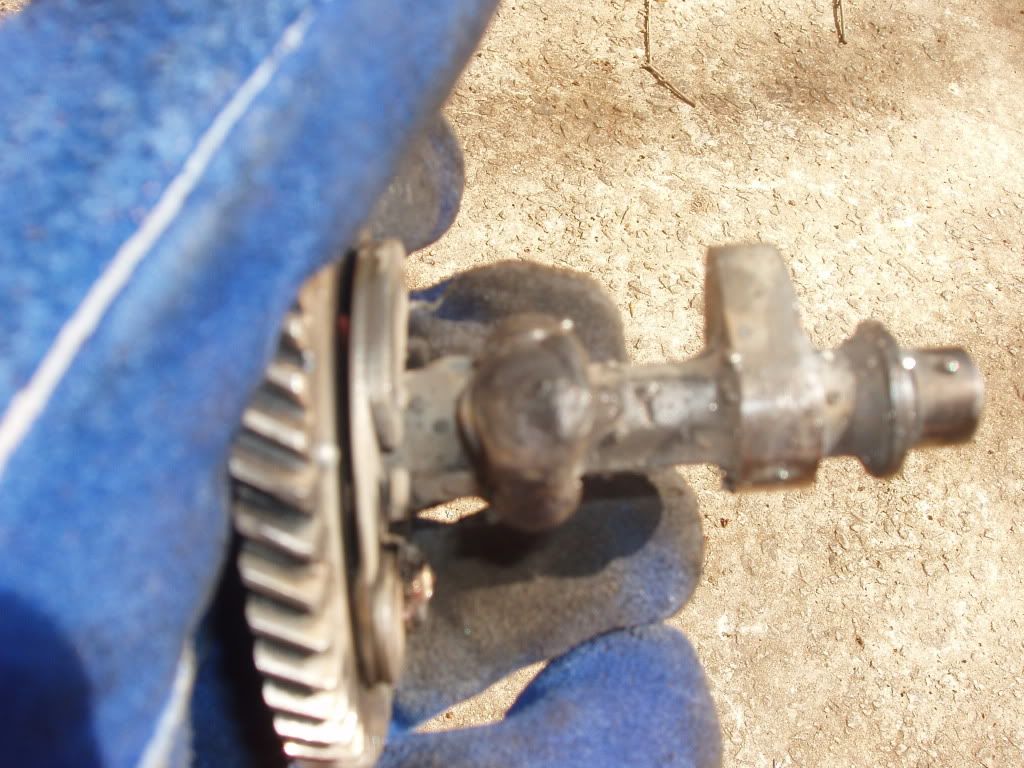
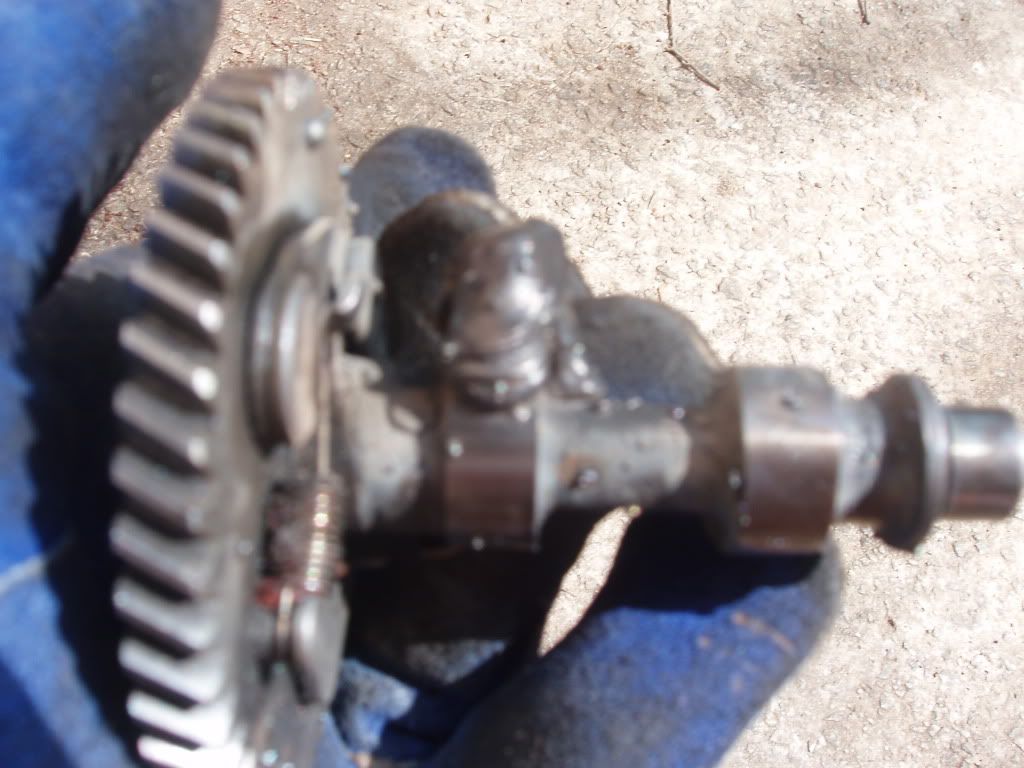
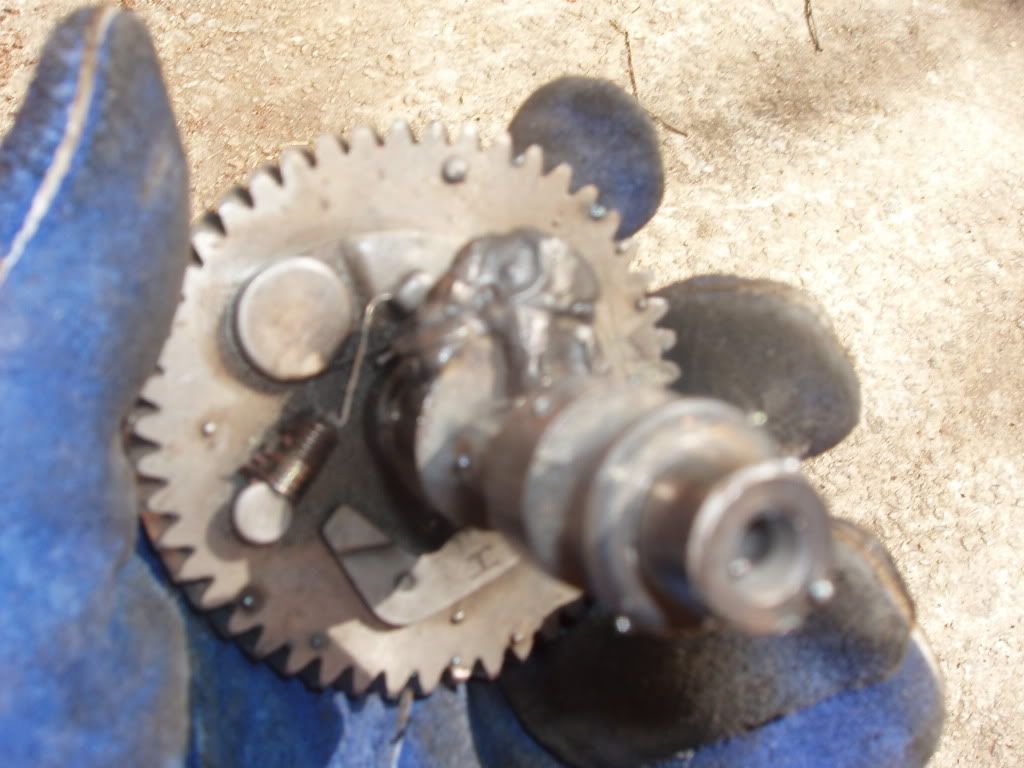
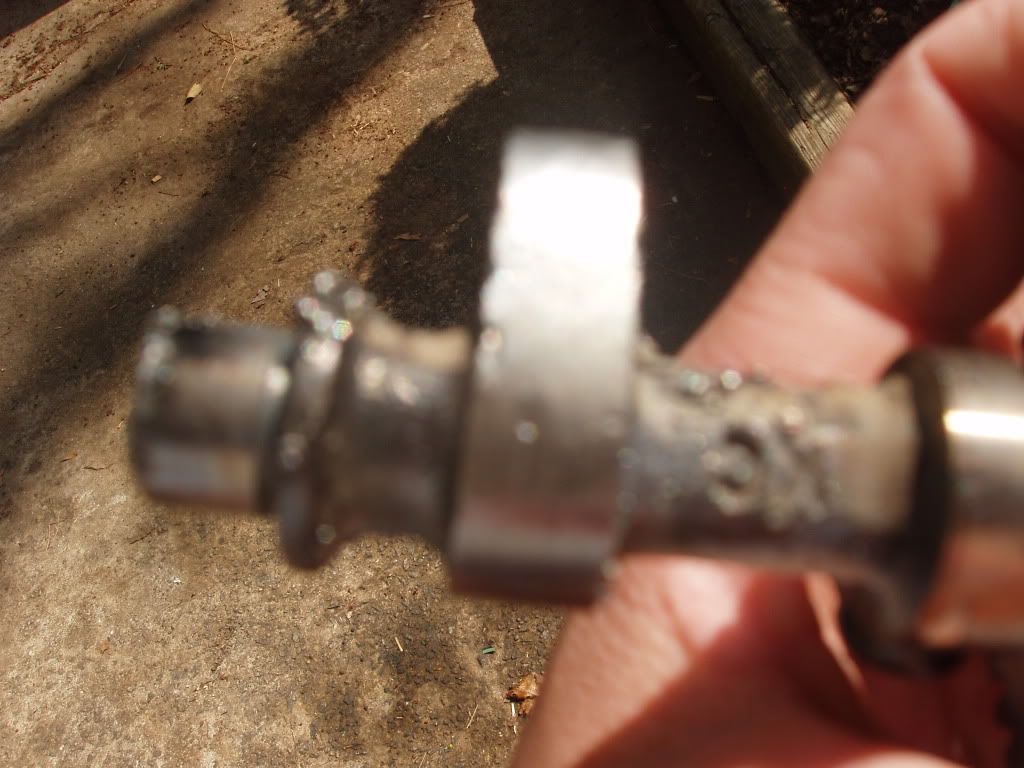
I haven't degreed my cam yet but what I did was before I welded it up, I marked a line from the top at the highest lift down to the base on the side of the lobe so that I know where it was centered as default. I shaped it based on that center line, adding material evenly on both sides.
The good thing with having .500 now is that you have plenty of material to work with.") If you have heavier springs, make that lobe fat. You can increase the valve opening and closing speed by adding more to the incline and decline of the lobe. Use common sense though, it can only open and close so fast before it'll fatigue very quickly. The faster it closes, the harder its going to slap the valve seat, etc.
If you have heavier springs, make that lobe fat. You can increase the valve opening and closing speed by adding more to the incline and decline of the lobe. Use common sense though, it can only open and close so fast before it'll fatigue very quickly. The faster it closes, the harder its going to slap the valve seat, etc.
You can also print out degree wheels online, which you can mount to cereal box cardboard or something plastic. I'd bet you it works just as well.
Good luck.
The good thing with having .500 now is that you have plenty of material to work with.
If you have heavier springs, make that lobe fat. You can increase the valve opening and closing speed by adding more to the incline and decline of the lobe. Use common sense though, it can only open and close so fast before it'll fatigue very quickly. The faster it closes, the harder its going to slap the valve seat, etc.You can also print out degree wheels online, which you can mount to cereal box cardboard or something plastic. I'd bet you it works just as well.
Good luck.
I like the center line idea wish I had thought of that. Damn!!! But yeah I have a lot to work with now I will try to see if I can find a degree wheel somewhere online but I think I'm just going to eye ball it and hope for the best.
EDIT: you say make the lobes fat, I understand that this would keep the vavles open longer. So this would be the best way to go compared to "slimming down" the lobes correct?
EDIT: you say make the lobes fat, I understand that this would keep the vavles open longer. So this would be the best way to go compared to "slimming down" the lobes correct?
Last edited:
this is the degree wheel i will be using...or try to use if i can figure it out
Tavia Performance Products Downloadable Degree Wheel
Tavia Performance Products Downloadable Degree Wheel

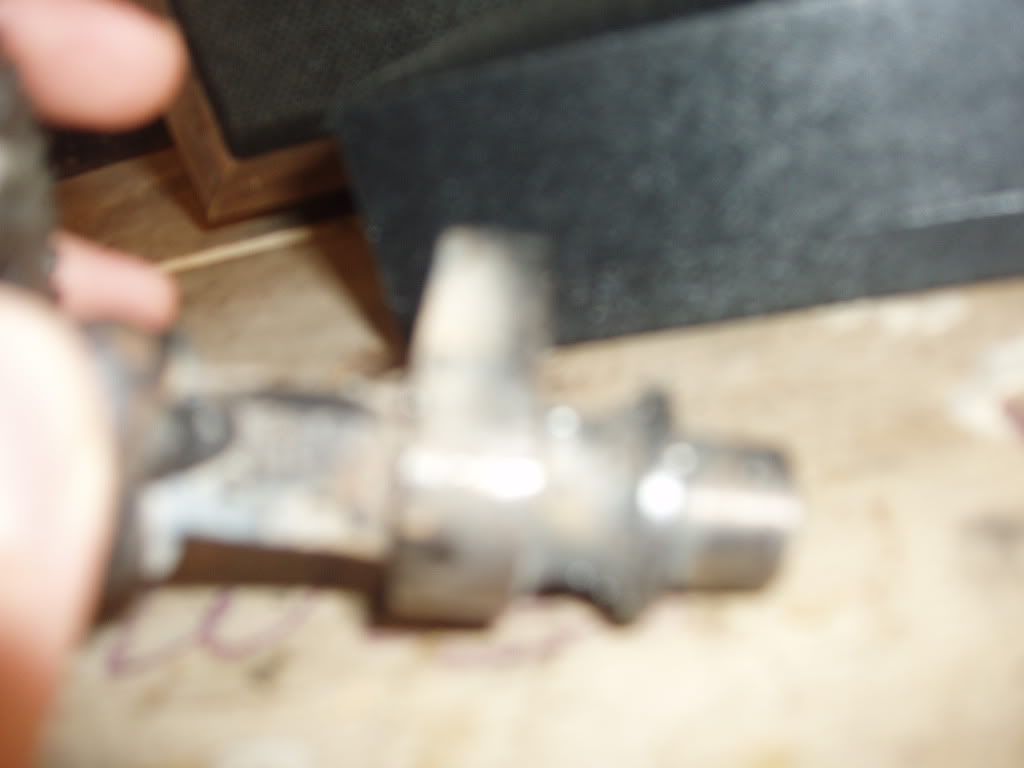
Getting there! Polish everything that touches something. Make it so smooth you can see a reflection of your finger nail. That area around your end of the shaft is going to need some cleaning up because of that slag. Also, make sure you flatten it with a file or you will be lifting the lifter with a 1mm thick wavy ridge going all around the cam lobe.
I see that you left the spring on too. Make sure no slag got underneath the compression release, in its movement path, on the spring(causing it to deform), or on the gear teeth. These will all cause you problems in starting the engine. I removed my entire compression release on my latest grind. Its not actually that hard to start with a pull start. Just bring it to compression stroke, rewind, and then PULL!!!!!:cursing::cursing::cursing: 
You have what looks like my third most successful try right there with your first! You'll get something decent out of it. I stress that flattening and then polishing is the biggest step. Expect to spend like 45 mins+ getting it just right.
I see that you left the spring on too. Make sure no slag got underneath the compression release, in its movement path, on the spring(causing it to deform), or on the gear teeth. These will all cause you problems in starting the engine. I removed my entire compression release on my latest grind. Its not actually that hard to start with a pull start. Just bring it to compression stroke, rewind, and then PULL!!!!!
:cursing::cursing::cursing: You have what looks like my third most successful try right there with your first! You'll get something decent out of it. I stress that flattening and then polishing is the biggest step. Expect to spend like 45 mins+ getting it just right.
ok well im at .295 lift and i am bumping into the crank......UUUHHHH!!!!!!
idk i think i might just bring it down to .285...also what did you use to polish it??? i was so ready to try it out today but with the bumping and crap and im leaving for panama city tommarrow UHHHH!!!! cant wait to finish this bad boy and get my carb and piston in!!!! :hammer:
idk i think i might just bring it down to .285...also what did you use to polish it??? i was so ready to try it out today but with the bumping and crap and im leaving for panama city tommarrow UHHHH!!!! cant wait to finish this bad boy and get my carb and piston in!!!! :hammer:
Where are you bumping. It may just be hitting because the cam is too wide width wise, not height wise. I dont know why affordablegokarts.com isnt working but I recall them having a guide on how to trim the lobes for this problem. If it works for you, check that out. You may also be hitting the case at the bottom of the piston sleeve. You can also shave this out with a dremel or grinder of some sort. You will need to take your entire engine apart though to clean the block afterwards so you can get all of the grit out of the engine.
I used the dremel(not harbor freight, lol.. they fall apart too quickly i've found) sanding and polishing kit and an extra kit of sanding discs. It comes with a cutting wheel post and sanding discs, a cotton wheel and I think an abrasive wheel. If it doesnt come with the abrasive, you'll need it. Use the sanding discs in increasing grit until you run out of them. These polish the best, smoothing the surface the most. Go lightly though because they do remove material. The abrasive wheel comes next. Pics below of all of these tools. This works well in conjunction with a good metal polish to remove a lot of crap from the surface and to polish it off for a good start on the cotton wheel. The cotton wheel is the king of getting this to shine. Take your time, and a lot of it. The cotton wheel gets a coating of metal polish as well.
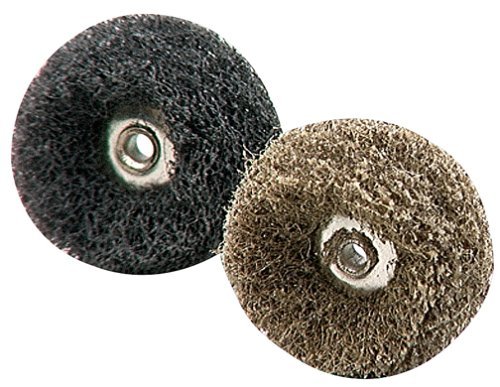


I used the dremel(not harbor freight, lol.. they fall apart too quickly i've found) sanding and polishing kit and an extra kit of sanding discs. It comes with a cutting wheel post and sanding discs, a cotton wheel and I think an abrasive wheel. If it doesnt come with the abrasive, you'll need it. Use the sanding discs in increasing grit until you run out of them. These polish the best, smoothing the surface the most. Go lightly though because they do remove material. The abrasive wheel comes next. Pics below of all of these tools. This works well in conjunction with a good metal polish to remove a lot of crap from the surface and to polish it off for a good start on the cotton wheel. The cotton wheel is the king of getting this to shine. Take your time, and a lot of it. The cotton wheel gets a coating of metal polish as well.
well i almost finished getting they motor back together. I need to get another set of feeler gauges to finish. i dont have very much hope for this thing. i tried to let me friend help me grind it done and the grinder slipped and ..... let just say theres a very very small flat spot normally something i wouldnt worry about but in this case i think it matters. there are also alot of dipples and chippy kinda-of areas. Some how something went wrong and the cam when its in the block wiggles around alot and it sticks into its slot on the side cover. i think it might have warped during welding i dont know. So i have a .275 rouf as hell lift cam i am going to try out today :crying: if the motor explodes it will give me a reason to buy a gx390 clone :wink:
no pics i didnt do very much polishing due to the warping issue, i was welding at about 85amp with a 3/32 6011 welding rod. i stuck her in today and the compression is f****** nuts i mean its crazy. i know its not really compression as a cam doesnt change that but crap that pullstart is like impossible to pull now and she really doesnt want to start...after looking into it i noticed i forgot the little black peice that goes behind the carb, and i think i may have put te head gasket in sideway as part of it seems to be sticking out...:xomunch: so i will fix those and get back to you tommarrow after i teach a buddy to drive my truck ( 5 speed)
no not yet i am pretty sure i tighten down the rod onto the crankshaft too tight thats why i am having a hard time. so i am waiting on gaskets to come it to button it back up. i also FOUND IN THE TRASH a 150cc scooter so thats been keeping me busy try to get that all back together and a new sexy girlfriend has been keeping me busy too. :thumbsup: