Thanks for heads up/concern. The flywheel and rod are on my list of things to buy (as well as valve/exhaust springs). I didn't plan on attaching the carb until I had the internals squared away.
Niquels' - Doodlebug Build - (Chinese Class)
Any luck testing out that 3D manual clutch?
") I did not ride it enough to give any kind of review, but here are a few observations. It is possible to stall it when taking off, seems obvious but I wanted to point that out. My first start I stalled it and the second one it kind of wheelied on me slightly even at about 5mph when letting the clutch out. You can kind of feel the connection between engine and tire which is nice, like when you let off the gas you have a little bit of engine braking. We didn't try and wheelies or launches, it was just a couple of passes up and down the street.
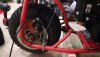
I did not ride it enough to give any kind of review, but here are a few observations. It is possible to stall it when taking off, seems obvious but I wanted to point that out. My first start I stalled it and the second one it kind of wheelied on me slightly even at about 5mph when letting the clutch out. You can kind of feel the connection between engine and tire which is nice, like when you let off the gas you have a little bit of engine braking. We didn't try and wheelies or launches, it was just a couple of passes up and down the street.With the nice 60 degree weather today it was a great chance for me and my buddy to go riding. I got the brakes temporarily put together today, there's a spring which is helping the arm return back down :no: That caliper may have seen its last days, but I am going to give it one more go at fixing it before I go the replacement or upgrade route..
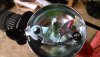
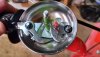
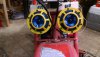
I started tinkering with adding a car horn to the bike, but I want the switch to be hidden in plain sight so I decided to purchase a regular bike bell and turn it into a simple switch. I don't want to spoil too much about other electronic components, but there will be more to come


When the bell lever is pressed the "wires" (one is spring from a pen) coming off the red and green areas touch. I'm using a spring from a pen because this is just a prototype I have a video of it but I can't attach that inline from what I see so maybe I will make a better video later on and upload it to youtube and share.
We did some night riding tonight (I'm sure the neighborhood appreciated it) and I have to say the 3D is pretty cool so far! It feels like it puts down the power very well, my buddy said that might be because it's a new engine No complaints so far but I haven't tried to do anything fancy with it yet.
I started tinkering with adding a car horn to the bike, but I want the switch to be hidden in plain sight so I decided to purchase a regular bike bell and turn it into a simple switch. I don't want to spoil too much about other electronic components, but there will be more to come
When the bell lever is pressed the "wires" (one is spring from a pen) coming off the red and green areas touch. I'm using a spring from a pen because this is just a prototype
I have a video of it but I can't attach that inline from what I see so maybe I will make a better video later on and upload it to youtube and share.
We did some night riding tonight (I'm sure the neighborhood appreciated it) and I have to say the 3D is pretty cool so far! It feels like it puts down the power very well, my buddy said that might be because it's a new engine
No complaints so far but I haven't tried to do anything fancy with it yet.Just a small update, we got an LED light mounted on the handlebars. This is just a proof of concept, it won't be on the bike for too long I just want to see how it performs so that improvements can be made. The wood has been notched out on the underside to allow for the steering to go "lock to lock". A hole was also drilled on the underside so that the bolt on top of the frame is recessed into the wood. I'm still not sure how it will attach to the frame, right now it's using some ties (and the battery is 100% temporary and an eyesore :laugh. It was too cold out (and a bit late to be waking up the neighborhood) to give it a test run tonight but I'm looking forward to it.
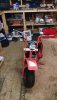
. It was too cold out (and a bit late to be waking up the neighborhood) to give it a test run tonight but I'm looking forward to it.
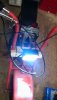
Just another small update, I have the Hella horns mounted on the bike alongside the light. As mentioned above, the little bell on the handlebars is what is used as the horn button. I used to have these horns on a car, they are very loud (especially inside). The wiring was just to make sure that everything worked (it's not pretty), I will be using a better gauge wire and making everything look cleaner in time.
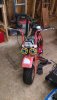
I was able to give the bike a quick ride and the headlight works super, it does exactly what it's supposed to do
I was able to give the bike a quick ride and the headlight works super, it does exactly what it's supposed to do

Any love on the printable motor mount hole template? Gotta new budget build, and would prefer not buying a swap plate on this one
Any love on the printable motor mount hole template? Gotta new budget build, and would prefer not buying a swap plate on this one
Haha..those horns :devil2: you can get 16 guage 18" x6" sheet for like $8 homedepot ..cut it w angle grinder w chop off blade to make bracket for light ..shaped like a [__] w two screw holes on tree crossmember
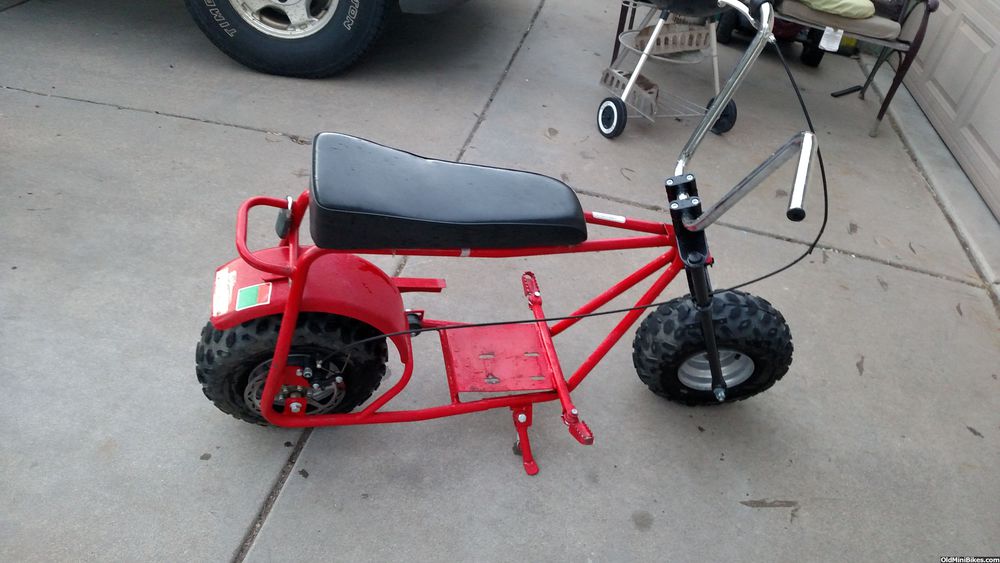
Some upcoming plans are to install my hotrodminibike hydro brake caliper (swapping in a right-hand brake lever), mount an ammo can (storage/battery box), some engine work, and split sprockets.
Thanks man, it's very entertaining I honked at my buddy one or twice when riding and he acted like it was a car so he moved over/looked behind haha. I have another identical fog light and I may run them side by side, it might be helpful (it's plenty bright as-is, I will be adding a low-beam high-beam feature so I don't blind anyone..).
I honked at my buddy one or twice when riding and he acted like it was a car so he moved over/looked behind haha. I have another identical fog light and I may run them side by side, it might be helpful (it's plenty bright as-is, I will be adding a low-beam high-beam feature so I don't blind anyone..).
Also if you want you could use a monentary switch button..or mount one of those rectangular doorbell push button switches. [ = ] :smile:
I'm working on some sketches on how something like that^ can attach to the front fork and how I can re-do what I have done with metal
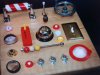
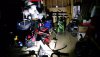
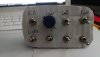
I ordered/received a ton of toggle switches the other day, here's a little mock up of the switch panel I made tonight.
View attachment 95546
I'm working on some sketches on how something like that^ can attach to the front fork and how I can re-do what I have done with metal
View attachment 95546
I'm working on some sketches on how something like that^ can attach to the front fork and how I can re-do what I have done with metal
Actually you could put all of that on the handlebar with a Pocket bike switch assembly.... A hole lot less trouble. :shrug:
), but for this one I want to do something different I think it might have a cool aesthetic. I want to have some "auxiliary" buttons but more on those later!