Repairing a classic engine

#1
Hi all!

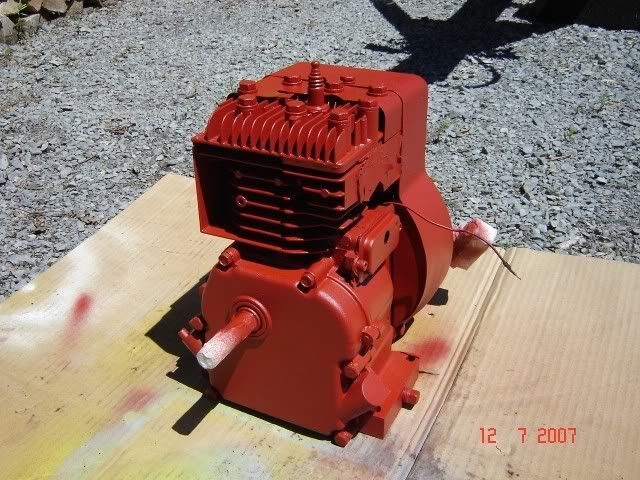
This thread will be dedicated to the repair of an old Briggs & Stratton 6B-S engine. I got this engine for free a while ago. It has very few hours on it (standard bore) and was stored without running for at least the last 25 years!

Needless to say, after sitting in a shed for so long, the appearance of the engine was horrible: surface rust, 2 decades of dirt accumulating, dead bugs and some things I don't even want to know what it might be! The gas in the tank was so old that it was all changed into a pile of wax! It smelled pretty bad too.

After an oil change and a few hours spent cleaning the gas tank and the carb, it started! I took a look at the internals and it has absolutely no wear anywhere. So, this thread will be more about cosmetic restoration, minor repairs and upgrading some parts.

Part 1: Recoil starter/flywheel

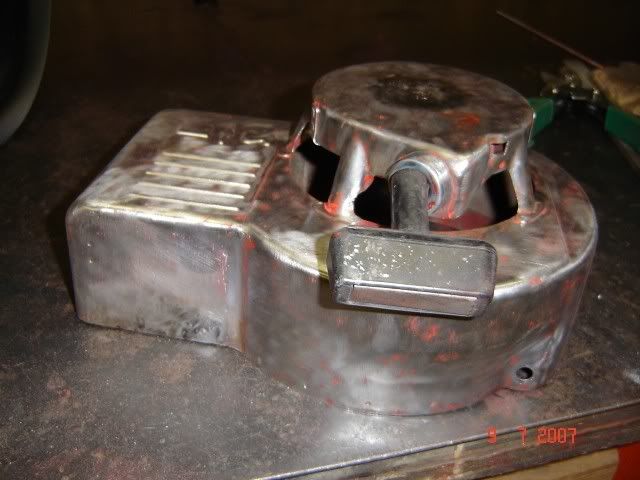
On these old engines, the recoil starter is one-piece with the blower housing. The recoil assembly is held in place by bending tabs that are on the housing. Someone before me must have wrestled a bit with the engine to replace the rope and broke all but one of the tabs. Great... So, I cut and filed smooth what remained of the old tabs and made some new ones out of 18-gauge steel that I riveted in place using small flat head rivets. Once the engine is painted they will be hardly noticeable.

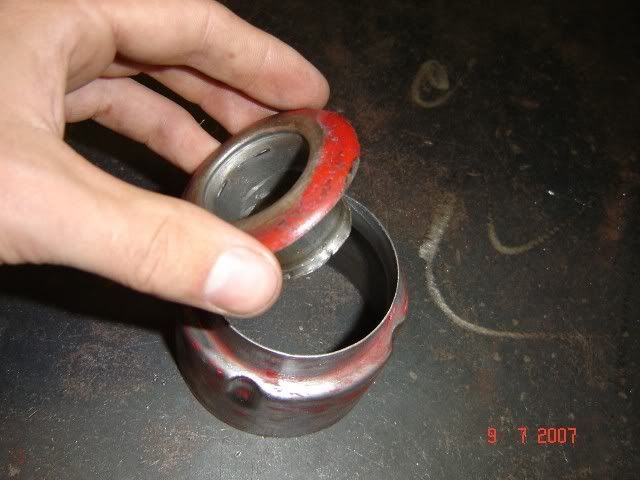
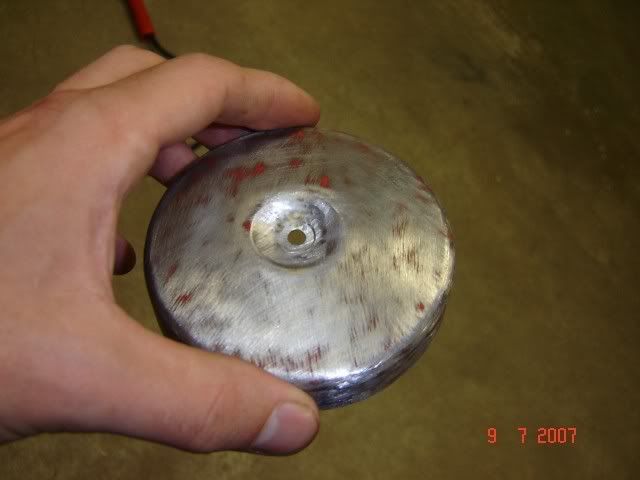
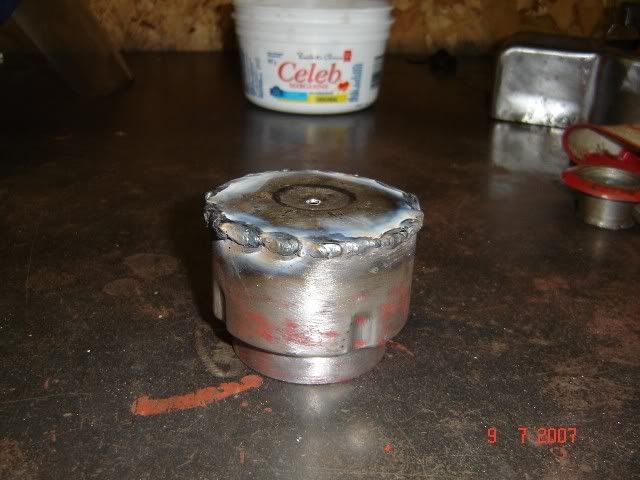
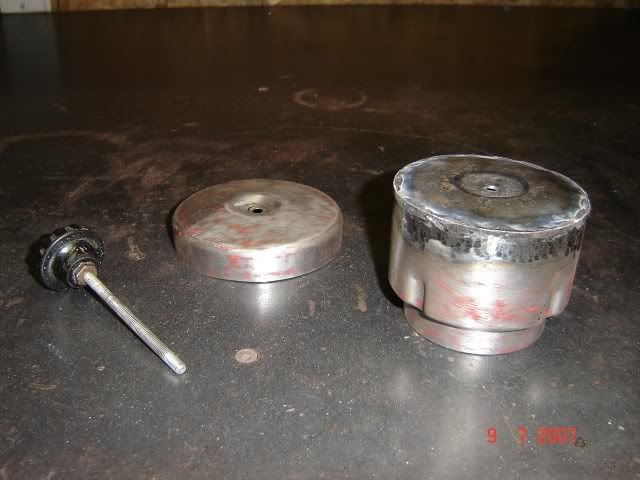
Next comes the starter clutch. It was shot. I had a bunch of clutches from 5hp engines, so I checked if they would fit. The treads are the same but the "nose" of the crank was bottoming out in the clutch. I tapped out the plug on the end of the starter clutch and that took care of the problem. I had to slightly shorten the part of the starter pulley that engages the clutch to prevent interference. Then I made a new debris screen to replace the missing original piece. Done.

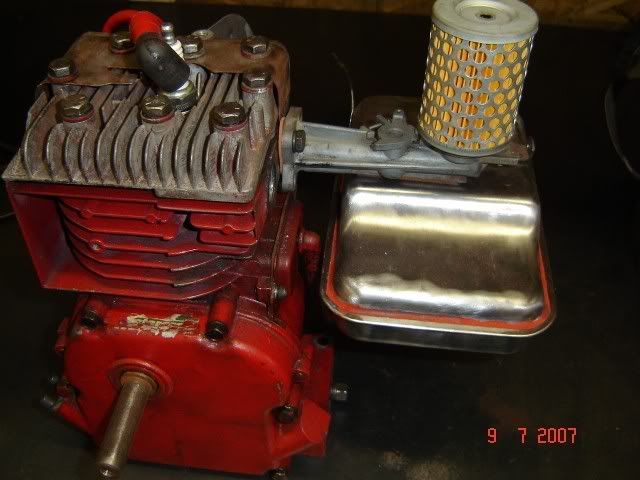
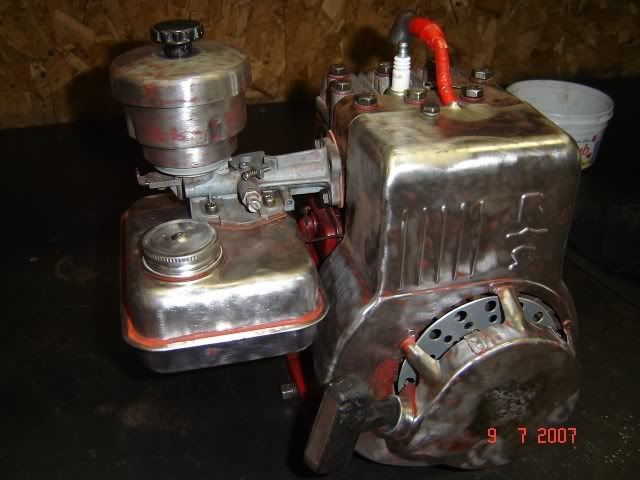
Next I trashed the old aluminium flywheel and obsolete magneto and replaced them with a cast iron flywheel and magneto from a late 3.5hp (yep, it fits). I kept the points for now but I can upgrade to an electronic coil later. I took out the air governer assembly and modified the air deflector (for lack of better term) of a 5hp to fit. I know it is crooked in the picture, I'll take care of that soon.

That's it for now. Stay tuned for some more progress as soon as I have some free time. Forgive these poor pictures, I'll take better ones the next time.
 
Last edited:

Oldsalt

Well-Known Member
#3
Why was the change made from an alum. flywheel to a cast one? Also describe the 'electronic coil' that you may install later.
 

65ShelbyClone

Well-Known Member
#4
The iron flywheels are less likely to fly apart on a non-governed engine. The electronic coil is self-firing; it eliminates the points. After all the hassle I went through today messing with points on my 10hp, I can appreciate an electronic coil.
 
Last edited:
#5
Why was the change made from an alum. flywheel to a cast one? Also describe the 'electronic coil' that you may install later.
65ShelbyClone pretty much summed it up. The original flywheel is cast aluminium and was meant to be used on a lawnmower where the rotating parts act as a flywheel. It is marginal even at governed rpm's. The cast iron flywheel is fine at rpm's slightly over 3600. This engine will most likely not be able to go past 4000 rpm anyway with its small suction carb.

Another advantage of the added rotating mass is that the engine will not stall as easily with the manual clutch I plan on using.
 
#6
Part 2: Air cleaner and sheetmetal work

Some more progress today. First I cut a piece of 18 gauge steel and welded it to the blower housing to plug the hole where the governer linkage used to be:


Next, I removed to original oil bath air cleaner and replaced it with a modern paper filter. I never liked oil bath air cleaners, they are messy and always leak all over the engine:


But now that new air filter looked really out of place on the old engine. So, since I wanted to keep the vintage look and needed an air box anyway, I started modifying the old air cleaner so that it would go over the new one. First I cut some unnecessary metal and dished a bump in the cover so it fitted the paper filter well:


I then welded a dished plate to the lower part of the cover so that it would be sandwitched between the upper part and the filter. Sorry about that not-so-pretty weld, welding 18 gauge sheetmetal with a Lincoln 225amp stick welder is not that easy :001_smile:


I made a bolt to hold everything to the carb using some threaded rod and the knob from an 8hp flathead's throttle assembly. The knob is held with a nut and some blue loctite:


Here's the finished air cleaner assembly. It has that vintage look and can be removed without any tool:


To be continued...
 
Last edited:

Oldsalt

Well-Known Member
#7
Thank for the explanations. Now another question. It was mentioned that a manual clutch will be used. I suppose that means a syntrificul will not be used.....Tell me more. On paper a manual clutch has several advantages over a fixed engagement device. Also. I love that air cleaner? Very well thought out!
 
#8
Thank for the explanations. Now another question. It was mentioned that a manual clutch will be used. I suppose that means a syntrificul will not be used.....Tell me more. On paper a manual clutch has several advantages over a fixed engagement device. Also. I love that air cleaner? Very well thought out!
Well it won't be anything super hi-tech, just a simple slipping belt clutch. One pulley on the engine, another pulley on the axle and a tensioner controlled by a hand lever. It will also have some mecanism to lock the clutch so I don't have to hold the lever while I start the engine.

I wanted to experiment with a setup like this for while. I don't see why it would not work, this setup has been used on lawnmowers, tillers and snowblowers for decades.
 

delray

Well-Known Member
#9
hey Backyard Builder, have you ever thought of making a dual pulley on the crank and two pulleys side by side on the jackshaft. one large and small. this would give you a low gear and a high gear. you could set it up so you have a idle pulley on low gear and then you could shift it into high. taking idle pulley tension off of low gear and on to high gear. you could use a foot control or a jockey shift? i would think this would work great for a small horse power engine(3-5hp) and just use heavy duty nylon cover green belts.
i have a toro 4hp(briggs) rotor tiller that uses a signal belt heavy duty that has been on for years and takes a real beating when it ingages in and out when its going throw the dirt. so on a minibike it should hold up good? this would work something like a two speed clutch set-up,but more mechanical because of the manual shifting
:scooter: ...............................:thumbsup:
 
#10
I'm actually debating with myself right now to decide if I want 1 or 2 speeds. I like the simplicity of a single speed, but I must admit that the idea of building something different is very tempting.

I would use only one tensioner, operated by a hand clutch. A shifter in front of the seat would move the tensioner side to side to select a gear, or even go past the belts to have a neutral.
 

delray

Well-Known Member
#12
hey Backyard Builder, you almost have to make it so it is a clutch set-up when taking off at idle. where you would be giving it gas and letting out the clutch and having a lower first gear so the minibike won't die on you. note in some of the pictures of the lawnmower build up he weld couple bolts around the pulley so the belt won't fall off when not ingage.
:scooter: .........:thumbsup:
 
#13
Thank you guys for the ideas and the link! It's official, I'm going with a 2-speed setup :thumbsup:

I'm removing the old paint and degreasing the engine right now. The paint job should follow soon. Stay tuned!
 
#14
Points to electronic coils

I've switched to an electronic coil many times. I cannabilize mowers thrown out by other people and always try to have a few coils in my parts box. I have never once regretted dumping a breaker point system. The rest of your work looks great.
 

Oldsalt

Well-Known Member
#16
delray, Backyard Builder. The two speed clutch/trans is a terrific idea! A lever mounted near the top frame rails would not be hard to operate. That is my opinion. I gotta old motorcycle that has a foot clutch and hand shift. Ya quickly get used to having the left hand off the grip. delrey...a question...are you from Del Rey?
 
Last edited:
#17
Part 2: Air cleaner and sheetmetal work

Some more progress today. First I cut a piece of 18 gauge steel and welded it to the blower housing to plug the hole where the governer linkage used to be:


Next, I removed to original oil bath air cleaner and replaced it with a modern paper filter. I never liked oil bath air cleaners, they are messy and always leak all over the engine:


But now that new air filter looked really out of place on the old engine. So, since I wanted to keep the vintage look and needed an air box anyway, I started modifying the old air cleaner so that it would go over the new one. First I cut some unnecessary metal and dished a bump in the cover so it fitted the paper filter well:


I then welded a dished plate to the lower part of the cover so that it would be sandwitched between the upper part and the filter. Sorry about that not-so-pretty weld, welding 18 gauge sheetmetal with a Lincoln 225amp stick welder is not that easy :001_smile:


I made a bolt to hold everything to the carb using some threaded rod and the knob from an 8hp flathead's throttle assembly. The knob is held with a nut and some blue loctite:


Here's the finished air cleaner assembly. It has that vintage look and can be removed without any tool:


To be continued...
i have the same motor was red now black i need to put it back together soon but it leaks gas from the carb
 

delray

Well-Known Member
#18
oldsalt,sorry i am not from delray. i just own a 1958 chevy delray. it's my first hobby and minibikes is my second hobby:thumbsup: i had a great last weekend with my car. my father inlaw and family came up from gulfport,ms and i took him for a ride thursday to a cruize night and just love hearing that 468cubic inch big block banging second gear and the exhuast going through 3in ss pipe. then sunday i too him to a carshow and won best gm of show. when he was younger he had a 55 chevy with a 283 bore to a 301,302? with 3 two's(carb's), he really like the car(old gear head)
picture 58
http://new.photos.yahoo.com/brian_c_53711/album/576460762334530240/photo/294928804130595800/8
sorry guys, but cars and minibikes go together for me:thumbsup:

Backyard Builder,what is the hp on that motor 2 or 3hp? from the looks of it with the old b&s cover late 50's motor? also a 5/8 shaft?
i think you will have to make it a 2speed,because of low hp motor you will be using? you could build a header pipe that go's into small muffler pipe exhaust. kind of like the 70's minibikes did. please dont use plumbers pipe. when you thread the pipe into the block you kind of restrict some of the exhaust.
picture of a header pipe and exhaust:
http://new.photos.yahoo.com/brian_c_53711/album/576460762401134267
this will give you little more power. maybe pull the con-rod out and polish the rod-up for strengh? and run throttle right of the carb(no-gov):thumbsup:
you will need that low gear to pull you from a died stop.
picture of the orange minibike only has a 2.5hp motor,but with the header pipe and gearing i did to it. it now pulls me and my step son around the yard:thumbsup:
:scooter:................................brian
 
#19
Delray, it is a 2hp engine, built in 1955. Yes it has the 5/8 shaft.

As for the exhaust, I can't use anything but a threaded exhaust since there are no bolt holes to bolt a header to. I will probably just use a stock muffler. They are compact and quiet.

I took a look at the pulleys I have and I think I will go with a 6.0:1 first and 4.0:1 second or something close (with 13" tires). I'd like to have some opinions about these ratios from people who have experience with small engines like this.
 
Top