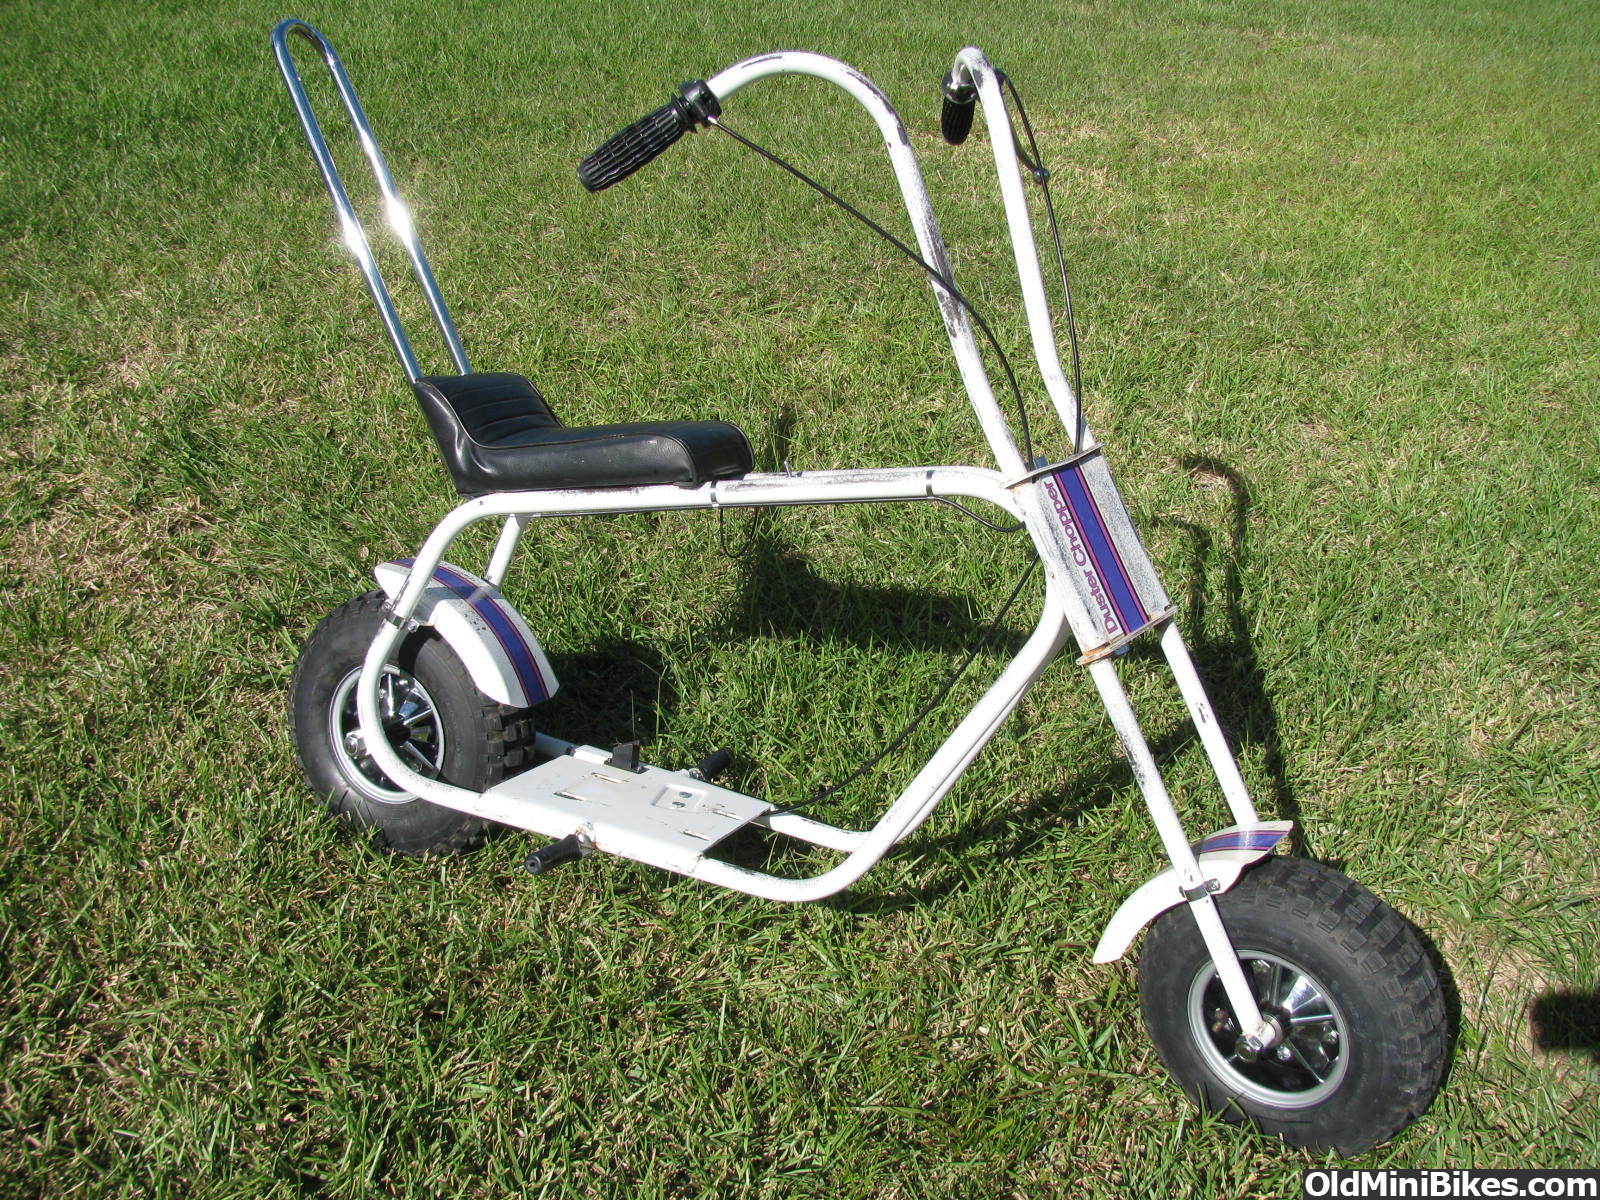
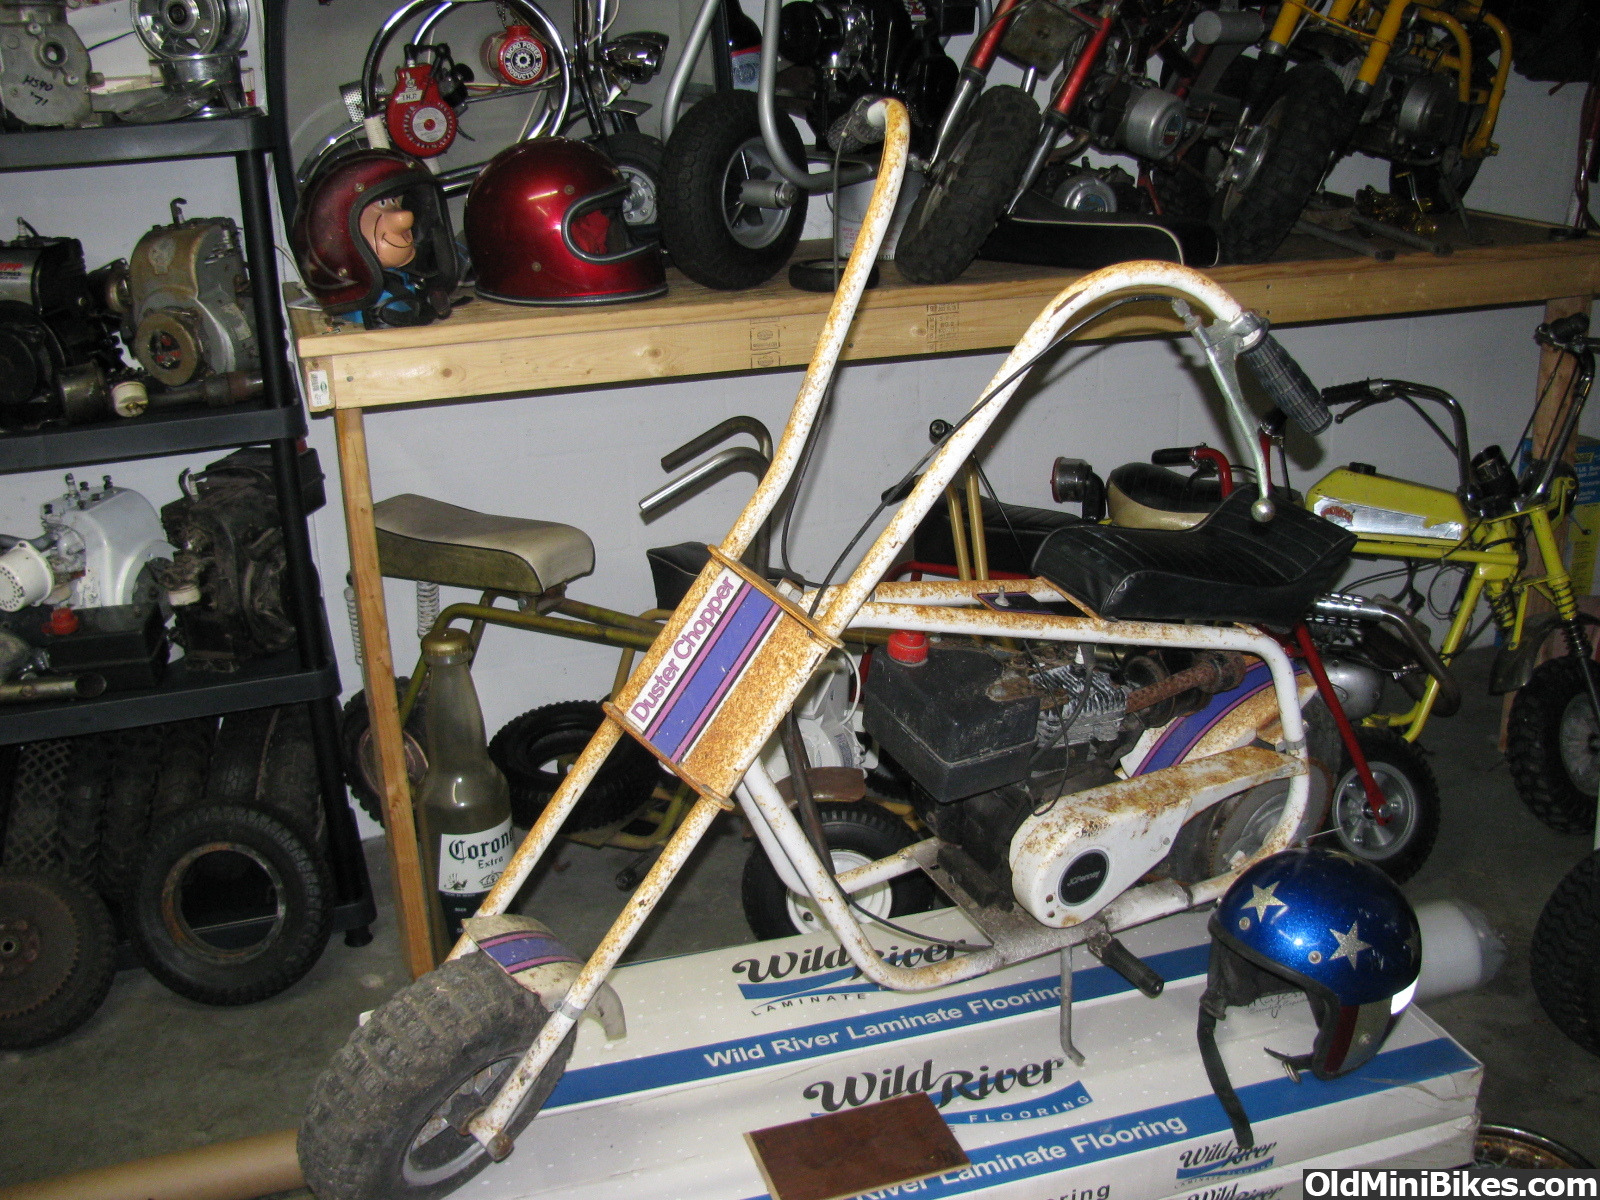
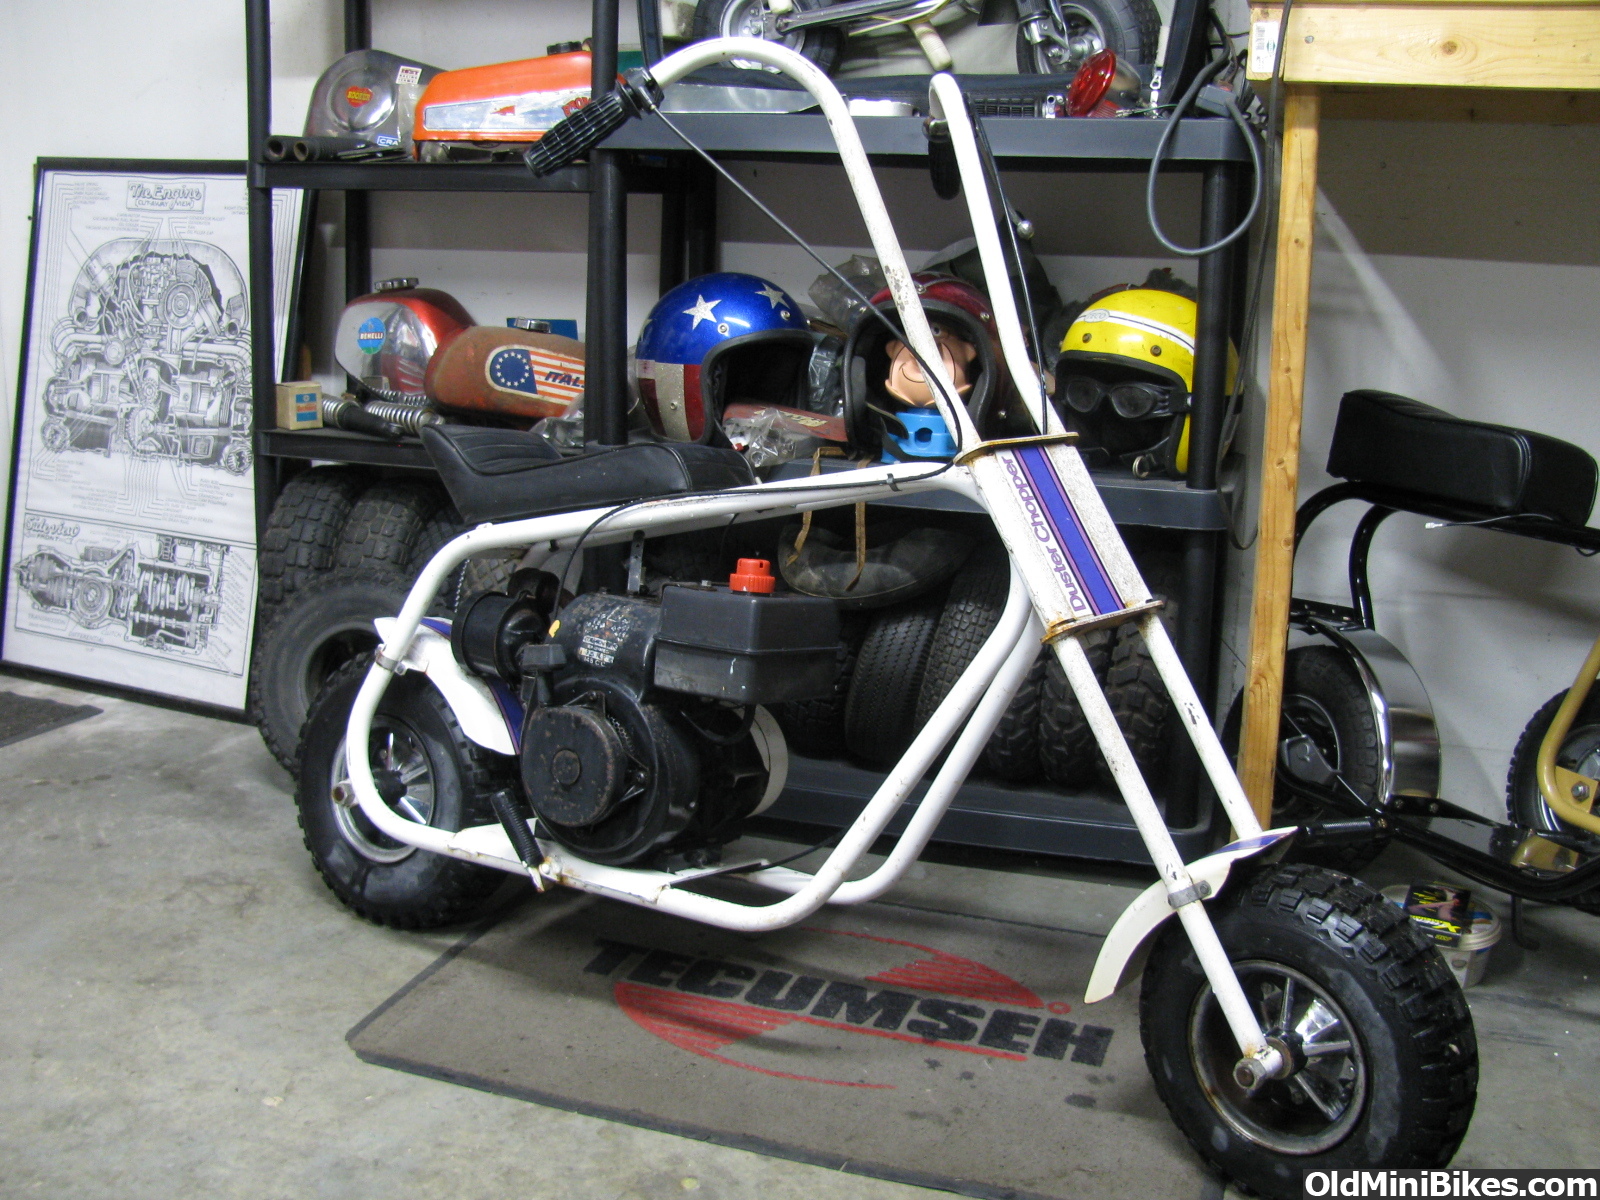
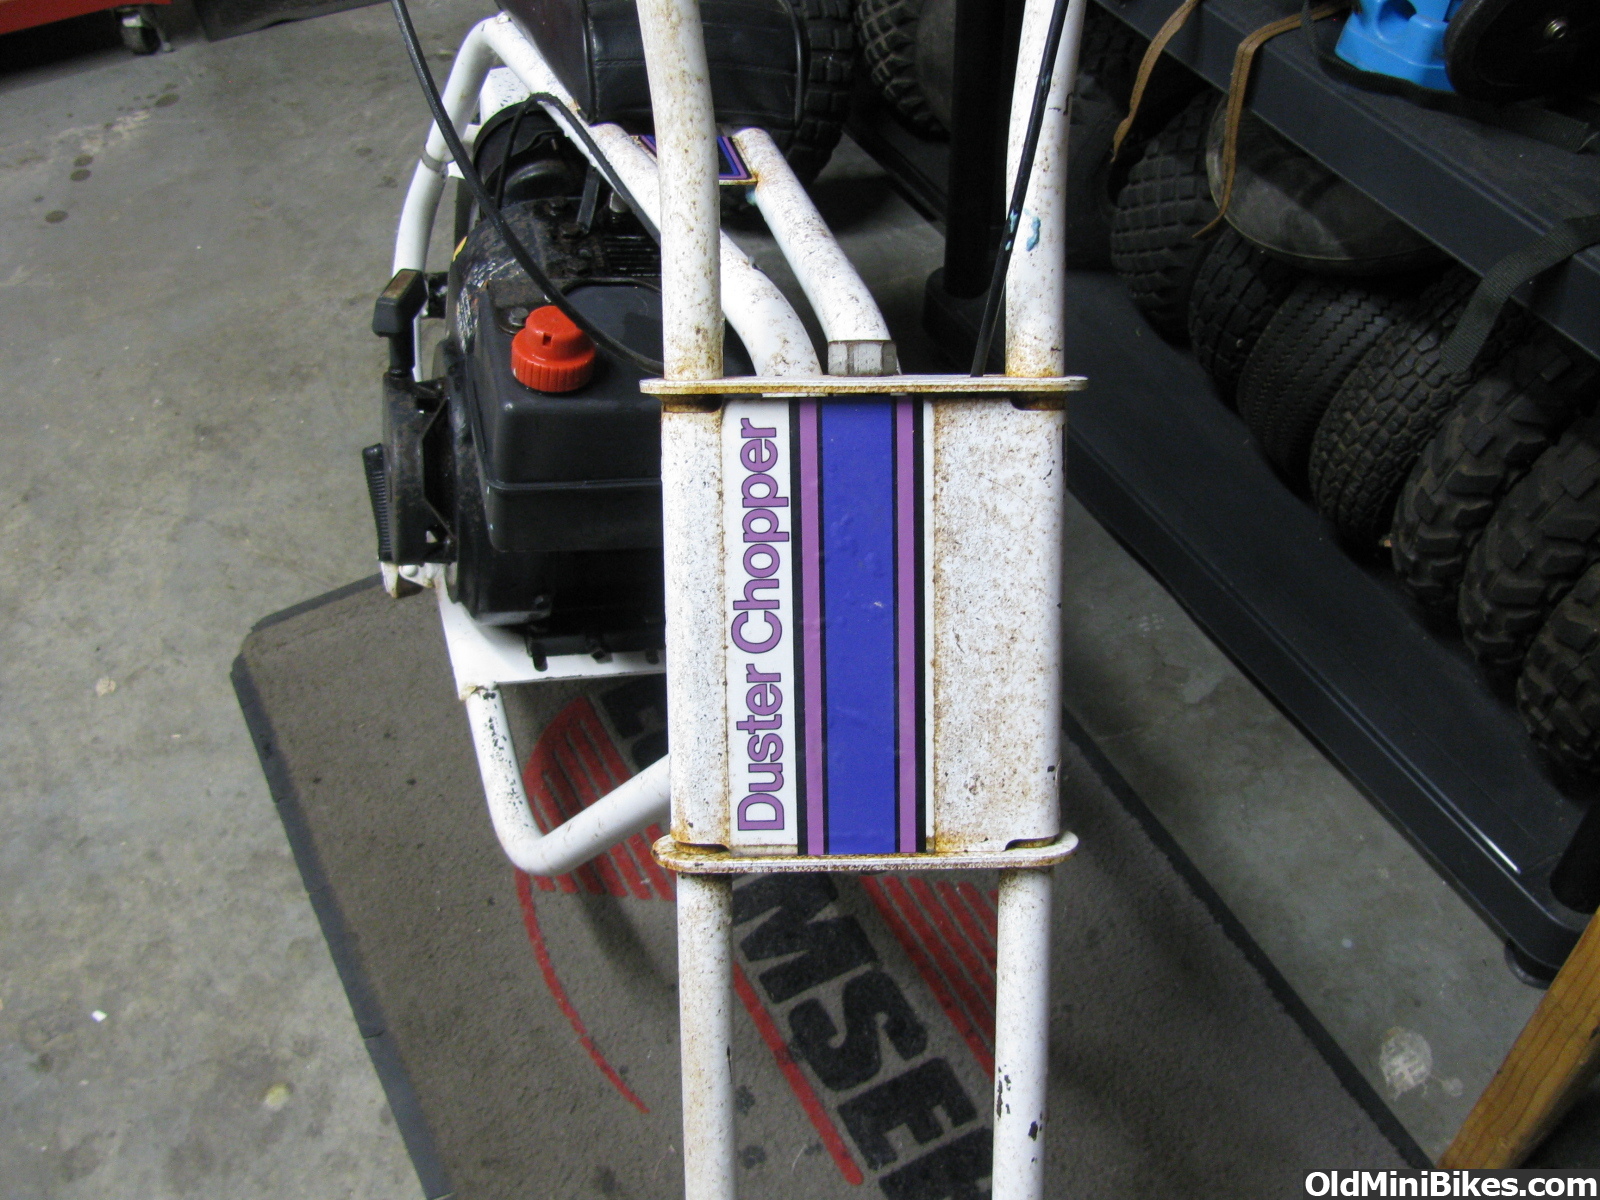
1974 JC Penney duster chopper (cat)!
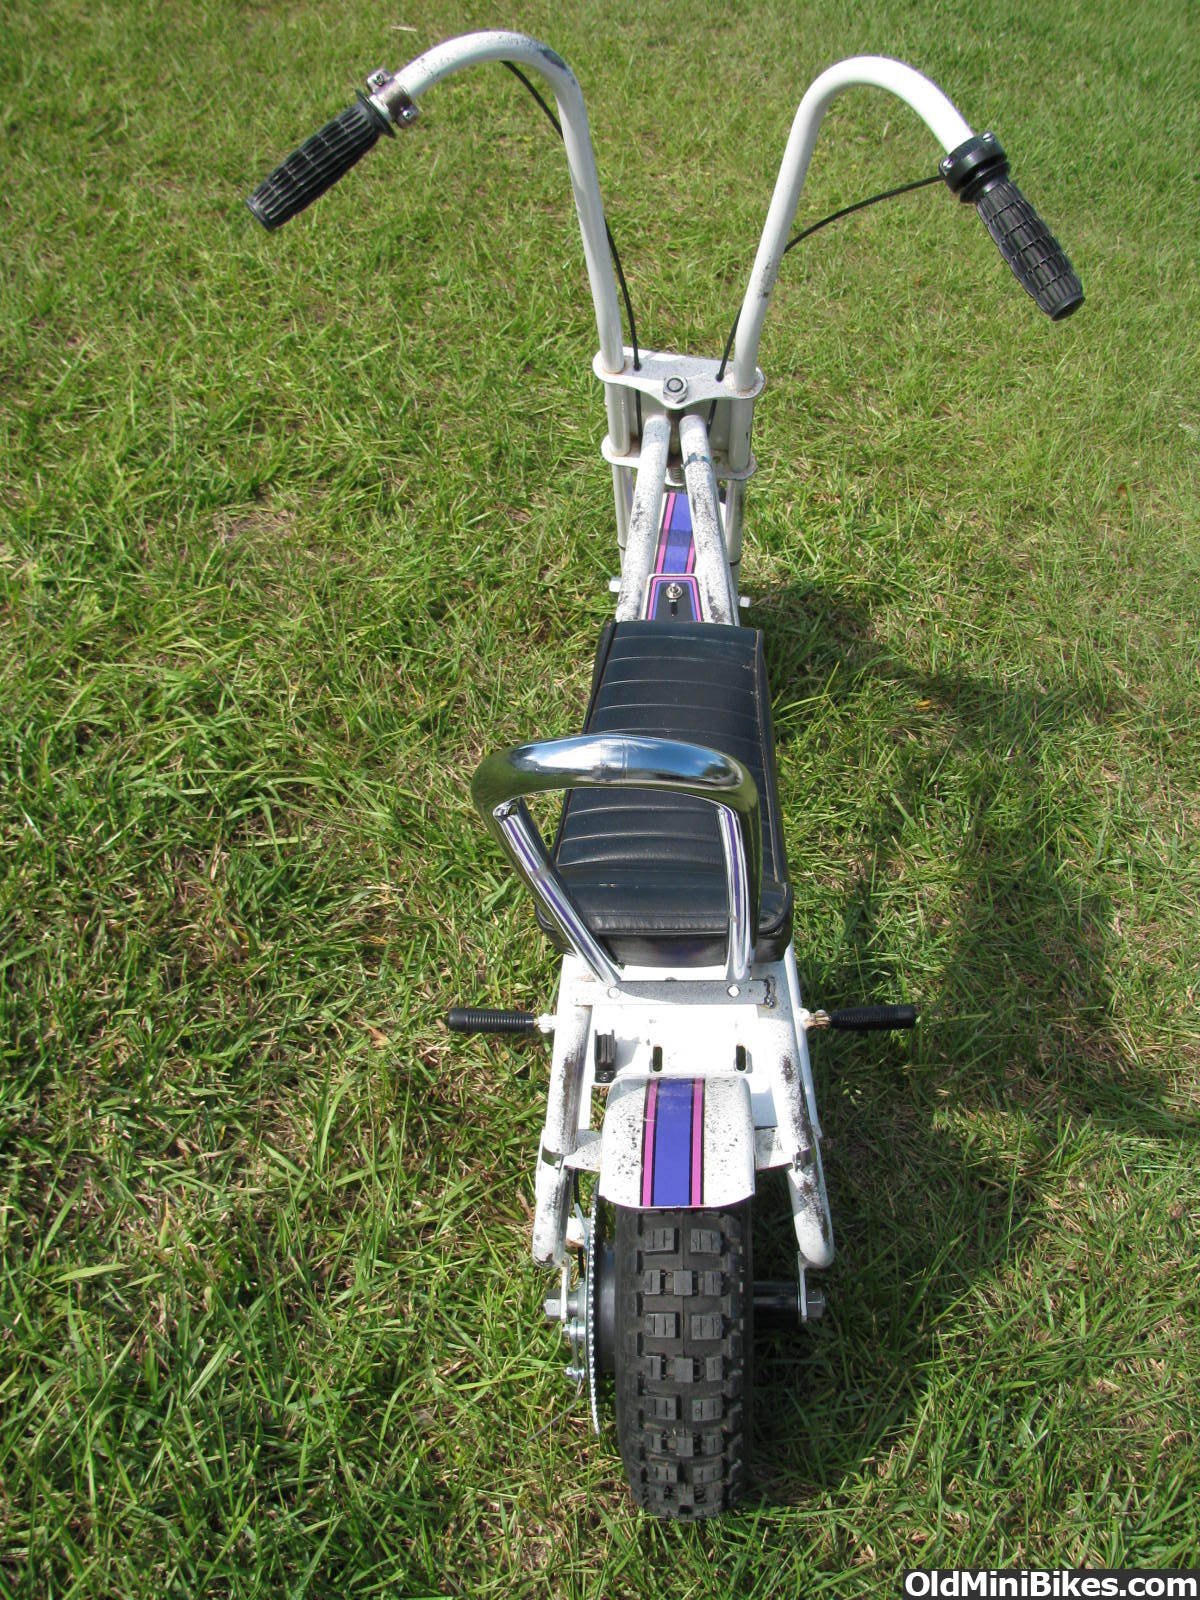
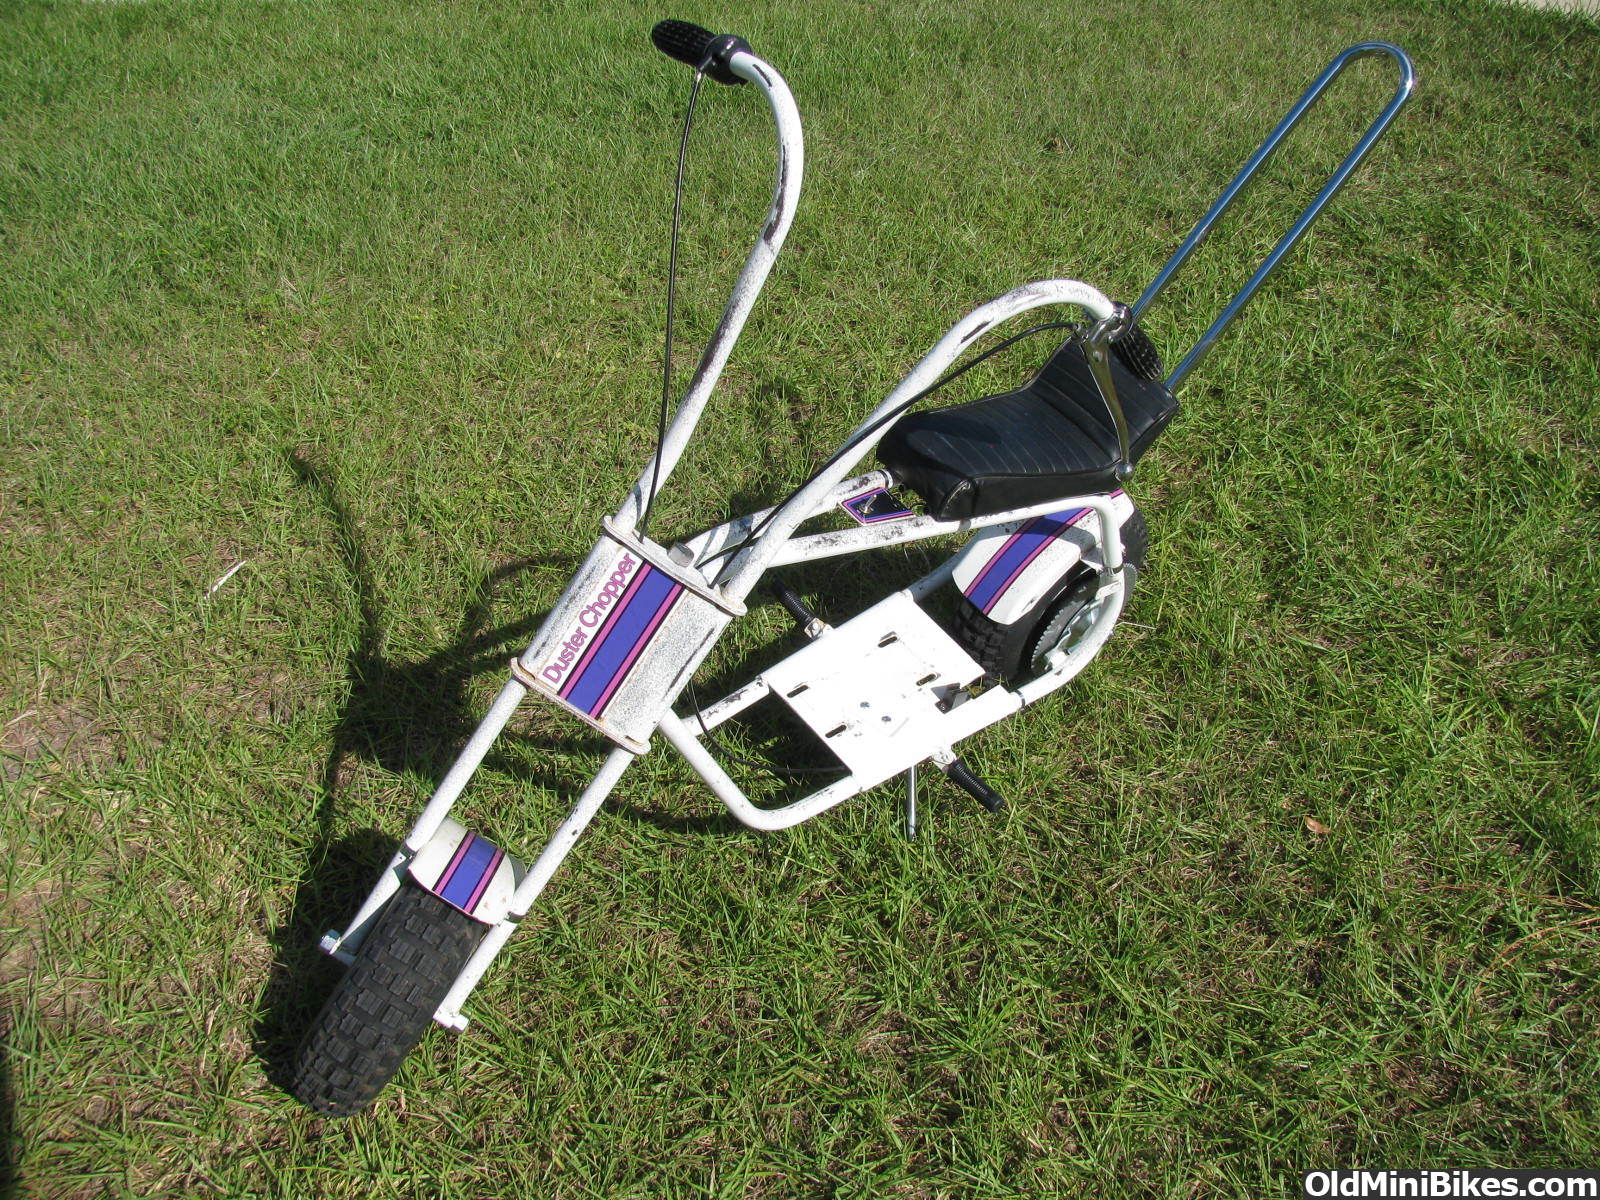
Ok so this bike got shoved up on the shelf last year till the other day when I had to take the bikes down to do some cleaning (dam spiders, gecko lizards, frogs, god knows what else lives in my garage:doah") . Tonight I rolled it out to the driveway, broke out the hose and a box of SOS pads and started cleaning. It looks better in the pics than in person, but still quite a change.
. Tonight I rolled it out to the driveway, broke out the hose and a box of SOS pads and started cleaning. It looks better in the pics than in person, but still quite a change.
Before:
after 4 SOS pads:

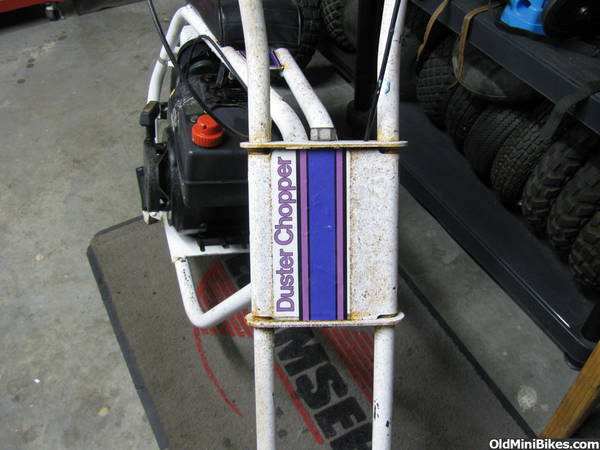
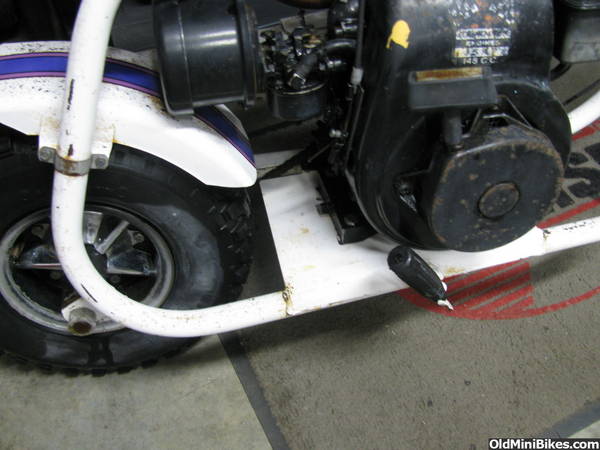
I am going to work it a little with rubbing compound to get some more of the staining off it and then seal it as best I can but I plan to leave it the way it is. With the exception of the seat being taken off due to the sissy bar that rotted away I don't think its ever had a wrench to it. It does not even look like the motor was even adjusted:
Its really too bad the damp Florida climate got to it but it could be worse!
I do hope to tinker with it a little since its down off the shelf. Maybe even get it running:thumbsup:
So If anyone just so happens to have a sissy bar.... :deal:
. Tonight I rolled it out to the driveway, broke out the hose and a box of SOS pads and started cleaning. It looks better in the pics than in person, but still quite a change. Before:
after 4 SOS pads:

I am going to work it a little with rubbing compound to get some more of the staining off it and then seal it as best I can but I plan to leave it the way it is. With the exception of the seat being taken off due to the sissy bar that rotted away I don't think its ever had a wrench to it. It does not even look like the motor was even adjusted:

Its really too bad the damp Florida climate got to it but it could be worse!
I do hope to tinker with it a little since its down off the shelf. Maybe even get it running:thumbsup:
So If anyone just so happens to have a sissy bar.... :deal:

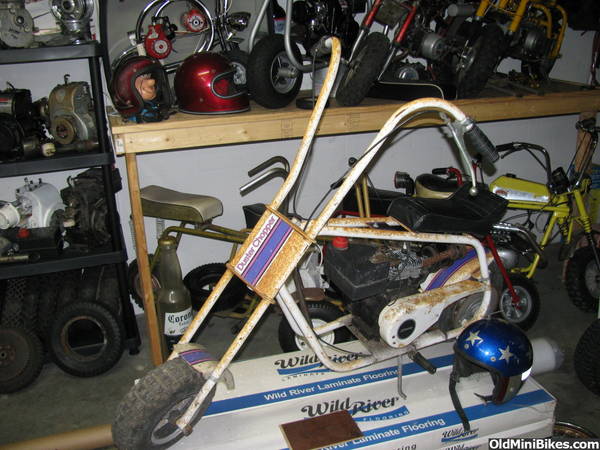
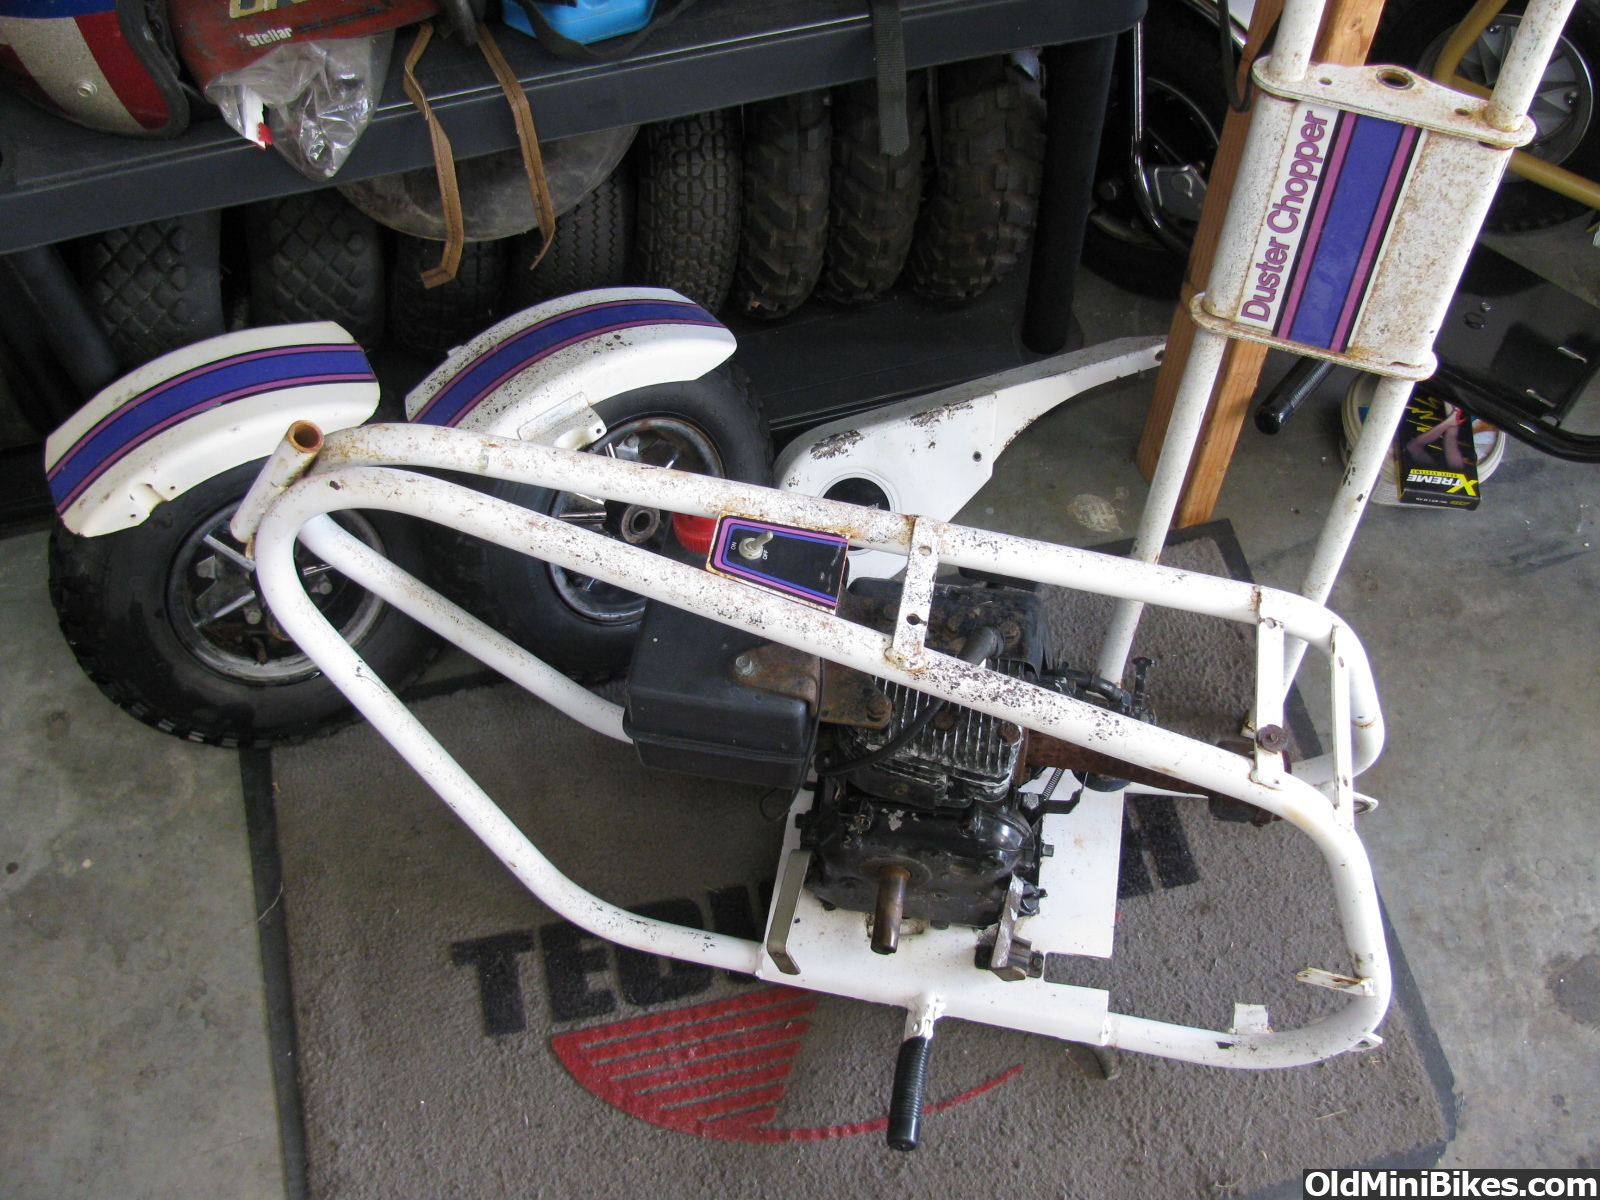
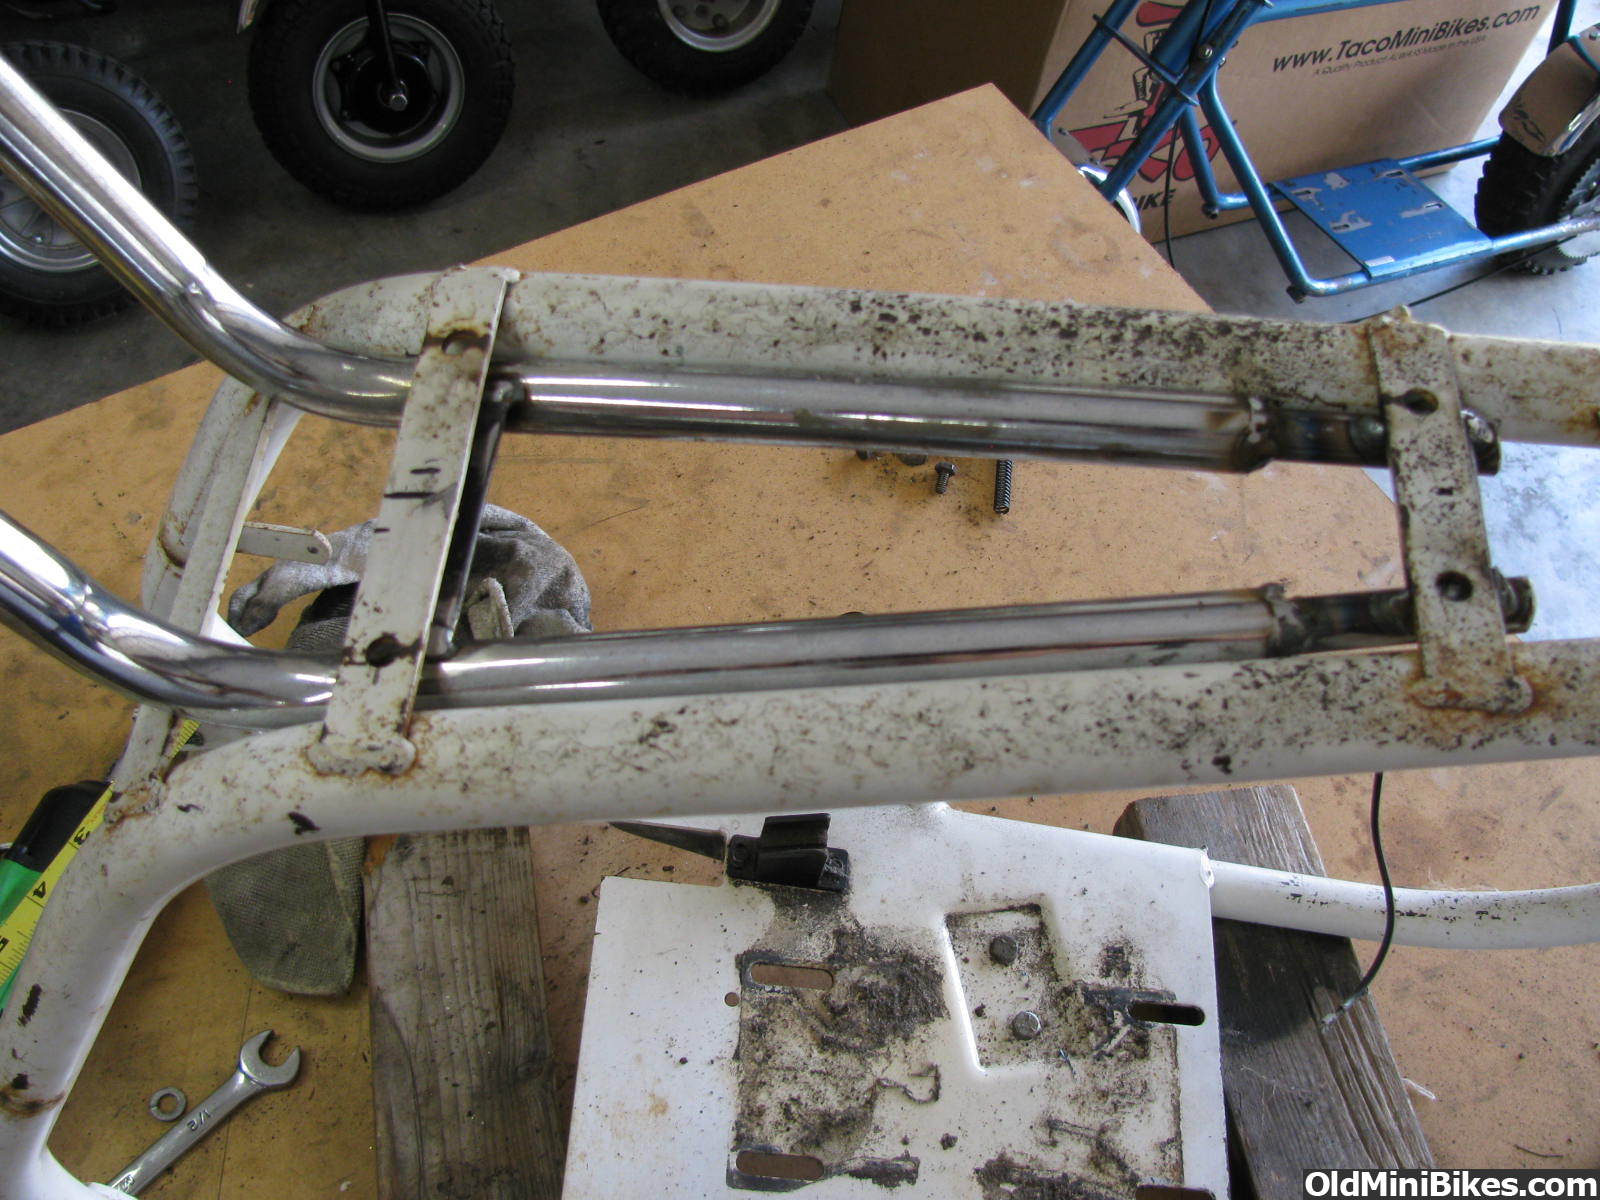
:doah: This is starting to turn into a big project! I took it apart today:
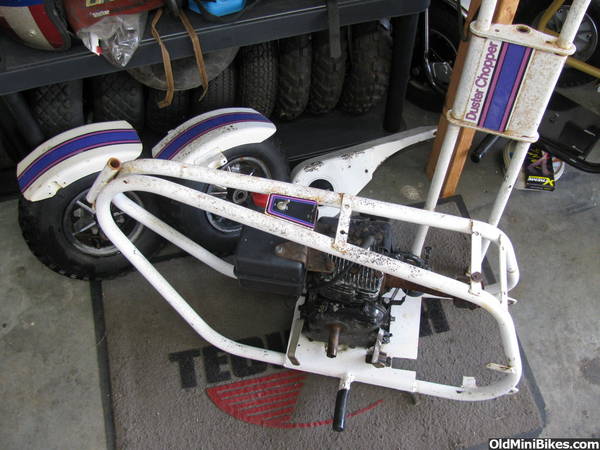
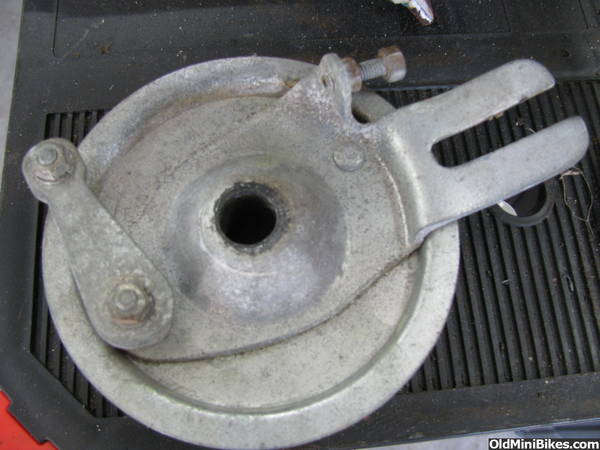
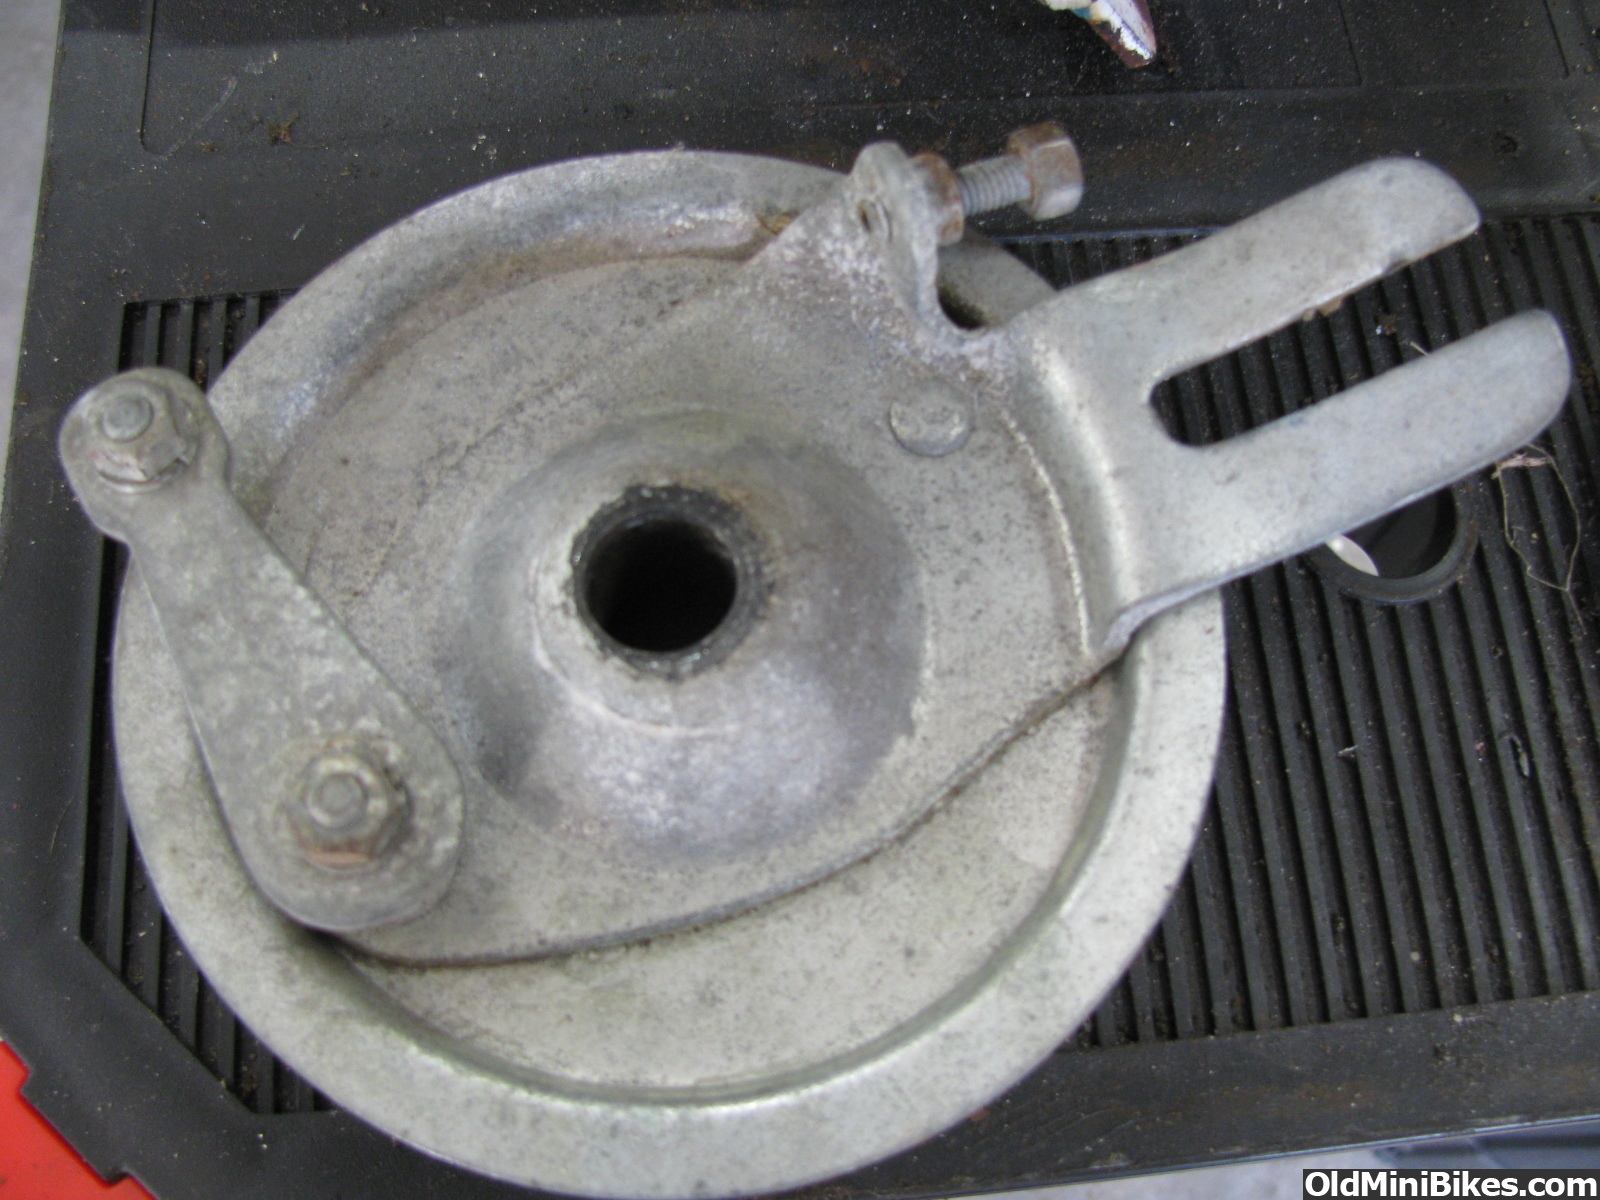
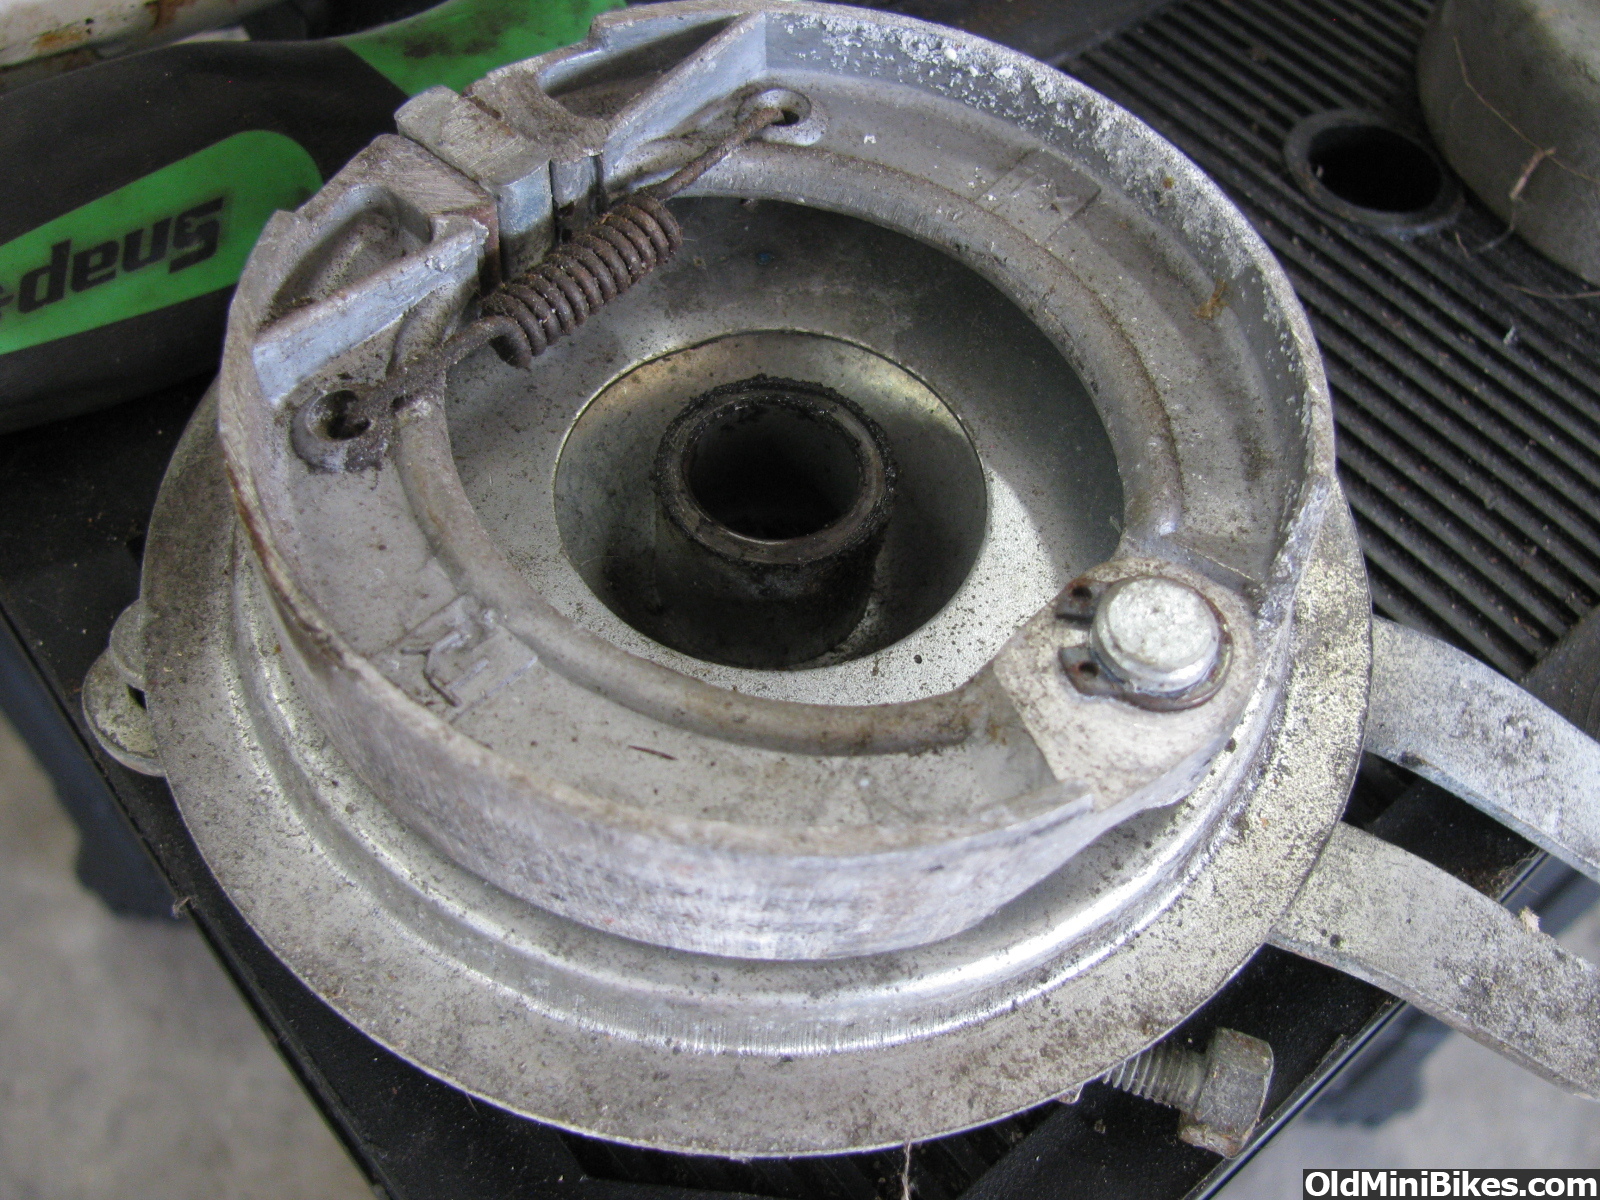
I found that the brake pads have disintegrated over the years, I saw stuff coming out when I was blasting with the hose the other night but just thought it was dirt/cobwebs. it was the brake linings!
It measures about 4" anyone know of a replacement? I have what looks like an identical backing plate on another bike that was a recent custom build, but I dunno the manufacturer of the assy. I looked around online but did not see a match at the usual places.

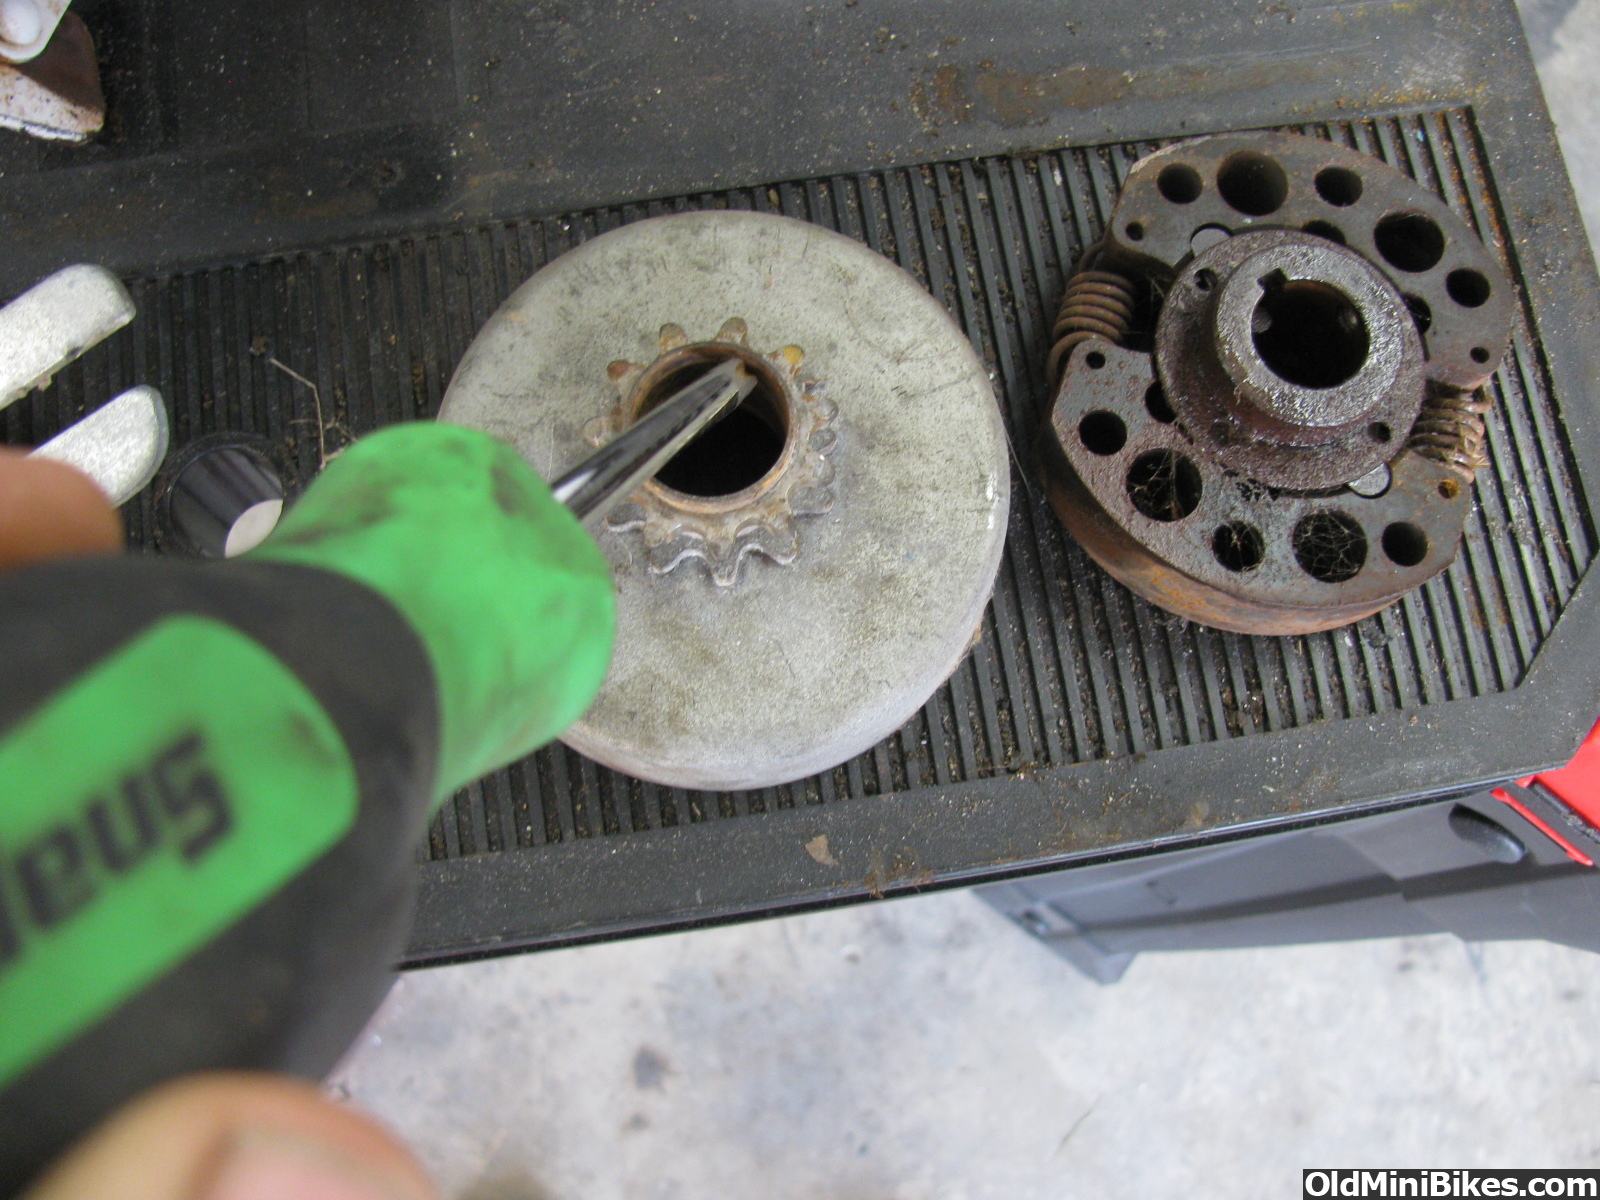
I also found that the bushing for the clutch was non existent! The clutch is unmarked, anyone know what brand it is and could I possibly find the bushing? (fits on the shaft and the bell rides on it, pointing where it goes with the screwdriver)

I found that the brake pads have disintegrated over the years, I saw stuff coming out when I was blasting with the hose the other night but just thought it was dirt/cobwebs. it was the brake linings!
It measures about 4" anyone know of a replacement? I have what looks like an identical backing plate on another bike that was a recent custom build, but I dunno the manufacturer of the assy. I looked around online but did not see a match at the usual places.
I also found that the bushing for the clutch was non existent! The clutch is unmarked, anyone know what brand it is and could I possibly find the bushing? (fits on the shaft and the bell rides on it, pointing where it goes with the screwdriver)
The brake assembly can be found on Ebay occasionally (seller Enginepowerdeals or something close to that) . The clutch is a Noram and you should be able to find replacement parts.
I'm thinking you should just forget about all that extraneous work and just box it up and send it to me....:shrug:....:laugh:
I'm thinking you should just forget about all that extraneous work and just box it up and send it to me....:shrug:....:laugh:
I have two of these left i think.. are these like the one you need?
http://www.oldminibikes.com/forum/m...-brake-assemblies-axle-bolts-mis-spacers.html
http://www.oldminibikes.com/forum/m...-brake-assemblies-axle-bolts-mis-spacers.html
Thanks guys, I ended up ordering a complete set up from enginepowered with a 72 tooth sprocket. That will give me another sprocket to use on that other bike with that same setup (has a 60 tooth now), as I plan to make some changes to it. Plus it comes with cable, handle, etc. for $27 shipped, just gonna have to clean it all up.
Been checking out Noram parts, looks like I can get a bushing, I just need to verify that the size is correct :thumbsup:
Been checking out Noram parts, looks like I can get a bushing, I just need to verify that the size is correct :thumbsup:
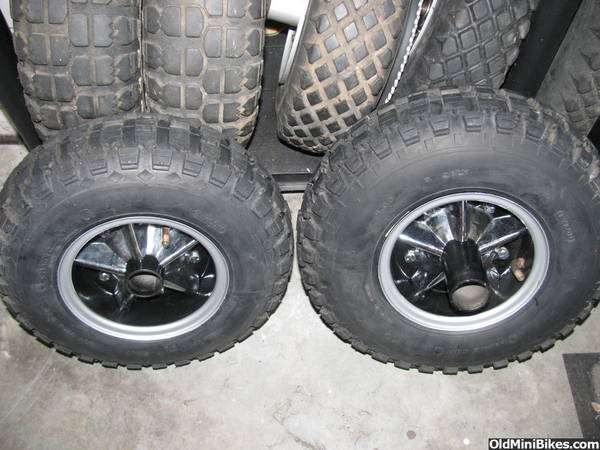
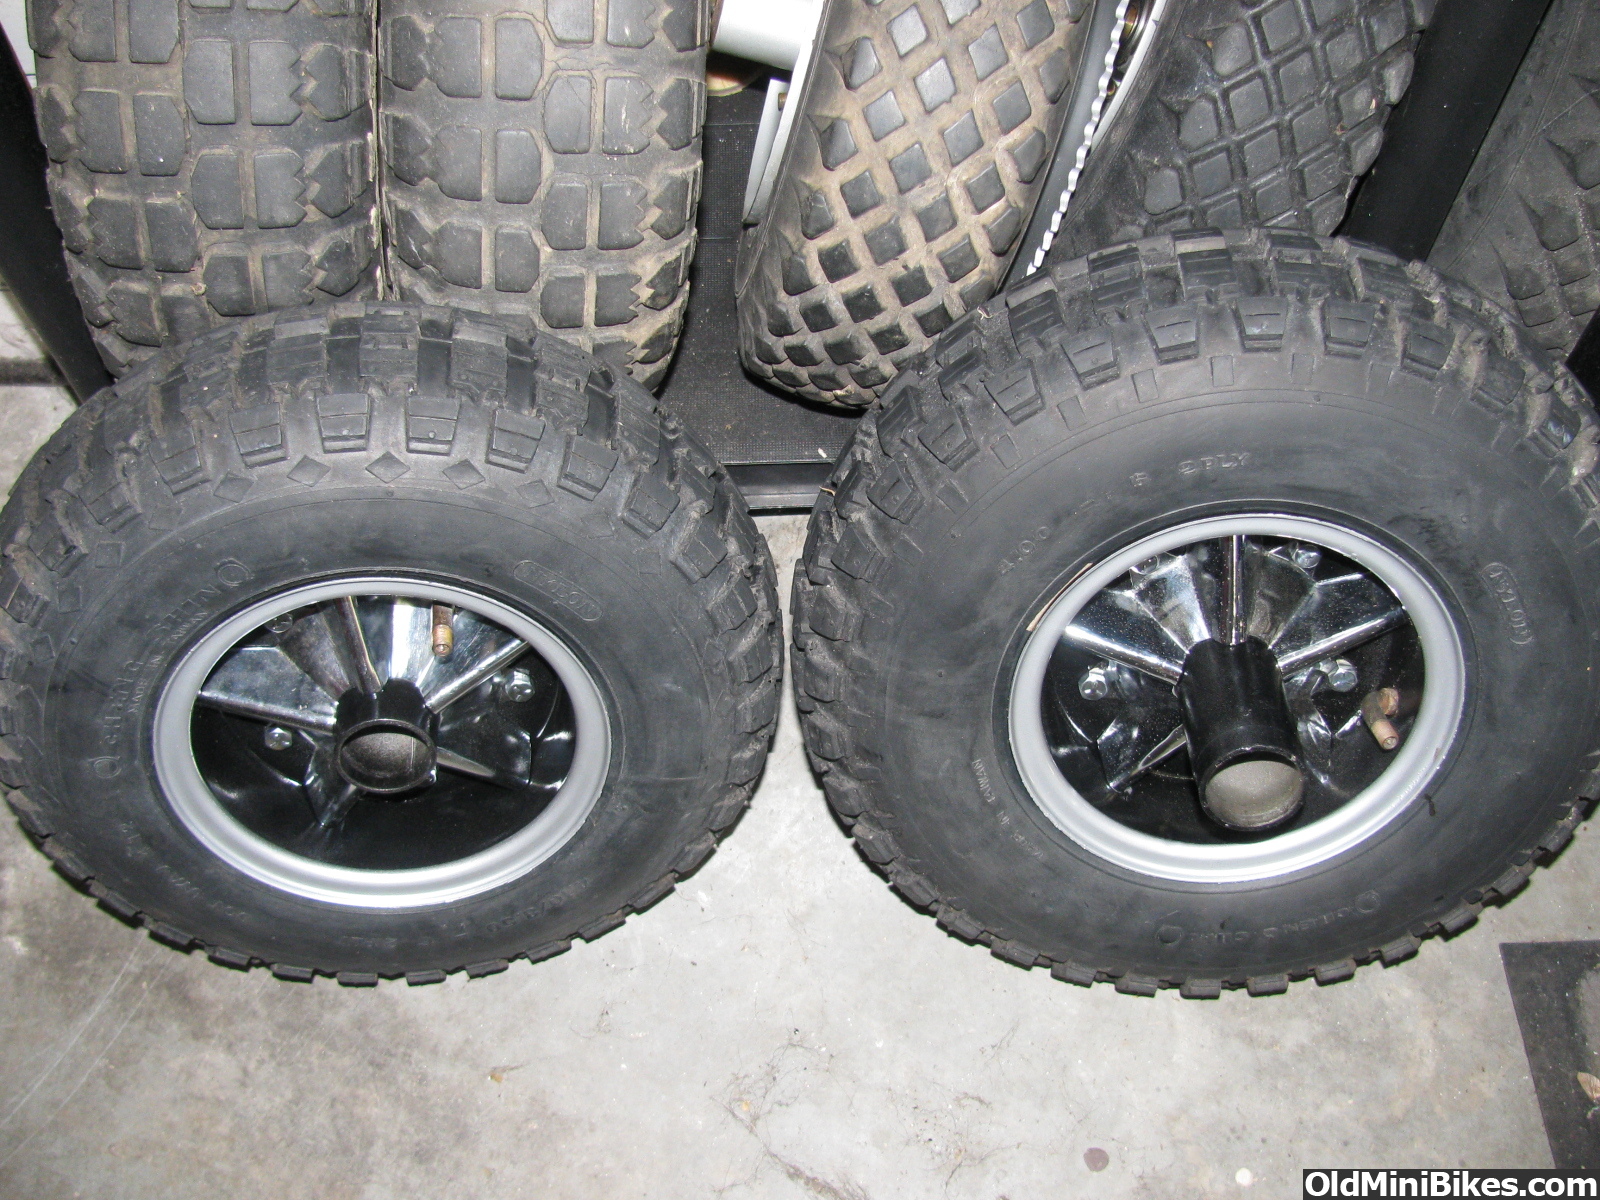
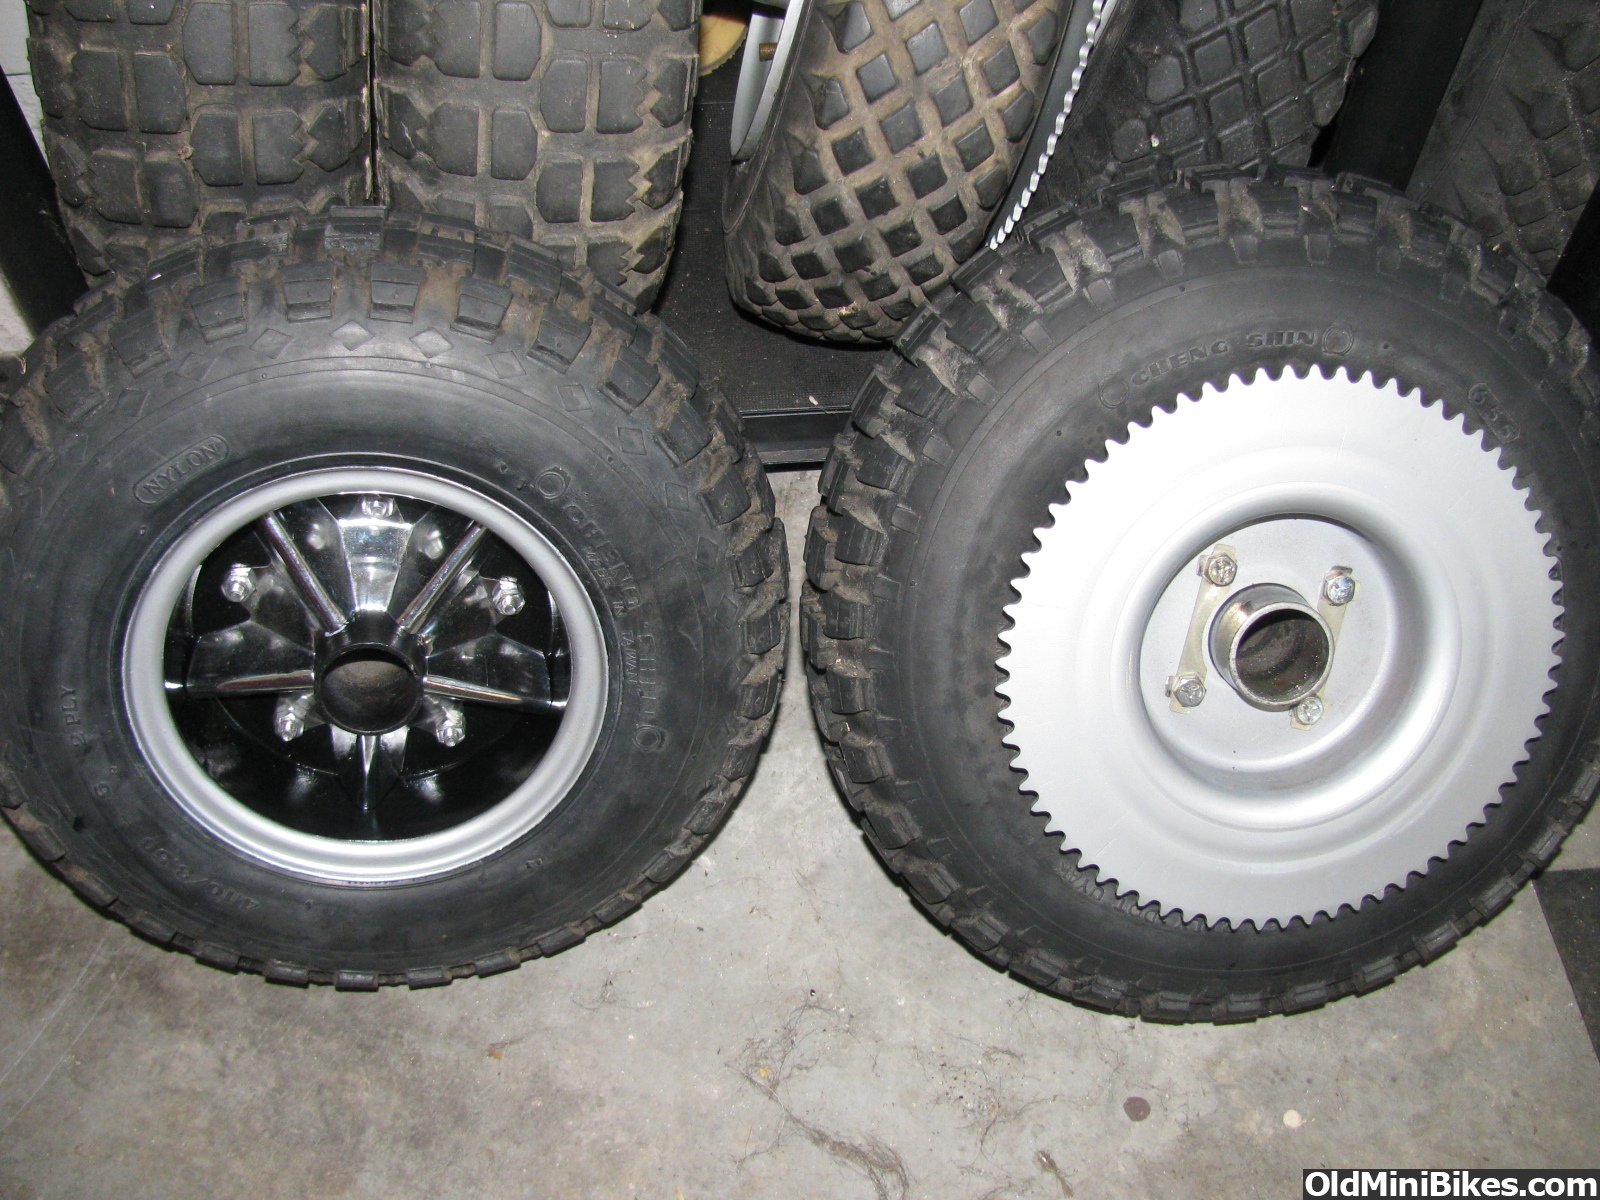
Bike is still in pieces in my garage, I grabbed the wheels today and decided to redo them as there was rust and the silver outer edge was pretty worn off after scrubbing them.
I posted another thread with my bright idea for painting the silver edge ( http://www.oldminibikes.com/forum/general-minibike-talk/68517-neat-paint-trick-6-wheels.html ) clearcoated them, let them bake for about an hour and slapped them together. I should have let them sit longer but if I didn't do it now I would be banging them around the garage. The clear dried fast but it still relatively soft, but the way these wheels go together there is virtually no way your not gonna get a scratch or 2 on them. I just bought a set of artist brushes so I'm ready to do some touch ups anyway:wink: Polished up the original nuts/bolts as well. still have some polish residue on the chrome, I will do a better detail job before they get bolted back on.
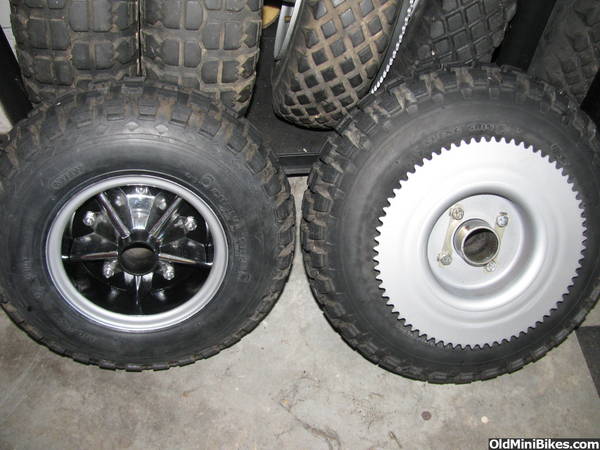
Oh yea, filled the rear tire with air and then all the sudden I hear hissing:doah: I should have tested it first, thats what I get for reusing 38 year old parts:crying:
I posted another thread with my bright idea for painting the silver edge ( http://www.oldminibikes.com/forum/general-minibike-talk/68517-neat-paint-trick-6-wheels.html ) clearcoated them, let them bake for about an hour and slapped them together. I should have let them sit longer but if I didn't do it now I would be banging them around the garage. The clear dried fast but it still relatively soft, but the way these wheels go together there is virtually no way your not gonna get a scratch or 2 on them. I just bought a set of artist brushes so I'm ready to do some touch ups anyway:wink: Polished up the original nuts/bolts as well. still have some polish residue on the chrome, I will do a better detail job before they get bolted back on.
Oh yea, filled the rear tire with air and then all the sudden I hear hissing:doah: I should have tested it first, thats what I get for reusing 38 year old parts:crying:
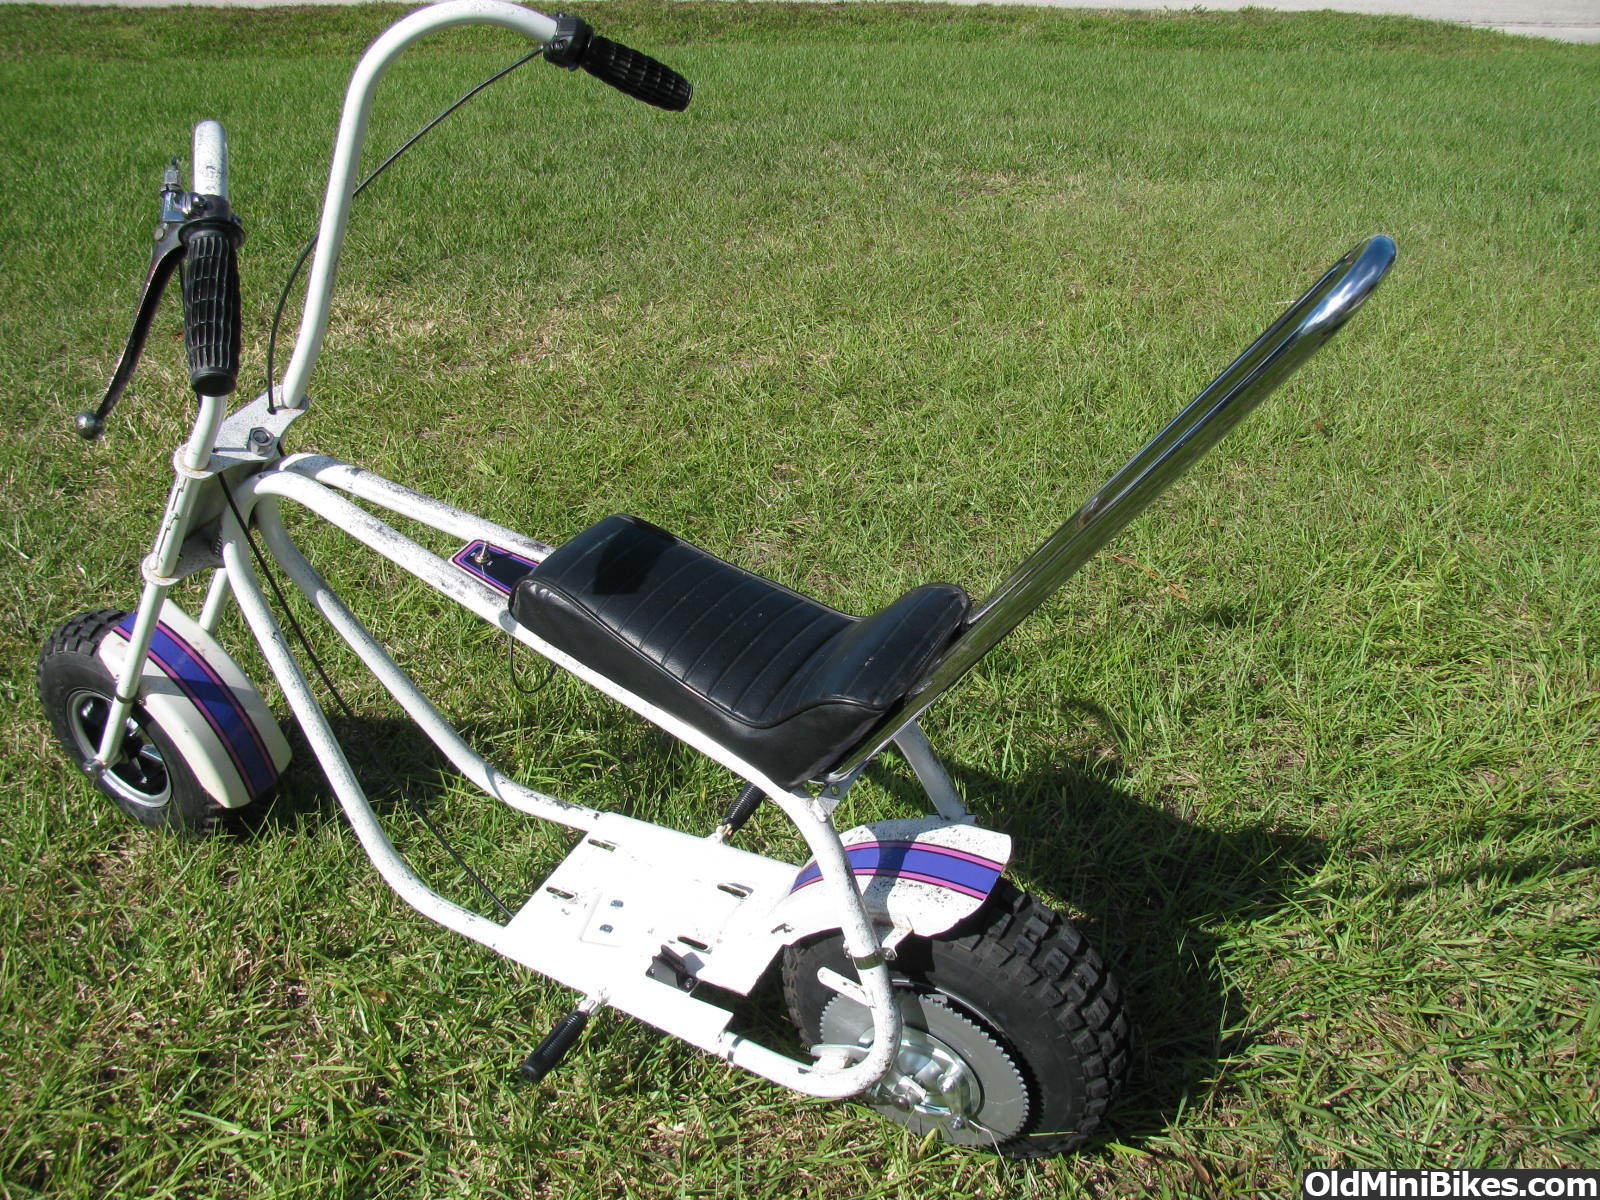
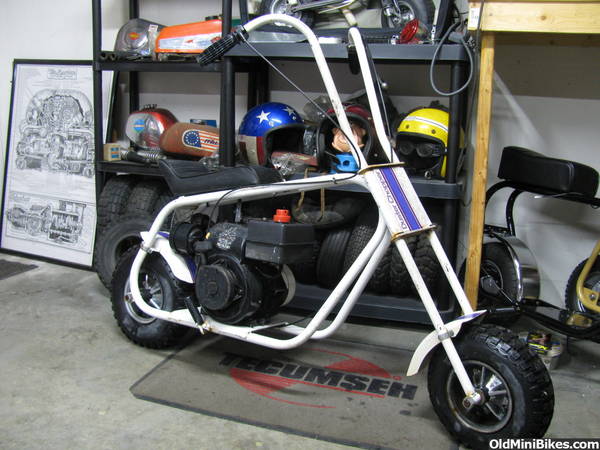
Built the sissy bar for this bike today. That was the one thing it was missing when I got it, there was a rusty chunk of it there but thats about it. When I bought the bike the guy gave me a generic sissy bar from a '70's street bike to try and use. The problem was I could not get it to compress enough with the decorative curly Q that was on there, so I had to cut it off:
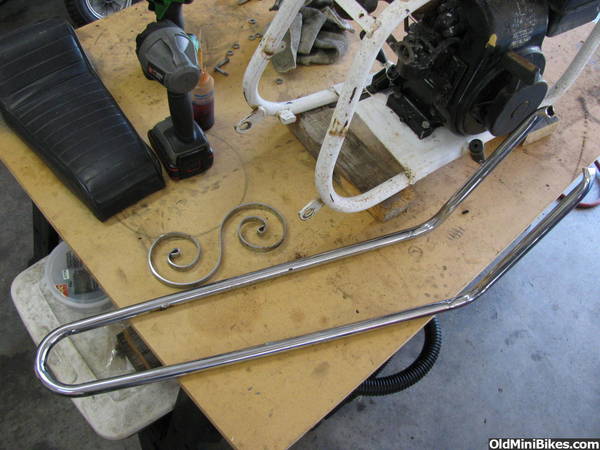
Next issue was that the front of the bar was crimped and bent to mount to shocks on the motorcycle, not a big deal but they were right at the front seat mount of the duster so they had to be cut off leaveing it too short to mount at the front. I got a piece of 1/2" OD hollow tubing at home depot to slip in and make up the length. The ID of the sissy was more like 9/16, this was as close as I could come up with.
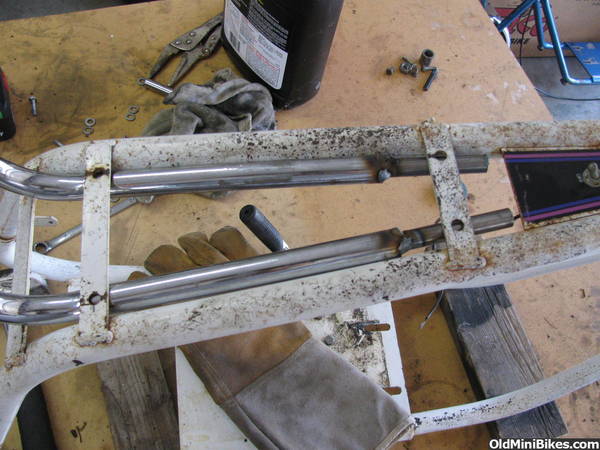
I'm not exaclty sure how the original bar fit on the bike, It looks like it sat above the frame sandwiched between the seat and holes were drilled through it. The thing I didn't like about hat was its going to want to stress and break at the rear holes. Plus since my bars were too short the extensions were going to be visible under the seat:anon.sml:
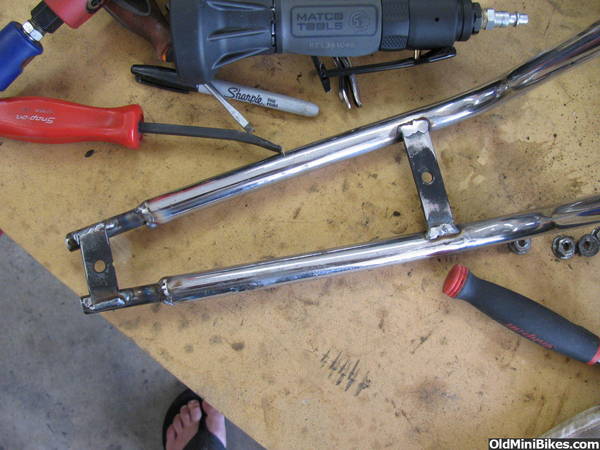
I was going to just drill through like before but again I did not like the stress point plus I know I was just opening myself up for issues trying to line up everything when putting it back together. So I welded tabs across the sissy bar at the same points that are on the bike, with a single hole centered in the tab (not the "tabs are actually a seat mount strap I cut off an old Fox frame I have that's no good.....re-cycle:thumbsup.
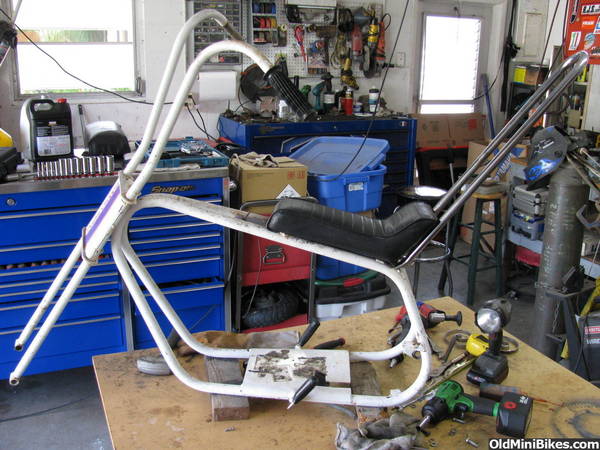
I think this should work out good, your always going to be using the sissy bar to pick up on, etc.. The seat is just there, no hang over anywhere so its only every going to be sat on not used as a grab point. I will have to drill the holes on the tabs on the frame, but its not a visible area, its an easy repair if I ever found an actual correct bar and painted the bike etc..

Makes a big difference with a sissy bar on there, It matches the patina of bike pretty good too!

Next issue was that the front of the bar was crimped and bent to mount to shocks on the motorcycle, not a big deal but they were right at the front seat mount of the duster so they had to be cut off leaveing it too short to mount at the front. I got a piece of 1/2" OD hollow tubing at home depot to slip in and make up the length. The ID of the sissy was more like 9/16, this was as close as I could come up with.

I'm not exaclty sure how the original bar fit on the bike, It looks like it sat above the frame sandwiched between the seat and holes were drilled through it. The thing I didn't like about hat was its going to want to stress and break at the rear holes. Plus since my bars were too short the extensions were going to be visible under the seat:anon.sml:
I was going to just drill through like before but again I did not like the stress point plus I know I was just opening myself up for issues trying to line up everything when putting it back together. So I welded tabs across the sissy bar at the same points that are on the bike, with a single hole centered in the tab (not the "tabs are actually a seat mount strap I cut off an old Fox frame I have that's no good.....re-cycle:thumbsup
. 
I think this should work out good, your always going to be using the sissy bar to pick up on, etc.. The seat is just there, no hang over anywhere so its only every going to be sat on not used as a grab point. I will have to drill the holes on the tabs on the frame, but its not a visible area, its an easy repair if I ever found an actual correct bar and painted the bike etc..
Makes a big difference with a sissy bar on there, It matches the patina of bike pretty good too!