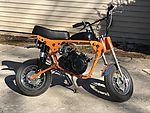
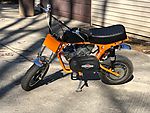
Danford1's - Sears Puddle Jumper - (Vintage Open)

#41
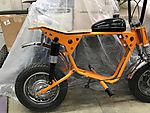
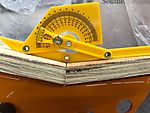
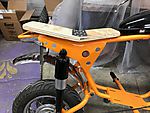
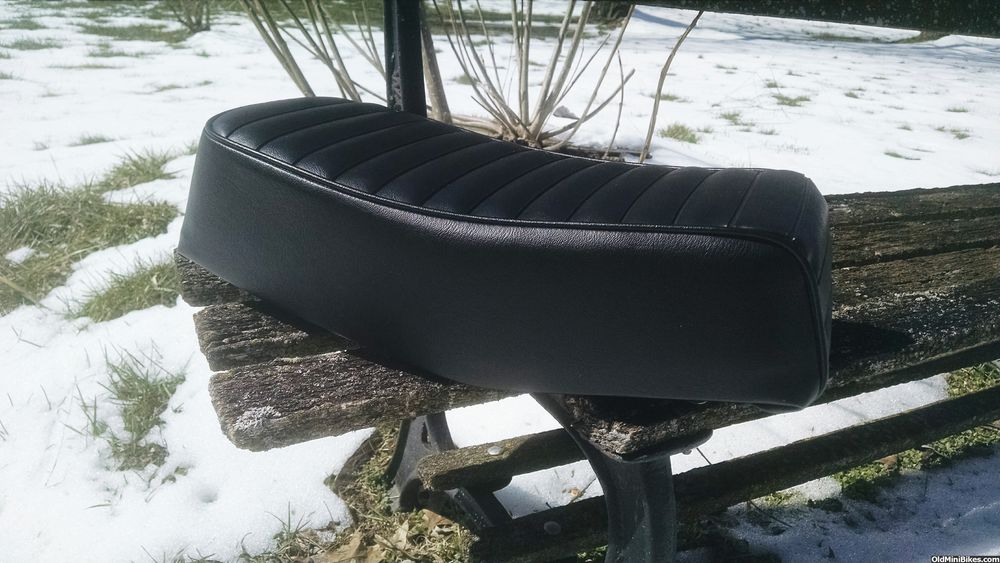
I made the wood portion of my seat today. The Rupp seat foam is nice and thick and firm. It will be perfect for this build.
The seat tilts at an angle. I used a strip of metal on the inside and two smaller strips on the underside to hold the shape.
I made it extra long yet I still have room to grab the rear lift bar I added.
Here are some pictures.

Danford1
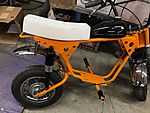
Best seat pan that I have ever seen made. :thumbsup:
 
#43
You couldn't even believe some of the :001_9898: that has showed up here to get a cover. :laugh: Thank you for payment, It will ship tomorrow and I will send you the tracking number.
 
#45
Arg... I can't get the video link to appear again. I tried multiple ways but it just won't appear once I submit the post.

How do we post a video link? The link icon doesn't seem to work.

Danford1

EDIT: I'll try again. Above I tried a Youtube link. Here I will try a Vimeo link.
The problem I see with Vimeo is the video doesn't play well. The sounds seems OK but the image freezes, then jumps ahead.
https://vimeo.com/209643918
 
Last edited:
#46
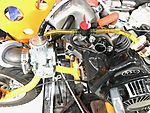
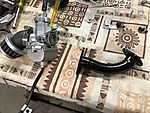
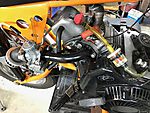
I didn't like the way the carb stuck out the side of the OHV Briggs Animal engine so today I made an adapter to turn the carb about 90 degrees.
I used a straight metal tube adapter and cut it in half. Then I took the a portion of the front fork from a kids bike. It had a nice tight bend
that worked out great. I welded in the center section, ground down the welds then painted it black. I also added a brace that goes from the inner carb bolt to the crank case to support the outer end of the adapter. I still need to hook up the gas line, throttle cable and get a bigger air filter. I gained a lot of clearance to me leg compared to how it was before.
Danford1

 
Last edited:
#47
This bike turned out beautifully, I seen you sold it and got it back.

I just picked up a puddle jumper, does your torque converter (chain) go strait back to the sprocket? Does everything fit and line up pretty nice? Did you have to use a tensioner? And what size wheels came on this bike? The one I picked up has small wheels on it but the frame is really nice, I'd like to build it similarly to what you did with yours, Thanks, Bobby
 
#48
Chain is straight back, lines up nice with the sprocket.
No chain tensioner is used. As long as the front sprocket is as close as you can get it to the swing arm pivot. The front sprocket, swing arm pivot and rear axle all should line up at half rear suspension travel. Then you shouldn't need a tensioner.
Mine has 10" wheels 3.5 x 10 tires.
Here is a video I did showing how important this all is.
I didn't "say" everything in the video but if you read the description I think you will understand... The video shows the puddle jumper before I restored it.
Yes , I sold and bought it back. Now guess what?, it is for sale again. I have other mini's I want to keep instead of it. To many toys, not enough room, need the money etc.
Danford1
[video=youtube;wSdqa1elQJ0]https://www.youtube.com/watch?v=wSdqa1elQJ0[/video]
 
Last edited:
#51
Chain is straight back, lines up nice with the sprocket.
No chain tensioner is used. As long as the front sprocket is as close as you can get it to the swing arm pivot. The front sprocket, swing arm pivot and rear axle all should line up at half rear suspension travel. Then you shouldn't need a tensioner.
Mine has 10" wheels 3.5 x 10 tires.
Here is a video I did showing how important this all is.
I didn't "say" everything in the video but if you read the description I think you will understand... The video shows the puddle jumper before I restored it.
Yes , I sold and bought it back. Now guess what?, it is for sale again. I have other mini's I want to keep instead of it. To many toys, not enough room, need the money etc.
Danford1
[video=youtube;wSdqa1elQJ0]https://www.youtube.com/watch?v=wSdqa1elQJ0[/video]
Thankyou for responding! This helps so much!

Very cool bike, good luck with the sale


Sent from my iPhone using OldMiniBikes mobile app powered by Tapatalk
 
Top