OldMiniBikes Shop Notes
- Thread starter KustomKartKid
- Start date
- Tags notes shop

I would think this has been done before..? But if not here is a SUPER easy way to make foot pegs for your Rupp or other mini bikes if you don't have any.....(which in my case I didn't!:doah:
Get 1/2",5/8",3/4" diameter conduit pipe (what ever dia. You need)
Cut your "overall length" needed and put one end in a vise and crush it down to the thickness need to insert into the stock foot peg bracket.
Measure your hole diameter of the bracket insert peg, mark and drill location on the peg.
Bolt foot peg on securely. done!:thumbsup:
 :facepalm:
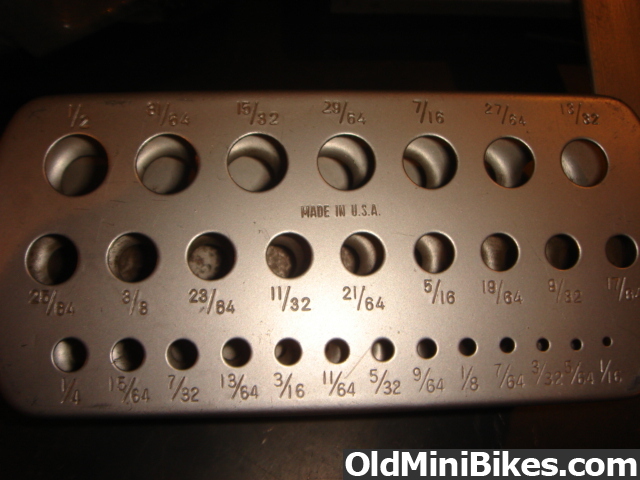
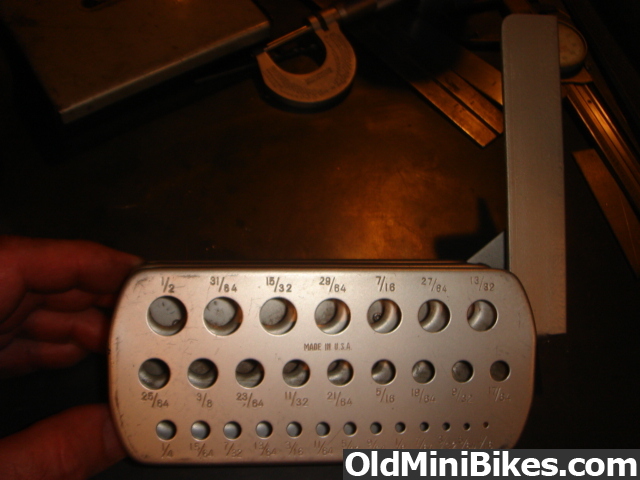
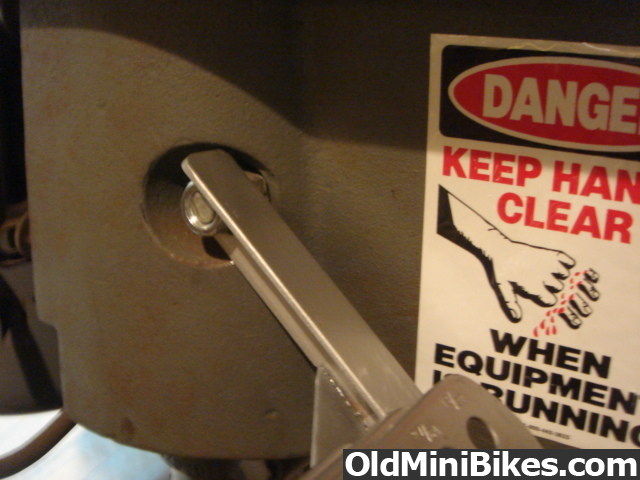
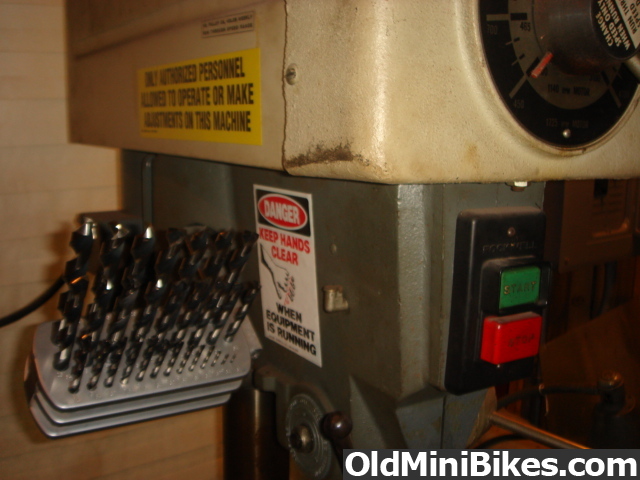
Always Handy Drill Press Chuck Key
I saw this idea while working in the Exxon machine shop..
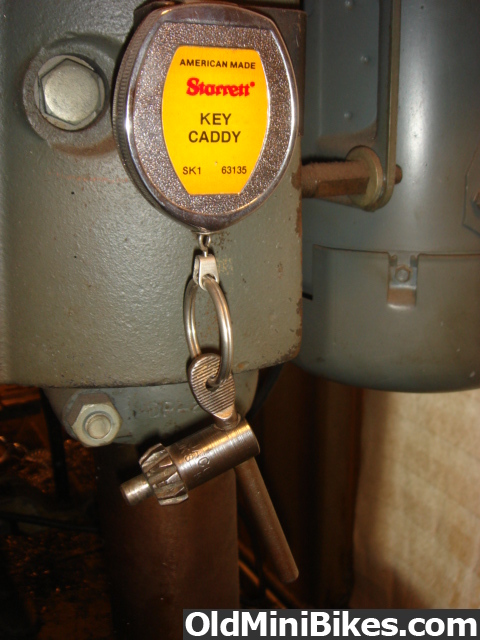
The "Key Caddy" is mounted or clipped to the side of the drill press and a hole drilled in the chuck key handle for the key ring. You need a good quality Key Caddy like this Starrett (check Ebay)
I've been using this one for 20 years and the recoil is still strong.
I saw this idea while working in the Exxon machine shop..
The "Key Caddy" is mounted or clipped to the side of the drill press and a hole drilled in the chuck key handle for the key ring. You need a good quality Key Caddy like this Starrett (check Ebay)
I've been using this one for 20 years and the recoil is still strong.
Last edited:
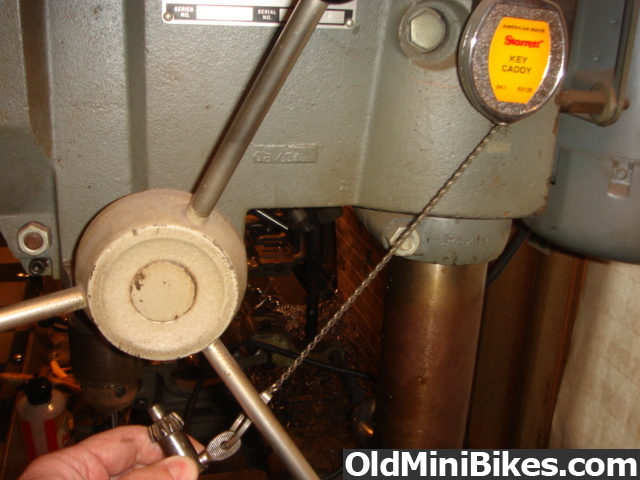
This is another idea I borrowed from the old Exxon shop worked in.
To keep drills handy at all times while operating the drill press, find a rack from a set of transfer punches:
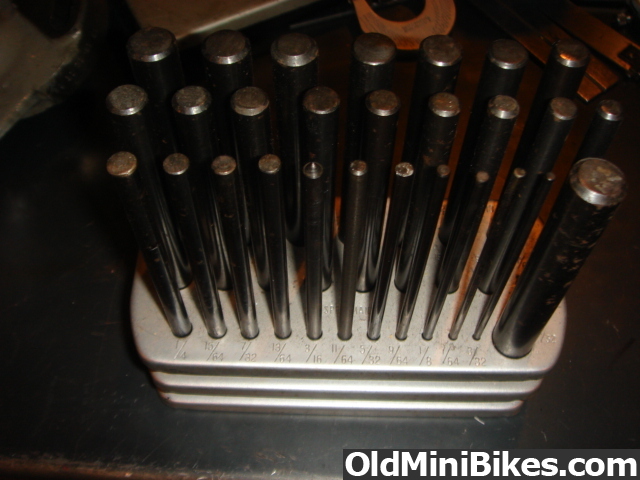
You can find the empty or half empty racks on Ebay for next to nothing.
Next make a bracket to hold it to your particular machine. The rack full of drills weighs a few pounds so don't skimp...we made ours out of 1" x 1" x 1/8" steel angle:
and pop riveted it to the bottom
I don't like drilling holes in equipment so I try to find an existing hole or bracket to mount to...in this case we utilized a 1/2" stud sticking out .
It will take a couple hours to make it up, but it is so nice to have all the drills at your fingertips you will wonder how you lived without it. As an added bonus our drill press is located at the end of our lathe bed, so it's just as easy to grab them for use in the tailstock.
To keep drills handy at all times while operating the drill press, find a rack from a set of transfer punches:
You can find the empty or half empty racks on Ebay for next to nothing.
Next make a bracket to hold it to your particular machine. The rack full of drills weighs a few pounds so don't skimp...we made ours out of 1" x 1" x 1/8" steel angle:
and pop riveted it to the bottom
I don't like drilling holes in equipment so I try to find an existing hole or bracket to mount to...in this case we utilized a 1/2" stud sticking out .
It will take a couple hours to make it up, but it is so nice to have all the drills at your fingertips you will wonder how you lived without it. As an added bonus our drill press is located at the end of our lathe bed, so it's just as easy to grab them for use in the tailstock.
Kitchen Aide
Building 2 very low budget bikes right now, both have provisions for a number plate on them, and of course both are missing the original plates.
Ebay seller Stokerace out of NJ is good enough to sell 2 plates for about 5.25 shipped that are intended for Kart racing, that's pretty much the cheapest I saw for them anyway.

But once they arrived I realized they are kinda big/out of proportion for the mini bike. So I just looked again to see if I could find something smaller, well anything else starts to get pretty pricey at least from what I have seen, plus what would I do with the ones I just got other than maybe use them for bondo mixing boards :shrug:
So I figured I would just cut them down and see what happened I thought an oval might be cool, but how :shrug:
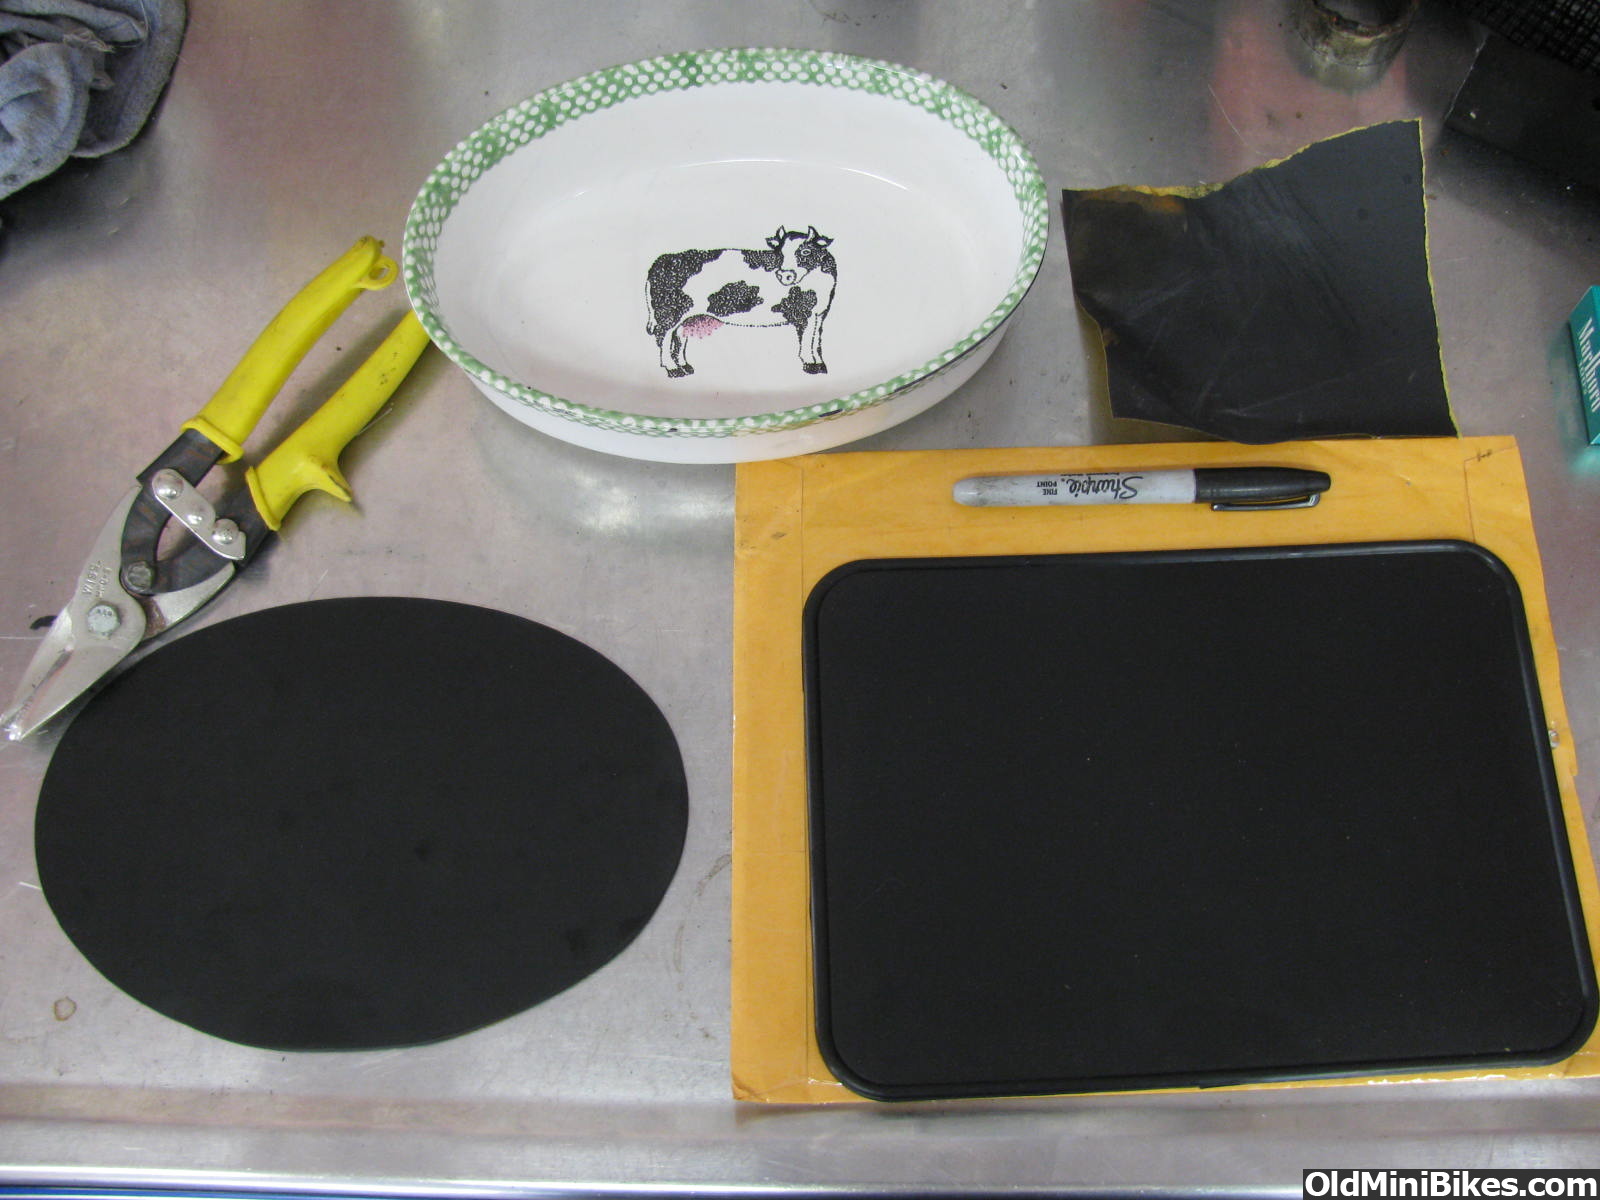
Found this oval baking bowl in the kitchen :thumbsup:
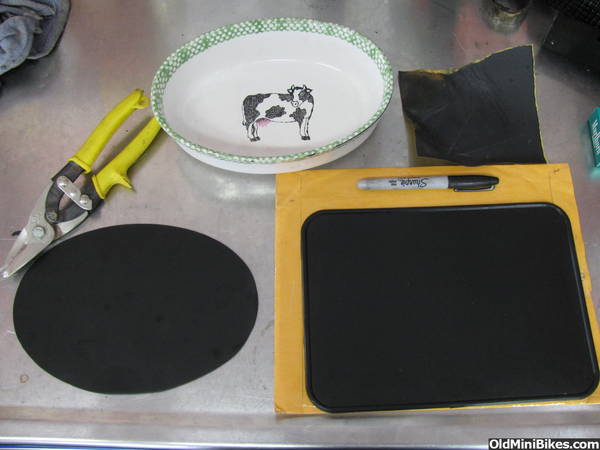
Other tools needed, some cutters that will cut the plastic, something to trace with (I used a sharpie, even against the black it was visible enough to use), a steady hand, and some sandpaper.
first one I cut on the left I went close to the edge on 2 sides thinking it would be easier, the plate has a raised lip so it was actually harder to cut and my shape is not dead on in a spot from it. So just center the pattern if you do this, I did a rough cut first and then did the final trim and it was very easy (other than the edge as stated) took the sandpaper and smoothed the edges out.
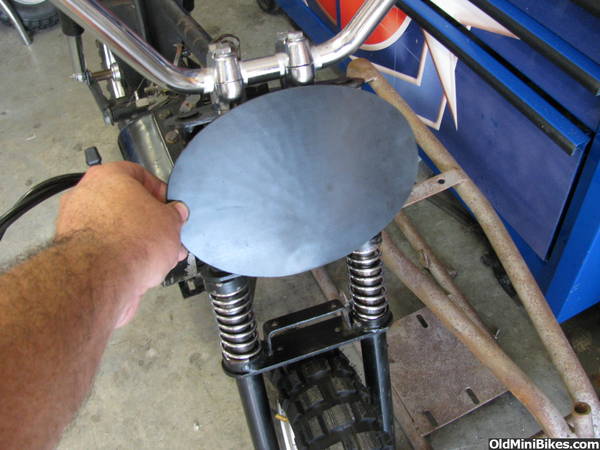
Covers the hole and only cost me $2.62 per bike :thumbsup:
Building 2 very low budget bikes right now, both have provisions for a number plate on them, and of course both are missing the original plates.
Ebay seller Stokerace out of NJ is good enough to sell 2 plates for about 5.25 shipped that are intended for Kart racing, that's pretty much the cheapest I saw for them anyway.
But once they arrived I realized they are kinda big/out of proportion for the mini bike. So I just looked again to see if I could find something smaller, well anything else starts to get pretty pricey at least from what I have seen, plus what would I do with the ones I just got other than maybe use them for bondo mixing boards :shrug:
So I figured I would just cut them down and see what happened I thought an oval might be cool, but how :shrug:
Found this oval baking bowl in the kitchen :thumbsup:
Other tools needed, some cutters that will cut the plastic, something to trace with (I used a sharpie, even against the black it was visible enough to use), a steady hand, and some sandpaper.
first one I cut on the left I went close to the edge on 2 sides thinking it would be easier, the plate has a raised lip so it was actually harder to cut and my shape is not dead on in a spot from it. So just center the pattern if you do this, I did a rough cut first and then did the final trim and it was very easy (other than the edge as stated) took the sandpaper and smoothed the edges out.
Covers the hole and only cost me $2.62 per bike :thumbsup:

So I was out in the garage the other day ......
There on the bench was an old Westbend 580 I had bought and on it was this old throttle cable with the spring-wound type sheath

There were two jam nuts on either side of a bracket to hold the cable in it's proper place. I thought somebody had just fudged them on there, but I took a wrench and broke them loose they spun off nicely like they were made for that purpose. The threads inside the nuts were nicely machined...I checked the pitch and they are 1/4-16 which is an oddball. :detective:
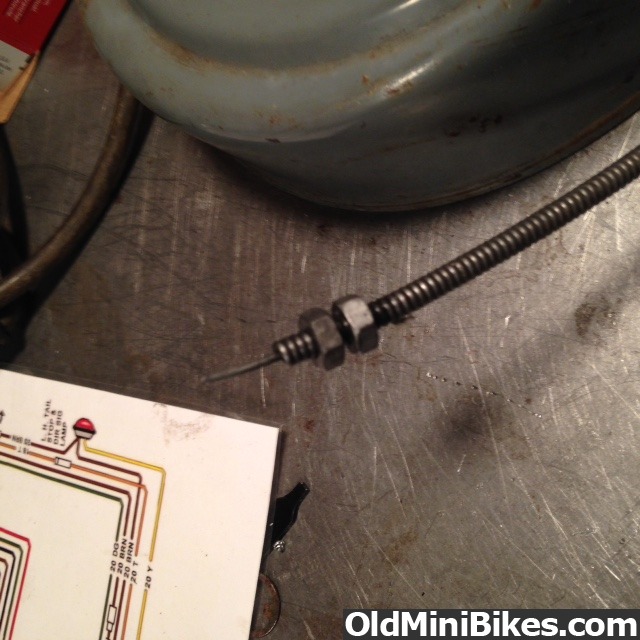
So obviously they are made specifically for this application...I have never seen them before but maybe they are common on snowblowers or mowers.
Anyway I thought it was interesting...but then again I am easily amused by stuff like this...:smile:
There on the bench was an old Westbend 580 I had bought and on it was this old throttle cable with the spring-wound type sheath
There were two jam nuts on either side of a bracket to hold the cable in it's proper place. I thought somebody had just fudged them on there, but I took a wrench and broke them loose they spun off nicely like they were made for that purpose. The threads inside the nuts were nicely machined...I checked the pitch and they are 1/4-16 which is an oddball. :detective:
So obviously they are made specifically for this application...I have never seen them before but maybe they are common on snowblowers or mowers.
Anyway I thought it was interesting...but then again I am easily amused by stuff like this...:smile:
Last edited by a moderator:
I've got this old Bonanza and the forks had a lot of "front to back" play in them. A closer look showed that most of the slop was in the lower triple tree plate where the bolt hole had become enlarged. I didn't feel like welding and re-drilling the hole...the bike is original paint. I could have drilled the lower hole larger and machined a special bushing but this was one instance where I was looking for a shortcut that would work and be "invisible" when done.
I found some really thin wall brass tubing and cut a ring off the end the same thickness as the plate.
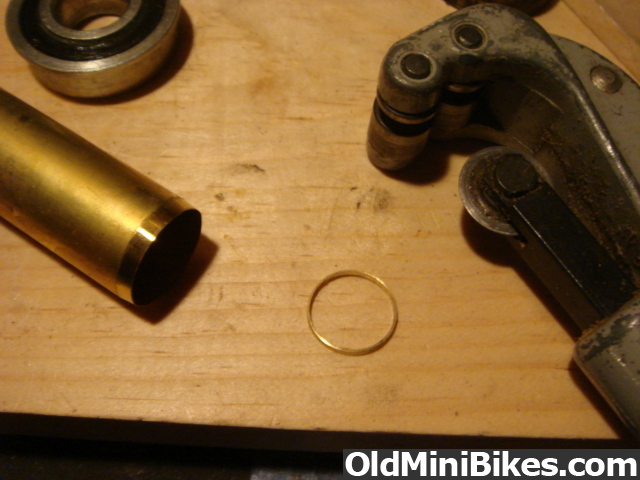
and then pressed it in...
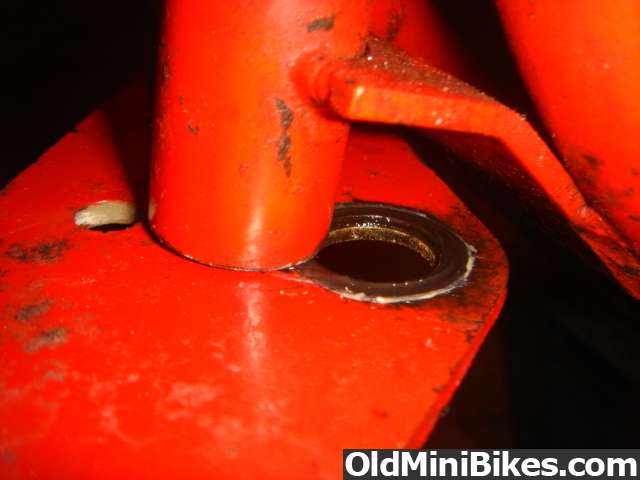
I was a bit of a wrestling match to get the bolt back in . You need to find or make a washer which is a snug fit on the bolt and use it on the bottom to prevent the bushing from dropping out . When it was finally assembled it was much better than before, I'd say 90% of the slop is gone.
I found some really thin wall brass tubing and cut a ring off the end the same thickness as the plate.
and then pressed it in...
I was a bit of a wrestling match to get the bolt back in . You need to find or make a washer which is a snug fit on the bolt and use it on the bottom to prevent the bushing from dropping out . When it was finally assembled it was much better than before, I'd say 90% of the slop is gone.
Last edited:
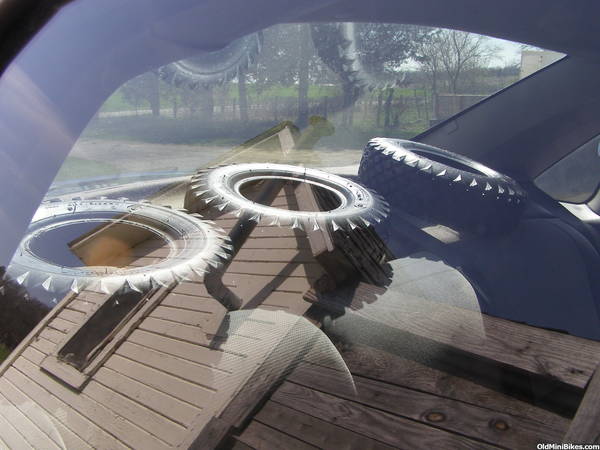
I've seen a lot of people mention what a PITA mounting tires can be. One thing that helps tremendously is the flexibility of the rubber. A cold tire is a harder to work with, so before I mount or dismount them I like to let them sit on the package tray on a nice sunny day with the windows rolled up. After an hour or so they are a lot easier to handle:thumbsup: