Super Bronc project has begun

#41
Doug, I don't know about the VT8 but on my VT3 the only way I found to get the front tire off was to pull the lower fork legs with the wheel still mounted to them

I hope its not that way on mine..... We will see when I get back on it... Thanks for the heads up. On the forks and that [MENTION=20377]buckeye[/MENTION] guy.....

Doug
 
#42
We have both fuel tanks on ours including the proper 3-way diverter valve, however, we never use the engine-mounted tank. We only use the top mounted (auxillary)tank. The engine mounted tank CAN be filled, but it is a royal pain in the ass to do so. You have to get "creative" and come up with a flexible tube you can connect to your gas can spout that you can snake in there. It is also difficult to see what level you have filled it to and very easy to over fill it. The auxillary tank was offered to increase the riding time/range w/o having to refuel. The headlight toggle switches you have are standard and correct- we have them on our bike. One is on-off and one is hi-low beam. The multi-function handlebar switch you mentioned is an upgrade which was designed to use with the horn as well. The single red button was standard and what we have on our bike. Have you called Ron Kimball at Powertec yet and chatted with him? If not , you are missing a great opportunity to talk to one of the nicest guys you will ever meet and he is a wealth of knowledge on these bikes.
Michael
One of my Super Broncs is plumbed in such a way that, you set the valves a certain way , fill the upper tank then open a valve and that fuel fills the lower tank. Once the lower tank is full you switch the valves and refill the upper tank. When the lower tank gets low, you switch valves to refill the lower tank from what is stored in the upper tank. I didn't plumb it one of the previous owners did.
 
#43
Doug, I don't know about the VT8 but on my VT3 the only way I found to get the front tire off was to pull the lower fork legs with the wheel still mounted to them and I have had it apart at least 4 times ]
I hope its not that way on mine.....
Randy is right, that's the only way to get the front wheel off. Just unscrew the top two bolts that hold the springs in and the lowers will slide right out with the wheel attached. You've got to replace the boots anyway:thumbsup:

FYI, get genuine HONDA boots, not the el cheapo knockoffs. I put a (cheap) pair on my Hauler and it's been sitting in the garage, never seen sunlight and they are staring to crack and rot.
 
#44
Randy is right, that's the only way to get the front wheel off. Just unscrew the top two bolts that hold the springs in and the lowers will slide right out with the wheel attached. You've got to replace the boots anyway:thumbsup:

FYI, get genuine HONDA boots, not the el cheapo knockoffs. I put a (cheap) pair on my Hauler and it's been sitting in the garage, never seen sunlight and they are staring to crack and rot.
Mark, I wouldn't buy anything but the factory Honda pieces. Learned that lesson a long time ago... More than once...lol...

I appreciate the information about the forks. I would have taken the bottom bolts out just by thinking about it and recliner engineering the job. I cant get out to the shop to look at it but why take out the top bolts instead of the lowers?

Thanks,

Doug
 
#45
Didn't that bike come with all of the Original Heald assembly instructions? It is VERY helpful as to how all of the parts are assembled (or disassembled) If you purchased this bike from Capguncowboy (Andy) I seem to remember that it did.
Michael
 
#47
Didn't that bike come with all of the Original Heald assembly instructions? It is VERY helpful as to how all of the parts are assembled (or disassembled) If you purchased this bike from Capguncowboy (Andy) I seem to remember that it did.
Michael
Yes I did and yes it did...

All of the stuff is in the shop and these pain meds don't have me thinking as clearly as I should.... But you are right the assembly instructions are in the box. Along with a catalog....

thanks,

Doug
 
#49
That bike suppa bad ass !... I just got a vt 5 and vt10 and I have my work cosmetically cut out for me...if you here of any one prefabricating super Bronc or Heath seats please pm me ... Great bike you got man..l
 
#50
That bike suppa bad ass !... I just got a vt 5 and vt10 and I have my work cosmetically cut out for me...if you here of any one prefabricating super Bronc or Heath seats please pm me ... Great bike you got man..l
Thank you sir!

Here ya go, click on the link below. That's a brand new one built from scratch by [MENTION=18286]manchester1[/MENTION] . Karen can fix you up. She is building me one so I can put my original away after she fixes the dry rotted thread. Well I guess I should say I am on the list to get one in the next month or so.... The build off has her busy. PM Karen and she can give you the details.

http://www.oldminibikes.com/forum/photopost/data/500/medium/super_bronc_seat_jan_2017.jpg


Did you buy the VT-10 that was on ebay recently?

Doug
 
Last edited:
#51
Super nice bike Doug! I need to get some work done on mine before Windber, new fork springs and boots, rear brake and wire up the head and tail light. I have jeeps kickstand and rear hitch and they work fantastic!
 
#53
Well, 1 day short of 2 full weeks I have gone back out in the shop and actually done something productive. Thank goodness for a rolling office chair and having the bike up on the lift that rolls around as well. Still having pain in the lower back and down the right leg but I have had enough of staying in the house...

Took the front end apart tonight. Disconnected the front brakes, loosened the boots and the speedometer. Pulled the upper spring bolts and it all fell out in the floor. Easy peasy. Pulled the battery, all the wiring, the TC, all the cables, the handle bars and the key switch.

Simple stuff but what a miss matched mess. Wires wrapped around cables and tied in a knot as they routed through one another... Cut every cable tie off of it. Somebody liked cable ties. And all of the wire is stiff and the covering is hard. Just an accident waiting to happen. The heavier gauge wires between the battery and the key switch have turned the copper black so that is just resistance to me. I will go by the boat store and buy some "tinned" marine TFFN wire to rewire the bike the right way. Proper crimps and self sealing heat shrink will do the trick.

One of the handle bars is tweaked. Easy fix.

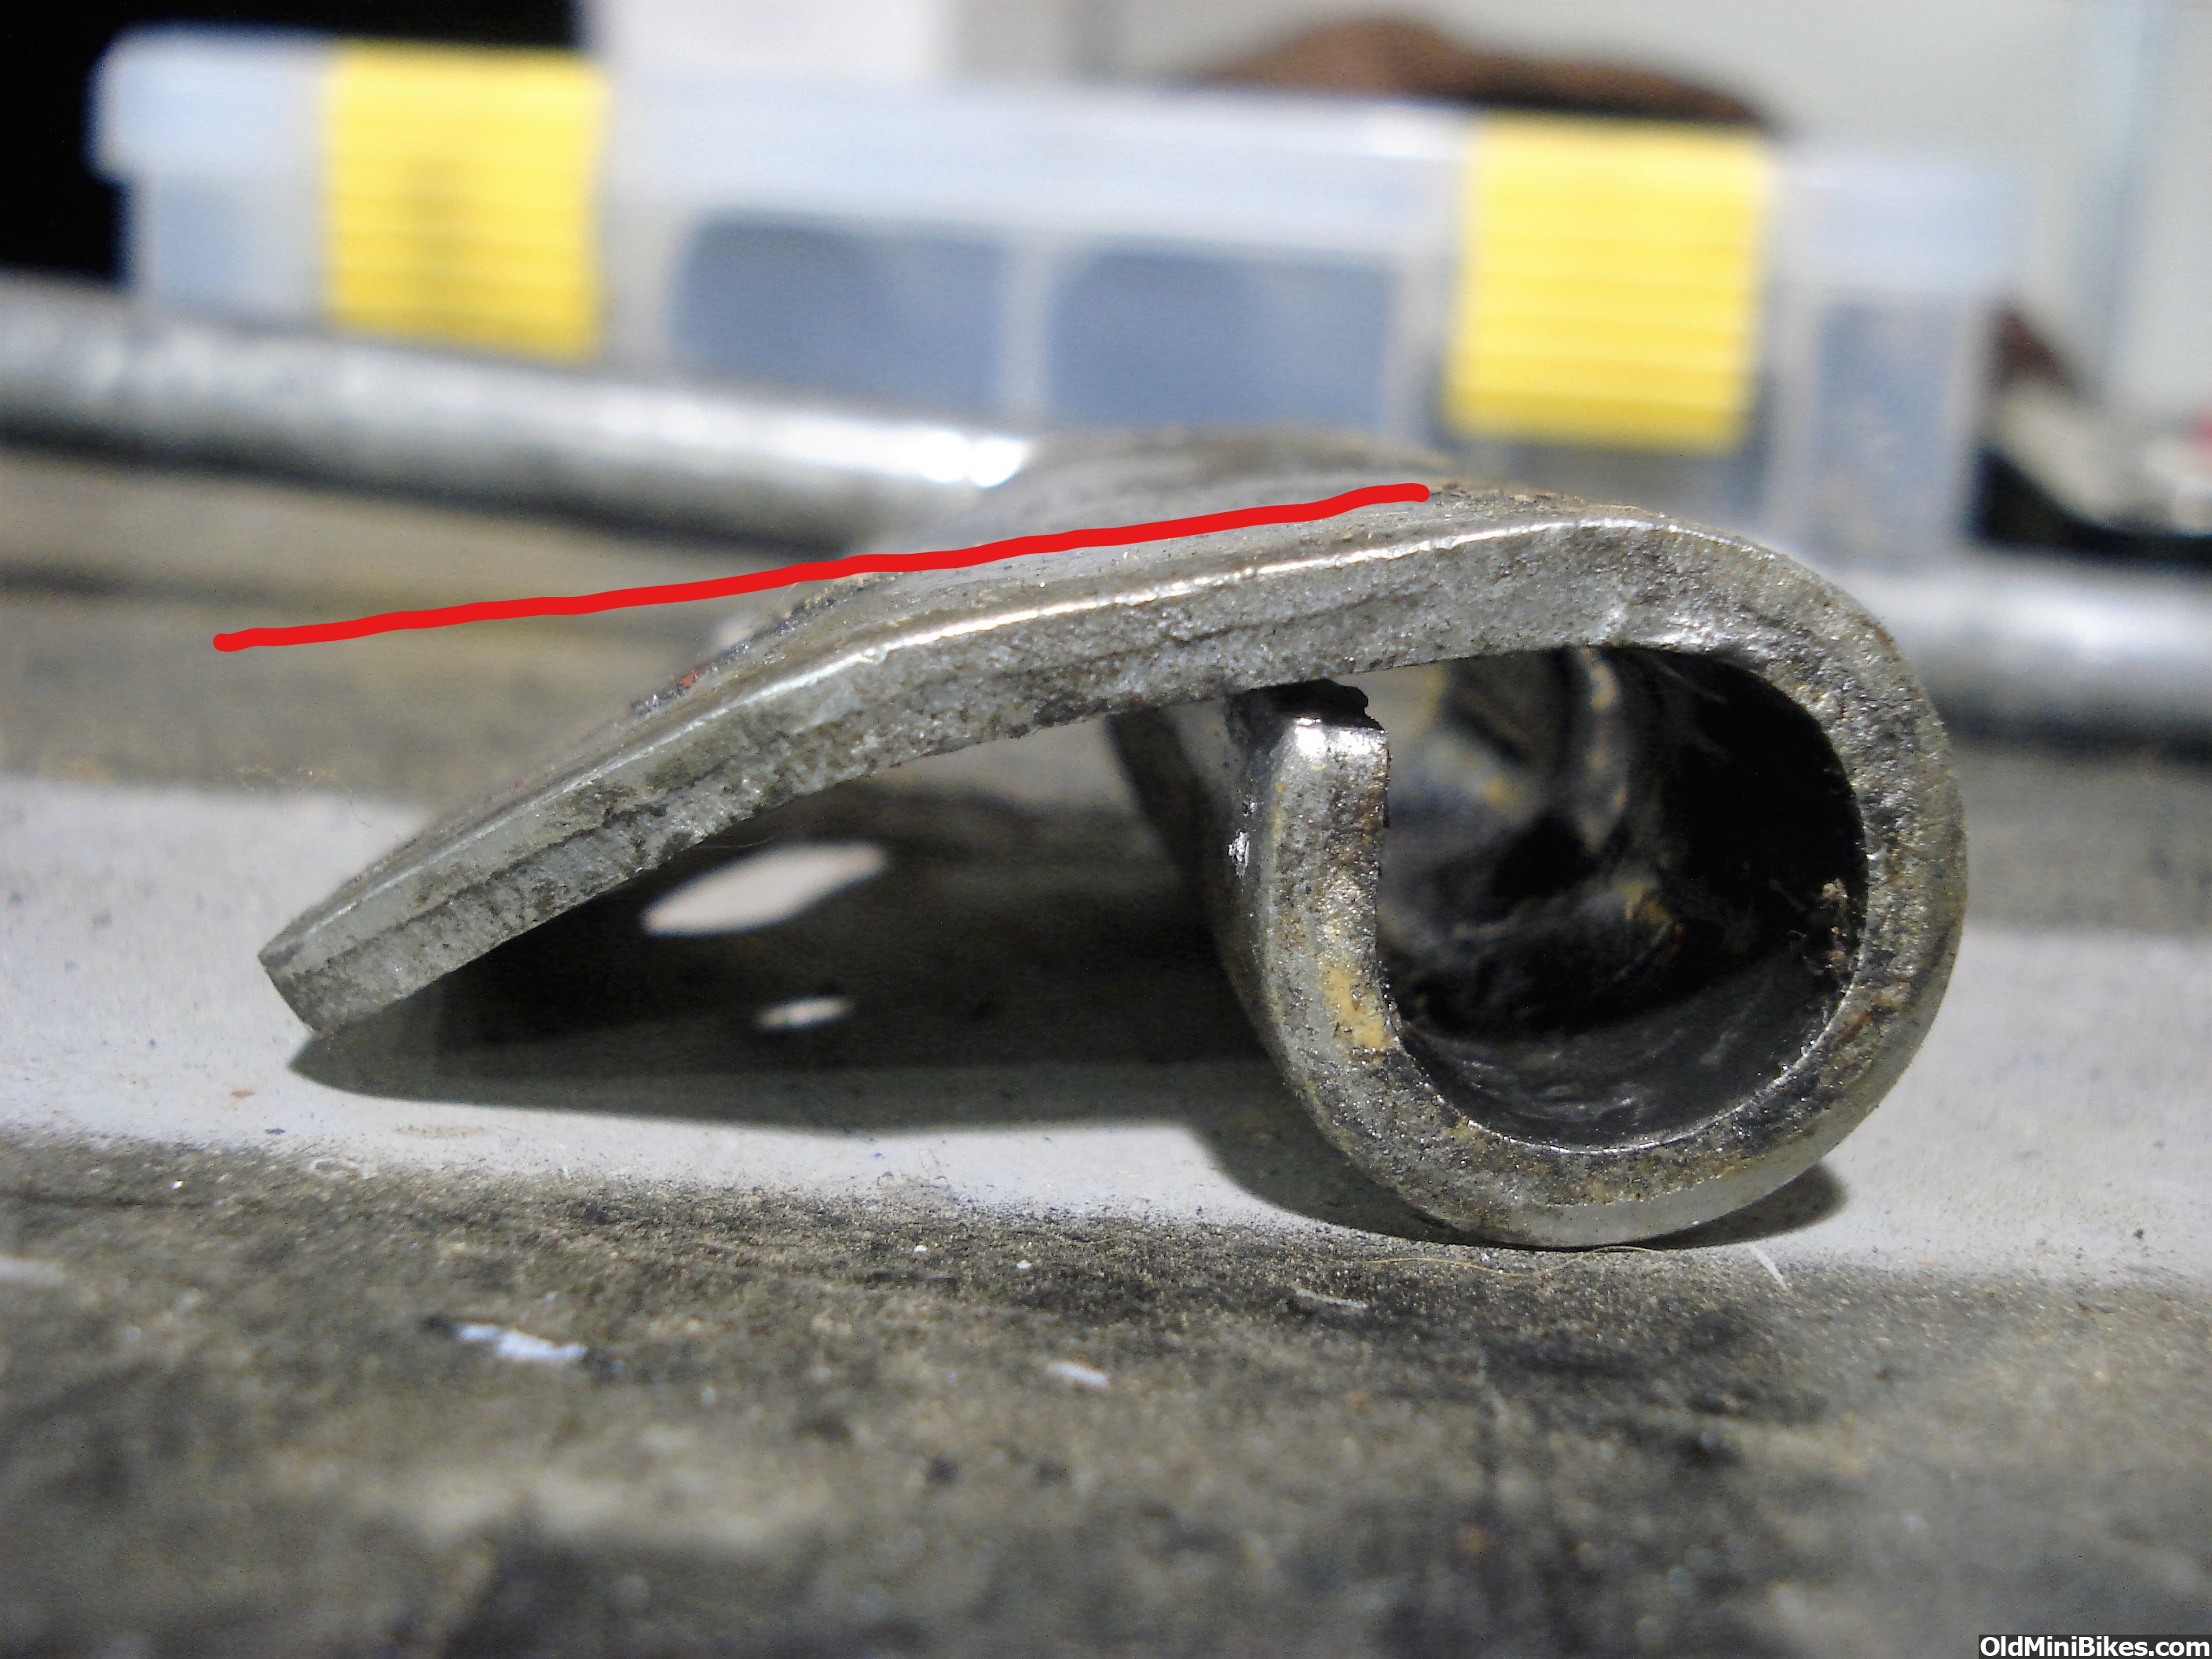
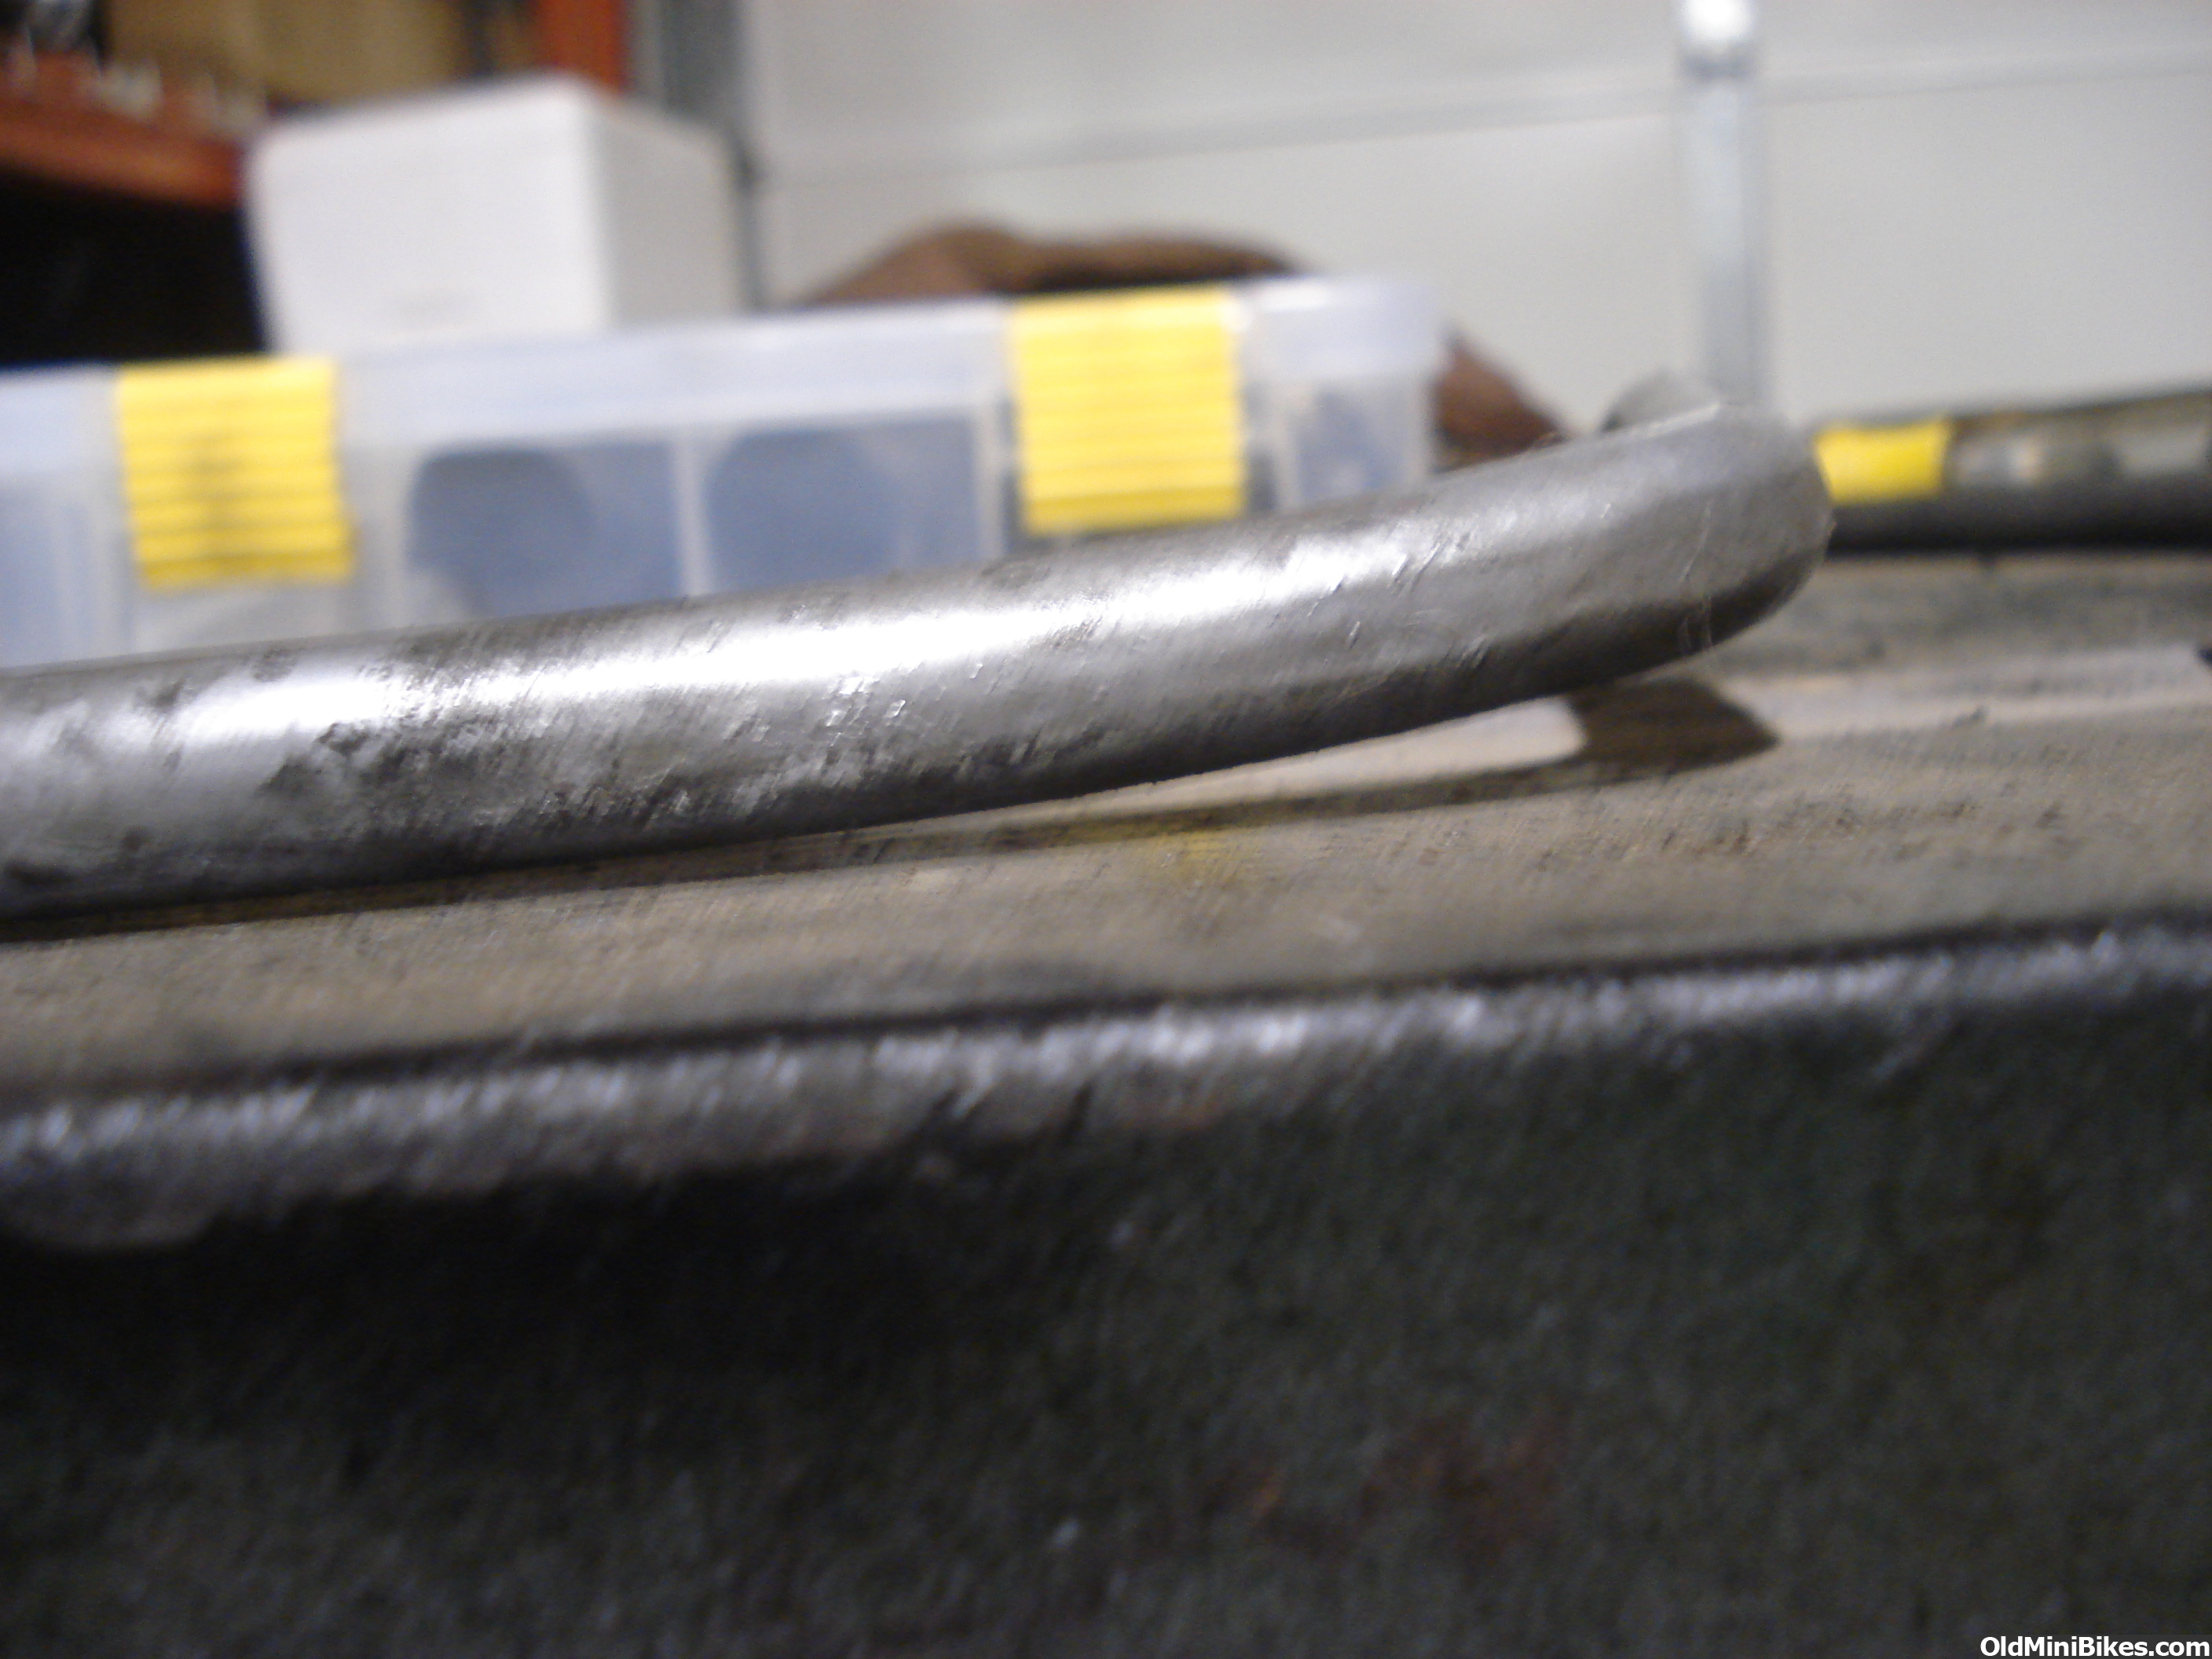
Still don't understand why the rear brake doesn't work correctly. Its all there and all correct. Even the 3/8's nut used as a spacer for the stop light switch that I thought was somebodies attempt to "fix" the rear brake. But through studying the factory paperwork and assembly instructions I discovered that it is part of the stop light switch. The torque converter sheaves don't look like the bike has ever been ridden. I said it needed the bushings in the neck replaced but I was testing them by grabbing the front tire as it was hanging while on the jack. Well if you add up the little bit of clearance in the forks where they slide together and the little bit of clearance on the bushings in the neck it feels bad all the way out at the tire. After a closer look I don't need to replace anything except the fork boots. I couldn't understand how anything could be worn like it was feeling and the bike have so few miles. Now I am wondering how it got 100 miles on it and things like the TC sheaves not look like they have been used at all.

The installation/assembly instructions can be quit entertaining if you really pay attention. If you have a front brake the kit instructions tell you to install it on the left. If you have a speedometer the installation instructions tell you to install it on the left also.... They never say that the speedo "Has" to be installed on the left and the brake moved to the right. There is also a very small reference to installing the speedo with a headlight and drilling a hole to the side for the speedo. The headlight instruction wants the light to be installed on the top brace and the horn instructions want the horn installed on the bottom brace.... I guess the fact of the matter was that, it was a kit and you did what pleased you the most. I am not sure I would like the headlight installed on the top brace. Mine is on the lower brace and I like it there as it "fits" between the braces nicely.

The wiring instructions also refer to the taillight as having a running light and a brake light. So I have to figure that out as mine only has 2 wires running to it currently. Probably have to replace the socket in the light.

Does anybody have any tricks to make this rear band brake work correctly. The band has plenty of lining and the drum doesn't look like the band brake has ever worked. Being that it is part of the TC assembly I didn't want to tear into it to far yet. So I just took off the complete TC assembly and set it aside.

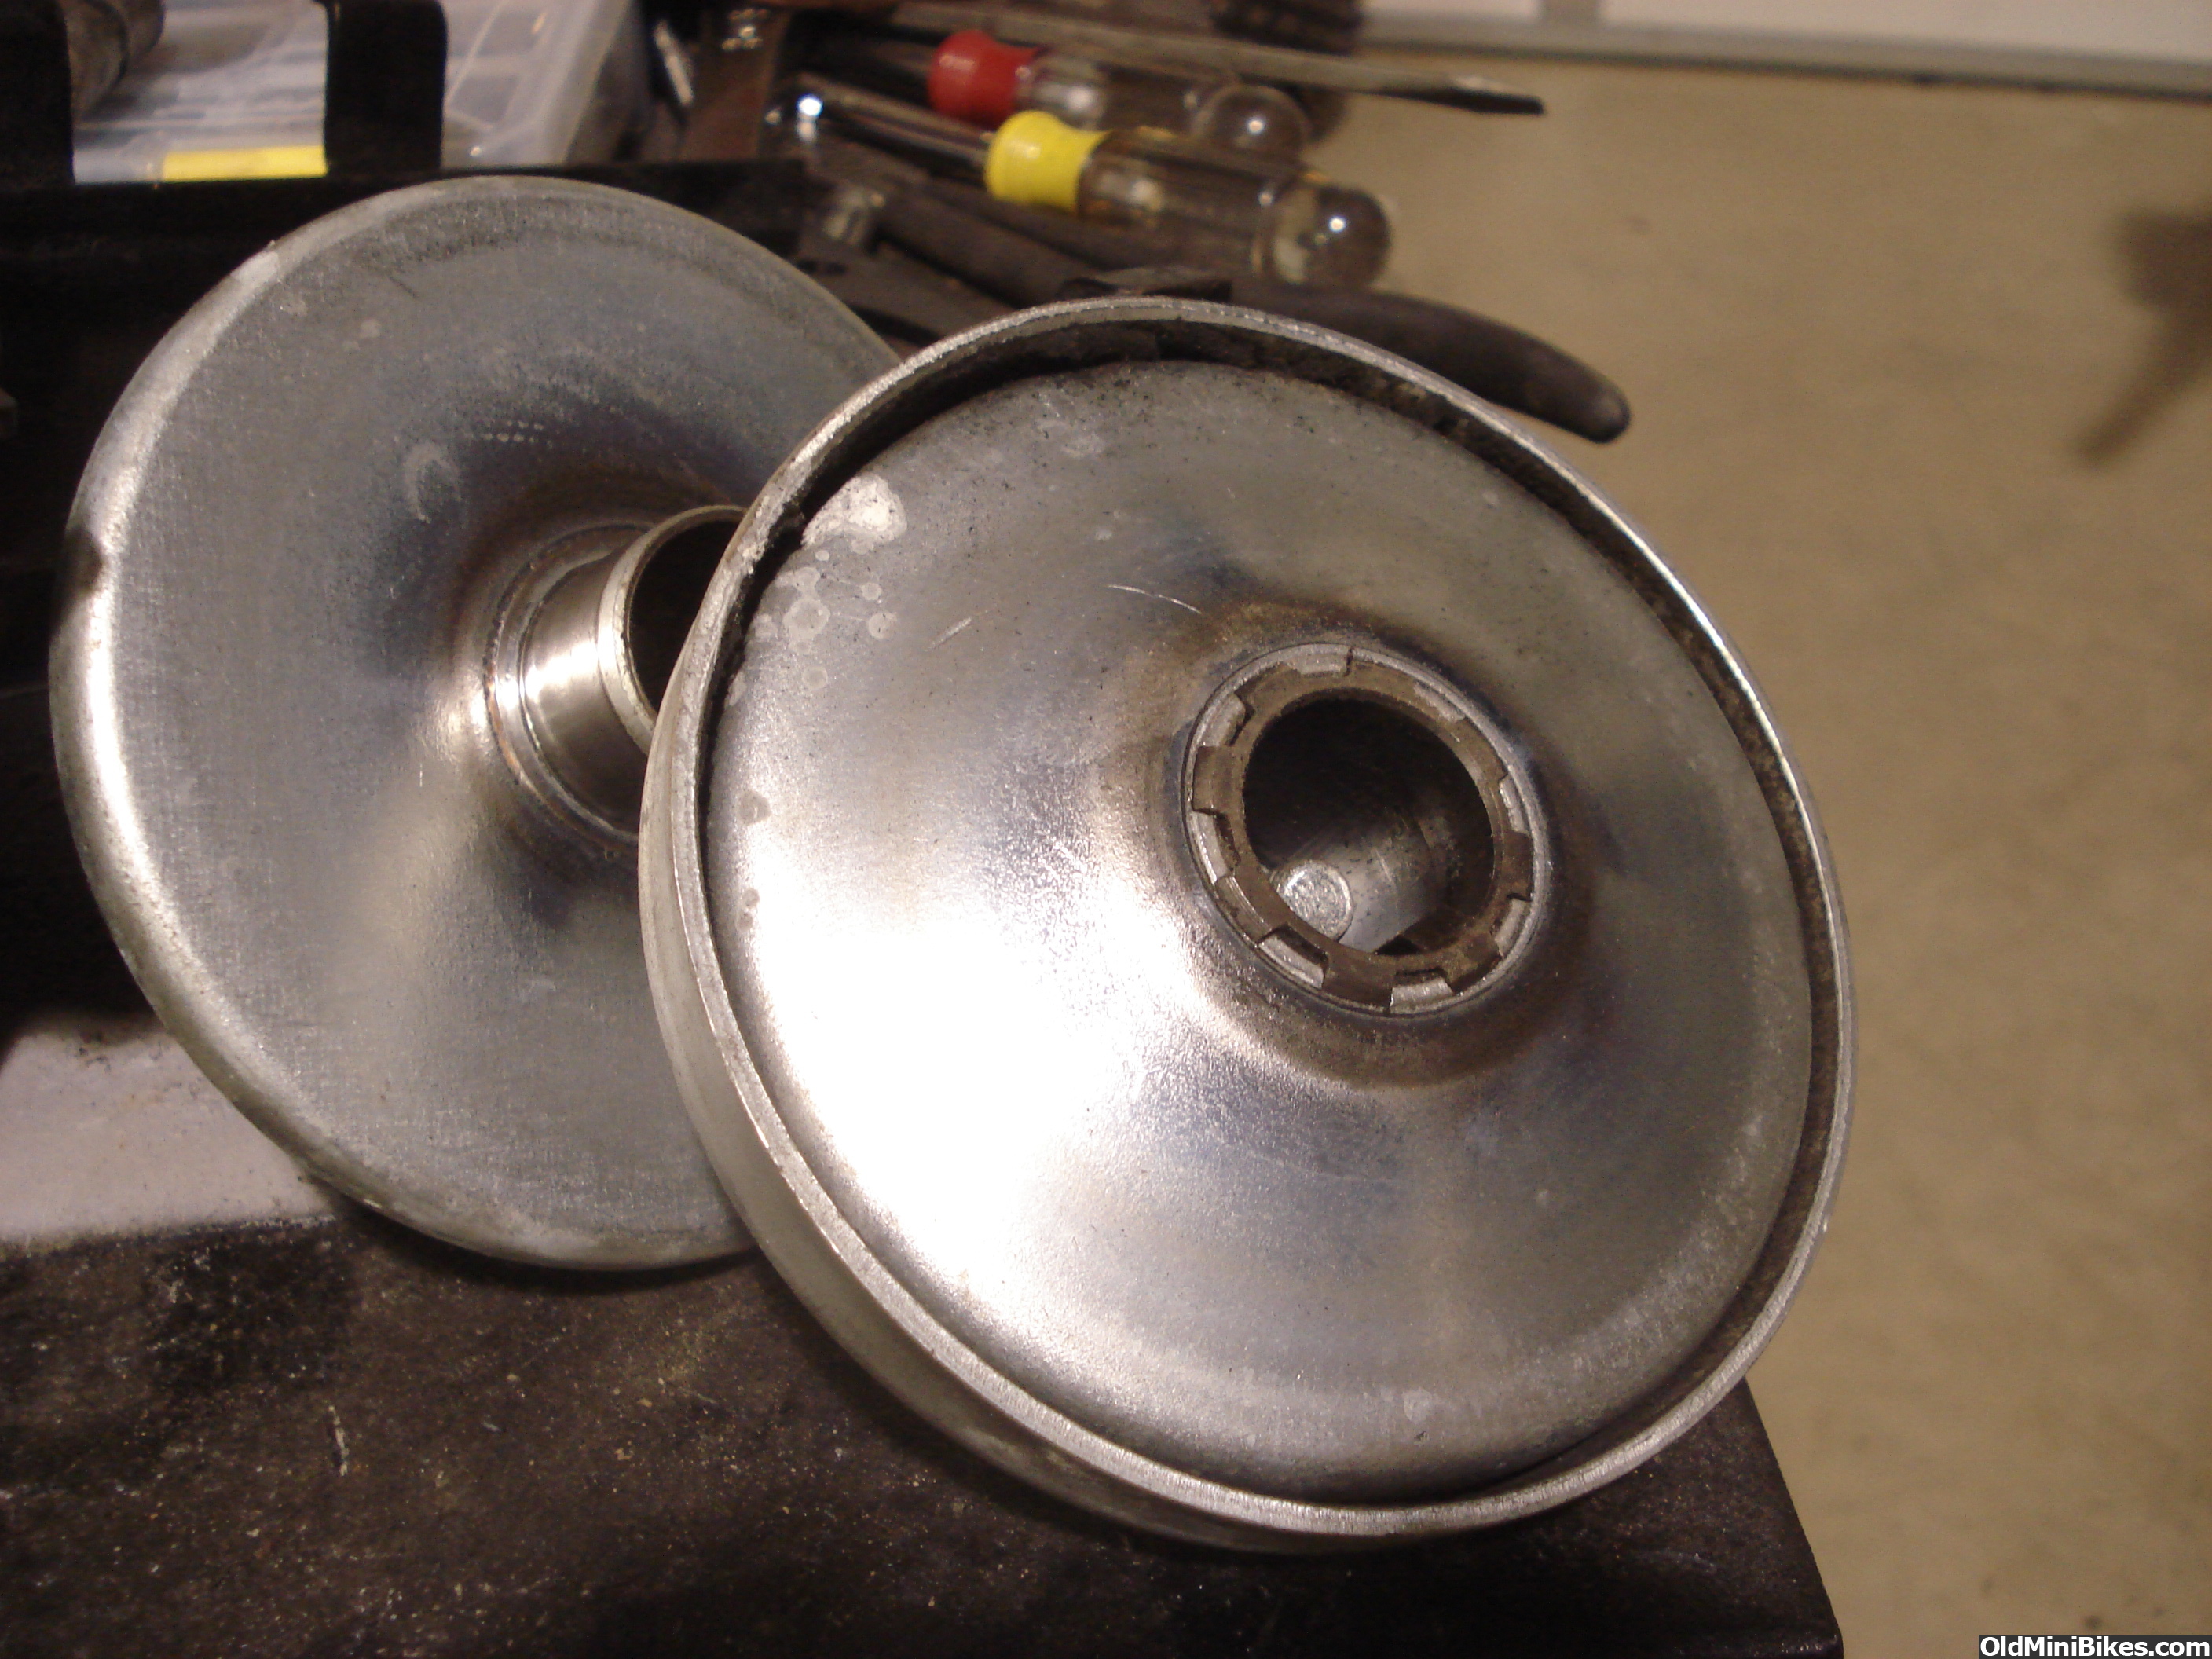
Torque converter question????? It still has a Comet belt on it and the entire assembly looks brand new. My question is about the brass or bronze bushing on the driver that the belt runs on in neutral. Should it have a floating bushing like I have seen in the add on units or did this particular version not have a bushing? It doesn't look like it ever had a bushing but that doesn't mean that it didn't roll under the work bench unnoticed when the kit was assembled originally.... And incase anyone is wondering it is a 30 series with the asymmetrical flat sided belt.

I cant find any information as to how much air pressure the tires should have in them. They are the correct 21 x 12 x 8's but no PSI info on the tire. I would think 5 to 8 psi would be about right with 10 being the max. This is just from 30 year old memory of my Yamaha and Honda 3 wheelers with the same tire.

Right know I have 2 concerns with the bike.

1 - making the rear brake work correctly. This is my main concern and focus.

2 - putting the throttle linkage back together correctly on the engine. The governor arm is loose and the link between the governor arm and the carb is missing. Andy has this and is supposed to be sending it. How do I figure out where the governor arm should be located?????? It has a screw on it and appears that you can clock it anywhere you want.

Doug
 
Last edited:
#54
Well I felt good enough to spend a little time on the Bronc today. I have concluded that the only thing wrong with the rear brakes is that they were never adjusted properly and just didn't have enough travel to engage the drum.

I took the original kickstand apart and it is bent in the arm and in the mounting bracket. I think I can spend a little time massaging it back to where it should be and it will work correctly. At least that is what I am going to try before I install the late style kickstand on it.

Pulled the rear light assembly off the fender and found my old can of Ford Bright Metal Cleaner. Cleaned up the rear fender real nice. Now I just need to put a good coat of paste wax on it for protection.

More planned for tomorrow if I feel up to going out to the shop. I hope so as I would like to start putting it back together.

Doug
 
#55
Anybody have any suggestions on how to get the white fuel tank whiter again. At least some improvement in removing the stain would be nice...

Thanks,

Doug
 
#58
Thank you sir! 50 - 50 mix? Stronger??? Weaker???
No Mama says 1/4 bleach to 3/4 water :thumbsup: She said you could try rubbing on dry baking soda and then spray it with straight white vinegar and when it stops bubbling rub it with a sponge :shrug: Make sure you clean the tank with fresh water before you try the other method :thumbsup:

PS: every one calls my wife Mama :laugh:
 
#59
I wanted to post pictures of the kickstand damage. I think I can straighten it without much effort.

What are the opinions of the damage being fixable and reliable??? The bracket I think will flatten right out if I take a little time with it in the press. The stand arm its self is bent just enough to say it is bent. I think it will straighten out on the welding table with a few licks from the dead blow hammer.


And here is a pic or the Drive. It almost looks like it has never been ridden... Should it have a bronze bushing for the belt to idle on like the TAV 2's or did these not use a bushing?


Thanks for looking,

Doug
 
#60
No Mama says 1/4 bleach to 3/4 water :thumbsup: She said you could try rubbing on dry baking soda and then spray it with straight white vinegar and when it stops bubbling rub it with a sponge :shrug: Make sure you clean the tank with fresh water before you try the other method :thumbsup:

PS: every one calls my wife Mama :laugh:
Tell Mama I said thank you very much!
 
Top