Bolt Restoration a simple How-To

#1
I was cleaning out my photobucket and came across some pics of a old how to thread I did for the guy on a budget. I originally came up with idea when I was reading a thread about some unhappy results with a man painting some of his hardware black, So I went and threw this simple process togeather for him since then I have had alot of people use this method with good results so I figured I would share it here. The pics im using are with body bolts but can be used with any steel hardware.

You will need a few simple things, You will need a way to clean your hardware a blast cabinet, wire wheel or some way to clean off all the rust, muratic acid works well for stripping rust also, I might do something on that later...

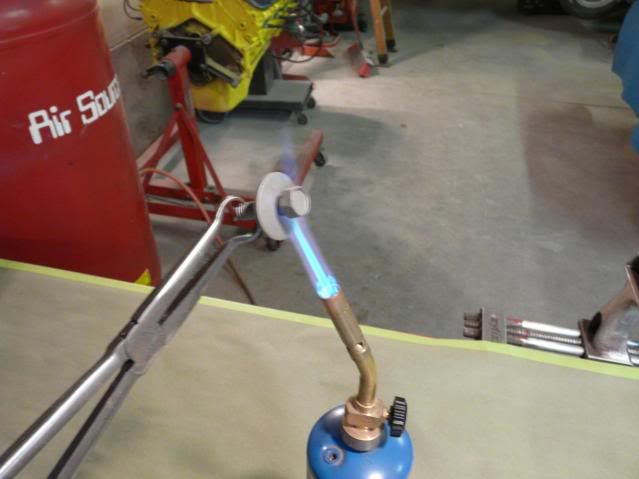
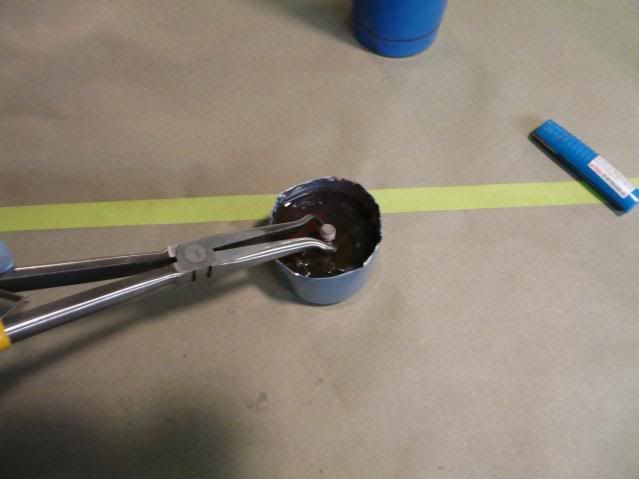
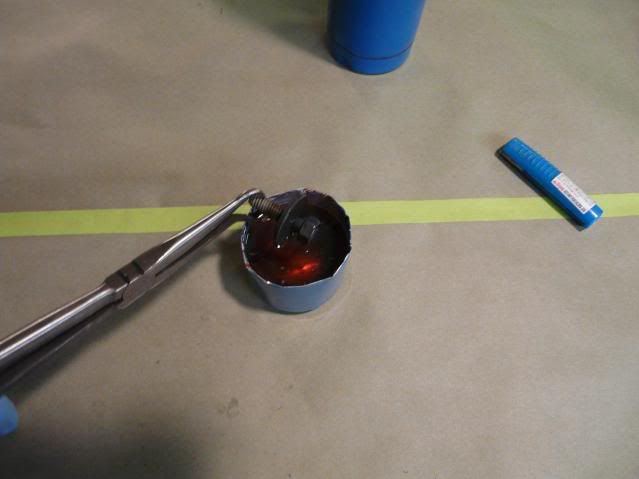
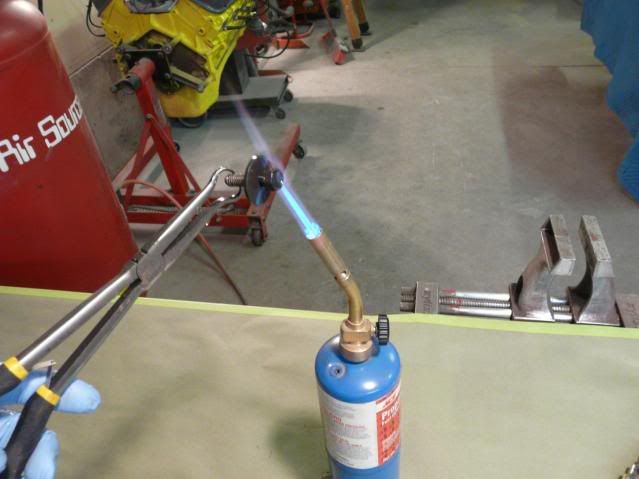
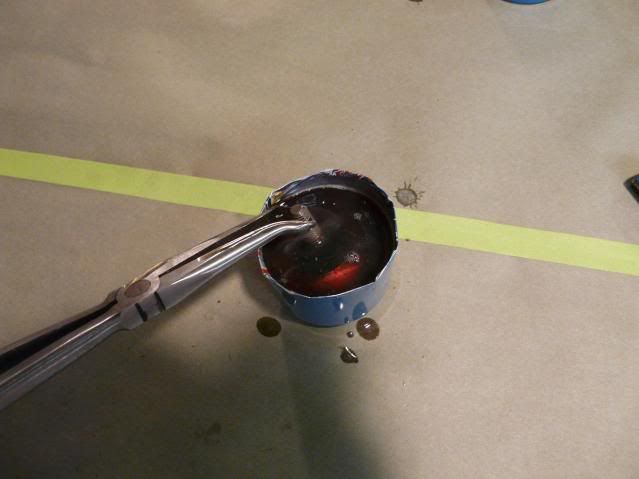
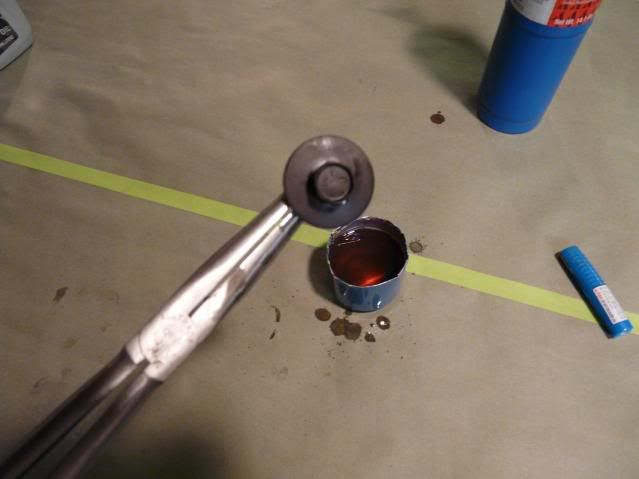
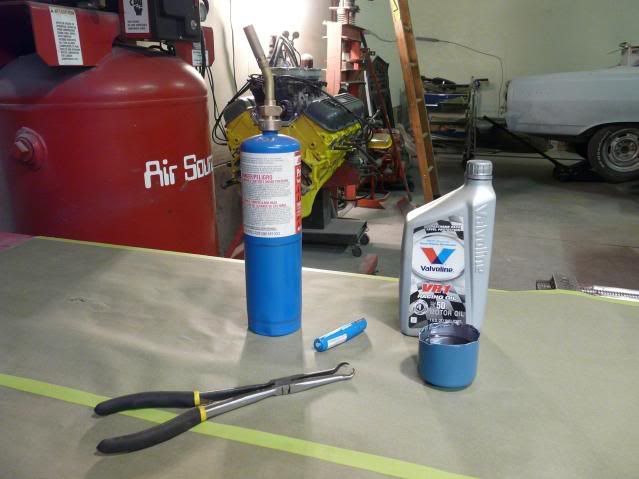
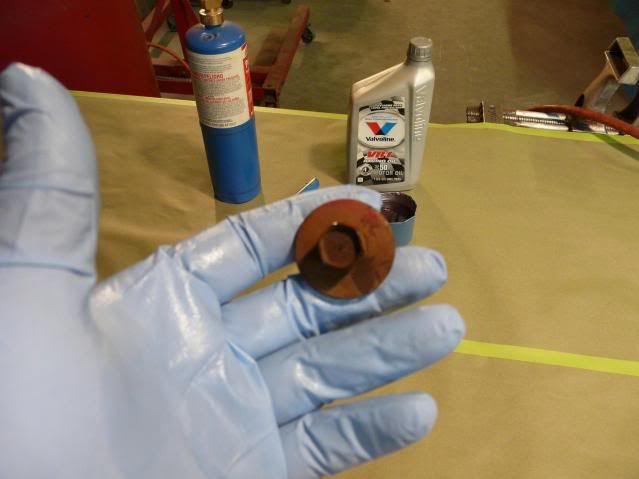
Things you will need a propane torch some oil a small steel cup and pliers.


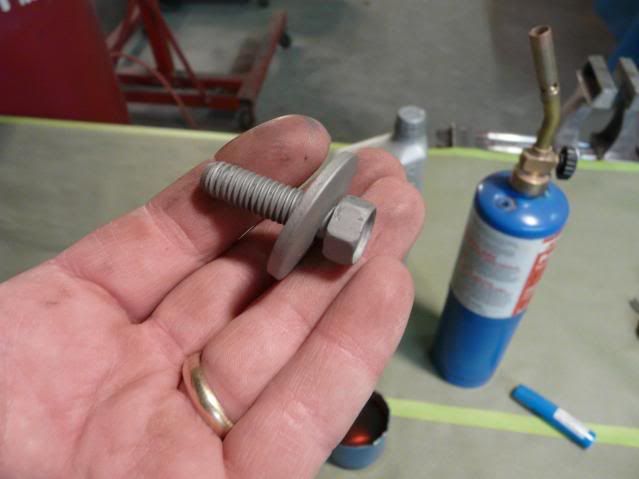
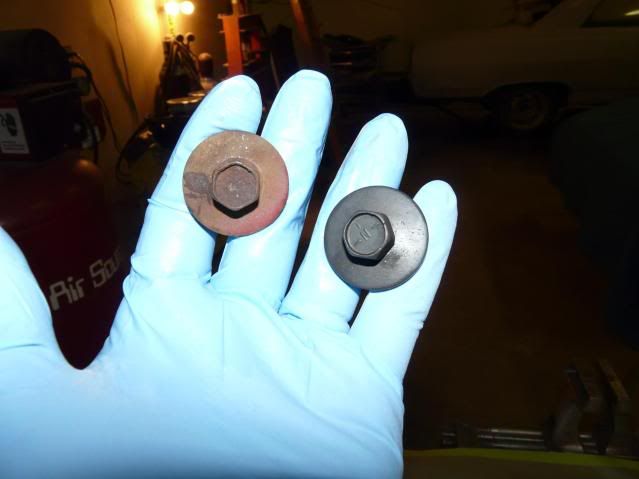
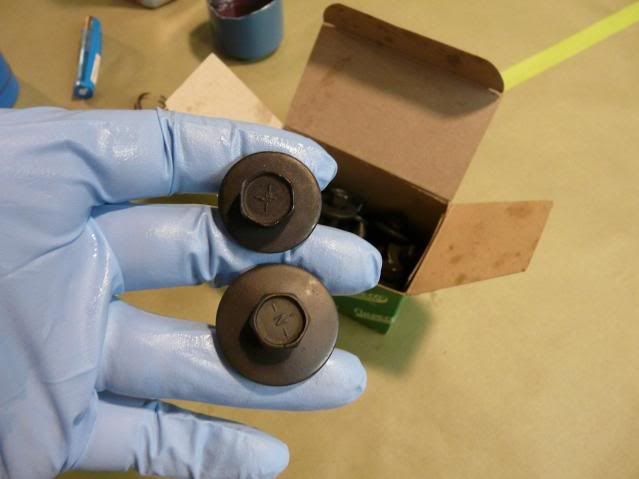
Then you need a rusty bolt

 
#2
You will need to clean the bolt or hardware very well, I used a bead blast cabinet


The next thing you want to do is heat the bolt, not glowing red but get it hot


Have a tin cup filled with regular motor oil.
The next step is when the bolt is good and hot soak it in the oil.

 
Last edited:
#3
Remove the bolt from the oil


Repeat the heat oil process while the bolt is still soaked with oil


Dip the bolt a second time in the oil while it is still hot

 
#4
Remove the bolt from the oil and let cool on its own


Before and after


This is a new bolt out of the box (small washer) against our 40 year old bolt

 
Last edited:
#5
I did this same thing on the side cover bolts on Side Poppin


It might take a couple times to get it down but once you do its quite easy, There are a few ways to do this and can be used with phosphate also but works well as is to clean up some old hard to get hardware. For the guy on a budget and about 6 bucks you can clean alot of hardware.
 
#11
I have hardware under my 69 Camaro crossmember bolts rear dif bolts and some other stuff for 3 years still looks good. It gets minimal use but holding in fine, but phosphate will last longer. The heat oil quenching is also a mild hardning process and oil will be absorbed a few mill by carbon steel.
 
#14
I have Zink and Phosphates also some different aluminum treating, I would like to be able to do nickel but I really do not need anymore crap in the shop either... This was just intended on showing how to do a easy cheap fix and save some old hardware with limited abilities.
 
#17
Where did you get that intake for the side popper--way cool!!!
I made the intake when I built the engine, There is a build thread in engines, but I was cleaning my phototbucket account last night and moved the pics changing the image code and it deleted the pics in the thread. I will have more up when the mini shows and the project continues.

 
#18
I have Zink and Phosphates also some different aluminum treating, I would like to be able to do nickel but I really do not need anymore crap in the shop either... This was just intended on showing how to do a easy cheap fix and save some old hardware with limited abilities.
Agreed! Not a discussion thread, it was a how-to.:thumbsup:
With all the above said...
My post was intended to make those that are not aware that your method although probably a good cheap fix.
One can get professional results for a fraction of what a good quality plating company is likely to charge..And this being an open forum all threads in my option are open for others input as well as discussion:thumbsup:
 
#20
It gives a nice look and the oil would give a degree of protection but to really do it correctly the oil and steel temps must be carefully controlled. A cool tip and as long as the fastener isn't crucial to safety it's fine. An oven for the bolts and a hot plate for the oil with thermometers for both would be ideal, the open flame and oil concerns me a bit but I'm a stickler for safety.:thumbsup:
 
Top