Powell model H restore
- Thread starter The Airman
- Start date
- Tags model powell restore
The long ones usually have a full circle at the top of the forks, the Stubbies usually have a notch cut in the circle maybe to make take down easier. But my D has long forks with the notch the chrome is shittier on these ones.


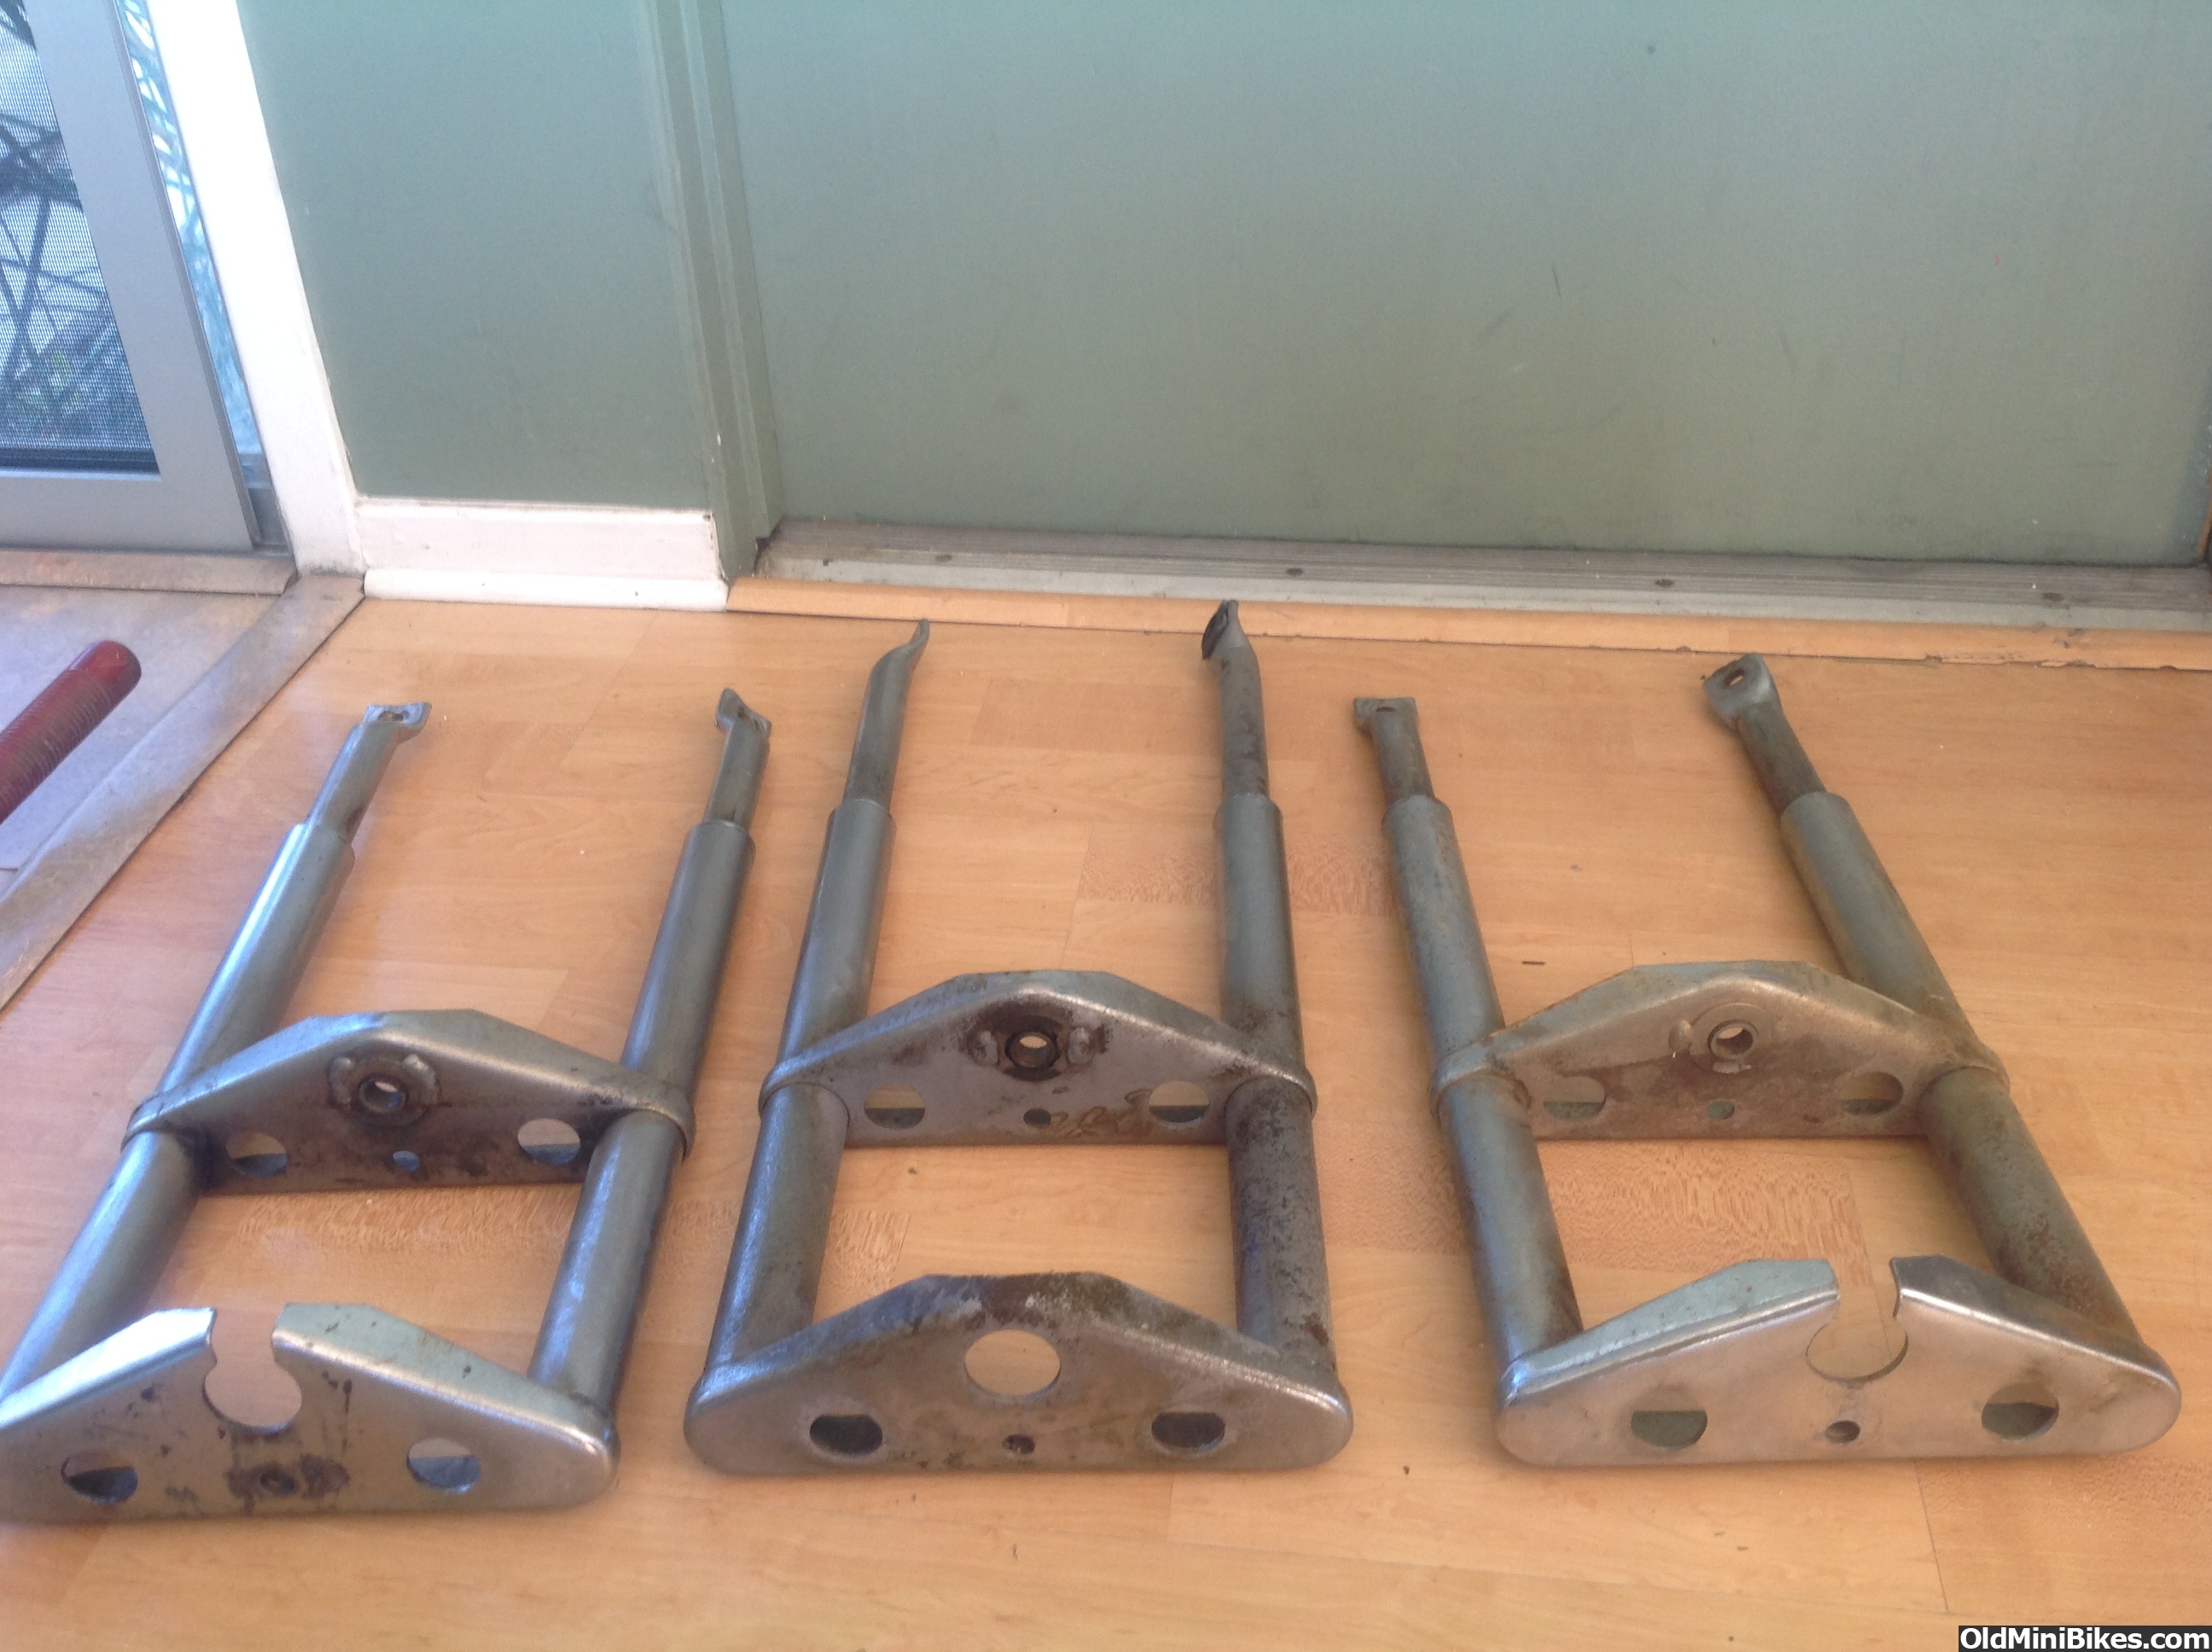

I also noticed that your long ones have a different type of spacer for the front wheel axle. Mine has no spacer like that welded to the lower fork. Only a small tab on the bottom of one side.
I had two E models, where I disassembled the forks for chrome. One of them had the fork tubes crimped at the top. The other set were round. Both used the welded on rings, which had to be removed for chrome. (To get the springs off) When you removed the rings on the crimped version, you could not remove the springs due to the crimps.
Based on serial numbers, I assumed the crimped version was the newer, improved idea. I do not recall this causing a difference in fork length, but you certainly had to cut the ends of the fork tube to get springs off. I welded them back on with slugs. If someone did not reweld them after spring removal, they would have been 2 inches shorter.
Just a guess here. No idea if this applied to other models.
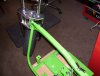
Also, if you'll notice in the pictures of the frame, when I had the drive belt idler pulley powder coated, I had him tape off the roller and bearings because I just didn't think I wanted to cut the weld so he could coat the whole thing. Maybe next time.
After trying to figure these forks out, that's the reason I didn't have the lower section re chromed. It just wasn't worth the time involved when the chrome looked so good after I cleaned them up. Maybe in the future, I'll cut apart the springs to have it done.
I restored an E model a couple of years ago. I don't usually put photos of my bikes in another's build thread, but I was doing it while doing another one as a roller I ended up selling to a member here.
I had to fabricate two belt adjusters from scratch. I was able to source some delrin rollers with bearings, nifty black knob, and had to have a friend machine some axles for it as well as the brake assembly where it fits into the rear wheel. Also found replacement swing arm springs from Century. Front end was easy to disassemble, just cut off the tack welded rings. But I had it all measured up first and took photos with notes before doing so. It's an odd feeling welding on new chrome. LOL. But it really made the bike and allowed me to replace the bronze lower and upper bushings which really stabilized the ride.
Alas, I shipped the bike North to my brother, where it sits in the front office of his business as a decoration, and ridden infrequently. Probably better than a rubber tree plant however.
Also, I note the herk. I worked on F/R models (USMC KC-130) which were a modified H from 1977 to 1999. Sorry I wasn't around during most of your build, but looks great. HD

Airman, you're doing a great job on this.
I restored an E model a couple of years ago. I don't usually put photos of my bikes in another's build thread, but I was doing it while doing another one as a roller I ended up selling to a member here.
I had to fabricate two belt adjusters from scratch. I was able to source some delrin rollers with bearings, nifty black knob, and had to have a friend machine some axles for it as well as the brake assembly where it fits into the rear wheel. Also found replacement swing arm springs from Century. Front end was easy to disassemble, just cut off the tack welded rings. But I had it all measured up first and took photos with notes before doing so. It's an odd feeling welding on new chrome. LOL. But it really made the bike and allowed me to replace the bronze lower and upper bushings which really stabilized the ride.
Alas, I shipped the bike North to my brother, where it sits in the front office of his business as a decoration, and ridden infrequently. Probably better than a rubber tree plant however.
Also, I note the herk. I worked on F/R models (USMC KC-130) which were a modified H from 1977 to 1999. Sorry I wasn't around during most of your build, but looks great. HD
Here's a link:
https://en.wikipedia.org/wiki/911th_Airlift_Wing
I hear them lumber over my house in formation almost daily, though.
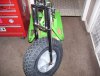
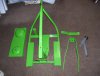
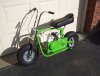
Well, I've been away for a while. I had to get one house ready to sell, and one house ready to move into. But the extended summer left me with time to just about finish my Powell "H".
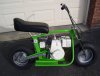
I tried to keep it as original as I could with the limited information I could find on it. Please...... I need comments, suggestions and tips on what everyone thinks I need to do to finish it.
The HS40 runs perfect, but the replacement drive belt seems too tight and it won't coast, hence the tie wrap around the belt adjuster until I can figure out how, and what exactly that pulley system really does. I have the original Powell belt, but used a Hi-Power B31 belt. It seemed to be the same size. But not sure why it won't coast.
The first ride (5 minutes) was smooth, and stable and it felt like brand new. Even on those 40+ year old tires!
Of course I'm still looking for that elusive Powell foil sticker for the clutch cover. I got in touch with a few people to try to duplicate it, with no luck. I even reached out to that guy on ebay that makes the yellow sticker copy with of course, no luck.
More pictures to follow as time permits.
Glad to see you back. The bike looks good.
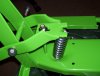
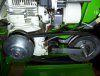
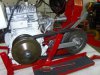
No, they don't coast at all, if you are talking about pushing them around the garage. The extra pulley is supposed to have spring tension pushing down on the belt, tightening it, and keeping it further into the driver, thus keeping it in a lower gear. (Or at least that is how it was explained to me) On my Powell, it was barely noticeable either way. Go ahead and get yourself a longer belt of high quality.
There should be a tang, (A bolt and nut) in the frame very near where you have the tye wrap that holds the arm in place.
Here is my Comet 20, belt, and driver with spacers in it to convert the Powell 5/8 to the Comet 3/4. Note bolt holding arm.