rebuilding my kids mini CCS Charger

#1
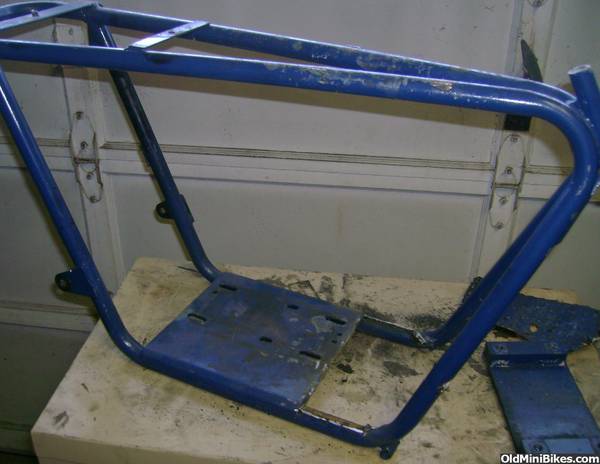
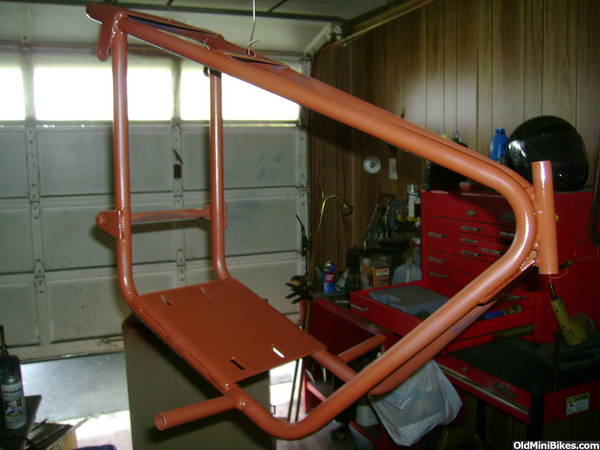
O.K the Wards bike is up and running. And I'm at a stand still on the broom so... This is my Daughters Central Cycle Supply "C.C.S." Charger. She will be riding this bike at Windber and it was in need of some attention. I'm not "restoring" it or anything like that. I just want to change somethings and simply repair what has been wrong with it for a-wail. She's deciding on the paint, hopefully she doesn't pick anything completely queer, but it's up to her. This will be the 2nd. time I re-did this bike and I picked the blue and she was never happy with it. I'm going to have her do the painting, so I'm excited about that.
The one thing is the forks are bent, so I'll straighten them "again".. Also I'm going to drop and square up the fender a little better, I realize I need some room for wheel travel but that is one thing on this bike that always bothered me. And the steering head is a absolute horrible design. I'm not going to get real carried away with it but I need to do something. I'm thinking like hinge pin bushing for a car door or something? But the way it is just keeps cutting into the triple tree area of the forks.


I'm going to remove the tank mounts, and also remove and reinstall a more conventional foot pegs.


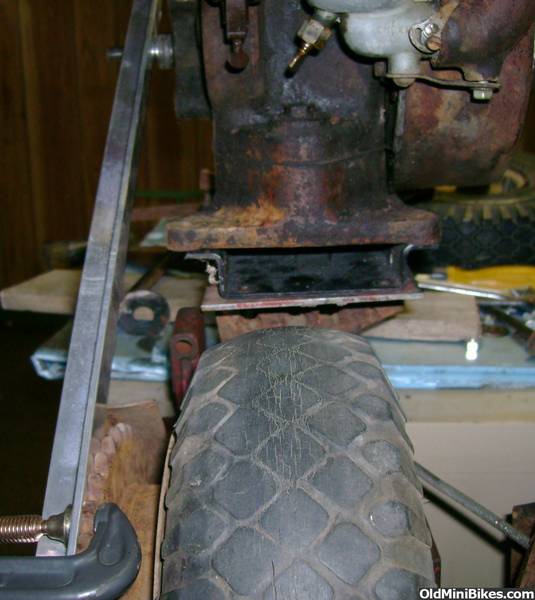
Here is something really different. At one time some one trimmed the tabs off for the jack shaft. And built this set up. This really through me off at first when I tried to I.D this bike. I could never find anything quite like it. And then I figured it out. There is one problem, You can't run rear shocks on the bike. I've tried, I also used to have a tensioner rigged up but it just would not work. The geometry is WAY wrong and the chain tension changes several inches with just a small amount of travel. I'm not getting involved with it. I just wanted to show it because it's sorta unique and to prove the point that these things can be tough to I.D some times because of "repairs" that have happened over the years.


I'll post more as we get to work........:hack::scooter:
 

125ccCrazy

Well-Known Member
#2
The pivot point of the swingarm has to be on the same plane (level) as the jackhsaft, if either is highe or lower than the other the chain will either tighten or loosen when thre suspenion is compressed. in your case the chain will loosen ALOT... I'd take the POS off there and put it back where it belongs and put shocks back on the bike...
 
#3
Well I'm up and running. I cut into this poor thing like a wild man! One huge complaint is whoever added all the junk to this was a real good welder!
I removed the tank mounts, jackshaft mount, foot pegs and the extra engine plate. Now I just need to grind everything smooth and weld up a couple of holes I managed to tear in the frame.
I'll need to figure out what I'm going to do with a jackshaft. I think either a two speed or a tav, I'm sorta hoping a tav but it will be what ever I can find reasonable?


It don't even look like the same bike!
 
#4
Well I got the pivot rod out of the swing arm today. In my opinion this is the toughest part of a Minibike rebuild! Why they did not have a grease fitting or at least assemble with anti seize I'll never know? This is the secound like this I managed to get apart. The first was on my TT500.. Once apart I ran the pivot rod in and out with valve lapping compoud. That cleans it all up nice.
 
#5
Hey Randy' somebody fabricated that.Take a look at the pics I posted. I think mines unmolested still pretty chessey tho.I was thinking the same thing. where can I get a grease fitting in here. mike
 
#6
Hey Randy' somebody fabricated that.Take a look at the pics I posted. I think mines unmolested still pretty chessey tho.I was thinking the same thing. where can I get a grease fitting in here. mike
This bike has had a lot of stuff added, but what part are you refering too being fabricated?

With the swing arm, once you get it apart you can put a self tapping zerk fitting in it. There available at any parts house. Just make sure you get a short one.:scooter:
 
#7
The whole thing is fabed swing arm, trailing arms, everything south of the frame itself.mines just got tabs bent 180 degs. trailing arm bolts to that. It's hookey but I think it's original. I kinda like your setup looks stronger than mine. kinda wish I hade'nt painted it today
 
Last edited:
#8
They are both correct, now that I can see your engine plate. Yours is a charger I or II.. I would need to look in the book again to be sure. But your swing arm is correct for your bike and mine is correct for a mine, Charger "Trail Boss"
They used the round independent arms up until 68 I believe and then 69-70 had a conventional swing arm. After that they went to a mini cycle "Super Charger"
 
Last edited:
#10
Well I mocked up an engine tonight and I'm sorta scratching my head. This thing has the mounting slots so far off to the left side that when I had it together before I had to run the JS sprocket way out past the frame. Some of these had a JS and some did not but either way I find it hard to believe that this is correct the way it is. But I really have nothing to go off of. So........ I set the engine on to show how far off too the left it is.

This is how it was, that's the frame tube running flush with the side cover, so that gives you an idea how far off it is.
And here is a shot from the front.

If I reuse the existing engine plate and simply flip it around to move my holes closer to the right side of the bike this is what I would have.


So... I think that's what I'm doing, just cutting the engine plate off and flipping it. I straight edged back to a mocked up wheel and sprocket and it will line up fine. No jack shaft. The geometry should be close enough on plain that I should not have any issues with chain tension, and if I do it would be minimal, so a spring loaded tensioner would solve it.
Comments, criticism?
 
#13
LoL! very easy to spot. I've worked on alot of tecumsehs but that one has an insane amount of compression, It took 2 guys to hold it down while I pulled it over, I hated to part with that one as it was my favorite but I don't see me building anymore minibikes in the future.
 
#14
Well today I got the engine plate off and cleaned up the old welds, so I'm ready to weld it back on. I'm going to weld up the extra holes while I'm at it just to clean it up a bit. I'm also going to make up the folding pegs, maybe tonight?
And then I should be able to weld every thing up.:thumbsup:


#16
Hey Randy
How do you square the plate slots back to the bike frame are rear wheel.
pete
Well, If I was building this from scratch, you could drop a plumb line down the bike and or straight edge from the rear sprocket. But this plate contours around the edge of the tubing so it really can go "too far" off center. Also if you where going to do this you would want to tack some braces to the frame because the engine plate is the only thing holding this one together, I was able to bolt the pivot back in for the swing arm, and that kept it from "springing"
 
#18
thanks for that info..mine sprung baddddd. now i've got some lining to do.
thanks pete
You should be able to install the rear wheel and get it squared up good, and then run a straight edge off of your rear sprocket. You can even set a block on there and go off of that or off of the mounting holes.

Like this:

 
#19
Well I got to play with this some more. I welded the engine plate on, flipped. I also welded the extra holes and extra slots shut, that where in it from before. I made pegs, non-folding, I know............ I also straightened the high speed forks and I dropped the fender mount 1"... Now when I get around to it I can mock it all up!:thumbsup:


Top