rebuilding my kids mini CCS Charger
- Thread starter Randy
- Start date
- Tags charger kids mini rebuilding

You've been busy.
I was going to ask what the extra holes in the plate where for but now they're gone. :sorcerer:
I was going to ask what the extra holes in the plate where for but now they're gone. :sorcerer:
Allison has decided on purple so we need to look around at some paint and then I would like Kenny to do a seat for her:thumbsup:
I was goofing around just now mocking things up and it will be fine. I need to figure out a brake? I have a band set up that was on it but I'm thinking either a internal drum or a disk. I think the drum would be more attractive? Like a bonanza set up maybe? I'm probley going to put a hs50 on it for her. I would love to find a cheap tav but they don't seem to exist. But I'm hopeful and I keep looking. She can handle it. She dose well on a 80cc manual bike.


This is what I was thinking with the side port, exhaust. Something like a shorty header. I think that would look cool, chrome.


what if you flip the fender and put the current back on in the front, would that change it at all?
I don't know? Other then it extending the fender forward? It would not change the contour.
I couldn't find bushings like I wanted for in the neck. From the factory there was nothing? So I got a plain bronze bushing and turned it down and then cut it in half. And I also ran a brass tube through the length of the neck and through each bushing. Now it's nice and smooth! And tight "no sloop". I don't know how durable it will be but it's better then what was there before.. "nothing".... I'm going to grind a little divot out of the lower crown plate and fill it in with braze around the bolt hole. That will put bronze on bronze and should work out well.


If it turns out to be problematic I'll put a tube on it with bearings. But I think it willbe fine.
This site won't let you post to there but go to www.gokartgalaxy.com and click on frames/fenders. Unplated is cheap.
That fender would be the right radius if it was mounted close to the tire, but it's not, and that makes it look fugly. I always thought Bonanza's fenders looked kinda wierd for the same reason. I think I would try to open that fender up alittle. Find something strong that's about the radius you want, like maybe a car wheel or a steel pipe, and use it to reshape the fender. You could pull it down with a large ratchet strap and maybe work it some with a dead blow hammer. The sides might try to spread some but maybe not too much since your only needing to increase the radius a small amount. You could try it a little and if it's not going your way then stop and go get some different fenders. I'm not trying to tell you what to do, just throwing out some thoughts. If you have a Northern Tool store near by, they have chrome ones pretty cheap.
That fender would be the right radius if it was mounted close to the tire, but it's not, and that makes it look fugly.


I started on mocking up the rear wheel. I'm going to use the band brake. I was going to change it but to keep cost down I'm using what I have on hand. I'm going to change it around a little and set it up like my Wards. I need to get a 65-72 ?? tooth sprocket so I need to see what I can find. I mocked it up like this just to double check my chain for clearance, that's going to be fine. With the wheel centered.:thumbsup: And I may go with 40/41 chain? so now I can cut my spacers and drill the mounting for the band. I'll also weld a cable stop/bracket to the swing arm for the brake cable.


maybe a grease insert in the steering neck might be a plus too. bushings will never wearout.
:thumbsup: "I've been waiting for a chance to use that saying"
Well today I dropped the front fender a little more. I figured out the rear brake and welded my cable mount to the swing arm. I also welded the rear fender mount on the front of the swing arm. So now I can final sand it and re-prime it. And then my Daughter is going to work her magic with the Krylon dark purple she picked out.:thumbsup::thumbsup:
The next photo's should be Deep Purple.......


The next photo's should be Deep Purple.......
randy how did you like your band brake on your first setup. i see you are going with it on this project too. i have only use one band brake setup on all my minibikes and that bike is on my columbia and works real good. i can lock up the wheel if want to. thinking of using the factory band brake on my gilson/wards bike. the only parts i have are the drum and a new band brake. i will have to fab the rest of it up:hack::weld:
Well on the wards it works good with my kid on it, she can lock up the wheel. With me on it, because of the weight it's not to good. This bike had it before and it worked fine. But it had a goofy bracket that someone had made so I had to switch the side the brake was on and when I did it I changed the mounting.
On the wards bike they used a cantilever type device, along with the standard band. Mine dose not have it. I'm assuming that is why my wards brakes are marginal? It looks like from the factory it had some sorta torque multiplier on it. Eventually I am going to copy his for mine, and put it back a little closer to stock. But I have a feeling that will correct it.
This is scooterboys gilson, and if you look at injuntoms gilson it has a band and a foot lever like the A/C bikes, so that would be an option as-well.
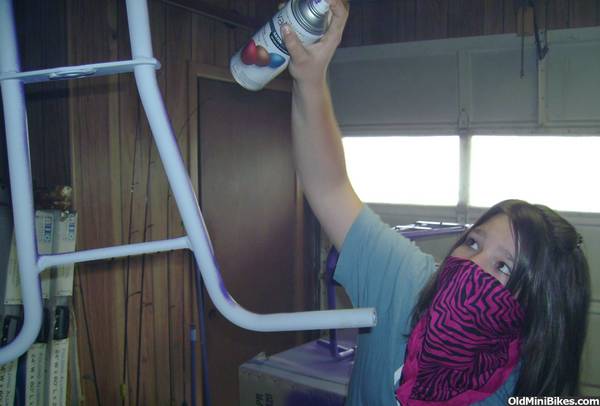
Paint Day!
Well it's still raining so I decided to just have her paint the bike in the garage. Our original plan was to hang it from the tree out back but it's rained for like 4 days straight so I had her paint it in the garage.
The color she picked was Sumptuous Purple by Valspar. It's a satin finish so I'm having her put a few cotes of clear over it as-well. It actually looks "pretty" cool.
I'll re-post some photo's once it's dried and we can take it in the house for better light.:thumbsup::thumbsup::thumbsup: