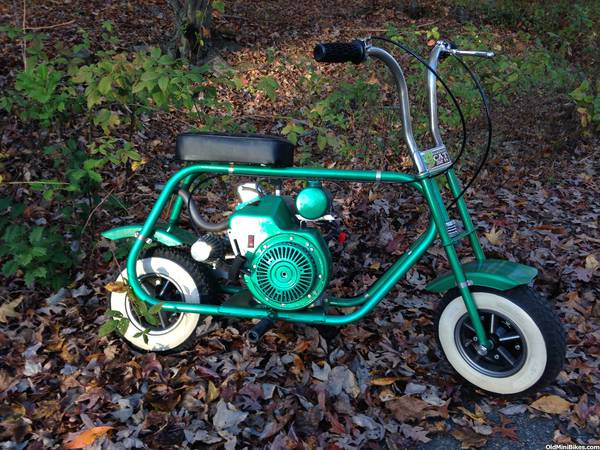
Mitsubishi Mirage???? Wow, that brings back memories--double overhead cam, right?!! Glad to see you are starting to roll on with the build. Like that wide rear tire!:thumbsup:
Jackeo21's - Vintage Class - Tru Test - OldMiniBikes Build Off 2016
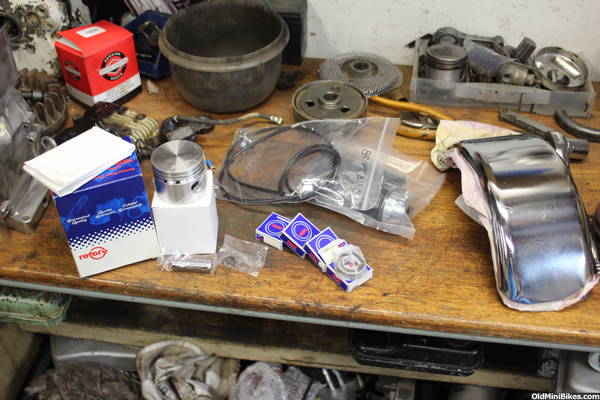
Glad to have all my parts. New Wheel bearings, Throttle Grips, Piston and Rings and 2 Guards. Now I need to sandblast my frame/forks and the rest of my engine. Then the motor can be painted black, and the frame, well, I'm torn between green and orange (either would be metallic or flake). I really like the look of a green and black bike, yet, orange and black looks just as good in my eyes. I need to get some inspiration from the forum!

Progress :thumbsup:
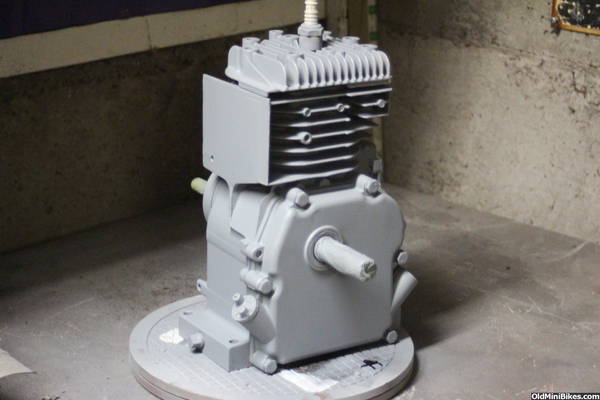
The motor and tank are primed. I assembled the engine block to avoid getting oil all over my fresh paint.
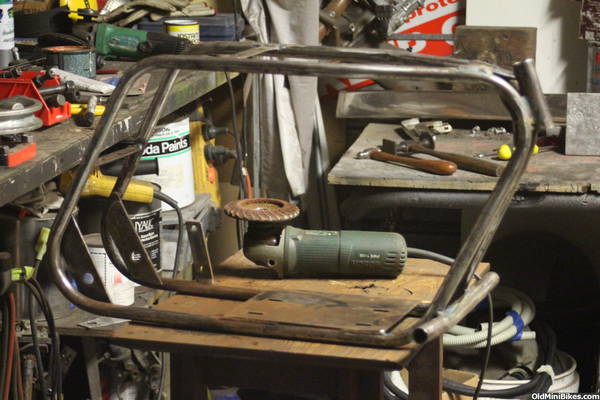
The frame got multiple coats of paint stripper, then I hit it with the grinder + soft nylon wheel, which got 90% of the paint off.
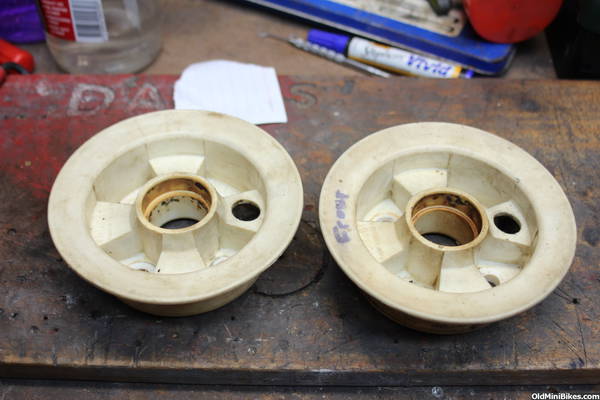
I also disassembled the rims. The sprocket has been cleaned up ready for paint. Speaking of paint, I have been thinking of a dark green metallic.
Tomorrow will be more sanding, and tidying up smaller things like axles, springs, bolts......
The motor and tank are primed. I assembled the engine block to avoid getting oil all over my fresh paint.
The frame got multiple coats of paint stripper, then I hit it with the grinder + soft nylon wheel, which got 90% of the paint off.
I also disassembled the rims. The sprocket has been cleaned up ready for paint. Speaking of paint, I have been thinking of a dark green metallic.
Tomorrow will be more sanding, and tidying up smaller things like axles, springs, bolts......
Last edited:
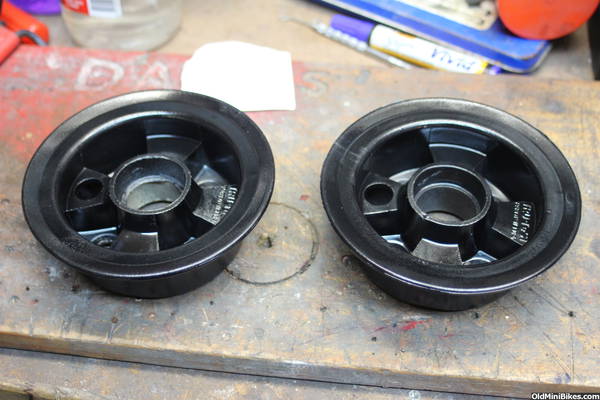
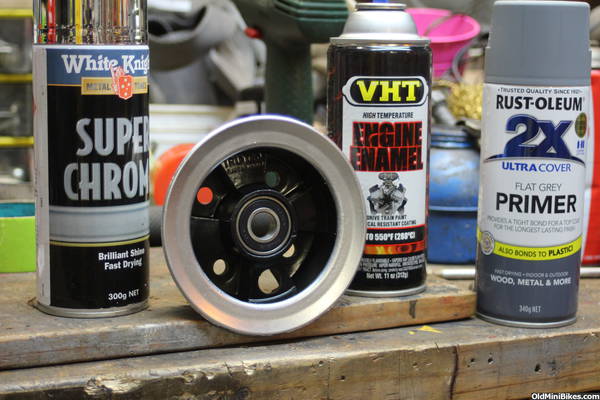
I got the rear rim pretty much finished today. First it was coated in rustoleum primer, then a few too many coats of VHT black (hard wearing), then some white knight super chrome to give it that classic looking chrome ring around the outside. I think it turned out ok! Most detailed rim I've ever done, should look good with whatever colour I decide to go with. Leaning towards dark green after seeing a few bikes in it, especially CarPlayLB's Rupp TT500! :thumbsup:
My new wheel bearings fit perfectly, everything is going smooth at the moment.
Motor is still wearing primer, preparing more parts so we can spray them all at once.
Also thinking of adding a few features. I have a 12v battery but fitting it on the bike is going to be really fun!
-jackeo21
Step 1:
Step 2:
Final Product:
Very nice! Check to see if you can bake the wheel at 200 deg F for an hour in the oven (say, PLEASE!--- a pitiful look also helps, too:laugh") . That'll harden the black VHT and probably won't hurt the chrome outer.
. That'll harden the black VHT and probably won't hurt the chrome outer.
. That'll harden the black VHT and probably won't hurt the chrome outer.
I have actually just put them on a shelf in the barbecue and they came out a bit harder :thumbsup: Made sure not to overcook the rims and warp them! Glad I did it outside, the smell would have made the house smell pretty bad.
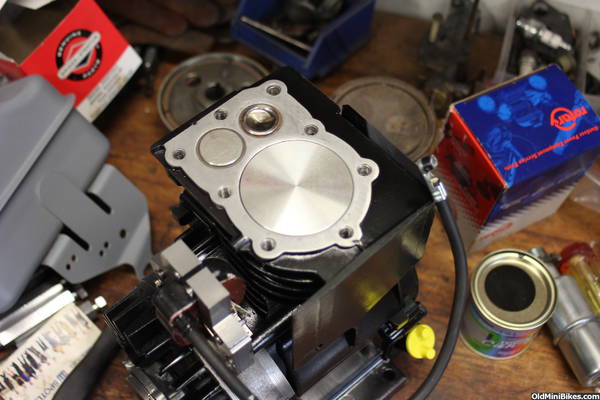
I have finally got around to painting the block! I used black VHT. After a few coats it hit the barbecue for a half hour. The paint is pretty solid now. The block looks sharp with the shiny new top end! Getting more and more excited for the finished product. :thumbsup:
Oh yeah, anybody know the reason for the dished exhaust valve?
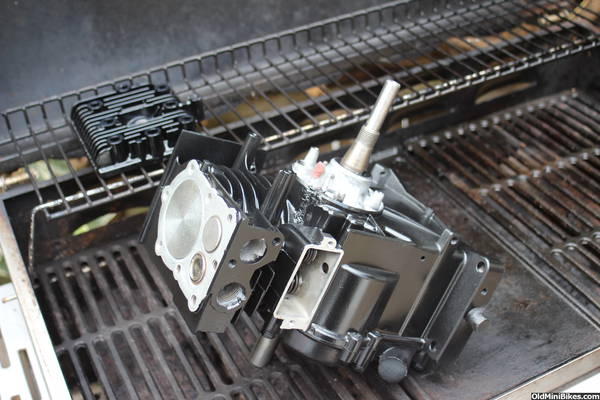
Oh yeah, anybody know the reason for the dished exhaust valve?
Last edited:
Why dished exhaust?? Possibly an Answer
Jack-- I found this in a Nova Scotia 4-H Guide to teaching Small Engines. It's a bit long, but it includes information about the effects of leaded gasoline on valves, which would have been what your engine was designed to handle. In a nutshell, the heat generated at the exhaust valve has to be dissipated and with leaded gasoline, more deposits built up on the exhaust valve than what we see today. I suspect that's why there is a dished exhaust on your engine--I've seen 'em before on flatheads. My ohvs have dished intake and exhaust valves.
From 4-H: Valves have to seal well enough to withstand pressures of 100 to 200 pounds per square inch.Under full load, the exhaust valve is exposed to temperatures high enough to cause it to operate at ared heat. The temperature of the exhaust valve under these conditions may be 1200Ec or more. Theintake valve is cooled by the incoming mixture. The exhaust valve is subjected to high temperatureexhaust gases passing over it on their way out of the cylinder. It is, therefore, very difficult to coolthe head of the exhaust valve. The cylinder head, the cylinder, and the top ofthe piston is exposed to this same heat, but it is cooled by heat radiating to the engine block whichis cooled by air from the fly wheel fan and oil from the crankcase. Very special steel is requiredin the exhaust valve to enable it to withstand the corrosive action of the high temperature exhaustgases.
Singlecylinder engine valves are seldom subjected to the extremes of abuse that automotive valves are.While valves may burn to some extent, it is very seldom that a valve seat or face is very badlyburned. Dished or necked valves are more commonly found on car engines.Valve seat burning is usually caused by an accumulative of carbon or fuel lead either on the valvestem or on the valve face, or from insufficient tappet clearance. These deposits on the valve stemor on the face will hold the valve open, allowing the hot flames of the burning fuel to eat away thevalve face and seat. A dished valve is one that has a sunken head. This is caused by operating attoo high a temperature with too strong a spring, or the head can be eroded away by highly leadedfuels. A necked valve is one that has the stem directly beneath the head eaten away badly by heator where the stem has been stretched.Valve sticking is caused by fuel lead, gum or varnish forming on the valve stem and in the valveguide. We believe that the most of the deposits formed are caused by carbon fuel lead, or gum.Since the amount of lead in different fuels varies, the rate of deposit build up naturally will vary.When an exhaust valve no longer closes properly, due to excess deposits, the hot gases escapingfrom the combustion chamber heat up the valve stem and guide excessively. This causes the oil onthe valve stem to oxidize into varnish which holds the valve partially open and causes burning.Intake valve sticking may be caused by the use of fuels having an excessively high gum content.Fuels that are stored for too long a period may contain high amount of gum. If burning occurs in arather limited area on the valve face, it indicates that something may have caused the valve to tip. This could be due to a bent valve stem or a deposit on one side of the valve or stem.Such a condition would leave an opening for the passage of hot exhaust gases which could burn thevalve so badly that it would not be refaced. These valves must be discarded.The important parts of a valve are the head, themargin, face and stem. They make contact with theseat and the valve guide in the cylinder. The marginis the edge of the valve head. As general rule, thevalve should be discarded when the margin becomesless than one-half of the original thickness.The margin on most four stroke cycle valves is 1/32of an inch, so that when it becomes less than 1/64 ofan inch the valve should be discarded. Remember,this is after all pit marks and burn marks have beenremoved from the valve face. If the valve is bent,the face will be ground unevenly, and if the marginbecomes too thin on one side the valve should alsobe discarded. A valve with too thin a margin willnot be able to withstand the heat and will quicklycrack and burn. After facing the valves and the valveseats to a 35 or 45 degree angle, place a little finegrindingcompound on the valve face, and very lightly lap thevalve to the seat.
Things have been slow. Got too many projects on!
I took the shroud off my worn out 69 2HP, as it was way cleaner and has all 4 tabs on it. Got the shroud painted the other day and learned the hard way about painting when it's too cold :hammer: So I gave it a few more coats today and baked it on the BBQ for a bit. Paint's great now!
New recoil springs pack quite a punch! Almost had it in and boom, un-hooks itself from the pawl and straight into my hand :laugh: Not fun, I advise more protection when working with them!!! Could have been worse...:shrug:
I also got the tank painted up and painted a "chrome" strip around the seam. Just trying different things, I don't think it looks all bad. I will get a pic of it later.
Need to get my frame round to a friends to sandblast the hard to get areas. Then ill be sanding for ages :hammer:
I found my intake valve wasn't seating so I took a bit of metal off the bottom of it and I fixed the problem as well as bypassing the easy spin feature :thumbsup:
Thanks for the info doc!
Thanks for the encouragement everyone!
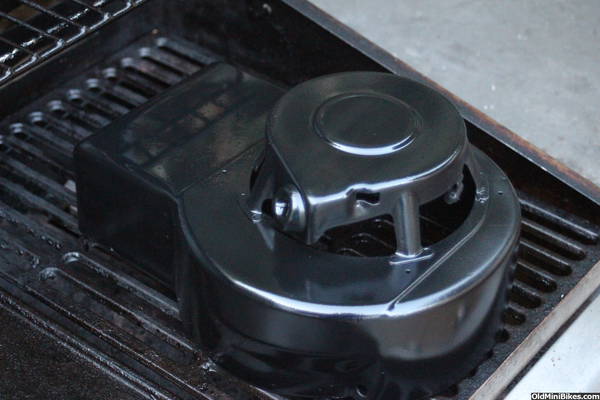
Last edited: